UK Heritage Trail
Sites of the American Revolution in Britain
Semiquincentennial Edition, 2026
The American Battlefield Trust
242 sites across 10 regions of the United Kingdom
Overview Map
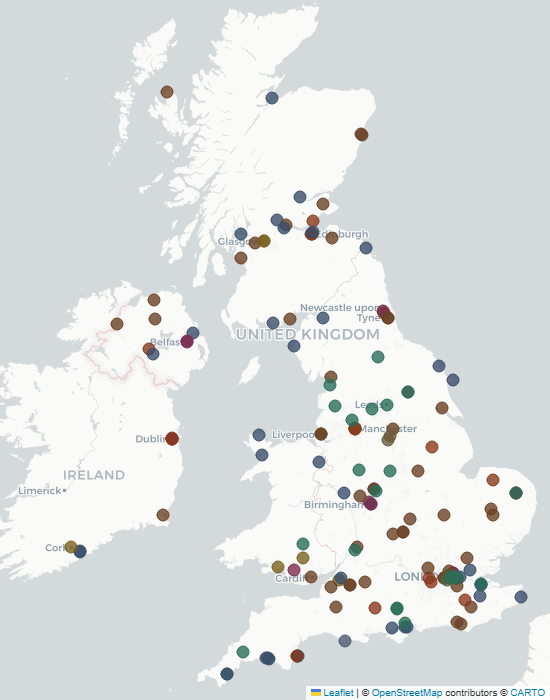
Table of Contents
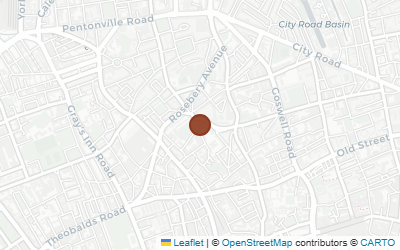
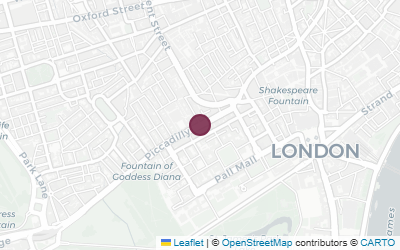
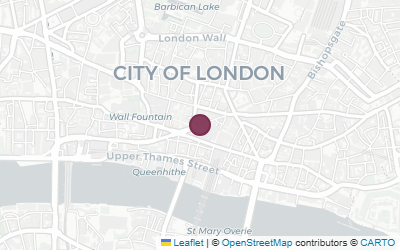
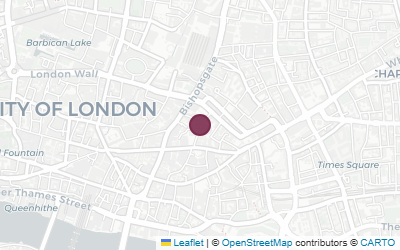
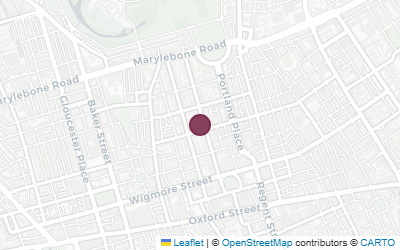
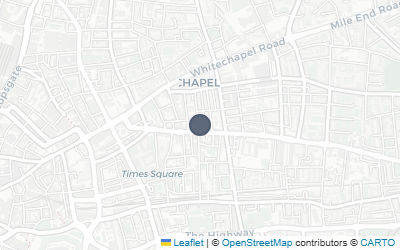
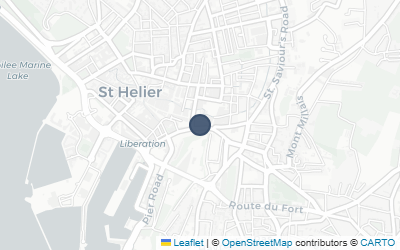
London (96 sites)
Political (17)
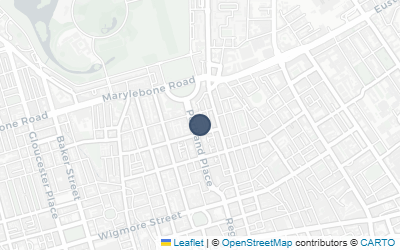
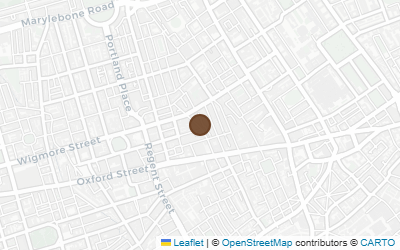
- 1 Stratford Place (Stephen Sayre) (American banker and Sheriff of London arrested here October 1775 for allegedly plotting...)
- 10 Downing Street (Lord North received the Yorktown surrender news here on November 25 1781, reportedly...)
- Banqueting House, Whitehall (Where Charles I was executed on 30 January 1649 -- the first European monarch tried and...)
- Charles James Fox Blue Plaque (Home of Charles James Fox, the leading parliamentary opponent of the American war who...)
- Club of Honest Whigs Meeting Site (Franklin's fortnightly supper club at the London Coffee House)
- Edmund Burke Blue Plaque (London town house of Edmund Burke, whose speeches 'On American Taxation' (1774) and 'On...)
- George Grenville House Site (Home of the PM who authored the Stamp Act (1765), the first direct tax on American...)
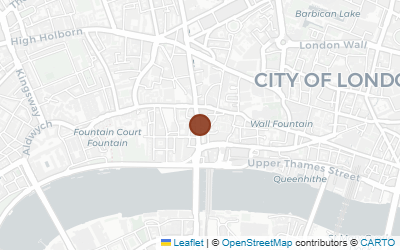
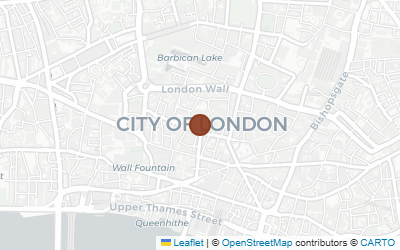
- Guildhall (The City of London's governing hall, where the Lord Mayor and Common Council debated...)
- Houses of Parliament (Where Parliament debated and passed the Stamp Act, Townshend Acts, Declaratory Act, and...)
- Middle Temple (Five signers of the Declaration of Independence trained as barristers here, absorbing the...)
- Privy Council Chamber (Cockpit) (Site of the 'Cockpit' where Benjamin Franklin was publicly humiliated before the Privy...)
- Smyrna Coffee House Site (Whig political gathering place; Franklin wrote his satirical Open Letter to Lord North...)
- Somerset House (Major government building housing the Navy Board during the American war)
- Spa Fields, Clerkenwell (Site of mass radical reform meetings in 1816-17 that transmitted American Revolutionary...)
- Thatched House Tavern Site (A St James's Street tavern where political clubs met to debate the American crisis)
- The National Archives (Houses the primary documentary record of the British government's conduct of the American...)
- William Pitt the Elder Blue Plaque (Chatham House) (Former home of William Pitt the Elder, Earl of Chatham, whose speeches defending colonial...)
Military (14)
People (20)
- 14 Newman Street (Benjamin West Studio) (Studio and residence of Benjamin West, the Pennsylvania-born painter who became President...)
- Benjamin Franklin House (The only surviving residence of Benjamin Franklin, who lived here for nearly 16 years as...)
- Black Loyalists & Committee for the Relief of the Black Poor (Site of Batson's Coffee House at 17 Cornhill where the Committee for the Relief of the...)
- Freemasons' Hall (Masonic meeting place since 1775)
- Gen. John Burgoyne Blue Plaque (London home of General John Burgoyne, who surrendered to the Americans at Saratoga in...)
- Ignatius Sancho Plaque (First known Black British voter (1774, 1780); his published letters commented on the...)
- John Singleton Copley Blue Plaque (English Heritage blue plaque marking the home of John Singleton Copley, the Boston-born...)
- Joseph Galloway's Lodgings, Queen Anne Street (London exile home of Joseph Galloway, former Speaker of the Pennsylvania Assembly and the...)
- Kenwood House (Lord Mansfield) (Country retreat of Lord Chief Justice Mansfield, who delivered the landmark 1772 Somerset...)
- Loyalist Claims Commission, Lincoln's Inn (Lincoln's Inn was the principal venue for the Loyalist Claims Commission established by...)
- Olaudah Equiano Plaque (Formerly enslaved man who became a leading abolitionist; published his autobiography at...)
- Patience Wright's Studio Site (First American sculptor; alleged spy who smuggled intelligence about British military...)
- Paul Wentworth's House (NH-born chief British spy handler during the Revolution)
- Phillis Wheatley Publication Site, Aldgate (Site where Archibald Bell published Poems on Various Subjects by Phillis Wheatley in...)
- Royal Botanic Gardens Kew (George III's mother Augusta established the gardens, and the King himself took great...)
- St Mary's Church Battersea (Benedict Arnold Burial) (Burial place of Benedict Arnold, the Continental Army general who defected to the British...)
- Thomas Gage Blue Plaque (London home of General Thomas Gage, Commander-in-Chief of British forces in North America...)
- Tothill Fields Bridewell Gateway (American artist and former Continental Army officer John Trumbull was imprisoned here...)
- Westminster Abbey (Burial site of Major John André, executed as a spy during the Revolution, and memorial to...)
- William Franklin's London Residence (Ben Franklin's son and last Royal Governor of New Jersey)
Diplomatic (8)
Commercial (10)
Protest & Dissent (15)
Commemoration (2)
- St Paul's Cathedral (Contains memorials to several British military figures who served during the American war)
- Whitechapel Bell Foundry (Cast the Liberty Bell in 1752, which became the iconic symbol of American independence)
Press (3)
Museums (7)
- British Museum (Founded in 1753, the Museum holds significant collections related to colonial America and...)
- National Army Museum (The national museum of the British Army holds significant collections on the American War...)
- National Maritime Museum, Greenwich (The world's largest maritime museum, holding ship models, naval charts, officers'...)
- National Portrait Gallery (Holds portraits of key figures from both sides of the American Revolution including...)
- Tate Britain (Houses major Revolutionary War era paintings including Copley's Death of Major Peirson...)
- The Fusilier Museum (Museum of the 7th Royal Fusiliers, who defended Quebec, were captured at Fort Chambly and...)
- The Guards Museum (Museum of the Foot Guards, whose composite Brigade served at Brandywine, Germantown, and...)
Southeast England (20 sites)
Political (3)
Military (8)
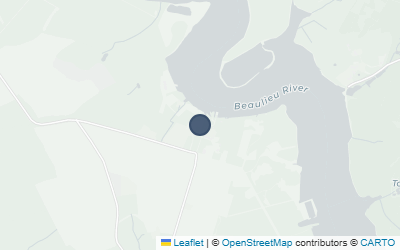
- Buckler's Hard, Beaulieu (18th-century shipbuilding village where warships for the American War were built...)
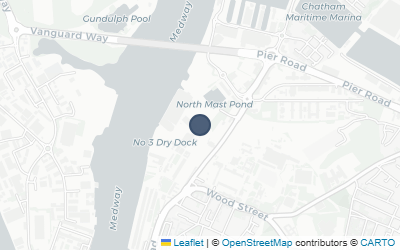
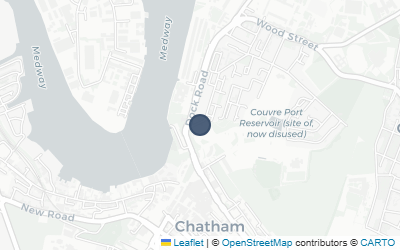
- Chatham Historic Dockyard (One of the Royal Navy's principal dockyards, Chatham built and fitted many warships used...)
- Coxheath Camp Site (Site of a massive 15,000-troop military camp established in 1778 during the American War)
- Deal Castle (Tudor coastal fortress overlooking The Downs, one of England's key naval anchorages where...)
- Fort Amherst, Chatham (Key strongpoint of the Chatham Lines, substantially enhanced during the American...)
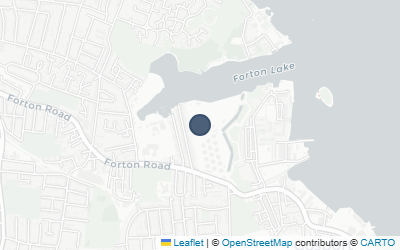
- Forton Prison Site (Held American prisoners of war, mostly captured sailors and privateers)
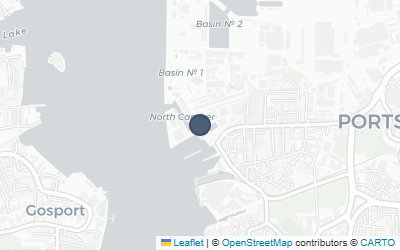
- Portsmouth Historic Dockyard (The Royal Navy's foremost dockyard and home port for many vessels that served in the...)
- Warley Camp Site (Camp of 10,000 soldiers on Warley Common during the American War to counter French...)
People (5)
Museums (4)
Southwest England (20 sites)
Political (2)
Military (7)
- Berry Head Fortifications (Coast defence batteries built at Berry Head in 1779-80 during the American War to protect...)
- Brixham Battery (Gun battery established by the Board of Ordnance during the American War after France and...)
- Devonport Dockyard (The western dockyard (then called Plymouth Dock) was critical to naval operations during...)
- Mill Prison Site (Major holding facility for American prisoners of war)
- Pendennis Castle (Major coastal fortress garrisoned by the Miners' Militia during the American War, with...)
- Royal Citadel, Plymouth (Star fortress on Plymouth Hoe where the garrison was placed on full action stations...)
- Stapleton Prison Site, Bristol (Purpose-built prisoner-of-war camp from 1779 holding Dutch and Spanish combatants...)
People (6)
Commercial (1)
- Bristol Harbour (A major Atlantic trading port with deep commercial ties to the American colonies)
Commemoration (1)
Museums (3)
East Anglia (8 sites)
Political (1)
People (4)
Commercial (1)
- Norwich Guildhall (In January 1775, Norwich merchants petitioned Parliament opposing the American war that...)
Protest & Dissent (1)
- Octagon Chapel, Norwich (Elegant 1756 Unitarian chapel that was a centre of Norwich's strong dissenting tradition...)
Museums (1)
Midlands (16 sites)
Political (1)
Military (2)
People (7)
Protest & Dissent (3)
Museums (3)
Northern England (30 sites)
Political (2)
Military (5)
- Berwick-upon-Tweed Barracks (Britain's first purpose-built barracks (1717-21), used as a garrison and staging post...)
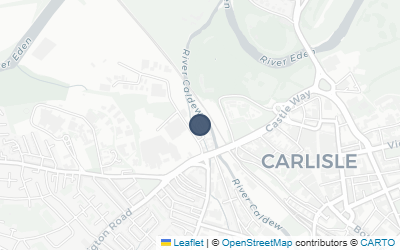
- Carlisle Castle (Used as a depot for raising and mustering troops bound for America)
- Flamborough Head (Battle Site) (Site of the most famous RevWar naval battle in British waters (23 September 1779))
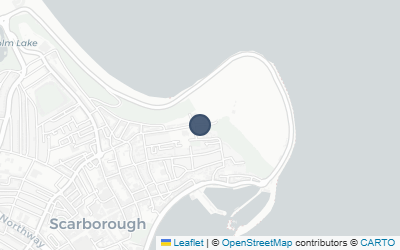
- Scarborough Castle (During the Battle of Flamborough Head (September 1779), 40+ merchant ships sheltered...)
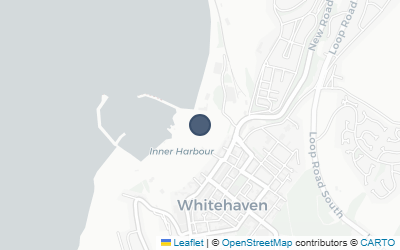
- Whitehaven Harbour (Target of John Paul Jones's raid on April 23, 1778 — one of the very few enemy attacks on...)
People (6)
Commercial (3)
Protest & Dissent (3)
- Thomas Spence's Broad Garth (Site where radical schoolmaster Thomas Spence developed land reform ideas inspired by...)
- Town Moor Newcastle (The 1771 enclosure dispute inspired Thomas Spence's radical land plan, framed in the...)
- York Assembly Rooms (On 30 December 1779, 600 Yorkshire freeholders met here to form the Yorkshire Association...)
Industrial (3)
Museums (8)
- Duke of Wellington's Regiment Museum (Museum of the 33rd Regiment of Foot, Cornwallis's own regiment, which fought at Brooklyn...)
- Fusilier Museum (Regimental museum of the XX Lancashire Fusiliers (20th Foot), who served in Burgoyne's...)
- King's Own Royal Regiment Museum (Museum of the 4th Foot (King's Own), whose flanking companies marched to Lexington and...)
- Lancashire Infantry Museum (Museum covering the 47th Foot, which fought at Bunker Hill and was largely captured at...)
- Royal Armouries Museum, Leeds (Houses the National Collection of Arms and Armour, including Brown Bess muskets, bayonets...)
- The Green Howards Museum (Regimental museum of the 19th Foot (Green Howards), which arrived in America in 1781 and...)
- Walker Art Gallery (Tarleton Portrait) (Holds Joshua Reynolds's famous portrait of Colonel Banastre Tarleton (1782), depicting...)
- York Army Museum (Covers Yorkshire regiments including the 33rd Foot, which fought under Cornwallis from...)
Wales (8 sites)
Military (3)
People (1)
Commercial (2)
Protest & Dissent (1)
Museums (1)
Scotland (22 sites)
Political (2)
Military (8)
- Black Watch Castle & Museum (Regimental museum of the 42nd Foot (Black Watch), which fought at Brooklyn, Fort...)
- Carron Ironworks Site (Scotland's pioneering ironworks that invented the carronade — the devastating short-range...)
- Edinburgh Castle (Served as a military garrison and recruiting center for regiments sent to fight in America)
- Fort George (Massive 18th-century garrison fortress used for mustering Highland regiments dispatched...)
- Greenock Harbour (Principal embarkation port for Highland regiments sailing to fight in America)
- Leith Fort (Built in 1780 after John Paul Jones's Franco-American squadron appeared in the Firth of...)
- St Mary's Isle Kirkcudbright (John Paul Jones attempted to kidnap the Earl of Selkirk from his estate here on April 23...)
- Stirling Castle (A major military garrison used for mustering Scottish troops during the American war)
People (10)
- Dunmore Park (The Dunmore Pineapple) (Scottish estate of John Murray, 4th Earl of Dunmore, the last Royal Governor of Virginia...)
- Flora MacDonald Grave, Kilmuir Cemetery (Grave of Flora MacDonald, who emigrated to North Carolina in 1774 and became a Loyalist...)
- James Wilson Birthplace, Carskerdo (Birthplace of James Wilson, one of only six men to sign both the Declaration of...)
- John Paul Jones Birthplace Cottage (Birthplace of John Paul Jones (born John Paul), the Continental Navy's most celebrated...)
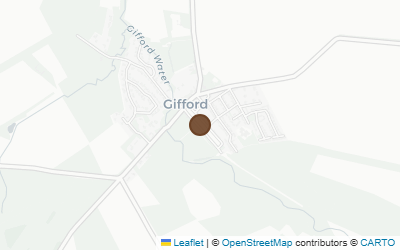
- John Witherspoon Birthplace, Gifford (Birthplace of John Witherspoon (1723), the only active clergyman and college president to...)
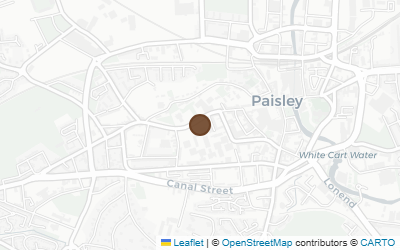
- John Witherspoon Statue, Paisley (Bronze statue of John Witherspoon, the only active clergyman to sign the Declaration of...)
- Kerelaw Castle (Alexander Hamilton's Father) (Ruined castle in Stevenston, Ayrshire, seat of the Hamilton family from 1655)
- King's College, Aberdeen (Patrick Henry's Father) (King's College, Aberdeen, where Patrick Henry's father John Henry attended on scholarship...)
- Marischal College (Hugh Mercer Plaque) (Where Continental Army brigadier general Hugh Mercer studied medicine before joining the...)
- University of Edinburgh Old College (Benjamin Rush, signer of the Declaration of Independence, earned his medical degree here...)
Commercial (2)
Ireland (16 sites)
Political (4)
Military (4)
- Carrickfergus Castle (John Paul Jones's ship Ranger engaged HMS Drake in Belfast Lough near Carrickfergus on...)
- Charlemont Fort (Ancestral seat of the Caulfeild family, whose scion the 1st Earl of Charlemont founded...)
- Cork Harbour (Major provisioning and embarkation port for British forces; Cork supplied vast quantities...)
- Spike Island, Cork Harbour (Island fortified from 1779 to protect Cork Harbour, Britain's primary provisioning hub...)
People (4)
Commercial (1)
Protest & Dissent (3)
Channel Islands (6 sites)
Military (5)
Museums (1)
1 Stratford Place (Stephen Sayre)
Political
Historical Significance
The story of Stephen Sayre and his arrest at 1 Stratford Place in October 1775 reads like something from a spy novel, yet it was a real episode that shook London's political establishment in the opening months of the American War. Sayre was an American-born financier from Long Island who had risen to remarkable prominence in the City of London. Educated at the College of New Jersey (later Princeton), he had crossed the Atlantic and built a career in banking, becoming a partner in the firm of Sayre & Purdon. In 1773, he was elected Sheriff of London and Middlesex -- an extraordinary achievement for an American-born man and a testament to both his social connections and the pro-American sympathies that ran through parts of London's mercantile elite. His home at 1 Stratford Place, a fashionable new development just off Oxford Street, placed him in the heart of polite London society.
On 23 October 1775, Sayre was arrested at his Stratford Place residence on a charge of high treason. The accusation, brought by Francis Richardson, an American-born adjutant in the Guards, was sensational: Sayre was alleged to have plotted to seize the Tower of London, kidnap King George III as he traveled to open Parliament, and overthrow the government. Richardson claimed that Sayre had confided the plot to him and sought his assistance in suborning soldiers from the Guards regiments. The arrest was ordered by Lord Rochford, one of the Secretaries of State, and Sayre was conveyed to the Tower of London -- an unusually dramatic venue for detention that underscored the gravity of the charge. The news caused a sensation in London's coffeehouses and newspapers, coming as it did just months after the battles of Lexington, Concord, and Bunker Hill had transformed the colonial dispute into open warfare.
Sayre was held in the Tower for only a brief period before being released on bail. The case against him collapsed almost immediately. Richardson's testimony was uncorroborated, and his own background -- he had debts and had been seeking preferment -- made him a suspect witness. Sayre was brought before the Court of King's Bench, where Lord Mansfield discharged him for lack of evidence. Rather than retreating quietly, Sayre went on the offensive, suing Lord Rochford for false imprisonment. The case, heard in 1776, resulted in a verdict in Sayre's favor, though the damages awarded were modest. The episode nevertheless served as a powerful illustration of the paranoid atmosphere in London during the early months of the war, when the government feared that American sympathizers in the capital might translate their political opinions into direct action.
The Sayre affair also illuminated the depth of pro-American networks in London. Sayre was connected to John Wilkes, the radical politician and Lord Mayor of London, who was himself a vocal opponent of the war and a champion of the colonists' rights. Sayre's prominence as Sheriff meant that his arrest was not merely a matter of individual jeopardy but a political event that embarrassed the City's opposition faction. After the collapse of the case, Sayre left England and spent the remainder of the war in various diplomatic and commercial ventures on the Continent, attempting with limited success to secure European support for the American cause. He petitioned the Continental Congress for recognition and compensation, with mixed results, and spent time in Paris, Berlin, and Copenhagen. His later career never matched his London prominence, but the Stratford Place episode remained one of the most dramatic moments of the Revolution's London chapter.
Key Figures
- Stephen Sayre -- American-born banker, Sheriff of London and Middlesex, arrested in 1775 on charges of plotting to kidnap George III; acquitted and awarded damages for false imprisonment
- Francis Richardson -- American-born adjutant in the Guards who informed on Sayre, claiming knowledge of a treasonous plot; his testimony was ultimately discredited
- Lord Rochford -- Secretary of State for the Southern Department who ordered Sayre's arrest; later found liable for false imprisonment
- Lord Mansfield -- Lord Chief Justice who discharged Sayre from the King's Bench for lack of evidence
- John Wilkes -- Radical Lord Mayor of London and ally of the American cause, connected to Sayre's political network in the City
What's There Today
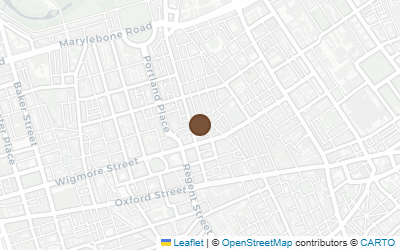
Stratford Place survives as one of London's most intact Georgian cul-de-sacs, running north from Oxford Street between Bond Street and Marylebone Lane. The street was developed in the 1770s by Edward Stratford, 2nd Earl of Aldborough, and retains much of its original character despite the commercial transformation of Oxford Street around it. At the head of the cul-de-sac stands Stratford House (also known as Derby House), a grand Palladian mansion completed in 1773 that has served since 1962 as the home of the Oriental Club. The house is a Grade I listed building and its facade, visible from the street, gives an excellent impression of the kind of fashionable setting in which Sayre moved. The specific house at number 1, where Sayre lived and was arrested, is at the Oxford Street end of the street. The buildings along Stratford Place have been altered over the centuries but the street plan and overall Georgian character remain legible.
There is no plaque or marker commemorating Stephen Sayre or the events of October 1775, and Stratford Place is not a public heritage site -- it is a working street with private residences and offices. However, it is freely accessible to pedestrians and easily visited as part of a walk along Oxford Street. The nearest Underground station is Bond Street (Central, Jubilee, and Elizabeth lines), directly adjacent to the entrance of Stratford Place. The street is also close to the Wallace Collection on Manchester Square, another Georgian-era destination.
Sources
- Alden, John R. Stephen Sayre: American Revolutionary Adventurer. Baton Rouge: Louisiana State University Press, 1983.
- "Stratford Place." In Survey of London, vol. 40: The Grosvenor Estate in Mayfair, Part 2. London: London County Council, 1980.
- "Stephen Sayre." UCL Bloomsbury Project / Bartlett School Survey Records.
- Sainsbury, John. Disaffected Patriots: London Supporters of Revolutionary America, 1769-1782. Kingston and Montreal: McGill-Queen's University Press, 1987.
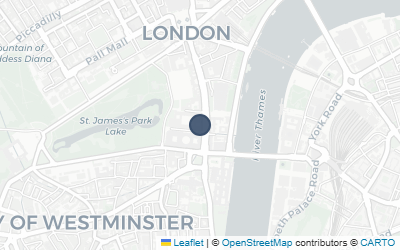
10 Downing Street
Political
Historical Significance
Ten Downing Street served as the nerve centre of the British war effort throughout the American Revolution. It was here that Frederick, Lord North, who held the combined offices of First Lord of the Treasury and Prime Minister from 1770 to 1782, presided over the political direction of the conflict that would cost Britain its most valuable colonial possessions. From the escalation of tensions following the Boston Tea Party in 1773 through the passage of the Coercive Acts in 1774 and the outbreak of open hostilities at Lexington and Concord in 1775, the critical political decisions that shaped Britain's response were made within these walls.
Lord North's tenure at Downing Street during the war years was marked by a deep and often agonizing tension between his personal doubts and his sense of duty to George III. North repeatedly expressed private misgivings about the war and on several occasions attempted to resign, only to be persuaded, sometimes almost commanded, by the King to remain in office. George III viewed the conflict as a test of royal and parliamentary authority and regarded any suggestion of compromise or withdrawal as tantamount to the dismemberment of the empire. North, temperamentally cautious and more inclined toward conciliation than confrontation, found himself executing a policy of military escalation that he privately feared was unwinnable. This dynamic, a reluctant prime minister prosecuting a war at the insistence of a determined monarch, played out in the corridors and private rooms of Downing Street throughout the late 1770s.
The most famous single moment in Downing Street's American Revolution story came on 25 November 1781, when Lord North received official confirmation of Cornwallis's surrender at Yorktown the previous month. The news was brought by Lord George Germain, the Secretary of State for the Colonies, who had himself received the dispatch. According to multiple contemporary accounts, North received the news with visible anguish, pacing the room and exclaiming repeatedly, "Oh God! It is all over!" The phrase has become one of the most quoted lines associated with the American Revolution, capturing in a single outburst the moment when the British political establishment recognized that the war was lost. Whether North's words were precisely these or something similar, the essential truth of the scene is well attested: the Prime Minister understood immediately that Yorktown meant not just a military defeat but the end of Britain's hold on the thirteen colonies.
In the months that followed, North's position became untenable. Parliamentary support for the war collapsed, and in March 1782 he finally succeeded in resigning. He was succeeded by the Marquess of Rockingham, whose brief ministry initiated peace negotiations, and then by the Earl of Shelburne, who oversaw the Treaty of Paris in 1783 that formally recognized American independence. The transition of power from North to his successors, all managed from Downing Street, marked the political conclusion of the American Revolution as far as Britain was concerned. Shelburne's willingness to offer generous peace terms, including the cession of territory stretching to the Mississippi River, was itself a product of the political exhaustion that North's long and unhappy war ministry had created.
Key Figures
- Frederick, Lord North - Prime Minister (1770-1782) who directed the political conduct of the American war; received the Yorktown dispatch at Downing Street in November 1781; his resignation in March 1782 effectively ended British pursuit of the war
- George III - King whose personal determination to suppress the American rebellion shaped government policy throughout the conflict; his close and sometimes overbearing relationship with North was central to the war's political dynamics
- William Petty, Earl of Shelburne - Succeeded Rockingham as Prime Minister in 1782 and negotiated the Treaty of Paris (1783) that recognized American independence; his relatively generous peace terms reflected a strategic vision of maintaining commercial ties with the new nation
- Lord George Germain - Secretary of State for the American Colonies (1775-1782) who was responsible for military strategy and brought the Yorktown news to North at Downing Street
What's There Today
Ten Downing Street remains the official residence and office of the Prime Minister of the United Kingdom, a function it has served almost continuously since Sir Robert Walpole first occupied the house in 1735. The exterior of the building, with its famous black door and white-painted Georgian facade, is largely unchanged in its essential appearance, though the interior has been extensively rebuilt and modernized over the centuries, most notably during Margaret Thatcher's tenure in the 1980s.
The street is not accessible to the general public. Since 1989, iron security gates have sealed the Whitehall end of Downing Street, and visitors can only view the famous door from behind these gates. The best vantage point is from Whitehall itself, looking down the short street toward Number 10. Despite the restricted access, the site remains one of London's most visited landmarks, and it is easily incorporated into a walking tour of the surrounding government quarter, which includes the Houses of Parliament, the Horse Guards, and the Banqueting House. The nearest Underground station is Westminster (Jubilee, District, and Circle lines), approximately a five-minute walk to the south along Whitehall, though Charing Cross station (Northern and Bakerloo lines) is roughly equidistant to the north.
Sources
- "Lord North," History of Parliament Online, https://www.historyofparliamentonline.org
- Thomas, Peter D.G. Lord North. London: Allen Lane, 1976
- Whiteley, Peter. Lord North: The Prime Minister Who Lost America. London: Hambledon Press, 1996
- O'Shaughnessy, Andrew Jackson. The Men Who Lost America: British Leadership, the American Revolution, and the Fate of the Empire. New Haven: Yale University Press, 2013
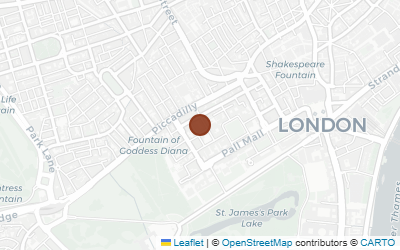
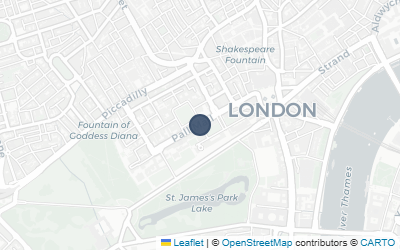
Banqueting House, Whitehall
Political
Historical Significance
On 30 January 1649, King Charles I was led through the Banqueting House, beneath the magnificent Rubens ceiling he himself had commissioned, and out through a window to the scaffold erected in Whitehall. He was the first European monarch tried and executed by his own people in public. The High Court of Justice declared him guilty of attempting to "uphold in himself an unlimited and tyrannical power to rule according to his will, and to overthrow the rights and liberties of the people." The assertion that a king could be held accountable -- that sovereignty resided in the people, not the crown -- was the revolutionary precedent that echoed across the Atlantic a century and a quarter later.
The intellectual link to the American Revolution is direct. John Milton's Tenure of Kings and Magistrates (1649), written to justify the execution, declared "all men naturally were born free" -- anticipating Jefferson's language by over a century. The English Civil War and Commonwealth period demonstrated that parliamentary government could replace monarchy, that written constitutions could limit power, and that political authority required consent. When American colonists argued against George III, they drew explicitly on this English precedent. John Adams studied the Commonwealth period intensely and cited it in his Defence of the Constitutions of Government.
The Banqueting House is the only surviving building of the Palace of Whitehall, designed by Inigo Jones and completed in 1622. The Rubens ceiling paintings, installed in 1636, are the largest surviving Rubens work in its original location.
Key Figures
- Charles I (1600-1649) - King of England; executed outside this building for tyranny against his people
- Oliver Cromwell (1599-1658) - Lord Protector of the Commonwealth; demonstrated that parliamentary government could replace monarchy
- John Milton (1608-1674) - Poet and polemicist; defended the execution in terms that anticipated revolutionary language
- John Adams - Studied the Commonwealth period extensively; cited it in his constitutional writings
What's There Today
The Banqueting House is a Historic Royal Palaces property on Whitehall, steps from existing trail sites in the Power & Protest walking tour. The Inigo Jones exterior is one of London's finest Palladian facades. Inside, the Rubens ceiling paintings depicting the glorification of James I are breathtaking -- and carry a bitter irony, given that Charles I walked beneath them to his death. An inscription inside marks the execution site. The building is undergoing conservation in 2026 with limited open days (check hrp.org.uk for the current schedule). Admission is approximately £7.50 for adults; children under 16 free. Historic Royal Palaces members enter free.
Sources
- Historic Royal Palaces, "Banqueting House" and "The Execution of Charles I," hrp.org.uk
- Worden, Blair, The English Civil Wars 1640-1660 (Weidenfeld & Nicolson, 2009)
- Adams, John, Defence of the Constitutions of Government of the United States (1787-88)
- Milton, John, The Tenure of Kings and Magistrates (1649)
- Wedgwood, C.V., A Coffin for King Charles (Macmillan, 1964)
Charles James Fox Blue Plaque
Political
Historical Significance
Charles James Fox (1749-1806) was the most radical and vocal parliamentary opponent of the war with America. His great speech on the colonial dispute in February 1775 marked the beginning of what is still considered one of the most remarkable political careers in British history. Fox denounced taxation without consent, called for negotiated peace, and -- in a theatrical flourish that captured his passionate partisanship -- dressed in the blue and buff colours of George Washington's Continental Army when attending Parliament.
Fox's opposition to the American war was part of a broader struggle with King George III that defined his career. Dismissed from office in 1774 for his sympathetic stance toward the colonies, Fox became the leading Whig critic of Lord North's war ministry. On February 2, 1777, he warned that sending more troops to America could leave Britain defenseless against France -- a prediction that proved accurate when France entered the war in 1778. After the British surrender at Yorktown in 1781, Fox insisted that recognition of American independence must be given unconditionally, not used as a bargaining chip in peace negotiations.
Fox served briefly as Foreign Secretary in the Rockingham ministry of 1782, during which American independence was recognized. His connection to 46 Clarges Street -- a Georgian townhouse built around 1730-1750 -- is commemorated by the LCC plaque erected in 1912.
Key Figures
- Charles James Fox - Whig statesman; leading parliamentary opponent of the American war; Foreign Secretary 1782 and 1806
- Lord Frederick North - PM whose prosecution of the American war Fox relentlessly attacked; government fell 1782
- King George III - Fox's political antagonist throughout his career; dismissed Fox from office over his colonial sympathies
- Edmund Burke - Fox's political ally and intellectual mentor in opposing the American war
What's There Today
46 Clarges Street is a Grade II listed Georgian townhouse (built c.1730-1750) now operating as the Fox Club, a private members' club and boutique hotel named after its famous former resident. The club has nine individually decorated guest rooms, a restaurant, and a bar, and is open to non-members for dining and overnight stays. The LCC blue plaque is visible on the exterior facade. The building sits opposite Green Park, with the tube station of the same name a two-minute walk away.
Sources
- English Heritage, "Charles James Fox" blue plaque page
- History of Parliament Online, "Fox, Hon. Charles James (1749-1806)" entry
- Britannica, "Charles James Fox" entry
- Mitchell, L.G., Charles James Fox (Oxford University Press, 1992)
Club of Honest Whigs Meeting Site
Political
Historical Significance
The Club of Honest Whigs was Benjamin Franklin's most important intellectual circle during his long residences in London, and its fortnightly meetings at the London Coffee House on Ludgate Hill placed it at the intersection of science, religion, and radical politics that defined the transatlantic Enlightenment. Founded in the early 1760s, the club brought together a remarkable collection of dissenting clergymen, natural philosophers, political writers, and American sympathisers who collectively shaped the intellectual climate in which the Revolutionary crisis developed. Franklin, who lived in London for most of the period from 1757 to 1775, was the club's most famous member, but the broader membership constituted a who's who of British progressive thought.
The club met every other Thursday evening at the London Coffee House, a substantial establishment on Ludgate Hill near St Paul's Cathedral that should not be confused with the London Tavern on Bishopsgate. Over supper and conversation, members discussed the scientific discoveries, philosophical questions, and political controversies of the day. The atmosphere was deliberately informal and egalitarian -- the name "Honest Whigs" signalled the members' commitment to open inquiry and opposition to arbitrary authority. Franklin's correspondence reveals how deeply he valued these gatherings. In a 1764 letter to fellow member John Canton, he expressed his eagerness to return to London and resume his Thursday evening suppers, describing the club as one of the chief pleasures of his London life.
The club's significance for the American Revolution lies in the intellectual networks it sustained. Richard Price, a Welsh dissenting minister and moral philosopher, was a member whose 1776 pamphlet Observations on the Nature of Civil Liberty became one of the most influential British defences of the American cause, selling 60,000 copies in its first year and earning him the thanks of the Continental Congress and an invitation to emigrate to America to help manage the new nation's finances. Joseph Priestley, the chemist and dissenting theologian, was another member whose sympathies for the American cause were so overt that he was eventually hounded out of England by a loyalist mob that burned his house in Birmingham in 1791. John Canton, a physicist who worked on electrical theory, provided Franklin with a network of scientific collaborators whose shared intellectual endeavour transcended political boundaries.
The dissenting religious background of many club members was central to their political sympathies. As Nonconformists excluded from the universities, the military, and public office by the Test and Corporation Acts, they had a personal understanding of what it meant to be denied political rights by an established order. Their theology, which emphasised reason, individual conscience, and scepticism of established authority, aligned naturally with the arguments American colonists were making against Parliamentary taxation without representation. The club thus served as an incubator for the pro-American intellectual movement in Britain, generating pamphlets, sermons, and political arguments that gave the American cause a respectable voice in British public debate. Through members like Price and Priestley, the club's influence extended far beyond its Thursday evening meetings, reaching into Parliament, the press, and the broader world of British dissenting culture.
Franklin's eventual departure from London in March 1775, after his humiliation before the Privy Council over the Hutchinson letters affair, marked the effective end of the club's most significant period. With war imminent and the political atmosphere increasingly hostile to American sympathisers, the informal networks that the club had sustained became more dangerous to maintain openly. Yet the intellectual foundations laid during those Thursday evening suppers continued to bear fruit throughout the war and beyond, as Price, Priestley, and others continued to write and speak in defence of American liberty.
Key Figures
- Benjamin Franklin (1706-1790) -- American polymath, colonial agent, and the club's central figure, whose London social networks profoundly shaped transatlantic intellectual exchange
- Richard Price (1723-1791) -- Welsh dissenting minister and moral philosopher whose Observations on the Nature of Civil Liberty was the most influential British defence of the American cause
- Joseph Priestley (1733-1804) -- Chemist, theologian, and political radical whose pro-American sympathies eventually forced his emigration from Britain
- John Canton (1718-1772) -- Physicist and Fellow of the Royal Society who collaborated with Franklin on electrical experiments and was among the club's founding members
What's There Today
The London Coffee House on Ludgate Hill, where the Club of Honest Whigs held its fortnightly meetings, was demolished in the nineteenth century and no trace of the original building survives. The site, located at approximately 24-26 Ludgate Hill, is now occupied by modern commercial buildings in the shadow of St Paul's Cathedral. There is no plaque or marker indicating the site's association with Franklin's club, despite its significance as a meeting place that helped forge the intellectual bonds between British and American progressive thought. The absence is part of a broader pattern in which London's coffee house heritage -- once the social infrastructure of the Enlightenment -- has been almost entirely effaced by urban redevelopment.
Ludgate Hill runs westward from St Paul's Cathedral toward Ludgate Circus and Fleet Street, following the route of one of London's oldest thoroughfares. The site is easily accessible from St Paul's Underground station (Central line), which exits directly onto the south side of the cathedral, or from City Thameslink station (National Rail), which is at the foot of Ludgate Hill. Blackfriars station (District and Circle lines, plus National Rail) is also a short walk to the south. The immediate surroundings are dominated by St Paul's Cathedral, which was the backdrop to the club's meetings and remains one of London's most visited landmarks. Visitors interested in Franklin's London life can combine a visit to this site with Benjamin Franklin House at 36 Craven Street, his only surviving residence, approximately a fifteen-minute walk to the west via Fleet Street and the Strand.
Sources
- Franklin, Benjamin. "Letter to John Canton, 19 March 1764." Founders Online, National Archives. https://founders.archives.gov
- Crane, Verner W. "The Club of Honest Whigs: Friends of Science and Liberty." William and Mary Quarterly 23, no. 2 (1966): 210-233.
- Aldridge, Alfred Owen. Franklin and His French Contemporaries. New York: New York University Press, 1957.
- Fruchtman, Jack Jr. The Political Philosophy of Thomas Paine. Baltimore: Johns Hopkins University Press, 2009. (For context on dissenting intellectual networks.)
Edmund Burke Blue Plaque
Political
Historical Significance
Edmund Burke (1729-1797) was the most eloquent parliamentary voice against Britain's coercive policies toward the American colonies. From 1771 to 1775, he served as the agent in Parliament for the New York Colonial Assembly, giving him direct knowledge of colonial grievances. His speech "On American Taxation" (April 19, 1774) called for full repeal of the Townshend duties, arguing that taxation without representation was impractical and unjust. His even more famous speech "On Conciliation with the Colonies" (March 22, 1775) -- delivered just one month before Lexington and Concord -- urged Parliament to comply with the colonists' spirit of liberty rather than try to crush it.
Burke's connection to this specific address dates to approximately 1787-1790, when he used 37 Gerrard Street as his London town house during the impeachment trial of Warren Hastings, of which he was the leading promoter. Although this post-dates the active war years, Burke's American advocacy continued throughout his career. He was among the first in Parliament to urge acceptance of American independence, and his political philosophy shaped the Rockingham Whig opposition that eventually brought down Lord North's government in 1782.
The plaque itself, erected in 1876 by the Royal Society of Arts, is historically significant in its own right: it is one of the earliest surviving blue plaques in London, part of the scheme that eventually became the English Heritage programme.
Key Figures
- Edmund Burke - MP, orator, and political philosopher; agent for New York Colonial Assembly; author of landmark speeches defending American rights
- Marquess of Rockingham - Burke's political patron; PM who repealed the Stamp Act (1766) and returned to power in 1782 to negotiate peace
What's There Today
37 Gerrard Street now stands in the heart of London's Chinatown, surrounded by Chinese restaurants, shops, and the distinctive red-and-gold ornamental gates of the neighbourhood. The RSA blue plaque remains on the building facade. The street itself was built in 1677-1685 and has been the centre of London's Chinese community since the 1970s. Visitors can view the plaque while exploring Chinatown. The nearest tube stations are Leicester Square and Piccadilly Circus.
Sources
- English Heritage, "Edmund Burke" blue plaque page
- Burke, Edmund, Speech on Conciliation with America (London, 1775)
- History of Parliament Online, "Burke, Edmund (1729-97)" entry
- Lock, F.P., Edmund Burke, Vol. 1 (Oxford: Clarendon Press, 1998)
George Grenville House Site
Political
Historical Significance
George Grenville may have done more than any other single British politician to set the American colonies on the road to revolution. As Prime Minister from 1763 to 1765, he authored and forced through Parliament the Stamp Act of 1765, the first direct internal tax ever levied on the American colonies by the British government. The consequences of that decision, colonial outrage, the Stamp Act Congress, boycotts, mob violence against tax collectors, and ultimately the forging of a shared American political identity rooted in resistance to parliamentary taxation, reverberated for the next decade until they culminated in open war. Grenville lived and died on Bolton Street in Mayfair, and it was from this address that he directed the fiscal policy that lit the fuse of revolution.
Grenville came to power in April 1763 at the end of the Seven Years' War, inheriting a national debt that had nearly doubled during the conflict. Britain's North American empire had expanded enormously, encompassing Canada and the vast territory east of the Mississippi, but garrisoning and administering these new possessions was expensive. Grenville, a meticulous and determined administrator whom even his admirers found tedious, believed that the colonies should contribute to the cost of their own defence. The Sugar Act of 1764, which reformed and tightened enforcement of existing trade duties, was his first step. The Stamp Act of 1765 was far more consequential. It required that a wide range of colonial documents, from legal contracts and newspapers to playing cards, bear a revenue stamp purchased from authorized distributors. The tax was modest in its rates but revolutionary in its principle: it asserted Parliament's right to tax colonists directly, without the consent of their own assemblies.
The colonial reaction stunned Grenville and much of the British political establishment. Americans drew a sharp distinction between external duties on trade, which they had long accepted as part of imperial regulation, and internal taxes imposed without representation, which they regarded as a violation of their rights as British subjects. The Virginia Resolves, the Stamp Act Congress, and widespread popular resistance, including the burning of stamp distributors in effigy and the ransacking of Lieutenant Governor Thomas Hutchinson's house in Boston, demonstrated that the colonies were prepared to resist with an intensity that Grenville had not anticipated. By the time the Stamp Act was repealed in 1766 under the Rockingham ministry, the essential constitutional argument of the Revolution had been articulated: no taxation without representation.
Grenville did not live to see the war his policies had helped provoke. He died on 13 November 1770 at his house on Bolton Street, Mayfair, at the age of fifty-eight. He had spent his final years in opposition, continuing to defend the principle of parliamentary sovereignty over the colonies and criticizing successive ministries for what he regarded as weakness in dealing with American resistance. His political legacy is inseparable from the Stamp Act, and historians have debated whether the Revolution could have been avoided had a less doctrinaire figure held the premiership in 1763. What is clear is that Grenville's insistence on asserting Parliament's taxing authority, however legally defensible in British constitutional theory, created the political crisis that ultimately could not be resolved short of war.
Key Figures
- George Grenville - Prime Minister (1763-1765) who authored the Stamp Act of 1765 and the Sugar Act of 1764; his insistence on colonial taxation established the constitutional dispute that led to the Revolution; lived and died at Bolton Street, Mayfair
- George III - King who appointed Grenville but came to find him personally insufferable; dismissed him in 1765 and later remarked that he would rather see the devil in his closet than Grenville; nonetheless continued to uphold the parliamentary sovereignty Grenville had asserted
- William Pitt the Elder - Grenville's brother-in-law and fierce political rival who denounced the Stamp Act in Parliament, declaring that Britain had no right to tax the colonies; his opposition helped bring about repeal and established him as the colonies' most powerful champion in British politics
What's There Today
Bolton Street is a quiet residential and commercial street in Mayfair, running between Piccadilly and Curzon Street. The eighteenth-century townhouses that lined the street in Grenville's day have been largely replaced by Victorian and later buildings, and there is no plaque or marker to indicate which house Grenville occupied or that a Prime Minister lived and died here. The street retains a certain Georgian character in its scale and proportions, but specific identification of the Grenville house site is not possible from surviving records.
The street is easily accessible and sits within one of London's most historically rich neighbourhoods. The nearest Underground station is Green Park (Jubilee, Piccadilly, and Victoria lines), approximately a three-minute walk to the south. Bolton Street is a short detour for anyone walking between Piccadilly and the cluster of Revolution-related sites around St James's, including St James's Palace, the site of William Pitt the Elder's house on St James's Square, and the broader government quarter along Whitehall. Mayfair itself was home to many of the political figures of the Revolutionary era, and a walk through its streets offers a sense of the intimate, club-like world in which Britain's American policy was debated and decided.
Sources
- "George Grenville," Wikipedia, https://en.wikipedia.org/wiki/George_Grenville
- "George Grenville," Prime Minister's Office biography, GOV.UK, https://www.gov.uk/government/history/past-prime-ministers/george-grenville
- Lawson, Philip. George Grenville: A Political Life. Oxford: Clarendon Press, 1984
- Morgan, Edmund S., and Helen M. Morgan. The Stamp Act Crisis: Prologue to Revolution. Chapel Hill: University of North Carolina Press, 1953
- Thomas, Peter D.G. British Politics and the Stamp Act Crisis: The First Phase of the American Revolution, 1763-1767. Oxford: Clarendon Press, 1975
Guildhall
Political
Historical Significance
The Guildhall, seat of the City of London Corporation, was a significant forum for political debate on the American colonies during the Revolutionary era. The City of London's merchant community had deep financial ties to the American trade, and the Common Council frequently passed resolutions sympathetic to the colonial cause. The City was notably more radical in its politics than the national Parliament, and its addresses to the Crown often criticised government policy toward the colonies. The Guildhall was where these debates played out and where petitions were drafted urging conciliation.
William Beckford, twice Lord Mayor of London (1762-63 and 1769-70), was the most prominent City figure connected to the American cause. A wealthy Jamaican-born plantation owner and MP for the City, Beckford was an ally of William Pitt the Elder and a vocal defender of colonial rights. He famously rebuked George III directly in a bold address from the Guildhall in 1770, an act commemorated by a prominent statue inside the hall. John Wilkes, the radical politician who served as Lord Mayor in 1774-75, also used the Guildhall as a platform for pro-American sentiment. The City's support was not purely ideological; merchants feared the loss of lucrative American trade, and petitions from London trading houses played a significant role in Parliamentary debates over colonial policy.
It should be noted that the City of London's support for the colonies was not unanimous. Some merchants and aldermen supported the government's position, and the City's radicalism was driven as much by domestic political grievances (particularly around parliamentary reform and the rights of electors) as by principled support for American liberty. The relationship between City radicalism and the American cause was genuine but complex.
Key Figures
- William Beckford - Lord Mayor of London and MP; prominent defender of colonial rights; statue in the Guildhall
- John Wilkes - Lord Mayor 1774-75; radical politician sympathetic to the American cause
- Brass Crosby - Lord Mayor 1770-71; involved in the Printers' Case defending press freedom
- Stephen Sayre - American-born banker and sheriff of London; arrested in 1775 on allegations of plotting to seize the King (charges were dropped and the case remains disputed)
- Barlow Trecothick - Lord Mayor 1770; American-born merchant who organised colonial trade petitions
What's There Today
The Guildhall remains the ceremonial and administrative heart of the City of London Corporation. The medieval Great Hall, dating originally to 1411 and rebuilt after both the Great Fire of 1666 and the Blitz of 1940, is used for civic banquets, ceremonies, and events. The Beckford statue remains prominently displayed. The Guildhall Art Gallery, adjacent to the hall, includes paintings and artefacts from the period. The Guildhall Library (now part of the London Metropolitan Archives and City of London libraries) holds extensive records of the City Corporation's proceedings during the Revolutionary era, including Common Council minutes and petitions.
The Guildhall is located in the heart of the City of London, near Bank and Moorgate Underground stations. The Great Hall is open to visitors free of charge when not in use for events, though access can be unpredictable. The Guildhall Art Gallery and the Roman Amphitheatre beneath it charge a small admission fee. The complex is well worth a visit for its combination of medieval, Georgian, and modern architecture and its tangible connection to the mercantile interests that shaped British policy toward America.
Sources
- Rudé, George, Wilkes and Liberty (Oxford University Press, 1962)
- Beckford, William, entry in Oxford Dictionary of National Biography (Oxford University Press, 2004)
- City of London Corporation, Common Council Journals, 1760s-1780s (London Metropolitan Archives)
- Sainsbury, John, Disaffected Patriots: London Supporters of Revolutionary America, 1769-1782 (McGill-Queen's University Press, 1987)
- City of London Corporation, "Guildhall," www.cityoflondon.gov.uk
Houses of Parliament
Political
Historical Significance
The Houses of Parliament at Westminster were the crucible in which the American Revolution was forged through legislation. It was here that Parliament passed the Stamp Act (1765), the Townshend Acts (1767), the Coercive Acts (1774), and the Prohibitory Act (1775), each escalating the constitutional crisis with Britain's American colonies. The House of Commons debated petitions from colonial agents, merchants, and dissenting members who warned that coercive taxation without representation would drive the colonies toward independence. The House of Lords, though generally more hawkish, also hosted significant debates on conciliation.
Key parliamentary figures shaped the course of events from these chambers. William Pitt the Elder (Earl of Chatham) delivered impassioned speeches against the Stamp Act and later collapsed in the House of Lords during a debate on American affairs in 1778. Edmund Burke argued for conciliation in his celebrated 1775 speech. On the government side, Lord North managed the war effort as Prime Minister from the Treasury Bench, while Lord George Germain directed military strategy as Secretary of State for the Colonies. Charles James Fox emerged as one of the most vocal critics of the war.
The present Gothic Revival building by Charles Barry and Augustus Pugin dates from the 1840s, replacing the medieval Palace of Westminster largely destroyed by fire in 1834. The debates of the Revolutionary era therefore took place in the older complex, of which only Westminster Hall, the Jewel Tower, and the crypt of St Stephen's Chapel survive. The Commons met in St Stephen's Chapel itself, a relatively small and intimate space quite different from the current chamber. It is worth noting that visitors today are seeing the successor building, not the physical rooms where these historic debates occurred.
Key Figures
- William Pitt the Elder (Earl of Chatham) - Opposed the Stamp Act; collapsed in the House of Lords in April 1778 during debate on American affairs and died shortly after
- Edmund Burke - MP who delivered his famous speech on conciliation with America in March 1775
- Lord North (Frederick North) - Prime Minister 1770-1782 who led the government during the war
- Lord George Germain - Secretary of State for the Colonies who directed British military strategy
- Charles James Fox - Whig MP and vocal critic of the war against the colonies
- Isaac Barre - MP who coined the phrase "Sons of Liberty" during the Stamp Act debates in 1765
- William Beckford - Lord Mayor of London and MP who supported colonial rights
- John Wilkes - Radical MP who sympathised with the American cause
What's There Today
The Palace of Westminster remains the seat of the UK Parliament. Visitors can tour the building when Parliament is not sitting, or attend debates from the public galleries when it is. Guided tours cover Westminster Hall, the oldest surviving part of the complex (dating to 1097), as well as the Lords and Commons chambers, the Royal Gallery, and St Stephen's Hall, which occupies the footprint of the old chapel where the Revolutionary-era debates took place. Brass studs in the floor of St Stephen's Hall mark the position of the old Speaker's chair.
Westminster Hall, which would have been familiar to colonial agents and lobbyists of the 1760s and 1770s, survives with its magnificent medieval hammerbeam roof. The Jewel Tower across the road is also original. The Parliamentary Archives hold records including original Acts of Parliament and petitions relevant to the American colonies. The site is a UNESCO World Heritage Site and is fully accessible via public transport (Westminster Underground station).
Sources
- Simmons, R.C. and Thomas, P.D.G., eds., Proceedings and Debates of the British Parliaments Respecting North America, 1754-1783 (Kraus, 1982-1987)
- Thomas, Peter D.G., British Politics and the Stamp Act Crisis (Oxford University Press, 1975)
- UK Parliament, "Visiting Parliament," www.parliament.uk
- Historic England, "Palace of Westminster" listing
- Thomas, Peter D.G., The Townshend Duties Crisis (Oxford University Press, 1987)
- Cobbett, William, Parliamentary History of England, vols. 16-22 (Hansard, 1813-1814)
Middle Temple
Political
Historical Significance
The Honourable Society of the Middle Temple, one of London's four ancient Inns of Court, occupies a precinct between Fleet Street and the Thames that has been associated with legal education since the fourteenth century. In the decades before the American Revolution, Middle Temple served as the premier training ground for ambitious colonial lawyers, and its influence on the intellectual formation of the American founding generation was profound. At least five signers of the Declaration of Independence — Thomas McKean, Thomas Heyward Jr., Edward Rutledge, Arthur Middleton, and John Rutledge (a signer of the Constitution) — received their legal education here, with some historical accounts placing the number of Middle Temple-trained signers as high as seven.
The colonial lawyers who came to Middle Temple in the mid-eighteenth century immersed themselves in the English common law tradition: the writings of Coke and Blackstone, the principles of due process, trial by jury, and the rights of Englishmen that had been forged through centuries of constitutional struggle. They absorbed these doctrines not as abstract philosophy but as practical legal tools — and when the imperial crisis deepened in the 1760s and 1770s, they turned those very principles against the Crown. The argument that Parliament could not tax the colonists without their consent, that standing armies in peacetime violated fundamental law, and that the colonial charters constituted binding compacts all drew on legal reasoning rooted in the English tradition these men had studied at the Inns of Court.
The irony was not lost on contemporaries. The men who drafted the Declaration of Independence and framed the legal case for revolution had been trained in the very institutions that embodied English legal authority. Their fluency in common law argument gave the American cause a jurisprudential legitimacy that distinguished it from a mere rebellion. The South Carolina delegation to the Continental Congress was particularly well represented among Middle Temple alumni: Rutledge, Heyward, and Middleton all came from planter families that had sent their sons to London for legal polish, and all three signed the Declaration.
The broader pattern of colonial legal education at the Inns of Court — Middle Temple was the most popular, but Lincoln's Inn and the Inner Temple also attracted Americans — helped create a shared Anglo-American legal culture that shaped the Revolution's ideology and, ultimately, the constitutional framework of the new republic. The legal concepts of limited government, separation of powers, and individual rights that found expression in the Declaration and the Constitution had deep roots in the libraries and dining halls of the Middle Temple.
Key Figures
- Thomas McKean — Middle Temple-trained lawyer from Delaware and Pennsylvania; signer of the Declaration of Independence and later President of Congress and Governor of Pennsylvania
- Edward Rutledge — South Carolina lawyer educated at Middle Temple; youngest signer of the Declaration of Independence at age twenty-six; later Governor of South Carolina
- Arthur Middleton — South Carolina planter and Middle Temple member; signer of the Declaration of Independence
- Thomas Heyward Jr. — South Carolina lawyer and Middle Temple alumnus; signer of the Declaration of Independence; captured by the British during the siege of Charleston
What's There Today
Middle Temple remains an active Inn of Court, and its grounds and principal buildings are accessible to visitors, though some areas may be restricted during legal term. The centrepiece is Middle Temple Hall, completed in 1573, one of the finest surviving Elizabethan halls in England. Its double hammerbeam roof, carved screen, and historic portraits create a powerful sense of the legal tradition that colonial Americans encountered when they arrived in London for their training. The hall is famous as the venue for the first known performance of Shakespeare's Twelfth Night in 1602, and it continues to serve as the Inn's ceremonial and dining hall.
The wider Temple precinct, shared with the Inner Temple, offers a remarkably peaceful enclave in the heart of London. The twelfth-century Temple Church, medieval gardens, and atmospheric courtyards and passageways provide a vivid sense of the environment in which colonial lawyers lived and studied. While there is no dedicated exhibit on the American revolutionary connection, the Middle Temple library holds archival records of colonial members, and the Inn has acknowledged its American heritage on various occasions. Visitors walking these grounds are treading the same paths as the men who would draft the legal case for independence.
Sources
- Bilder, Mary Sarah. The Transatlantic Constitution: Colonial Legal Culture and the Empire. Cambridge, MA: Harvard University Press, 2004.
- Breen, T. H. "Subjecthood and Citizenship: The Context of James Otis's Radical Critique of John Locke." New England Quarterly 71, no. 3 (1998): 378-403.
- Roper, Robert. Now the Drum of War: Walt Whitman and His Brothers in the Civil War. New York: Walker, 2008. [For broader context on Inns of Court and American legal training.]
- Middle Temple Archives. Records of admissions, including colonial members. Available via Middle Temple Library, London.
- Lemmings, David. Gentlemen and Barristers: The Inns of Court and the English Bar, 1680-1730. Oxford: Clarendon Press, 1990.
Privy Council Chamber (Cockpit)
Political
Historical Significance
The Privy Council Chamber, known historically as the Cockpit, was the setting for one of the most dramatic and consequential events in the lead-up to the American Revolution. On 29 January 1774, Benjamin Franklin was summoned before the Privy Council ostensibly to hear a petition from the Massachusetts Assembly requesting the removal of Governor Thomas Hutchinson. Instead, Franklin was subjected to a brutal public humiliation by Solicitor General Alexander Wedderburn, who denounced him for his role in leaking the Hutchinson letters, private correspondence that had revealed Hutchinson's recommendations for restricting colonial liberties.
Wedderburn's attack lasted over an hour before an audience of Privy Councillors and spectators, many of whom laughed and applauded. He called Franklin a thief and a man of "three-fold guilt" and suggested he had acted dishonourably in obtaining and transmitting the letters. Franklin stood in silence throughout the ordeal, reportedly wearing a suit of Manchester velvet that he would later don again at the signing of the Franco-American alliance in 1778, in a deliberate act of symbolic revenge. The Privy Council rejected the Massachusetts petition and Franklin was dismissed from his position as Deputy Postmaster General for North America shortly afterward.
The event is widely regarded as a turning point in Franklin's political evolution. Before the Cockpit hearing, Franklin had spent years working for reconciliation between Britain and the colonies. Afterward, he moved decisively toward supporting independence. The humiliation also hardened opinion in the colonies, where it was seen as evidence of British contempt for American rights. The original Cockpit was part of the old Whitehall Palace complex; the building was subsequently modified and is now part of the Cabinet Office on Whitehall.
Key Figures
- Benjamin Franklin - Colonial agent for Massachusetts; subjected to public humiliation by the Privy Council
- Alexander Wedderburn - Solicitor General who attacked Franklin in his address to the Council
- Lord Gower - Lord President of the Council who presided over the hearing
- Thomas Hutchinson - Royal Governor of Massachusetts whose leaked letters triggered the crisis
- Lord North - Prime Minister; present at the hearing
- Joseph Priestley - Franklin's friend who attended and left an account of the proceedings
What's There Today
The site of the original Cockpit is now within the Cabinet Office complex at 70 Whitehall, part of the UK government's administrative headquarters. The building is not open to the public, as it houses active government offices. The exterior can be viewed from Whitehall and Horse Guards Parade. The specific room where the hearing took place has been significantly altered over the centuries; the current structure incorporates elements from William Kent's 18th-century Treasury building, but the interior has been extensively modified.
A blue plaque or interpretive marker would be helpful for visitors, but as of the most recent information available, the site's connection to the Franklin hearing is not prominently marked on the exterior. Visitors can view the site from the street and should note its proximity to other trail locations: the Houses of Parliament are a short walk south along Whitehall, and Downing Street is immediately adjacent. The Banqueting House, the only surviving above-ground portion of the original Whitehall Palace, is across the street and open to the public.
Sources
- Franklin, Benjamin, The Papers of Benjamin Franklin, vol. 21, ed. William B. Willcox (Yale University Press, 1978)
- Van Doren, Carl, Benjamin Franklin (Viking Press, 1938)
- Brands, H.W., The First American: The Life and Times of Benjamin Franklin (Doubleday, 2000)
- Hutchinson, Thomas, The Diary and Letters of His Excellency Thomas Hutchinson (Sampson Low, 1883-1886)
- Campbell, John (Lord), Lives of the Lord Chancellors (John Murray, 1847), for Wedderburn's career
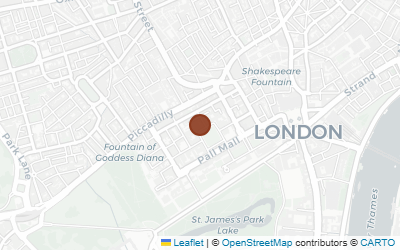
Smyrna Coffee House Site
Political
Historical Significance
The Smyrna Coffee House on Pall Mall was one of Georgian London's most politically significant coffeehouses, and its connection to the American Revolution centers on one of Benjamin Franklin's most pointed acts of political theatre. On 5 April 1774, Franklin composed a satirical open letter addressed to Lord North, the Prime Minister, from the Smyrna, deploying the coffeehouse's role as a venue for political discourse to maximum rhetorical effect. The letter, written just weeks after Franklin's humiliation before the Privy Council in the Hutchinson letters affair, was a carefully crafted piece of public argument disguised as conversational wit -- exactly the kind of communication that coffeehouses were designed to produce and circulate.
The Smyrna Coffee House had operated at various locations on Pall Mall since the early eighteenth century, settling at number 59 by mid-century. It was known as a gathering place for Whig politicians, wits, and men of letters. Jonathan Swift had frequented an earlier incarnation of the house, and by the 1770s it had established itself as one of the more intellectual coffeehouses in the St James's district, attracting patrons who discussed politics, literature, and foreign affairs over dishes of coffee and chocolate. Its location on Pall Mall placed it in the corridor of power between St James's Palace and Westminster, surrounded by gentlemen's clubs, aristocratic townhouses, and government offices. The political character of the coffeehouse made it an ideal stage for Franklin's purposes.
Franklin's open letter to Lord North, written from the Smyrna, belongs to the genre of satirical political correspondence that flourished in the London press during the American crisis. Franklin was a master of this form, having deployed it throughout his years as colonial agent. The April 1774 letter came at a moment of personal and political crisis. In January, Solicitor General Alexander Wedderburn had publicly excoriated Franklin before the Privy Council over his role in obtaining and transmitting letters written by Thomas Hutchinson, the royal governor of Massachusetts, which revealed Hutchinson's private advocacy for restricting colonial liberties. Franklin had stood in silence during the attack, but his response came through the press. The letter from the Smyrna used irony and mock-reasonable proposals to expose the absurdity of the government's American policies, suggesting with deadpan logic that measures designed to punish Massachusetts would inevitably drive all the colonies into united resistance -- a prediction that proved entirely accurate.
The broader significance of the Smyrna Coffee House lies in its role as part of the coffeehouse network through which political intelligence and opinion circulated in eighteenth-century London. Coffeehouses were not merely places to drink; they were information exchanges, reading rooms, and debating chambers. Different houses attracted different clienteles -- merchants gathered at Lloyd's and Jonathan's in the City, while politicians and literati congregated at houses in the St James's and Westminster districts. The Smyrna's Whig character meant that its patrons were disproportionately sympathetic to the American cause, or at least skeptical of the North ministry's handling of the crisis. Franklin, who frequented multiple coffeehouses across London, chose the Smyrna deliberately, knowing that his letter would circulate among readers predisposed to receive its message and amplify it through their own networks of correspondence and conversation.
Key Figures
- Benjamin Franklin -- Colonial agent and polymath who composed a satirical open letter to Lord North from the Smyrna Coffee House in April 1774, criticizing British American policy
- Lord North -- Prime Minister (1770-1782) and target of Franklin's satirical letter; architect of the coercive policies that drove the colonies toward independence
- Alexander Wedderburn -- Solicitor General who humiliated Franklin before the Privy Council in January 1774, an event that preceded and informed the Smyrna letter
- Charles James Fox -- Whig politician and opponent of the American war who frequented the Pall Mall political establishments
- Edmund Burke -- Whig statesman whose opposition to coercive American policies aligned with the views of the Smyrna's Whig clientele
What's There Today
The Smyrna Coffee House no longer exists, and the building at 59 Pall Mall has been replaced several times since the eighteenth century. The site is currently occupied by Quebec House, which has served as the London office of the Government of Quebec since 1981. The building is a handsome mid-Victorian commercial structure that bears no outward connection to its coffeehouse past. There is no plaque, marker, or interpretive signage at the site commemorating the Smyrna Coffee House or Benjamin Franklin's association with it.
Pall Mall itself, however, remains one of the most historically resonant streets in London, and walking it gives a strong sense of the Georgian political landscape. The street runs from Waterloo Place (at its eastern end, near Trafalgar Square) to St James's Street (at its western end, near St James's Palace), lined with the grand facades of gentlemen's clubs -- the Reform Club, the Travellers Club, the Athenaeum -- that succeeded the coffeehouses as venues for elite political and social life in the nineteenth century. The nearest Underground station is Piccadilly Circus (Piccadilly and Bakerloo lines), approximately five minutes' walk north via Regent Street. Charing Cross (Northern and Bakerloo lines, plus National Rail) is a similar distance to the east. The site is well positioned for a walking tour of Revolution-era Pall Mall and St James's, including the locations of other lost coffeehouses and the extant buildings associated with the Duke of Cumberland, Lord Shelburne, and other figures of the period.
Sources
- Franklin, Benjamin. Papers of Benjamin Franklin, Founders Online, National Archives. https://founders.archives.gov/
- "Pall Mall, South Side." In Survey of London, vol. 29: St James Westminster, Part 1. London: London County Council, 1960. British History Online.
- Ellis, Markman. The Coffee House: A Cultural History. London: Weidenfeld & Nicolson, 2004.
- Isaacson, Walter. Benjamin Franklin: An American Life. New York: Simon & Schuster, 2003.
- Cowan, Brian. The Social Life of Coffee: The Emergence of the British Coffeehouse. New Haven: Yale University Press, 2005.
Somerset House
Political
Historical Significance
Somerset House served as the headquarters of the Navy Board from 1789, but its connection to the American Revolution runs deeper. The present neoclassical building, designed by Sir William Chambers and begun in 1776, replaced an earlier Tudor and Stuart palace on the same site. During the Revolutionary War, the Navy Board — responsible for the construction, maintenance, and supply of Royal Navy vessels — operated from offices in the vicinity before relocating into the new building. The Board's administrative decisions directly affected Britain's ability to project naval power across the Atlantic, and its struggles with logistics, ship repair, and manning were among the factors that undermined British strategy.
The Navy Board was distinct from the Admiralty Board (based at the Admiralty on Whitehall) but was subordinate to it. While the First Lord of the Admiralty, the Earl of Sandwich, set strategic direction, the Navy Board handled the practical business of keeping the fleet operational. During the American war, the Board faced criticism for the poor condition of ships, slow refitting times, and shortages of naval stores — problems compounded when France and Spain entered the conflict. The Comptroller of the Navy, Sir Maurice Suckling (uncle and patron of the young Horatio Nelson), served until his death in 1778, a period when the demands of the American war were straining the naval establishment.
A notable feature of Somerset House's courtyard is a bronze statue of George III, erected in 1788, depicting the king in classical Roman attire. George III was, of course, the reigning monarch against whom the American colonies declared independence, and the figure who symbolized British authority in the Declaration of Independence's lengthy list of grievances. The statue remains in place today, an enduring reminder of the sovereign whose name was synonymous with the conflict.
Key Figures
- George III - King of Great Britain during the American Revolution, depicted in the courtyard statue
- John Montagu, 4th Earl of Sandwich - First Lord of the Admiralty 1771-1782, oversaw naval strategy during the war
- Sir Maurice Suckling - Comptroller of the Navy 1775-1778, responsible for fleet readiness
- Sir William Chambers - Architect of Somerset House, begun the same year as American independence
- Sir Charles Middleton (later Lord Barham) - Comptroller of the Navy from 1778, worked to reform naval administration during and after the war
What's There Today
Somerset House is one of London's great public buildings, open to visitors year-round. The neoclassical courtyard, where the George III statue stands, hosts seasonal events including an ice rink in winter and a fountain display in summer. The building houses the Courtauld Gallery, which reopened in 2021 after renovation, as well as exhibition and event spaces. Visitors can walk freely through the courtyard and Embankment Terrace. The Navy Board offices occupied the south wing, now used for other purposes, but the overall layout conveys the scale of the Georgian administrative complex.
The site is easily accessible via Temple or Covent Garden Underground stations, or by Waterloo Bridge. While there is no dedicated interpretation of the building's Navy Board history related to the American Revolution, the George III statue and the architectural fabric of the 1770s-1780s building are themselves tangible links to the era.
Sources
- Knight, Roger, "The Royal Navy's Recovery after the Early Phase of the American Revolutionary War," in The British Navy and the Use of Naval Power in the Eighteenth Century, ed. Jeremy Black and Philip Woodfine (Leicester University Press, 1988)
- Rodger, N.A.M., The Insatiable Earl: A Life of John Montagu, 4th Earl of Sandwich (HarperCollins, 1993)
- Somerset House, "History," www.somersethouse.org.uk
- Syrett, David, The Royal Navy in American Waters 1775-1783 (Scolar Press, 1989)
- Historic England, "Somerset House" listing
Spa Fields, Clerkenwell
Political
Historical Significance
Spa Fields in Clerkenwell was the site of mass radical reform meetings in November and December 1816 that represented the direct transmission of American Revolutionary ideals into British working-class politics. The meetings, organised by the Spencean movement (followers of Thomas Spence, whose Newcastle lecture is already on this trail), called for universal male suffrage, annual parliaments, secret ballots, and redistribution of land -- demands rooted in the natural rights philosophy that had justified American independence.
Henry "Orator" Hunt addressed crowds of approximately ten thousand from a platform at the Merlin's Cave tavern. The second meeting on 2 December 1816 erupted into riot when a faction led by Arthur Thistlewood attempted to march on the Tower of London. Thistlewood had acquired his revolutionary ideals from reading Paine and from time spent in the United States and France. The government responded with the Seditious Meetings Act of 1817, the so-called "Gagging Acts," which restricted public assembly -- a direct parallel to the colonial experience of British authorities suppressing American political expression.
The Spa Fields meetings were a direct precursor to the Peterloo demonstration of 1819 and the broader reform movement that culminated in the Great Reform Act of 1832. They mark the point where the American Revolution's promise of popular sovereignty became a demand of British working people.
Key Figures
- Henry "Orator" Hunt (1773-1835) - Principal speaker at both Spa Fields (1816) and Peterloo (1819)
- Arthur Thistlewood (1774-1820) - Radical organiser; influenced by Paine and the American example; later executed for the Cato Street Conspiracy
- Thomas Spence (1750-1814) - Radical thinker whose 1775 Newcastle lecture (already on trail) inspired the Spencean movement behind the meetings
What's There Today
Spa Fields Park is a small public park on Skinner Street in Clerkenwell, managed by the London Borough of Islington. The original fourteen hectares of open ground have been mostly built over since the 1830s; what remains is a modest park with a children's playground, ball court, outdoor gym, and green space. A couple of Islington Council plaques provide brief historical context, but there is no substantial heritage interpretation of the 1816-1817 meetings. The adjacent Exmouth Market is a lively semi-pedestrianised street with restaurants and cafes. The nearest tube station is Farringdon, approximately five minutes' walk.
Sources
- Wikipedia, "Spa Fields" and "Spa Fields Riots"
- London Historians, "Remembering the Spa Fields Riots"
- National Archives, "Protest and Democracy 1816-1818"
- Thompson, E.P., The Making of the English Working Class (Victor Gollancz, 1963)
Thatched House Tavern Site
Political
Historical Significance
The Thatched House Tavern, located at 86 St James's Street in London's fashionable West End, was one of the most important meeting places for political clubs and societies during the American Revolutionary War. Established in the early 18th century, the tavern served as the headquarters for several political and literary clubs whose members included leading figures in the debate over American policy. The tavern's private dining rooms and club rooms provided discreet venues where politicians, writers, and men of influence could discuss the American crisis away from the formal settings of Parliament.
Among the clubs that met at the Thatched House was the Society of the Supporters of the Bill of Rights, a radical organisation founded in 1769 to support John Wilkes, which later championed American colonial rights. The Literary Club (later known as simply "The Club"), founded by Samuel Johnson and Joshua Reynolds in 1764, also met at various taverns in the St James's area and included members on both sides of the American question, among them Edmund Burke, Charles James Fox, and Edward Gibbon. The Dilettanti Society and other gentlemen's associations also used the tavern. While the specific policy impact of conversations at the Thatched House is inherently difficult to document, the tavern's role as a nexus of elite political sociability during the American crisis is well attested in contemporary diaries and correspondence.
It should be noted that the precise extent to which particular American war debates occurred specifically at the Thatched House, as opposed to the many other St James's taverns and clubs, is not always clear from surviving records. The tavern's prominence in the social geography of Georgian political London, however, is not in question.
Key Figures
- Charles James Fox - Leading opposition politician and critic of the American war, frequented St James's clubs
- Edmund Burke - Whig politician and advocate of conciliation with America, associated with clubs in the area
- John Wilkes - Radical politician and supporter of American liberty, whose associates met at the Thatched House
- Samuel Johnson - Literary figure and staunch opponent of the American cause; his Taxation No Tyranny (1775) defended the government's position
- Joshua Reynolds - Painter and founding member of the Literary Club
What's There Today
The Thatched House Tavern was demolished in 1814, and the site at 86 St James's Street is now occupied by the Conservative Club (built 1843-1845, designed by George Basevi and Sydney Smirke). No physical trace of the original tavern survives above ground. A small plaque or marker acknowledging the tavern's history may be present, but the site is not prominently interpreted.
St James's Street itself remains one of London's most prestigious addresses, lined with historic gentlemen's clubs, wine merchants, and luxury shops. The surrounding area retains much of its Georgian and early Victorian character, and visitors can readily imagine the 18th-century atmosphere of political clubland. Nearby sites of interest include Brooks's Club (No. 60, a Whig stronghold during the American war), White's Club (No. 37-38, a Tory bastion), and Boodle's Club (No. 28). The street is freely accessible and located a short walk from Green Park Underground station.
Sources
- Colley, Linda. Britons: Forging the Nation 1707-1837. Yale University Press, 1992.
- Lillywhite, Bryant. London Coffee Houses. George Allen & Unwin, 1963.
- Weinreb, Ben, et al. The London Encyclopaedia. 3rd ed. Macmillan, 2008.
- The Survey of London, vols. 29-30: St James Westminster, Part One. London County Council, 1960.
- Black, Jeremy. The English Press in the Eighteenth Century. Croom Helm, 1987.
The National Archives
Political
Historical Significance
The National Archives at Kew holds the most comprehensive documentary record of the American Revolution from the British perspective. As the repository for UK government records, it contains the original correspondence, military dispatches, diplomatic papers, and administrative records generated by the British government before, during, and after the war. These documents provide irreplaceable primary source material for understanding British decision-making, military operations, intelligence activities, and the diplomatic negotiations that ended the conflict.
Key collections include the Colonial Office papers (CO 5 series), which contain correspondence between the Secretary of State and colonial governors, military commanders, and agents throughout the Revolutionary period. The War Office records (WO series) document military operations, troop movements, and logistics. The Admiralty papers (ADM series) cover the naval war, including fleet movements, ship logs, and signals. The records of the Treasury (T series), Privy Council (PC series), and State Papers (SP series) illuminate the political and financial dimensions of the conflict. The papers of Lord George Germain, commander of the war effort as Secretary of State for the Colonies, are particularly significant.
The archives also hold the Board of Ordnance records, maps and plans of American fortifications and battlefields, intercepted correspondence, Loyalist claims for compensation after the war (Audit Office, AO 12 and AO 13 series), and records of prisoners of war. The Loyalist claims alone constitute a vast and under-utilised resource for understanding the human cost of the Revolution on those who remained loyal to the Crown. For any serious researcher of the Revolution, the National Archives is an essential destination.
Key Figures
- Lord George Germain - Secretary of State for the Colonies; his correspondence is extensively preserved
- Lord North - Prime Minister; Treasury and Cabinet records document his management of the war
- Sir Henry Clinton - Commander-in-Chief in North America; official correspondence preserved in War Office and Colonial Office files
- Lord Sandwich - First Lord of the Admiralty; Admiralty records cover naval strategy under his direction
- American Loyalists - Thousands of claims for compensation are preserved in the Audit Office records
What's There Today
The National Archives is located in a purpose-built facility in Kew, southwest London, adjacent to Kew Gardens. Access to the reading rooms and original documents is free, though visitors must register for a reader's ticket (available on the day with valid identification). The archives offer an excellent online catalogue (Discovery) that allows researchers to search and identify relevant records before visiting. Many documents have been digitised and are available online, though the vast majority of the collection remains accessible only in person.
The building includes exhibition spaces that mount rotating displays drawn from the collections, a bookshop, and a cafe. The archives regularly host talks, workshops, and events, some of which address American Revolution themes. For heritage trail visitors who are not researchers, the exhibitions and the building itself offer an accessible introduction to the documentary record. The archives are a short walk from Kew Gardens Underground station (District line) and can easily be combined with a visit to the Royal Botanic Gardens.
Sources
- The National Archives, "Research guides: American Revolution," www.nationalarchives.gov.uk
- The National Archives, Discovery catalogue, discovery.nationalarchives.gov.uk
- Norton, Mary Beth, The British-Americans: The Loyalist Exiles in England, 1774-1789 (Little, Brown, 1972) - demonstrates use of Audit Office records
- Mackesy, Piers, The War for America, 1775-1783 (Harvard University Press, 1964) - extensively uses National Archives sources
- Ritcheson, Charles R., British Politics and the American Revolution (University of Oklahoma Press, 1954)
William Pitt the Elder Blue Plaque (Chatham House)
Political
Historical Significance
William Pitt the Elder, 1st Earl of Chatham (1708-1778), occupied 10 St James's Square from 1759 to 1761, during his tenure as Secretary of State for the Southern Department. He was already one of Britain's greatest orators, having turned around British fortunes in the Seven Years' War. Though his residency at this address predates the Revolution, Pitt's role in the American crisis from the mid-1760s until his death in 1778 makes this site a significant point on the trail.
Pitt was the most prominent defender of colonial rights in the House of Lords. In January 1775, he delivered perhaps the greatest oration of his life, rising to condemn the Coercive Acts and calling for the immediate withdrawal of British troops from Boston. He argued passionately that Parliament had no right to tax the colonies without their consent, while maintaining that the colonies should remain within the British Empire. His position was distinctive: he championed American rights but opposed American independence.
On April 7, 1778, Pitt made his final appearance in the House of Lords, rising on crutches to protest "the dismemberment of this ancient and most noble monarchy." His voice was so broken he could scarcely be heard. He collapsed during the debate and was carried from the chamber. He died at his country home at Hayes on May 11, 1778, a figure of immense stature whose warnings about the consequences of coercing the colonies proved prophetic.
Key Figures
- William Pitt the Elder, Earl of Chatham - PM (1766-1768); the most prominent parliamentary defender of colonial rights; collapsed during his last speech in 1778
- William Pitt the Younger - His son; PM who later governed during the aftermath of American independence
- Earl of Derby and William Gladstone - Two other Prime Ministers who later lived at the same address, also commemorated on the plaque
What's There Today
10 St James's Square is a Grade I listed building designed by Henry Flitcroft and built in 1735-36. Since 1923, it has been the headquarters of Chatham House -- the Royal Institute of International Affairs -- one of the world's leading think tanks on international policy. The building is named for Pitt himself. While not generally open to casual visitors, Chatham House hosts over 300 public and private events annually, and the exterior with the blue plaque is easily viewable from St James's Square. The nearest tube stations are Piccadilly Circus and Green Park.
Sources
- English Heritage, "William Pitt" blue plaque page
- Britannica, "William Pitt the Elder -- Last years"
- Peters, Marie, Pitt and Popularity: The Patriot Minister and London Opinion during the Seven Years' War (Oxford, 1986)
- Brown, Peter Douglas, William Pitt, Earl of Chatham: The Great Commoner (London: Allen & Unwin, 1978)
Admiral Hood's House
Military
Historical Significance
Admiral Samuel Hood, 1st Viscount Hood, was one of the Royal Navy's most capable commanders during the American Revolutionary War, and his London residence on Wimpole Street in Marylebone served as his home during periods ashore between commands. Hood's most consequential engagement during the war was the Battle of the Chesapeake on 5 September 1781, a naval action whose outcome arguably decided the fate of the American Revolution. As second-in-command of the British fleet under Rear Admiral Thomas Graves, Hood participated in the failed attempt to break through the French naval line commanded by Rear Admiral the Comte de Grasse and relieve the besieged British army at Yorktown, Virginia. The British failure at the Chesapeake sealed Lord Cornwallis's fate, leading directly to the surrender that effectively ended the war.
Hood's role in the battle was controversial and has been debated by naval historians ever since. His division, forming the rear of the British line, was never fully engaged during the action because Graves's signals were confused and Hood interpreted them as requiring him to hold his position rather than close with the enemy. Whether Hood was following orders correctly or deliberately holding back to embarrass his superior remains disputed. Hood himself was scathingly critical of Graves's conduct of the battle, writing private letters that left no doubt he believed the action had been bungled by his commanding officer. He argued that the British fleet could have achieved a decisive victory had it attacked the French van before de Grasse's entire fleet had cleared the Chesapeake capes and formed its line of battle. Whatever the merits of this counterfactual, the result was catastrophic for British arms: de Grasse maintained control of the Chesapeake, the French fleet continued to support Washington and Rochambeau's siege of Yorktown, and Cornwallis was forced to surrender his army of nearly 8,000 men on 19 October 1781.
Hood's subsequent career during the war was more distinguished. In January 1782, commanding his own squadron in the West Indies, he executed a brilliant manoeuvre to seize the anchorage at Basseterre, St Kitts, from the Comte de Grasse's numerically superior fleet -- a feat that even his critics acknowledged as masterly seamanship. He then served as second-in-command to Admiral Rodney at the Battle of the Saints in April 1782, the decisive British victory that restored the Royal Navy's prestige after the humiliations of the Chesapeake and Yorktown. Hood urged Rodney to pursue the defeated French fleet more aggressively after the battle, and once again his criticism of his superior's caution became a source of controversy.
Hood's career illustrates the internal tensions within the Royal Navy's command structure during the Revolutionary War. The service was riven by personal rivalries, political factionalism, and disputes over tactics and strategy that materially affected its performance. The Admiralty's failure to concentrate sufficient naval force in North American waters at the critical moment -- and the operational failures of commanders like Graves when battle was joined -- were among the most important factors in Britain's defeat. Hood, whatever his personal failings, understood that the war would be decided at sea, and his frustration at the missed opportunities of the Chesapeake campaign reflected a broader truth about the conflict.
Key Figures
- Samuel Hood, 1st Viscount Hood (1724-1816) -- Royal Navy admiral who served as second-in-command at the Battle of the Chesapeake and the Battle of the Saints, and later became Governor of Greenwich Hospital
- Rear Admiral the Comte de Grasse (1722-1788) -- Commander of the French fleet at the Chesapeake whose tactical victory ensured the success of the Yorktown siege
- Charles Cornwallis, 1st Marquess Cornwallis (1738-1805) -- Commander of British forces at Yorktown, whose surrender following the Chesapeake effectively ended the war
- Rear Admiral Thomas Graves (1725-1802) -- Commander of the British fleet at the Chesapeake whose handling of the battle was criticised by Hood and subsequent historians
What's There Today
Wimpole Street in Marylebone is today best known for its concentration of private medical practices, a character it has held since the nineteenth century. The precise location of Hood's residence on the street is not confirmed by a surviving plaque or marker, and successive redevelopment has replaced most of the eighteenth-century houses. The street retains its Georgian character in general layout and proportions, though many of the individual buildings have been rebuilt or substantially altered. There is no blue plaque commemorating Hood's residence here, despite his significance in the naval history of the Revolutionary War. Hood is commemorated elsewhere -- he has a monument in Westminster Abbey, and HMS Hood, the famous battlecruiser sunk in 1941, was ultimately named for his family.
Wimpole Street runs north-south between Henrietta Place and New Cavendish Street in Marylebone. It is readily accessible from Bond Street Underground station (Central and Elizabeth lines), approximately a ten-minute walk to the south, or from Regent's Park station (Bakerloo line) to the north. Oxford Circus station (Central, Bakerloo, and Victoria lines) is also within walking distance. The street is pleasant to walk along, with its dignified Georgian and Victorian facades, and visitors may wish to combine a visit with other nearby sites including the Handel & Hendrix House on Brook Street and the Wallace Collection on Manchester Square. Literary enthusiasts will recognise Wimpole Street from Robert Browning and Elizabeth Barrett's famous courtship -- the Barrett family home was at No. 50.
Sources
- "Samuel Hood, 1st Viscount Hood." More Than Nelson: Royal Navy Officers of the American Revolution. http://www.morethan-nelson.com
- "Samuel Hood, 1st Viscount Hood." Wikipedia. Wikimedia Foundation. https://en.wikipedia.org/wiki/Samuel_Hood,_1st_Viscount_Hood
- Trew, Peter. Rodney and the Breaking of the Line. Barnsley: Pen & Sword, 2006.
- Larrabee, Harold A. Decision at the Chesapeake. New York: Clarkson N. Potter, 1964.
Admiral Howe's House Site
Military
Historical Significance
Grafton Street in Mayfair was the London address of Admiral Richard Howe, 1st Earl Howe, one of the most important British military figures of the American Revolution. As commander of the Royal Navy's North American squadron from 1776 to 1778, Howe bore direct responsibility for the naval dimension of Britain's effort to suppress the American rebellion. His tenure was marked by a complex mixture of military action and diplomatic initiative that reflected the deep ambivalence many senior British officers felt about waging war against their fellow subjects.
Richard Howe came from a family deeply intertwined with the American colonies. His eldest brother, George Augustus, 3rd Viscount Howe, had been killed fighting alongside American colonial troops at Ticonderoga in 1758 during the French and Indian War, and the colony of Massachusetts had commissioned a memorial to him in Westminster Abbey. The family's connection to America was thus bound up with bonds of shared sacrifice, and Richard Howe appears to have felt genuine reluctance about the prospect of military coercion. Before the war, he had been involved in back-channel peace negotiations, some of which involved his friend Benjamin Franklin. In the winter of 1774-75, Howe and Franklin met secretly on multiple occasions in London, exploring whether a diplomatic resolution to the crisis might be possible. These conversations ultimately failed, but they demonstrated that Howe was a man who sought peace even as he prepared for war.
When Howe was appointed to command the North American naval station in 1776, he was also granted a joint peace commission alongside his younger brother, General William Howe, who commanded the British land forces. The brothers thus held the unusual dual authority to wage war and negotiate peace simultaneously. Their most notable diplomatic effort came in September 1776, when they arranged the Staten Island Peace Conference with a delegation from the Continental Congress that included Benjamin Franklin, John Adams, and Edward Rutledge. The conference, held at the Billop House on Staten Island on 11 September, was courteous but ultimately fruitless. Howe could not recognise American independence as a precondition for talks, and the American delegates could not negotiate without it. The conference broke down after approximately three hours, and the military conflict continued.
Admiral Howe's naval command during this period was consequential. He oversaw the naval operations that supported the British capture of New York in 1776 and the subsequent campaigns around Philadelphia in 1777. However, his relationship with the government in London deteriorated, and he became increasingly critical of what he saw as inadequate support and confused strategic direction from Lord Germain, the Secretary of State for the American Colonies. He resigned his command in 1778 and returned to England, where he spent years defending his conduct and exchanging bitter recriminations with Germain. His Grafton Street residence was thus both the home to which he returned from the American war and the base from which he fought his political battles in its aftermath. Howe later redeemed his reputation spectacularly during the French Revolutionary Wars, commanding the Channel Fleet to victory at the Battle of the Glorious First of June in 1794.
Key Figures
- Admiral Richard Howe, 1st Earl Howe - Commander of British naval forces in North America (1776-78) and joint peace commissioner, who attempted diplomacy before and during the war, including secret meetings with Benjamin Franklin.
- General William Howe, 5th Viscount Howe - Richard's younger brother and commander of British land forces in North America (1775-78), who shared the joint peace commission and oversaw the campaigns at New York and Philadelphia.
- Benjamin Franklin - Friend of the Howe family who engaged in secret peace talks with Richard Howe in London in 1774-75 and later met him at the Staten Island Peace Conference as a member of the congressional delegation.
What's There Today
Grafton Street is a short, elegant street in Mayfair running between Dover Street and New Bond Street. Number 11, identified in historical sources as Howe's address, has undergone significant changes since the eighteenth century. The street and surrounding area have been subject to extensive commercial redevelopment over the past two centuries, and the original Georgian building that Howe occupied has very likely been demolished and replaced. The current buildings along Grafton Street house a mixture of luxury retail, commercial offices, and high-end residences characteristic of Mayfair. No blue plaque or marker commemorates Howe's association with the street.
The nearest Underground station is Green Park (Piccadilly, Victoria, and Jubilee lines), approximately a five-minute walk to the west. Bond Street station (Central, Jubilee, and Elizabeth lines) is a similar distance to the north. Grafton Street is a public road and freely accessible at all times. Visitors interested in the Howe brothers' story may wish to combine a visit with nearby sites in Mayfair and St James's, an area where many figures connected to the American Revolution lived and worked.
Sources
- "Richard Howe, 1st Earl Howe," Royal Museums Greenwich, https://www.rmg.co.uk
- "Richard Howe, 1st Earl Howe," Wikipedia, https://en.wikipedia.org/wiki/Richard_Howe,_1st_Earl_Howe
- Gruber, Ira D., The Howe Brothers and the American Revolution (New York: Atheneum, 1972).
- Syrett, David, The Royal Navy in American Waters, 1775-1783 (Aldershot: Scolar Press, 1989).
Admiral Rodney's House Site
Military
Historical Significance
Admiral George Brydges Rodney, 1st Baron Rodney, was one of the most important naval commanders of the American Revolutionary War, and his final years were spent at his house on Hanover Square in Mayfair, where he died on 24 May 1792. Rodney's greatest achievement was his decisive victory at the Battle of the Saints on 12 April 1782, fought in the strait between Dominica and Guadeloupe in the West Indies, which restored British naval prestige at a moment when it had reached its lowest ebb. Coming just months after the catastrophic defeat at the Chesapeake and the surrender at Yorktown, the Saints provided a desperately needed demonstration that the Royal Navy could still command the seas, and it materially strengthened Britain's hand in the peace negotiations that followed.
The Battle of the Saints was remarkable not only for its outcome but for the tactical innovation that produced it. During the engagement, a shift in the wind opened gaps in the French line of battle, and Rodney -- or, as some historians argue, his flag captain Sir Charles Douglas -- seized the opportunity to break through the enemy formation. This manoeuvre, whether deliberate or opportunistic, shattered the French fleet and resulted in the capture of the French flagship Ville de Paris along with Rodney's old adversary, the Comte de Grasse, who had commanded the French fleet at the Chesapeake. The breaking of the line at the Saints foreshadowed the tactics that Nelson would employ to devastating effect at Trafalgar twenty-three years later, and it cemented Rodney's reputation as one of the great fighting admirals of the age.
Rodney's career during the Revolutionary War was eventful and controversial well before the Saints. He had been living in Paris to escape his creditors when the war began, and it was only through the generosity of his French acquaintance Marechal de Biron that he was able to return to England and accept a command. In January 1780, he relieved the besieged garrison of Gibraltar -- then under joint Spanish and French siege -- before sailing to the West Indies to take command of the Leeward Islands station. His tenure there was marked by both tactical successes and bitter disputes with subordinates and superiors. His seizure of the Dutch island of St Eustatius in 1781, followed by the wholesale confiscation of the island's vast trading stocks, enriched Rodney personally but drew accusations of corruption and distracted him from more pressing strategic priorities. Some historians have argued that Rodney's preoccupation with St Eustatius contributed to his failure to intercept de Grasse's fleet before it reached the Chesapeake, thereby enabling the French naval victory that sealed the fate of Yorktown.
Despite these controversies, the victory at the Saints made Rodney a national hero. He was raised to the peerage as Baron Rodney on his return to England, and his final decade was spent in the comfortable retirement of Hanover Square. The strategic significance of the Saints extended well beyond the immediate military situation: by demonstrating that the French fleet could be defeated in open battle, it persuaded the French government that the naval war was not going uniformly in their favour and made them more amenable to the peace terms negotiated at Paris. The battle thus contributed to ending the war on terms that, while acknowledging American independence, preserved much of Britain's Caribbean empire and commercial position.
Key Figures
- George Brydges Rodney, 1st Baron Rodney (1718-1792) -- Admiral who commanded the British fleet at the Battle of the Saints and lived his final years at Hanover Square
- Comte de Grasse (1722-1788) -- French admiral defeated and captured at the Saints, previously the victor at the Chesapeake who enabled the Yorktown siege
- John Montagu, 4th Earl of Sandwich (1718-1792) -- First Lord of the Admiralty during much of the war whose administration of the navy was widely criticised but who supported Rodney's appointment
- Sir Charles Douglas (1727-1789) -- Rodney's flag captain at the Saints who may have initiated the decisive line-breaking manoeuvre
What's There Today
Hanover Square is a public garden square in Mayfair, laid out in the early eighteenth century and named after the Hanoverian dynasty. The square retains its elegant Georgian proportions, though most of the original houses have been rebuilt or substantially altered. There is no plaque or marker indicating Rodney's residence or his death here in 1792. The square is perhaps best known for St George's Hanover Square, the parish church on its south side where many fashionable Georgian weddings took place. Rodney has a prominent memorial elsewhere -- a tall column topped with his statue stands in the central square of Spanish Town, Jamaica, commemorating his relief of the island during the war.
Hanover Square is centrally located in Mayfair, a short walk from Oxford Circus Underground station (Central, Bakerloo, and Victoria lines) to the north or Bond Street station (Central and Elizabeth lines) to the northwest. The square sits at the junction of several elegant Mayfair streets and is a pleasant spot to pause, with benches around a central garden featuring a statue of William Pitt the Younger. The surrounding area offers numerous sites of Revolutionary-era interest within walking distance, including the former locations of several gentlemen's clubs on St James's Street and Pall Mall where politicians and military officers debated the war. Visitors may wish to combine a stop at Hanover Square with a walk through Mayfair's Georgian streets to appreciate the world of wealth and political connection that sustained Britain's war effort.
Sources
- "George Brydges Rodney, 1st Baron Rodney." Encyclopaedia Britannica. https://www.britannica.com/biography/George-Brydges-Rodney-1st-Baron-Rodney
- "George Brydges Rodney, 1st Baron Rodney." Wikipedia. Wikimedia Foundation. https://en.wikipedia.org/wiki/George_Brydges_Rodney,_1st_Baron_Rodney
- Mundy, Godfrey Basil. The Life and Correspondence of the Late Admiral Lord Rodney. 2 vols. London: John Murray, 1830.
- Trew, Peter. Rodney and the Breaking of the Line. Barnsley: Pen & Sword, 2006.
Cumberland House Site
Military
Historical Significance
Cumberland House on Pall Mall was the London residence associated with Prince William Augustus, Duke of Cumberland (1721-1765), the younger son of George II who served as Captain-General of the British Army. Cumberland was the military figure most associated with the reorganisation of the British Army in the mid-18th century, and his influence shaped the force that would fight in America a decade after his death. While Cumberland himself did not live to see the American Revolution, the military infrastructure and command culture he helped create were directly relevant to the British war effort.
Pall Mall and the surrounding streets of St James's were home to numerous military and political figures connected to the American war. The area functioned as an informal corridor of power, with gentlemen's clubs, government offices, and the residences of senior officers clustered in close proximity. Military planning and political intrigue overlapped in the drawing rooms and dining tables of this neighbourhood. The War Office, Horse Guards, and the Admiralty were all within walking distance, making the Pall Mall area a nerve centre for the conduct of the war.
It should be noted that the specific connections between Cumberland House and American war planning are somewhat indirect, as Cumberland died a decade before hostilities began. The site's significance lies more in its association with the broader military establishment that directed the war and with the Pall Mall neighbourhood as a hub of wartime decision-making. The house passed through various hands after Cumberland's death, and its later uses during the Revolutionary period are not well documented in standard sources.
Key Figures
- Prince William Augustus, Duke of Cumberland - Captain-General of the British Army; died 1765, before the Revolution
- Lord Amherst - Commander-in-Chief of the British Army during part of the American war; operated from nearby Horse Guards
- Earl of Sandwich - First Lord of the Admiralty, based at the nearby Admiralty building
- Lord George Germain - Secretary of State for the Colonies, whose offices were in the Whitehall area
What's There Today
Cumberland House no longer survives in its 18th-century form. The Pall Mall area has been extensively redeveloped over the centuries, and the approximate site is now occupied by later buildings. The street itself remains one of London's most distinguished addresses, lined with gentlemen's clubs, galleries, and institutional buildings that retain something of its 18th-century character, even if the specific structures have changed.
For Heritage Trail visitors, the value of this site lies in walking the streets where British military and political leaders made the decisions that shaped the American war. Pall Mall connects naturally to other trail sites in the Whitehall and St James's area, including Horse Guards, the Admiralty, and St James's Palace. The area is fully accessible on foot from Green Park or Piccadilly Circus Underground stations. Visitors should treat this as part of a walking tour of London's Revolutionary-era power centres rather than as a standalone destination.
Sources
- Mackesy, Piers, The War for America 1775-1783 (Harvard University Press, 1964)
- Survey of London, Vols. 29-30: The Parish of St James Westminster, Part 1 (London County Council, 1960)
- Charteris, Evan, William Augustus, Duke of Cumberland (Edward Arnold, 1913)
- Whitworth, Rex, Field Marshal Lord Ligonier: A Story of the British Army, 1702-1770 (Oxford University Press, 1958)
Deptford Dockyard Site
Military
Historical Significance
Deptford Dockyard, established by Henry VIII in 1513 on the south bank of the Thames, was one of the Royal Navy's oldest and most important shipbuilding and repair facilities. During the American Revolutionary War, Deptford played a vital role in preparing the fleet that Britain depended upon to maintain communications with its forces in North America and to project naval power across the Atlantic. The dockyard built, fitted out, and repaired warships and transport vessels throughout the conflict, working alongside the larger yards at Chatham and Portsmouth to sustain an expanding fleet.
After France entered the war in 1778 and Spain in 1779, the demands on Royal Dockyards including Deptford intensified dramatically. Britain now faced hostile navies in European waters, the Caribbean, and the Indian Ocean simultaneously. Deptford's workforce expanded, and the yard operated at a pace that strained both labour and material supplies. The yard was also involved in fitting out the numerous transport and victualling ships required to sustain British armies operating thousands of miles from home, a logistical undertaking without precedent.
By the time of the American war, Deptford was increasingly focused on smaller vessels and repair work, with the largest ships of the line built at Chatham and Portsmouth. Nevertheless, the dockyard's contribution to the overall naval effort was significant, and its proximity to London and the Admiralty made it a convenient facility for urgent refitting work. The dockyard also housed a victualling yard that supplied provisions to the fleet.
Key Figures
- Lord Sandwich (John Montagu, 4th Earl of Sandwich) - First Lord of the Admiralty (1771-1782), oversaw the Navy's dockyard operations during the war
- Sir Hugh Palliser - Comptroller of the Navy (1770-1775), responsible for dockyard management in the early war period
- Sir Maurice Suckling - Comptroller of the Navy (1775-1778), uncle and patron of Horatio Nelson
- Captain James Cook - His ships Resolution and Discovery were fitted at Deptford before his final voyage (1776), which overlapped with the American war
What's There Today
Deptford Dockyard closed in 1869, and most of the historic structures were demolished during subsequent redevelopment. The site, located near modern Deptford in the London Borough of Lewisham, is now largely occupied by the Pepys Park housing estate and the Convoys Wharf development site. The Master Shipwright's House (built 1708) survives and is a Grade II listed building, though it is in private ownership and not routinely accessible to the public.
Archaeological investigations conducted ahead of the Convoys Wharf redevelopment have uncovered significant remains of the dockyard's infrastructure. A few boundary walls and the Olympia Building (a Victorian warehouse) also survive. Interpretive signage is minimal at present. The site is accessible from Deptford station (Southeastern Railway) or via the Thames Path. Visitors interested in the dockyard's history may also wish to visit the nearby St Nicholas Church, Deptford, where several dockyard officials are buried.
Sources
- MacDougall, Philip. Royal Dockyards. David & Charles, 1982.
- The National Archives, Kew: Admiralty records relating to Deptford Dockyard (ADM 106 series).
- Survey of London, vols. 43-44: Poplar, Blackwall, and the Isle of Dogs (relevant comparative material on Thames dockyards).
- Historic England listing entries for the Master Shipwright's House and associated structures.
- Endsor, Richard. The Restoration Warship: The Design, Construction and Career of a Third Rate. Conway Maritime Press, 2009.
Gen. Henry Clinton's House
Military
Historical Significance
Portland Place in Marylebone was the London residence of General Sir Henry Clinton, the British Commander-in-Chief in North America from 1778 to 1782. Clinton held supreme command during some of the most consequential phases of the American Revolution, including the siege of Charleston and the catastrophic British defeat at Yorktown that effectively ended the war. His tenure as commander was marked by strategic disagreements, fractious relationships with subordinates, and a persistent sense of grievance that followed him for the rest of his life.
Clinton was born around 1730 into a family with strong military and colonial connections — his father, Admiral George Clinton, served as Governor of New York. Henry spent part of his youth in America before pursuing a military career in Europe, seeing combat during the Seven Years' War. He was sent to Boston in 1775 as one of three major generals dispatched to support General Thomas Gage, and played a significant role at Bunker Hill on 17 June 1775, commanding a flanking movement that contributed to the British capture of Breed's Hill. The battle was a tactical victory but a strategic shock: heavy casualties demonstrated the Americans were far more formidable than London had assumed.
Clinton succeeded Sir William Howe as Commander-in-Chief in May 1778. France's entry into the war had transformed the conflict into a global struggle, and Clinton was ordered to evacuate Philadelphia and consolidate in New York. From there he directed operations for three years, launching the successful siege of Charleston in May 1780, the worst American defeat of the war. He entrusted the subsequent Southern campaign to Lord Cornwallis, a decision that would lead to profound disagreement.
The relationship between Clinton and Cornwallis is one of the most consequential command failures of the Revolution. Clinton believed Cornwallis exceeded his instructions by marching into Virginia without adequate support. Cornwallis believed Clinton failed to provide clear direction and timely reinforcement. Their recriminations intensified after Cornwallis fortified Yorktown in the summer of 1781 and found himself trapped by a combined Franco-American force under Washington and Rochambeau, with the French fleet under de Grasse blocking escape by sea. Clinton's relief expedition arrived too late; Cornwallis surrendered on 19 October 1781 with over seven thousand troops, effectively ending major combat operations in North America.
Clinton was recalled in 1782 and returned to his Portland Place home, where the dispute with Cornwallis consumed the remainder of his public life. In 1783 he published his Narrative of the Campaign of 1781 in North America, a detailed and pointed defence of his generalship that laid blame for Yorktown squarely on Cornwallis's unauthorised movements. Cornwallis responded with his own Answer, and the exchange drew in their respective partisans across London's political circles. Clinton supplemented the Narrative with further pamphlets and maintained voluminous private papers annotating every point of contention. The historian William Willcox, who edited Clinton's papers in the twentieth century, described the general as trapped in an "endless post-mortem" that defined his later years. Clinton was eventually restored to favour, being appointed Governor of Gibraltar in 1794, but died there in 1795 before taking effective command.
Key Figures
- Gen. Sir Henry Clinton - British Commander-in-Chief in North America (1778-82), whose tenure saw both the triumph at Charleston and the catastrophe at Yorktown.
- Lord Cornwallis (Charles Cornwallis, 1st Marquess Cornwallis) - Clinton's subordinate commander in the South whose entrapment at Yorktown ended the war and sparked a bitter feud with Clinton over responsibility for the defeat.
- Benedict Arnold - American general who defected to the British in 1780 and served under Clinton's command in New York and Virginia, the most infamous act of treason in American history.
What's There Today
Portland Place is one of London's grandest streets, a wide boulevard running from Langham Place to Park Crescent and Regent's Park. Designed by the Adam brothers in the 1770s as an exclusive residential address, many of its original Georgian terraces survive, now largely converted to institutional use. The street houses several embassies, the Royal Institute of British Architects (RIBA), and the BBC's Broadcasting House at its southern end. No blue plaque identifies Clinton's specific residence, and pinpointing the exact house is difficult given subsequent renumbering and redevelopment.
The nearest Underground station is Regent's Park (Bakerloo line), with Great Portland Street (Metropolitan, Circle, and Hammersmith & City lines) also close by. Oxford Circus (Central, Victoria, and Bakerloo lines) is approximately a ten-minute walk to the south. Portland Place is a public road and freely accessible at all times. The street's grand architecture makes it an attractive destination in its own right, and it pairs naturally with nearby William Franklin's residence on Bolsover Street for a Marylebone-focused walking tour.
Sources
- "Henry Clinton (general)," History of Parliament Online, https://www.historyofparliamentonline.org
- "Henry Clinton," Wikipedia, https://en.wikipedia.org/wiki/Henry_Clinton_(general)
- Willcox, William B., Portrait of a General: Sir Henry Clinton in the War of Independence (New York: Knopf, 1964).
- Clinton, Henry, Narrative of the Campaign of 1781 in North America (London, 1783; reprinted various editions).
- O'Shaughnessy, Andrew Jackson, The Men Who Lost America: British Leadership, the American Revolution, and the Fate of the Empire (New Haven: Yale University Press, 2013).
Horse Guards
Military
Historical Significance
The Horse Guards building in Whitehall served as the headquarters of the Commander-in-Chief of the British Army during the American Revolutionary War, making it the nerve centre from which military operations in North America were directed and administered. Designed by William Kent and completed in 1753, the building housed the offices of the senior military staff responsible for the organisation, deployment, and supply of the forces fighting to suppress the American rebellion. Orders, dispatches, and intelligence relating to the war passed through Horse Guards throughout the conflict.
The role of Commander-in-Chief during the American war was complicated by the British command structure of the period. Lord Barrington served as Secretary at War (a largely administrative position based at the War Office), while the strategic direction of the American war fell primarily to Lord George Germain, Secretary of State for the Colonies, operating from his offices in Whitehall. The Commander-in-Chief's office at Horse Guards managed the army's establishment, appointments, and discipline. General Sir Jeffrey Amherst, who served as Commander-in-Chief from 1778 to 1782, operated from Horse Guards during the crucial later years of the war, overseeing the army's response to the expanded conflict following French and Spanish entry.
Horse Guards was also the administrative hub through which reinforcements, supplies, and instructions were dispatched to the commanders in America, including Generals Gage, Howe, Clinton, and Cornwallis. The building's location in the heart of Whitehall, adjacent to the Admiralty and within easy reach of Downing Street and the Houses of Parliament, placed it at the centre of the governmental machinery prosecuting the war. The delays inherent in transatlantic communication, with dispatches taking weeks or months to cross the ocean, meant that decisions made at Horse Guards often arrived in America too late to influence events on the ground.
Key Figures
- General Sir Jeffrey Amherst - Commander-in-Chief of the British Army (1778-1782), headquartered at Horse Guards
- Lord Barrington (William Wildman Barrington, 2nd Viscount) - Secretary at War (1765-1778), administered army affairs from the War Office nearby
- Lord George Germain - Secretary of State for the Colonies (1775-1782), principal architect of military strategy in America, worked closely with Horse Guards
- General Sir Henry Clinton - Commander-in-Chief in America (1778-1782), received his instructions via Horse Guards
- Adjutant-General and Quartermaster-General - Senior staff officers based at Horse Guards who managed army organisation and logistics
What's There Today
The Horse Guards building survives largely unchanged from its 18th-century appearance and remains in government and military use. It is the official entrance to the royal palaces from Whitehall and houses the Household Cavalry Museum, which is open to the public. The iconic mounted sentries of the Household Cavalry stand guard at the Whitehall entrance, and the Changing of the Guard ceremony takes place daily on Horse Guards Parade, the large open ground behind the building.
Visitors can view the exterior freely and enter the Household Cavalry Museum, which includes displays on the history of the cavalry regiments. The museum's focus is primarily on the Household Cavalry rather than the broader army administration, so specific American Revolutionary War content is limited. However, the building's Palladian architecture and its setting within the Whitehall government quarter provide a powerful sense of the 18th-century administrative centre from which the war was managed. Horse Guards is located between Trafalgar Square and Westminster, accessible from Charing Cross or Westminster Underground stations.
Sources
- Whitworth, Rex. Field Marshal Lord Ligonier: A Story of the British Army 1702-1770. Oxford University Press, 1958. (Covers the establishment of Horse Guards as army HQ.)
- Mackesy, Piers. The War for America 1775-1783. Harvard University Press, 1964.
- Valentine, Alan. Lord George Germain. Oxford University Press, 1962.
- The National Archives, Kew: War Office records (WO series), particularly WO 3 (Commander-in-Chief, out-letters) and WO 4 (Secretary at War, out-letters).
- Bradley, Simon, and Nikolaus Pevsner. The Buildings of England: London 6, Westminster. Yale University Press, 2003.
Lord Germain's House Site
Military
Historical Significance
Pall Mall, the grand avenue running through the heart of St James's in London's West End, was home to Lord George Germain, the Secretary of State for the American Colonies from 1775 to 1782. In that role, Germain bore primary responsibility for directing British military strategy during the American Revolution from the ministerial level. He was, in effect, the war minister for the American conflict, and his decisions, misjudgements, and personal feuds shaped the course of the war from beginning to end. According to tradition, it was to his Pall Mall residence that the news of the British surrender at Yorktown was first delivered in November 1781, marking the moment when the reality of Britain's defeat reached the heart of the government.
Germain, born George Sackville, had a long and controversial military career before his appointment to direct the American war. He had served with distinction in several European campaigns during the War of the Austrian Succession, but his reputation was permanently scarred by his conduct at the Battle of Minden in 1759 during the Seven Years' War. Commanding the British and Hanoverian cavalry, Sackville refused or failed to execute an order to charge the retreating French, a decision that may have cost the allies a more complete victory. He was court-martialled and declared unfit for military service, a verdict that George II ordered recorded in the orderly book of every regiment in the army. It was a humiliation from which most careers would never recover, but Sackville, who later took the name Germain upon inheriting the estate of a benefactress, rebuilt his political fortunes through parliamentary skill and the patronage of George III.
When Lord North's government needed a forceful minister to direct the war against the American colonies, Germain was appointed to the newly prominent position of Secretary of State for the American Colonies in November 1775. He brought energy and determination to the role, advocating an aggressive military strategy aimed at crushing the rebellion decisively. He was instrumental in planning the campaigns of 1776 and 1777, including the ambitious plan to isolate New England by having General Burgoyne advance south from Canada while General Howe moved north from New York. The catastrophic failure to coordinate these movements contributed directly to Burgoyne's surrender at Saratoga in October 1777, the turning point of the war that brought France into the conflict as an American ally. The extent of Germain's responsibility for the failure of coordination remains debated by historians; some argue that he gave Howe discretion to pursue his own campaign against Philadelphia instead of supporting Burgoyne, while others contend that the communication failures were more systemic.
Germain's relationship with his commanders in the field was consistently difficult. The vast distances involved in directing a war across the Atlantic created inevitable delays in communication, but Germain's imperious manner and tendency to issue detailed instructions from London exacerbated the friction. He clashed with the Howe brothers, with Clinton, and with nearly every senior officer who served in America. After Yorktown, Germain's position became untenable. He was forced from office in February 1782 when the North ministry collapsed, and his departure was accompanied by a final controversy when George III elevated him to the peerage as Viscount Sackville, a decision that provoked outrage from those who remembered his disgrace at Minden. He retired to his country estate at Stoneland Lodge in Sussex and died in 1785. His legacy remains that of the minister who directed a war he could not win from a distance he could not bridge.
Key Figures
- Lord George Germain (1st Viscount Sackville) - Secretary of State for the American Colonies (1775-82) who directed British military strategy from London, bearing ministerial responsibility for the campaigns that ended in defeat at Yorktown.
- King George III - The monarch who appointed Germain and supported his aggressive approach to the war, maintaining confidence in him long after many others had lost faith.
- Lord North (Frederick North, 2nd Earl of Guilford) - Prime Minister (1770-82) in whose government Germain served, and with whom he shared responsibility for the political direction of the war.
What's There Today
Pall Mall remains one of London's most distinguished streets, stretching from Trafalgar Square in the east to St James's Palace in the west. The street is renowned for its grand gentleman's clubs, including the Athenaeum, the Reform Club, and the Travellers Club, which line its southern side in imposing Italianate and neoclassical buildings. The northern side features a mixture of commercial premises, galleries, and institutional buildings. The exact location of Germain's residence on Pall Mall has not been definitively established, and no blue plaque or commemorative marker identifies the site. Given the extensive redevelopment of the street during the nineteenth century, when most of the clubs were built, the original building is unlikely to survive.
The nearest Underground station is Piccadilly Circus (Piccadilly and Bakerloo lines), approximately a five-minute walk to the north. Charing Cross (Northern and Bakerloo lines, plus mainline rail) is a similar distance to the east. Pall Mall is a public road and freely accessible at all times, though the clubs along it are private establishments. The street sits within the broader St James's area, one of the richest concentrations of sites connected to the political direction of the American Revolution, including St James's Palace, the Horse Guards, and the former residences of numerous political and military figures of the era.
Sources
- "Lord George Germain," Wikipedia, https://en.wikipedia.org/wiki/George_Germain,_1st_Viscount_Sackville
- "Lord George Germain," American Battlefield Trust, https://www.battlefields.org
- Valentine, Alan, Lord George Germain (Oxford: Clarendon Press, 1962).
- O'Shaughnessy, Andrew Jackson, The Men Who Lost America: British Leadership, the American Revolution, and the Fate of the Empire (New Haven: Yale University Press, 2013).
Old Royal Naval College
Military
Historical Significance
The Old Royal Naval College in Greenwich, originally built as the Royal Hospital for Seamen (Greenwich Hospital), served as a home for retired and disabled naval veterans during the American Revolution. Founded by Royal Charter in 1694 and designed by Christopher Wren, Nicholas Hawksmoor, and others, the hospital housed thousands of former sailors, including men who had served in the wars of the 18th century. During the Revolutionary period, veterans of earlier conflicts resided here, and as the war progressed, seamen wounded or disabled in the American and global naval campaigns of 1775-1783 would have joined them.
The hospital was governed by a Board of Directors and funded through a combination of Crown grants, parliamentary appropriations, and deductions from seamen's wages. Its Painted Hall, decorated by Sir James Thornhill with elaborate allegorical scenes celebrating British naval power, served as the dining hall for the pensioners. The Chapel, rebuilt after a fire in 1779 by James "Athenian" Stuart, was completed in 1789 in a neoclassical style. The hospital represented the British state's commitment to its naval veterans, a commitment that was tested by the demands of the Revolutionary war and the wider conflict it spawned.
Greenwich Hospital also functioned as an administrative body managing estates and revenues, including properties in the north of England. Its role as a veterans' institution provides a human dimension to the naval war that is sometimes overshadowed by accounts of battles and strategy. The men who lived here bore the physical consequences of Britain's maritime conflicts, including the war to retain the American colonies.
Key Figures
- Naval pensioners - Retired and disabled seamen who resided at the hospital, including veterans of the Revolutionary-era naval campaigns
- Lord Sandwich - First Lord of the Admiralty during the war; connected to the hospital through his role overseeing the navy
- Sir James Thornhill - Painted the Painted Hall's magnificent ceiling and wall paintings celebrating naval and royal power
- James "Athenian" Stuart - Architect who redesigned the Chapel after the 1779 fire
What's There Today
The Old Royal Naval College is now one of Greenwich's premier visitor attractions and part of the Maritime Greenwich UNESCO World Heritage Site. The hospital ceased operating as a veterans' home in 1869 and was subsequently used by the Royal Naval College until 1998. The site is now managed by the Greenwich Foundation and is partially occupied by the University of Greenwich and Trinity Laban Conservatoire of Music and Dance.
The Painted Hall, often called "the finest dining hall in Europe," is open to the public (admission charge) and has been beautifully restored. The Chapel is open free of charge. The grounds, including the grand baroque courtyards designed by Wren, are open and free to walk through. The Visitor Centre provides historical context. The site is immediately adjacent to the Cutty Sark DLR station and the Greenwich foot tunnel. It can be combined with visits to the Royal Observatory on the hill above, the National Maritime Museum, and the Queen's House. River bus services from central London provide a scenic approach.
Sources
- Bold, John, Greenwich: An Architectural History of the Royal Hospital for Seamen and the Queen's House (Yale University Press, 2000)
- Newell, Philip, Greenwich Hospital: A Royal Foundation 1692-1983 (Greenwich Hospital, 1984)
- Old Royal Naval College, www.ornc.org
- Rodger, N.A.M., The Command of the Ocean: A Naval History of Britain, 1649-1815 (W.W. Norton, 2004)
Royal Arsenal Woolwich
Military
Historical Significance
The Royal Arsenal at Woolwich was Britain's principal centre for the manufacture, testing, and storage of military ordnance throughout the American Revolutionary War (1775-1783). Situated on the south bank of the Thames in southeast London, the Arsenal produced the cannons, muskets, ammunition, and gunpowder that supplied British forces fighting in North America. The Board of Ordnance, which oversaw the Arsenal's operations, dramatically increased output after hostilities began at Lexington and Concord in April 1775, and the complex expanded significantly during the war years to meet the enormous logistical demands of prosecuting a conflict across the Atlantic.
The Arsenal's role extended beyond mere production. It served as the central depot from which ordnance supplies were dispatched to the various theatres of war, including North America, the Caribbean, and, after 1778, against France and Spain. The Royal Military Academy, established at Woolwich in 1741, trained the artillery and engineering officers who served in the American campaigns, including officers who fought at Bunker Hill, Saratoga, and Yorktown. The scale of the Arsenal's wartime operations reflected the unprecedented logistical challenge Britain faced in supplying armies thousands of miles from home.
The strain of sustained wartime production at Woolwich also exposed the limitations of British war-making capacity. Shortages of skilled labour, raw materials, and shipping capacity hampered the Arsenal's ability to keep pace with demand. These logistical difficulties contributed to the broader strategic challenges that ultimately undermined the British war effort in America.
Key Figures
- Lord Townshend - Master-General of the Ordnance (1772-1782), responsible for overseeing Arsenal operations during most of the war
- Sir Charles Frederick - Surveyor-General of the Ordnance, managed day-to-day procurement and supply
- George III - Took personal interest in military preparations and visited Woolwich on multiple occasions
- Sir William Congreve (the elder) - Comptroller of the Royal Laboratory at Woolwich, oversaw ammunition production
What's There Today
The Royal Arsenal ceased military operations in 1967 and has since been extensively redeveloped as a mixed-use residential and commercial district known as Royal Arsenal Riverside. Several historic buildings survive, including the imposing Dial Arch (c. 1717), the Royal Brass Foundry, and the Main Guard House. The Firepower Royal Artillery Museum operated on the site until its closure in 2016; as of this writing, plans for its future remain uncertain.
Visitors can explore the heritage quarter, which retains much of the Arsenal's Georgian and Victorian architecture. The site is accessible via Woolwich Arsenal station (Elizabeth Line and National Rail) and Woolwich Arsenal DLR. Interpretive panels around the development provide some historical context, though coverage of the American Revolutionary War period specifically is limited. The nearby Royal Artillery Barracks on the common also date from this era and remain in military use.
Sources
- Hogg, O.F.G. The Royal Arsenal: Its Background, Origin, and Subsequent History. 2 vols. Oxford University Press, 1963.
- The National Archives, Kew: Board of Ordnance records (WO 47 series, minute books covering 1775-1783).
- Historic England listing entries for surviving Arsenal buildings.
- Douet, James. British Barracks 1600-1914. The Stationery Office, 1998.
Royal Hospital Chelsea
Military
Historical Significance
The Royal Hospital Chelsea, founded by King Charles II in 1682 and designed by Sir Christopher Wren, was established as a home for soldiers who had been rendered unfit for further service by age or disability. By the time of the American Revolution it had been fulfilling this mission for nearly a century, and the war of 1775-1783 produced a substantial new generation of veterans who would eventually pass through its doors. Chelsea Pensioners — the name given to the Hospital's resident veterans — who had served in the American campaigns brought with them first-hand experience of the battles, sieges, and marches that defined Britain's unsuccessful attempt to suppress the colonial rebellion.
The pension records associated with the Royal Hospital, now held at The National Archives in Kew, constitute one of the most valuable documentary sources for studying the ordinary British soldier in the American Revolution. Soldiers who applied for admission to the Hospital or for an out-pension (a regular payment to veterans living outside the institution) were required to provide details of their service, including the regiments in which they had served, the engagements in which they had fought, and the wounds or ailments that rendered them unfit. These records name men who stood in the lines at Bunker Hill, endured the Saratoga campaign, fought at Brandywine and Germantown, and surrendered at Yorktown, providing a ground-level view of the war rarely captured in officers' memoirs or official dispatches.
The administration of army pensions during and after the war fell largely to Sir William Fawcett, who served as Adjutant General from 1781 to 1799. Fawcett oversaw the complex bureaucracy of demobilisation and pension allocation as thousands of soldiers returned from America, and his tenure coincided with a period of significant pressure on the Hospital's resources. The influx of American war veterans, combined with those from other theatres of the global conflict, stretched the institution's capacity and contributed to ongoing debates about military welfare that would continue into the nineteenth century.
The Royal Hospital thus serves as a site where the human cost of the American Revolution can be traced in British terms — not through the grand narratives of statesmen and generals, but through the records of ordinary soldiers who fought, were wounded, and in many cases spent their final years within Wren's great brick courts beside the Thames.
Key Figures
- Chelsea Pensioners — the veteran soldiers, including American war veterans, who resided at or received pensions from the Royal Hospital
- Sir William Fawcett (1727-1804) — Adjutant General from 1781, who oversaw the administration of army pensions during the post-war demobilisation
- King Charles II (1630-1685) — founder of the Royal Hospital in 1682
- Sir Christopher Wren (1632-1723) — architect who designed the Hospital's original buildings
What's There Today
The Royal Hospital Chelsea remains an active home for retired soldiers and is one of London's most distinguished architectural landmarks. The Wren-designed buildings, arranged around the grand Figure Court with its bronze statue of Charles II, are open to visitors and convey the scale and dignity of the institution. The Great Hall and the Chapel, both part of Wren's original design, are accessible on guided tours and self-guided visits. The Hospital's small museum displays artefacts relating to the history of the institution and its residents, including material from the eighteenth century. The annual Chelsea Flower Show is held in the Hospital's grounds, though this is a separate ticketed event.
The Royal Hospital is located on Royal Hospital Road in Chelsea, a short walk from Sloane Square Underground station. Visitors interested in the American Revolution pension records should note that the original documents are held at The National Archives in Kew, where they can be consulted in the reading rooms or, in many cases, accessed through digitised collections online. The Hospital itself provides the physical and atmospheric context for understanding how these records were generated and what became of the men they describe. Combined with a visit to the adjacent National Army Museum, the Royal Hospital offers a compelling account of the British military experience of the American Revolution and its aftermath.
Sources
- Dean, C. G. T. The Royal Hospital Chelsea. London: Hutchinson, 1950.
- The National Archives, Kew. War Office records series WO 97 (Royal Hospital Chelsea: Soldiers' Service Documents) and WO 116-117 (Admission Books).
- Frey, Sylvia R. The British Soldier in America: A Social History of Military Life in the Revolutionary Period. Austin: University of Texas Press, 1981.
- Annual Reports of the Royal Hospital Chelsea, 1780s-1790s. Royal Hospital Chelsea Archives.
Royal Observatory Greenwich
Military
Historical Significance
The Royal Observatory at Greenwich played an important supporting role in the American Revolution through its contribution to naval navigation and cartography. Founded by Charles II in 1675, the Observatory's primary mission was to improve celestial navigation for the Royal Navy and merchant fleet. By the time of the Revolution, the Observatory under Astronomer Royal Nevil Maskelyne was producing the Nautical Almanac (first published 1767), which provided the lunar distance tables essential for determining longitude at sea. This publication was critical to the navigation of British warships and transports crossing the Atlantic to fight in America.
The Observatory's work underpinned the broader cartographic enterprise that mapped the American colonies and their coastal waters. Accurate charts and astronomical observations enabled the Royal Navy to plan and execute operations along the American seaboard, from the naval blockades to amphibious operations at places like Charleston and New York. The Board of Longitude, which met at the Observatory and administered the famous Longitude Prize, oversaw the development of navigational tools and chronometers that were deployed on ships serving in the American theatre.
It should be noted that the Observatory's connection to the Revolution is institutional and technical rather than directly political or military. No battles were planned in its rooms, and no Revolutionary figures were associated with it in the way that Franklin was associated with Craven Street. Its significance lies in the infrastructure of navigation and timekeeping that made transatlantic warfare possible, and in the broader context of 18th-century British maritime power that the Revolution challenged.
Key Figures
- Nevil Maskelyne - Astronomer Royal (1765-1811) who produced the Nautical Almanac used for naval navigation
- John Harrison - Clockmaker whose marine chronometers, tested and evaluated in connection with the Observatory, revolutionised ocean navigation
- Board of Longitude - Body that administered navigational research and met in connection with the Observatory
- Captain James Cook - Navigator who used the Observatory's data; his Pacific voyages overlapped with the Revolutionary period
What's There Today
The Royal Observatory is part of Royal Museums Greenwich and sits atop the hill in Greenwich Park, offering commanding views of the Thames, the Queen's House, and the Old Royal Naval College below. The site is famous as the home of the Prime Meridian (longitude 0 degrees), and visitors can stand on the meridian line. The Observatory houses collections of astronomical instruments, marine chronometers (including Harrison's famous timepieces), and exhibits on the history of navigation and timekeeping.
The Flamsteed House, the original Observatory building designed by Christopher Wren, contains the Octagon Room where early observations were made and is open to visitors. The site charges an admission fee. Greenwich is accessible by rail (Greenwich or Maze Hill stations), DLR (Cutty Sark station), river bus, or via the foot tunnel from the Isle of Dogs. The Observatory can be combined with visits to the Old Royal Naval College and the National Maritime Museum, both of which have their own connections to the Revolutionary period. The park itself is a pleasant walk and a UNESCO World Heritage Site.
Sources
- Howse, Derek, Greenwich Time and the Longitude (Philip Wilson, 1997)
- Maskelyne, Nevil, The Nautical Almanac and Astronomical Ephemeris (Board of Longitude, 1767 onwards)
- Royal Museums Greenwich, "Royal Observatory," www.rmg.co.uk
- Sobel, Dava, Longitude (Walker & Company, 1995)
- Mackesy, Piers, The War for America, 1775-1783 (Harvard University Press, 1964)
The Admiralty (Ripley Building)
Military
Historical Significance
The Admiralty building on Whitehall, designed by Thomas Ripley and completed in 1726, was the operational headquarters of the Royal Navy throughout the American Revolutionary War. From this building, the Board of Admiralty directed the largest naval mobilisation Britain had undertaken since the Seven Years' War, coordinating fleet movements across the Atlantic, the Caribbean, the English Channel, the Mediterranean, and the Indian Ocean. The Admiralty was where strategic decisions about convoy protection, fleet deployment, and naval operations against American, French, Spanish, and Dutch forces were made and communicated.
The First Lord of the Admiralty during most of the war was John Montagu, 4th Earl of Sandwich, who held the position from 1771 to 1782. Sandwich directed naval operations from the Admiralty building under enormous pressure as the war expanded from a colonial insurgency into a global conflict. The Royal Navy's ability to maintain control of American waters was crucial to the British war effort, and its eventual failure to do so, most critically at the Battle of the Chesapeake in September 1781, led directly to the surrender at Yorktown. Sandwich has been both criticised for the Navy's lack of preparedness and defended as having managed an impossible strategic situation with inadequate resources. The historiographical debate on his stewardship continues.
The Admiralty's famous Board Room, with its wind dial connected to a weather vane on the roof, was where the Lords Commissioners of the Admiralty met to discuss operations. Dispatches from naval commanders in America, including Admirals Howe, Graves, and Rodney, arrived at the Admiralty and shaped the Board's decisions. The Robert Adam screen, added to the Whitehall frontage in 1759-1761, provided the elegant entrance that survives today and gave the building greater presence on the street during the war years.
Key Figures
- Lord Sandwich (John Montagu, 4th Earl of Sandwich) - First Lord of the Admiralty (1771-1782), directed naval strategy throughout most of the war
- Admiral Augustus Keppel - First Lord of the Admiralty (1782-1783), managed the end of the naval war
- Philip Stephens - Secretary to the Admiralty (1763-1795), the senior civil servant who managed the Admiralty's daily operations and correspondence throughout the entire war
- Admiral Sir Charles Middleton (later Lord Barham) - Comptroller of the Navy (1778-1790), reformed naval administration and improved dockyard efficiency
- Admiral Thomas Graves - His failure to defeat the French fleet at the Chesapeake (1781) was among the most consequential decisions communicated back to the Admiralty
What's There Today
The Ripley Building and the Robert Adam screen survive and remain in government use as part of the Ministry of Defence. The building is not generally open to the public, though it is occasionally included in Open House London events (held annually in September), when visitors may be able to see the historic Board Room with its 18th-century wind dial, the ornate Nelson Room, and other historic interiors.
The Robert Adam screen on Whitehall is freely visible from the street and is one of the finest examples of neoclassical design in London. The building sits on the west side of Whitehall, between Horse Guards and Trafalgar Square, and is easily identified by the screen and the pair of stone dolphins flanking the entrance arch. Visitors can view the exterior and the adjacent Old Admiralty Building (Victorian era) from the pavement. The site is a short walk from Charing Cross or Embankment Underground stations. For those interested in the naval history of the period, the National Maritime Museum at Greenwich provides extensive coverage of the Royal Navy during the American war.
Sources
- Rodger, N.A.M. The Insatiable Earl: A Life of John Montagu, 4th Earl of Sandwich. HarperCollins, 1993.
- Mackesy, Piers. The War for America 1775-1783. Harvard University Press, 1964.
- Willis, Sam. The Struggle for Sea Power: A Naval History of the American Revolution. W.W. Norton, 2015.
- The National Archives, Kew: Admiralty records (ADM series), particularly ADM 1 (Admiralty correspondence) and ADM 2 (Admiralty out-letters).
- Bradley, Simon, and Nikolaus Pevsner. The Buildings of England: London 6, Westminster. Yale University Press, 2003.
Tower of London
Military
Historical Significance
The Tower of London served dual roles during the American Revolution: as the principal ordnance depot for the British military and as a state prison for high-profile captives. The Board of Ordnance, headquartered at the Tower, was responsible for supplying arms, ammunition, and artillery to British forces fighting in America. The Tower's stores and workshops equipped the armies and navies dispatched across the Atlantic, and the Ordnance Office coordinated the massive logistical effort required to sustain military operations three thousand miles from home. Records of the Board of Ordnance provide some of the most detailed accounts of British military supply during the war.
The Tower's most prominent connection to the Revolution is the imprisonment of Henry Laurens, President of the Continental Congress, from 1780 to 1781. Laurens was captured at sea in September 1780 while en route to the Netherlands to negotiate a treaty and loan for the American cause. Documents found on his ship contributed to Britain's declaration of war against the Dutch Republic. Laurens was held in the Tower on a charge of high treason, making him the last notable political prisoner confined there. His conditions of imprisonment were a subject of debate; Laurens later claimed harsh treatment, while British accounts suggested more lenient conditions. He was released on bail in December 1781 and subsequently served as one of the American peace commissioners who negotiated the Treaty of Paris in 1783. He was exchanged for Lord Cornwallis.
The Tower also housed the Small Armoury and Grand Storehouse, which contained vast quantities of weaponry. A significant fire destroyed the Grand Storehouse in 1841, along with much of its contents. The Tower's role as an ordnance depot is less well-known than its medieval history but was critical to Britain's ability to wage war in the 1770s and 1780s.
Key Figures
- Henry Laurens - President of the Continental Congress; imprisoned in the Tower October 1780 to December 1781
- Board of Ordnance officials - Managed arms supply for the British war effort from the Tower
- Lord Cornwallis - Exchanged for Laurens after the war
- Lord George Germain - Secretary of State who coordinated with the Ordnance Board
What's There Today
The Tower of London is one of Britain's most visited historic sites and a UNESCO World Heritage Site. It is managed by Historic Royal Palaces and is open daily (admission charge applies). While the Tower's primary interpretation focuses on its medieval and Tudor history, the site retains physical fabric from the Revolutionary period. The White Tower houses the Royal Armouries collection, which includes weaponry of the type used during the war. The area where Laurens was held is within the complex, though the specific room is not always identified in standard tours.
Visitors interested in the Revolutionary connection should look for references to the Board of Ordnance and Laurens's imprisonment. The Tower is located on the north bank of the Thames in central London, easily reached via Tower Hill Underground station or Tower Gateway DLR station. Guided tours led by the Yeoman Warders ("Beefeaters") are included with admission and provide entertaining historical overviews, though they typically focus on earlier periods. The Tower's archives and the Royal Armouries research collections hold significant material related to 18th-century ordnance and supply.
Sources
- Laurens, Henry, The Papers of Henry Laurens, ed. David R. Chesnutt et al. (University of South Carolina Press, 1968-2003)
- Tomlinson, Howard, Guns and Government: The Ordnance Office Under the Later Stuarts (Royal Historical Society, 1979) - for background on Ordnance operations
- Historic Royal Palaces, "Tower of London," www.hrp.org.uk
- Massey, Gregory D., John Laurens and the American Revolution (University of South Carolina Press, 2000)
- National Archives, Board of Ordnance records (WO 47, WO 55 series)
14 Newman Street (Benjamin West Studio)
People
Historical Significance
Benjamin West was born in 1738 in Springfield, Pennsylvania, and rose from provincial origins to become the most influential American-born artist of the eighteenth century. After early training in Philadelphia and a transformative period of study in Italy (1760-1763), West settled in London in 1763, where he would remain for the rest of his life. He quickly attracted the patronage of George III, who appointed him historical painter to the King in 1772 and became his most important and consistent patron over decades. West's London studio, at 14 Newman Street in what is now Fitzrovia, became the centre of his artistic production and a gathering place for artists from both sides of the Atlantic.
West's most revolutionary contribution to painting was his insistence on depicting modern historical events in contemporary dress rather than classical costume. His The Death of General Wolfe (1770), showing the British commander's death at the Battle of Quebec in 1759, caused a sensation by clothing its figures in modern uniforms rather than Roman togas. Joshua Reynolds and other Royal Academy colleagues initially objected, but the painting's popular success vindicated West's approach and permanently shifted the direction of history painting. He went on to paint numerous works on historical and biblical subjects for George III, including a massive but never-completed cycle for the Royal Chapel at Windsor.
West's position as an American-born artist holding a prestigious role at the British court created an unusual dynamic during the Revolution. He maintained personal connections with figures on both sides of the conflict, and his studio on Newman Street served as an informal meeting point for American artists and visitors in London. He mentored a remarkable succession of American painters who came to study under him, including John Singleton Copley, Gilbert Stuart, Charles Willson Peale, and John Trumbull. Through these pupils, West exerted an outsized influence on the development of American art, even as he remained rooted in London's artistic establishment.
In 1792 West succeeded Sir Joshua Reynolds as President of the Royal Academy, a post he held (with one brief interruption) until his death in 1820. He was the first American-born artist to achieve such institutional eminence in Europe. His Newman Street studio, where he worked for over four decades, was the physical hub of this extraordinary career, and its location in the heart of London's artistic quarter underscores how deeply embedded West became in the cultural life of the nation against which his native country had rebelled.
Key Figures
- Benjamin West — Pennsylvania-born painter, historical painter to George III, and President of the Royal Academy (1792-1820); his Newman Street studio was a centre of Anglo-American artistic exchange
- George III — King of Great Britain and West's principal patron for nearly fifty years; commissioned numerous paintings for the Royal Collection
- Sir Joshua Reynolds — First President of the Royal Academy and initially a critic of West's modern-dress approach to history painting; West succeeded him as President in 1792
- John Singleton Copley — Boston-born painter who studied under West's influence in London; both men were leading history painters of their generation
- Gilbert Stuart — Rhode Island-born painter who trained in West's studio before returning to America, where he painted the most famous portraits of George Washington
- John Trumbull — Connecticut-born painter and Revolutionary War veteran who studied with West in London and painted iconic scenes of the American Revolution
What's There Today
The building at 14 Newman Street bears an English Heritage blue plaque commemorating Benjamin West's long residence and work at the site. The building itself has been altered since West's time, and the interior is not accessible to the public as a museum. Newman Street sits in the Fitzrovia neighbourhood, a historically artistic and bohemian area just north of Oxford Street. The street and its surroundings retain a mix of Georgian and later architecture, giving some sense of the neighbourhood's character in West's era, though modern commercial development has changed the streetscape considerably.
For visitors, the blue plaque provides a clear marker of the site's significance, and the location makes a natural pairing with other Revolution-era artistic sites in central London, including the Royal Academy of Arts on Piccadilly (where West presided) and the National Portrait Gallery. Several of West's major works can be seen at the National Gallery, Tate Britain, and the Royal Collection. Newman Street is easily reached on foot from Goodge Street or Tottenham Court Road Underground stations. The site is best appreciated as part of a broader exploration of the remarkable American artistic presence in Georgian London.
Sources
- Von Erffa, Helmut, and Allen Staley, The Paintings of Benjamin West (Yale University Press, 1986)
- Alberts, Robert C., Benjamin West: A Biography (Houghton Mifflin, 1978)
- Solkin, David H., ed., Art on the Line: The Royal Academy Exhibitions at Somerset House, 1780-1836 (Yale University Press, 2001)
- English Heritage, "Benjamin West" blue plaque listing
Benjamin Franklin House
People
Historical Significance
The house at 36 Craven Street, just off the Strand, was Benjamin Franklin's London residence for nearly eighteen years across two extended stays (1757-1762 and 1764-1775). It is the only surviving Franklin residence anywhere in the world. From this address, Franklin served as colonial agent for Pennsylvania, Georgia, New Jersey, and Massachusetts, making him the most prominent American in London and a key intermediary between the colonies and the British government. The house was effectively an unofficial embassy for colonial America.
During his years at Craven Street, Franklin engaged in scientific experiments, political lobbying, and social networking that placed him at the centre of London's intellectual and political life. He was a Fellow of the Royal Society, a regular at coffeehouses and clubs, and a skilled operator in the corridors of power. His landlady, Margaret Stevenson, and her daughter Mary ("Polly") became close companions, and the house was a lively gathering place for scientists, writers, and politicians. Franklin's years here also saw the progressive deterioration of relations between Britain and the colonies, a process he observed and tried to influence from within.
Franklin's departure from Craven Street in March 1775 marked the final rupture. He had been publicly humiliated before the Privy Council in January 1774 (see the Privy Council Chamber entry), and by 1775 he recognised that reconciliation was impossible. He sailed for Philadelphia, arriving just days after the battles of Lexington and Concord. His London years had transformed him from a loyal subject seeking accommodation within the British Empire to a committed revolutionary.
Key Figures
- Benjamin Franklin - Colonial agent, scientist, and diplomat; resident 1757-1762 and 1764-1775
- Margaret Stevenson - Franklin's landlady and close friend
- Mary "Polly" Stevenson (later Hewson) - Margaret's daughter; Franklin's intellectual companion and correspondent
- William Franklin - Benjamin's son, who accompanied him to London and later became the Loyalist governor of New Jersey
- Joseph Priestley - Scientist and friend who visited Franklin at Craven Street
What's There Today
Benjamin Franklin House at 36 Craven Street opened as a museum in 2006 after extensive restoration. It is the only surviving Franklin residence in the world. The house offers two visitor experiences: the "Historical Experience," a guided performance-based tour using projection and live actors to tell the story of Franklin's London years, and the "Architectural Tour," which focuses on the Georgian building itself and the restoration process. Both require advance booking and operate on a timed-entry basis.
The house retains much of its original Georgian fabric, including the staircase, panelling, and window glass. During restoration, builders discovered bones in the basement, which were determined to be from an 18th-century anatomy school run by William Hewson, Polly Stevenson's husband, rather than anything connected to Franklin. The house is located just steps from Charing Cross station and Trafalgar Square, making it one of the most accessible sites on the trail. There is a small admission charge.
Sources
- Franklin, Benjamin, The Papers of Benjamin Franklin, ed. Leonard W. Labaree et al. (Yale University Press, 1959-present)
- Schiff, Stacy, A Great Improvisation: Franklin, France, and the Birth of America (Henry Holt, 2005)
- Benjamin Franklin House, official website, www.benjaminfranklinhouse.org
- Brands, H.W., The First American: The Life and Times of Benjamin Franklin (Doubleday, 2000)
- Isaacson, Walter, Benjamin Franklin: An American Life (Simon & Schuster, 2003)
Black Loyalists & Committee for the Relief of the Black Poor
People
Historical Significance
The presence of thousands of destitute Black people in 1780s London was a direct consequence of the American Revolution. During the war, Lord Dunmore's Proclamation (1775) and subsequent British offers of freedom drew thousands of enslaved people to the British side. After the British defeat, Black Loyalists were evacuated -- many to Nova Scotia, others to London. British promises of land and compensation went largely unfulfilled, and by the mid-1780s an estimated one thousand or more Black Loyalists lived in London in extreme poverty.
In January 1786, the Committee for the Relief of the Black Poor was formed, initially meeting at a bookshop on Bond Street before settling at Batson's Coffee House, 17 Cornhill, opposite the Royal Exchange. The Committee raised approximately £890 and distributed daily relief at two locations: the White Raven tavern in Mile End (serving the East End Black community) and the Yorkshire Stingo in Lisson Grove. A sick house on Warren Street provided medical care. Olaudah Equiano -- already on this trail -- served briefly as commissary for provisions before being dismissed after raising concerns about mismanagement.
The Committee eventually proposed resettlement in Sierra Leone. In April 1787, approximately 441 people departed from London, arriving at Frenchman's Bay in May. The settlement was devastated by disease and conflict, but it became the precursor to the later Sierra Leone colony. The story of the Black Loyalists exposes the gap between the Revolution's rhetoric of liberty and its reality. The British offered freedom as a war strategy, not from conviction, and many who accepted the offer found themselves abandoned in London's streets.
Key Figures
- Olaudah Equiano (c.1745-1797) - Former enslaved person, memoirist, and abolitionist; served as commissary for the Committee
- Granville Sharp (1735-1813) - Abolitionist; leading organiser of the Committee and the Sierra Leone scheme
- Jonas Hanway (1712-1786) - Philanthropist; among the Committee's founders
- Lord Dunmore (1730-1809) - Virginia governor whose 1775 Proclamation offering freedom to enslaved people who fought for Britain set the chain in motion
What's There Today
Batson's Coffee House at 17 Cornhill, where the Committee held its regular meetings, no longer exists. The Cornhill address is in the heart of the City of London financial district, opposite the Royal Exchange and near Bank tube station. No surviving plaque or marker commemorates the Committee at this location. The surrounding area, however, is rich with existing trail sites -- including entries for Lloyd's Coffee House, the Bank of England area, and the East India Company -- providing strong contextual atmosphere for a walking tour that addresses the Revolution's impact on Black lives. The Committee's story connects directly to the existing Equiano plaque (Riding House Street), Kenwood House (Somerset v Stewart), and the Ignatius Sancho plaque elsewhere on the trail.
Sources
- Braidwood, Stephen J., Black Poor and White Philanthropists: London's Blacks and the Foundation of the Sierra Leone Settlement, 1786-1791 (Liverpool University Press, 1994)
- Schama, Simon, Rough Crossings: Britain, the Slaves and the American Revolution (BBC Books, 2006)
- Layers of London, "Batson's Coffee House, 17 Cornhill," layersoflondon.org
- Black Presence in Britain, "Black Loyalists in 18th Century London," blackpresence.co.uk
- Pybus, Cassandra, Epic Journeys of Freedom: Runaway Slaves of the American Revolution and Their Global Quest for Liberty (Beacon Press, 2006)
Freemasons' Hall
People
Historical Significance
Freemasonry provided one of the most important transatlantic networks connecting American revolutionaries with sympathizers in Britain, and the site at 60 Great Queen Street has been the institutional heart of English Freemasonry since the first purpose-built hall was erected there in 1775, the very year the American Revolution began. The timing is coincidental but symbolically fitting: the fraternal organization whose ideals of liberty, equality, and rational inquiry profoundly influenced the founding generation of the American republic established its grand London headquarters just as the political bonds between Britain and its colonies were violently severed.
The Masonic connections to the American Revolution are extensive and well documented. Benjamin Franklin, the most prominent American in Europe during the war years, was a deeply committed Mason who had served as Grand Master of Pennsylvania. During his years in London before the Revolution (1757-1775), Franklin moved in Masonic circles that brought him into contact with sympathetic British politicians, intellectuals, and merchants. After his departure for France, he was initiated into the prestigious Lodge of the Nine Sisters in Paris, which also counted Voltaire among its members. Franklin's Masonic affiliations provided him with a ready-made network of contacts and a shared language of Enlightenment values that facilitated his diplomatic work on behalf of the American cause.
George Washington's Masonic membership is among the most frequently cited facts about the first president, and his lodge membership was not merely ceremonial. Washington was initiated in Fredericksburg Lodge No. 4 in Virginia in 1752 and remained an active Mason throughout his life. He was inaugurated as President in 1789 on a Bible borrowed from St John's Lodge No. 1 in New York, and he laid the cornerstone of the United States Capitol in full Masonic regalia in 1793. The Masonic commitment to constitutional governance, religious tolerance, and rational civic order that Washington embodied was shared by dozens of other founders, including John Hancock, Paul Revere, John Paul Jones, and the Marquis de Lafayette, the French nobleman whose own Masonic ties helped cement the Franco-American alliance that proved decisive in the war.
The significance of Freemasonry to the Revolution extended beyond the affiliations of individual leaders. Masonic lodges on both sides of the Atlantic served as meeting places where men of different social ranks, religious backgrounds, and political persuasions could gather on terms of relative equality. In the American colonies, lodges provided organizational infrastructure for the patriot cause: the Boston Tea Party was planned in part at Masonic gatherings, and many of the Sons of Liberty were lodge members. In Britain, lodges offered spaces where dissenting views about the American war could be expressed with a degree of safety. The fraternity's emphasis on brotherhood and mutual obligation created bonds that sometimes transcended national allegiance, as when British and American Masonic officers extended courtesies to one another during the war, recognizing a shared identity that existed alongside their military hostility.
The Grand Lodge of England, headquartered at Great Queen Street, was the original governing body of Freemasonry worldwide, having been established in 1717. By the time of the American Revolution, it had chartered lodges throughout the colonies, creating an institutional web that linked craftsmen, merchants, and gentlemen across the Atlantic. This network did not dissolve with independence; American grand lodges simply reorganized themselves as sovereign bodies, maintaining fraternal relations with their English parent. The continuity of Masonic ties after the war contributed to the relatively rapid normalization of Anglo-American relations and the commercial partnerships that sustained both nations in the nineteenth century.
Key Figures
- Benjamin Franklin - Grand Master of Pennsylvania; used Masonic networks extensively during his years in London and Paris; his lodge connections facilitated diplomatic contacts essential to securing French support for the American cause
- George Washington - Initiated as a Mason in 1752; his Masonic identity was a defining element of his public persona and reflected the Enlightenment values, constitutional governance, religious tolerance, rational order, that shaped the new republic
- Marquis de Lafayette - French nobleman and Mason whose transatlantic Masonic connections reinforced the Franco-American alliance; his friendship with Washington was expressed partly through shared Masonic bonds; served as a critical link between French and American revolutionary movements
What's There Today
The current Freemasons' Hall is the third building on the site and was constructed between 1927 and 1933 as a memorial to the Freemasons who died in the First World War. Designed by architects H.V. Ashley and Winton Newman, it is a striking Art Deco building faced in Portland stone, and its grand tower is a prominent landmark on Great Queen Street. The building is designated Grade II* listed by Historic England, recognizing its architectural and historical significance.
Freemasons' Hall is open to the public and offers free guided tours that depart hourly, typically from 11:00 to 16:00 on weekdays and 10:00 to 14:00 on Saturdays, though visitors should verify current times before attending. The tours include the Grand Temple, a vast ceremonial hall decorated with elaborate mosaics and bronze work, and the museum and library, which house a collection of Masonic regalia, documents, and artefacts spanning more than three centuries. The museum includes material related to the eighteenth-century lodges in which the figures of the American Revolution participated. The library is a significant research resource for anyone studying the social and intellectual networks of the Enlightenment era.
The nearest Underground station is Holborn (Central and Piccadilly lines), approximately a three-minute walk to the east, and Covent Garden (Piccadilly line) is a similar distance to the south. The building sits on the edge of Covent Garden, making it easy to combine with a visit to the wider theatre district and the nearby sites of eighteenth-century London.
Sources
- United Grand Lodge of England, "History of Freemasons' Hall," https://www.ugle.org.uk
- "Freemasons' Hall, London," Wikipedia, https://en.wikipedia.org/wiki/Freemasons%27_Hall,_London
- Bullock, Steven C. Revolutionary Brotherhood: Freemasonry and the Transformation of the American Social Order, 1730-1840. Chapel Hill: University of North Carolina Press, 1996
- Jacob, Margaret C. Living the Enlightenment: Freemasonry and Politics in Eighteenth-Century Europe. New York: Oxford University Press, 1991
- Tabbert, Mark A. American Freemasons: Three Centuries of Building Communities. Lexington, MA: National Heritage Museum, 2005
Gen. John Burgoyne Blue Plaque
People
Historical Significance
General John Burgoyne (1722-1792) took the lease on 10 Hertford Street in 1769, even before the house was completed, and commissioned his friend Robert Adam to design the interiors. The house was Burgoyne's London base throughout the war years.
Burgoyne is best known for his surrender at Saratoga on October 17, 1777, when he gave up his entire force of approximately 6,200 men to the American army -- a defeat widely regarded as the turning point of the Revolution because it brought France into the war as an American ally. He returned to England on May 13, 1778, but King George III refused to see him or grant him a court-martial. He was stripped of his regiment and his governorship of Fort William. From this house, Burgoyne mounted his political defence, arguing before a parliamentary select committee in 1779 that he had been given inflexible orders and only half the troops he requested. He published his case in A State of the Expedition from Canada (1780).
When the Rockingham Whigs came to power in 1782, Burgoyne was restored to rank, given a colonelcy, appointed commander-in-chief in Ireland, and made a privy councillor. After the fall of that government in 1783, he withdrew increasingly into private life and his second career as a playwright, producing works including The Heiress (1786). He died unexpectedly at this house on August 4, 1792, having been seen at the theatre in good health the night before. He is buried in Westminster Abbey.
Key Figures
- Gen. John Burgoyne - Commander of the British Northern Army; surrendered at Saratoga 1777; playwright and politician
- Robert Adam - Architect who designed the interiors of 10 Hertford Street for Burgoyne (1769-1771)
- Richard Brinsley Sheridan - Dramatist and politician who later lived and died in the same house (1795-1816); also commemorated with a plaque
What's There Today
The building at 10 Hertford Street is a Grade I listed five-storey, three-bay brown brick house with a stuccoed ground storey. It was used as offices from World War II until 1990, when it was placed on English Heritage's "buildings at risk" register. It has since been restored and returned to private domestic use. The two blue plaques -- one for Burgoyne, one for Sheridan -- are visible from the street. The Robert Adam interiors, some of which survive, can be traced in original design drawings held at Sir John Soane's Museum. The nearest tube stations are Hyde Park Corner and Green Park.
Sources
- Britannica, "John Burgoyne" entry
- English Heritage, "General John Burgoyne" blue plaque page
- Sir John Soane's Museum, "Hertford Street, number 10: designs for interior decoration for Lieutenant-General John Burgoyne, 1769-71"
- Burgoyne, John, A State of the Expedition from Canada (London, 1780)
Ignatius Sancho Plaque
People
Historical Significance
Ignatius Sancho occupies a singular place in the history of the American Revolution -- not as a soldier, diplomat, or politician, but as the first known Black British voter, and as a writer whose published letters laid bare the fundamental contradiction at the heart of the American struggle for liberty. Born around 1729 on a slave ship crossing the Atlantic, orphaned by the time he reached England as an infant, Sancho rose from servitude to become a shopkeeper, composer, man of letters, and a figure who moved in the literary circles of Georgian London. His life story alone challenged every assumption that underpinned the Atlantic slave trade, and his written words did so with devastating wit.
Sancho's connection to the American Revolution is both direct and philosophical. In the general elections of 1774 and 1780, he exercised his right to vote as a property-holding householder in Westminster -- making him the first person of African descent documented as voting in a British parliamentary election. The 1774 election took place just as tensions between Britain and the American colonies were reaching a breaking point, and the 1780 election occurred in the thick of the war itself. Sancho was keenly aware of the political stakes. His letters, published posthumously in 1782 as Letters of the Late Ignatius Sancho, an African, contain sharp observations on the American conflict. He expressed sympathy for the colonists' grievances about parliamentary overreach while simultaneously condemning the rank hypocrisy of American slaveholders who demanded liberty for themselves while denying it to hundreds of thousands of enslaved people. In a letter dated 1778, he wrote with characteristic directness about the war's moral contradictions, noting that the "Grand object" of liberty was undermined by those who practiced "the abominable traffic" in human beings.
The Letters were edited and published by Frances Crewe and dedicated in part to George Cumberland, a friend and patron. The collection became a sensation, running through multiple editions and serving as powerful evidence in the growing abolitionist argument that people of African descent were fully capable of intellectual and artistic achievement. Sancho corresponded with the novelist Laurence Sterne, whose own anti-slavery passages in Tristram Shandy were influenced by their exchange. Thomas Gainsborough painted Sancho's portrait, now held in the National Gallery of Canada, giving visual permanence to a man who might otherwise have been erased from the historical record. The publication of the Letters during the final year of the American War made their commentary on liberty and slavery particularly resonant, arriving at a moment when British public opinion was turning against both the war and the slave trade.
Sancho's commentary placed him among the sharpest contemporary critics of Revolutionary hypocrisy. While Enlightenment philosophers debated liberty in the abstract, Sancho wrote from lived experience of its denial, giving his observations a moral authority that few pamphleteers could match. His insistence that American claims to freedom were hollow so long as slavery persisted anticipated arguments that abolitionists would press for decades.
Sancho died on 14 December 1780, just weeks after casting his vote in the general election. He did not live to see the end of the war or the publication of his letters, but his legacy endured. The Letters were cited in parliamentary debates on abolition and remained in print well into the nineteenth century.
Key Figures
- Ignatius Sancho -- Writer, composer, shopkeeper, and the first documented Black British voter; his published letters offered pointed commentary on the American Revolution and the hypocrisy of slaveholding patriots
- George Cumberland -- Artist, writer, and friend to whom portions of Sancho's published letters were dedicated
- Laurence Sterne -- Novelist and correspondent of Sancho whose anti-slavery sympathies were shaped in part by their friendship
- Frances Crewe -- Society figure who helped prepare Sancho's letters for posthumous publication
- Thomas Gainsborough -- Painter who created the most famous portrait of Sancho, affirming his place in Georgian cultural life
What's There Today
A heritage plaque commemorating Ignatius Sancho is affixed to the Foreign, Commonwealth & Development Office (FCDO) building on King Charles Street in Westminster. The plaque, installed as part of broader efforts to recognise Black British historical figures, marks the approximate location where Sancho lived and ran a grocery shop at 19 Charles Street (the numbering and street layout have changed since the eighteenth century). The FCDO building itself is a grand Victorian structure designed by George Gilbert Scott and completed in 1868, now housing government offices. The plaque is visible from the street and freely accessible to visitors at any time.
A short walk away, the Church of St Margaret's, Westminster -- the parish church of the Houses of Parliament, situated next to Westminster Abbey -- holds a memorial to Sancho. He was buried in the churchyard of St Margaret's following his death in 1780, though the exact location of his grave is no longer marked. The church is open to visitors and regularly hosts services; check the St Margaret's website for current opening hours, as they vary seasonally. The nearest Underground stations are Westminster (Jubilee, District, and Circle lines) and St James's Park (District and Circle lines), both within a five-minute walk. King Charles Street itself connects Parliament Square to St James's Park, making the plaque easy to incorporate into a walking tour of Westminster's political landmarks.
Sources
- Sancho, Ignatius. Letters of the Late Ignatius Sancho, an African. London: J. Nichols, 1782. Reprinted with introduction by Vincent Carretta. London: Penguin, 1998.
- Carretta, Vincent. "Ignatius Sancho." Oxford Dictionary of National Biography. Oxford University Press, 2004; online edition, 2008.
- "Ignatius Sancho." London Remembers. https://www.londonremembers.com/memorials/ignatius-sancho
- "Ignatius Sancho: A Man of Letters." Foreign, Commonwealth & Development Office Blog, October 2020.
- Gerzina, Gretchen. Black London: Life before Emancipation. New Brunswick: Rutgers University Press, 1995.
John Singleton Copley Blue Plaque
People
Historical Significance
John Singleton Copley was born in Boston in 1738 and became colonial America's finest portrait painter before the Revolution uprooted his life and career. Entirely self-taught in a city with no established artistic tradition, Copley developed a startlingly direct and realistic portrait style that captured the faces and aspirations of Boston's merchant class. His subjects included Samuel Adams, Paul Revere, and John Hancock — men who would become leaders of the Revolution. Yet Copley himself was politically cautious, married into a prominent Loyalist family (his father-in-law, Richard Clarke, was one of the tea consignees targeted in the Boston Tea Party of 1773), and grew increasingly uncomfortable as political tensions threatened his livelihood and safety.
Copley departed Boston in June 1774, months before the outbreak of hostilities, travelling first to Italy for study and then settling permanently in London by 1775. He never returned to America. In London he reinvented himself as a history painter, competing directly with Benjamin West for commissions and public attention. His most ambitious works in this genre included Watson and the Shark (1778), a dramatic depiction of a shark attack in Havana harbour, and The Death of Major Peirson (1783), which showed the defence of Jersey against a French invasion in 1781. Both paintings demonstrated Copley's gift for theatrical composition and his ability to bring modern events to vivid life on enormous canvases.
Copley lived and worked at 25 George Street (now in the Marylebone district) for much of his London career. His house served as both residence and studio, and he exhibited his large history paintings there privately, charging admission — a commercial strategy that sometimes put him at odds with the Royal Academy, which preferred that major works be shown at its own exhibitions. Copley's relationship with the Academy and with Benjamin West was marked by professional rivalry and periodic tension, though he was elected a full Royal Academician in 1779.
Copley's later years in London were difficult. His artistic output declined, his finances deteriorated, and his health suffered. He died in 1815, largely forgotten by the London art world. His legacy, however, proved enduring on both sides of the Atlantic. In America, his colonial portraits are regarded as masterpieces of early American art; in Britain, his history paintings hold an important place in the development of the genre. His son, John Singleton Copley Jr., pursued a career in law rather than art and rose to become Lord Chancellor of England in 1827, receiving the title Baron Lyndhurst — an extraordinary social ascent within a single generation.
Key Figures
- John Singleton Copley — Boston-born painter who became colonial America's leading portraitist before relocating permanently to London in 1775; painted Watson and the Shark and The Death of Major Peirson
- Benjamin West — Fellow American-born painter in London and Copley's principal rival in history painting; as President of the Royal Academy, West's institutional influence sometimes clipped Copley's ambitions
- John Singleton Copley Jr. (Baron Lyndhurst) — Copley's London-born son, who became Lord Chancellor of England, illustrating the remarkable trajectory of an American emigrant family in British society
- Richard Clarke — Copley's father-in-law and one of the Boston tea consignees, whose Loyalist position contributed to the family's departure from America
What's There Today
The building at 25 George Street in Marylebone bears an English Heritage blue plaque commemorating Copley's residence. The plaque identifies him as an "American painter" and marks the site as his London home. The building has been altered since Copley's time, and the interior is not open to the public. George Street is a quiet residential street in a well-preserved Georgian neighbourhood, and the surroundings give a reasonable sense of the kind of area where prosperous artists and professionals lived in late eighteenth-century London.
Visitors interested in Copley's work can see major paintings at several London institutions. The Tate Britain holds The Death of Major Peirson, one of the most dramatic large-scale history paintings of the period. The National Gallery owns a version of Watson and the Shark. Combined with a visit to the blue plaque site, these collections offer a comprehensive picture of Copley's London career. George Street is easily reached on foot from Baker Street Underground station. The site pairs naturally with other American artist locations on the trail, particularly Benjamin West's studio on Newman Street, roughly a fifteen-minute walk to the southeast.
Sources
- Prown, Jules David, John Singleton Copley (2 vols., Harvard University Press, 1966) — the standard scholarly catalogue of Copley's work
- Rebora, Carrie, et al., John Singleton Copley in America (Metropolitan Museum of Art, 1995)
- English Heritage, "John Singleton Copley" blue plaque listing
- Neff, Emily Ballew, John Singleton Copley in England (Merrell Holberton, 1995)
Joseph Galloway's Lodgings, Queen Anne Street
People
Historical Significance
Joseph Galloway was the most politically prominent American Loyalist to take refuge in London during the Revolutionary War, and his years of exile in the Marylebone district -- where he lodged on Queen Anne Street and nearby addresses -- made him the de facto leader and chief advocate of the Loyalist refugee community in Britain. A former Speaker of the Pennsylvania Assembly and one of the most powerful politicians in pre-revolutionary America, Galloway's London exile represents the experience of elite Loyalists who lost everything and spent the rest of their lives seeking recognition and compensation from a government that had limited patience for their grievances.
Before the Revolution, Galloway had been a close political ally of Benjamin Franklin, with whom he dominated Pennsylvania politics for more than a decade. The two men shared a pragmatic, commercially minded vision for the colonies within the British Empire. At the First Continental Congress in 1774, Galloway proposed a Plan of Union that would have created an American legislative body operating alongside Parliament -- a final attempt at compromise that was narrowly defeated. The rejection of his plan marked the point at which Galloway concluded that the revolutionary movement had been captured by radicals unwilling to negotiate. He joined the British when they occupied Philadelphia in 1777, serving as superintendent of police and intelligence under General Howe.
When the British evacuated Philadelphia in 1778, Galloway sailed for England with his daughter Elizabeth, leaving behind his wife Grace Growden Galloway, who attempted to protect the family's extensive Pennsylvania estates from confiscation. Grace's diary, a remarkable document of the Revolution, records her increasingly desperate efforts to retain the family property while navigating the hostility of her former neighbours. She failed: the Pennsylvania government confiscated the Galloway estates, and Grace died in 1782 without seeing her husband again.
In London, Galloway settled in the Marylebone area, taking lodgings on Queen Anne Street. He threw himself into political advocacy, testifying before Parliament on the conduct of the war and publishing pamphlets arguing that the conflict could still be won if the government would commit sufficient resources. His testimony before the parliamentary inquiry into the conduct of Sir William Howe in 1779 was devastating: he argued that Howe had squandered multiple opportunities for decisive victory and that the Loyalist population of America had been abandoned by incompetent British commanders. His pamphlets, including Letters to a Nobleman on the Conduct of the War in the Middle Colonies (1779), were widely circulated.
Galloway also served as the chief Loyalist representative in dealings with the government, lobbying for better pensions and compensation. He appeared before the Loyalist Claims Commission and helped other refugees navigate the claims process. His own losses were immense -- his Pennsylvania estates had been among the largest in the colony -- but the Commission's awards, as always, fell short of what he claimed. He spent his final years in declining health and diminishing influence, dying in 1803, a man who had once wielded more political power than any other figure in Pennsylvania reduced to a pensioner in a foreign city.
Key Figures
- Joseph Galloway - Former Speaker of the Pennsylvania Assembly, author of the 1774 Plan of Union, and the most politically active Loyalist exile in London; testified before Parliament and led the refugee community's advocacy efforts
- Grace Growden Galloway - Joseph's wife, who remained in Philadelphia to protect the family estates; her diary is a primary source for the Loyalist experience during the Revolution; died in 1782 without recovering the property
- Benjamin Franklin - Galloway's former political ally in Pennsylvania; their friendship did not survive the Revolution, and Galloway's testimony before Parliament implicitly criticised Franklin's role in pushing the colonies toward independence
- Sir William Howe - British Commander-in-Chief whom Galloway accused before Parliament of failing to prosecute the war vigorously enough and of neglecting Loyalist support in the colonies
What's There Today
Queen Anne Street is a quiet residential street in Marylebone, running east-west between Welbeck Street and Portland Place. The street retains many of its Georgian terraced houses, though most have been converted to medical consulting rooms, reflecting the area's long association with Harley Street medicine. No plaque or marker identifies Galloway's specific lodgings. The street's preserved Georgian character, however, provides an authentic sense of the environment in which Loyalist refugees lived during their London exile.
The nearest Underground station is Oxford Circus (Central, Victoria, and Bakerloo lines), approximately an eight-minute walk south. Bond Street (Central, Jubilee, and Elizabeth lines) is also nearby. Queen Anne Street is a public road accessible at any time. It pairs naturally with other Marylebone Loyalist sites on the trail, including William Franklin's residence on Bolsover Street and General Clinton's house on Portland Place, all within a few minutes' walk of each other.
Sources
- Ferling, John, The Loyalist Mind: Joseph Galloway and the American Revolution (University Park: Pennsylvania State University Press, 1977)
- Norton, Mary Beth, The British-Americans: The Loyalist Exiles in England, 1774-1789 (Boston: Little, Brown, 1972)
- Galloway, Grace Growden, "Diary of Grace Growden Galloway," Pennsylvania Magazine of History and Biography 55 (1931) and 58 (1934)
- Galloway, Joseph, Letters to a Nobleman on the Conduct of the War in the Middle Colonies (London, 1779)
- Jasanoff, Maya, Liberty's Exiles: American Loyalists in the Revolutionary World (New York: Knopf, 2011)
Kenwood House (Lord Mansfield)
People
Historical Significance
Kenwood House on Hampstead Heath was the country retreat of William Murray, 1st Earl of Mansfield, who served as Lord Chief Justice of England from 1756 to 1788. In June 1772, Mansfield delivered the landmark ruling in Somerset v Stewart, holding that an enslaved man named James Somerset could not be forcibly removed from England and returned to slavery in the colonies. Though the ruling was narrower than often claimed -- it did not abolish slavery in England outright -- its effect was profound. Enslaved people in England increasingly understood that the law would not sanction their forced deportation, and the case rippled across the Atlantic. American slaveholders viewed it with alarm, fearing that British courts might one day extend the principle further. Some historians argue that Somerset contributed to slaveholding colonists' willingness to break with Britain, as independence would insulate American slavery from any future metropolitan interference.
Kenwood is also the home of Dido Elizabeth Belle, the mixed-race great-niece of Lord Mansfield, who was raised here alongside her white cousin Lady Elizabeth Murray. Born around 1761 to an enslaved African woman and Captain Sir John Lindsay of the Royal Navy, Dido occupied a unique position in 18th-century society -- raised as a gentlewoman yet unable to fully share the social privileges of her cousin. A celebrated double portrait of the two young women, attributed to David Martin and now hanging at Scone Palace in Scotland, has become an icon of Black British history. Lord Mansfield's personal experience of raising Dido has long been debated as a possible influence on his judicial thinking about slavery and human freedom.
Mansfield remodelled Kenwood extensively, commissioning the great Scottish architect Robert Adam to create the library and other principal rooms in the 1760s and 1770s. The house was thus being transformed during the very years that Mansfield was shaping the law on slavery, colonial governance, and the rights of dissenters -- all issues central to the coming Revolution.
Key Figures
- William Murray, 1st Earl of Mansfield - Lord Chief Justice 1756-1788; delivered the Somerset ruling
- James Somerset - Enslaved man whose case tested whether slavery could exist under English law
- Dido Elizabeth Belle - Mansfield's mixed-race great-niece, raised at Kenwood
- Robert Adam - Architect who redesigned Kenwood's interiors in the neoclassical style
What's There Today
Kenwood House is a free English Heritage property set in 112 acres of landscaped parkland on the edge of Hampstead Heath. The Robert Adam library is one of the finest neoclassical interiors in London, and the house contains the Iveagh Bequest, a world-class art collection featuring works by Rembrandt, Vermeer, Gainsborough, and Turner. Interpretation panels address Lord Mansfield's judicial career, the Somerset case, and the story of Dido Belle. The grounds include formal gardens, a lakeside concert bowl, and woodland walks connecting to the wider Heath.
The house is open daily (generally 10:00-17:00, with seasonal variations). Nearest stations are Hampstead or Golders Green on the Northern line, each about a 20-minute walk. The 210 bus from Golders Green or Archway stops on Hampstead Lane near the entrance. Parking is available on site (charges apply). There is a cafe in the former service wing.
Sources
- Wise, Steven M., Though the Heavens May Fall: The Landmark Trial That Led to the End of Human Slavery (Da Capo Press, 2005)
- Byrne, Paula, Belle: The True Story of Dido Belle (William Collins, 2014)
- English Heritage, Kenwood (guidebook, revised edition, 2023)
- Gerzina, Gretchen, Black London: Life Before Emancipation (Rutgers University Press, 1995)
Loyalist Claims Commission, Lincoln's Inn
People
Historical Significance
The Loyalist Claims Commission, formally established by Act of Parliament in 1783, was the British government's principal mechanism for compensating the tens of thousands of American Loyalists who had lost their homes, lands, businesses, and livelihoods through their allegiance to the Crown during the Revolutionary War. The Commission conducted much of its work at Lincoln's Inn, one of London's four Inns of Court, where its commissioners heard testimony, examined evidence, and adjudicated claims over a period of more than a decade. For the Loyalist refugees who crowded into London after the war, Lincoln's Inn became the place where their sacrifices were weighed, often found wanting, and reduced to a fraction of what they had lost.
The scale of the Loyalist exodus was immense. The historian Maya Jasanoff has estimated that approximately 60,000 Loyalists left the United States during and after the Revolution -- proportionally, the largest refugee crisis in American history. Many settled in Canada, the Bahamas, and other parts of the British Empire, but a significant number came to Britain itself, particularly to London. They congregated in neighbourhoods like Soho, Marylebone, and around the Strand, forming a displaced community bound by shared loss and the uncertain hope that the British government would make good on its implied promises of protection.
The Commission was chaired initially by John Eardley Wilmot, a retired Chief Justice of the Court of Common Pleas, and later by other senior legal figures. It heard over 3,000 individual claims between 1783 and 1789, with further claims processed into the 1790s. Claimants were required to prove both their loyalty to the Crown and the value of the property they had lost. The process was rigorous and often adversarial. Commissioners cross-examined witnesses, demanded documentary evidence, and were sceptical of inflated valuations. Many Loyalists found the experience humiliating: having sacrificed everything for the British cause, they were now required to justify their losses to bureaucrats who questioned their honesty.
The Commission's records, now held at The National Archives at Kew (series AO 12 and AO 13), constitute one of the most valuable historical sources for understanding the American Revolution from the Loyalist perspective. They contain detailed inventories of confiscated properties, personal testimonies describing the circumstances of displacement, and assessments of individual loyalty that reveal the complex motivations of those who chose the Crown. Historians including Mary Beth Norton, in her landmark study The British-Americans, have used these records to reconstruct the social world of the Loyalist refugees and to document the gap between what they claimed and what they received.
The total compensation awarded was approximately three million pounds -- a substantial sum, but far less than the claimants believed they were owed. Many received annual pensions rather than lump-sum payments, keeping them dependent on government goodwill for years. The experience left a lasting bitterness among the Loyalist community and raised enduring questions about the obligations of a sovereign power to those who remain loyal in a losing cause.
Key Figures
- John Eardley Wilmot - Retired Chief Justice of the Court of Common Pleas who served as the Commission's first chairman, bringing judicial rigour and independence to the claims process
- William Franklin - Last Royal Governor of New Jersey and Benjamin Franklin's estranged son, whose claim for over 48,000 pounds was dramatically reduced; one of the most prominent Loyalists to appear before the Commission
- Joseph Galloway - Former Speaker of the Pennsylvania Assembly and the most prominent Loyalist political figure in London, who testified extensively and advocated for better treatment of refugees
- Samuel Curwen - Salem, Massachusetts merchant and Loyalist diarist whose journal provides one of the most detailed firsthand accounts of exile life in London and the claims process
- Mary Beth Norton - Historian whose The British-Americans: The Loyalist Exiles in England, 1774-1789 (1972) was the first major scholarly study of the Loyalist refugee community using Commission records
What's There Today
Lincoln's Inn is one of London's four Inns of Court and remains an active legal institution. Its grounds include the New Hall and Library (built 1843-1845), the Old Hall (dating from 1489-1492), and the Chapel (consecrated 1623). The New Square and Stone Buildings precincts preserve a remarkable atmosphere of Georgian and earlier legal London. While the specific rooms where the Commission sat are not identified with certainty, the Inn's Old Hall or chambers in Stone Buildings are likely candidates. The Inn's grounds are generally open to the public during daytime hours, though the buildings themselves are not routinely accessible to visitors.
Lincoln's Inn is located between Chancery Lane and Serle Street, with the main entrance on Chancery Lane. The nearest Underground station is Chancery Lane (Central line), directly adjacent. Holborn (Central and Piccadilly lines) is also within a short walk. The Inn sits within the wider legal quarter of London, near the Royal Courts of Justice and the other Inns of Court, providing a broader context for understanding the institutional infrastructure of Georgian Britain.
Sources
- Norton, Mary Beth, The British-Americans: The Loyalist Exiles in England, 1774-1789 (Boston: Little, Brown, 1972)
- Jasanoff, Maya, Liberty's Exiles: American Loyalists in the Revolutionary World (New York: Knopf, 2011)
- Wilmot, John Eardley, Historical View of the Commission for Enquiring into the Losses, Services, and Claims of the American Loyalists (London: J. Nichols, 1815)
- The National Archives, Kew, AO 12 and AO 13 series: American Loyalist Claims Commission records
- Palmer, Gregory, Biographical Sketches of Loyalists of the American Revolution (Westport, CT: Meckler, 1984)
Olaudah Equiano Plaque
People
Historical Significance
Olaudah Equiano, born around 1745 in what is now southeastern Nigeria, was kidnapped into slavery as a child and endured the horrors of the Middle Passage before being sold to a Royal Navy officer and later to a Quaker merchant in the Caribbean. After purchasing his freedom in 1766, Equiano settled in London, where he became one of the most effective voices against the transatlantic slave trade. In 1789, while living at what was then 10 Union Street (now 73 Riding House Street) in Fitzrovia, he published The Interesting Narrative of the Life of Olaudah Equiano, or Gustavus Vassa, the African -- a bestselling autobiography that gave British readers a first-person account of enslavement, brutality, and resistance.
Equiano's activism was deeply intertwined with the ideals of the American Revolution. The language of liberty and natural rights that animated the Declaration of Independence was the same language abolitionists used to condemn slavery, and Equiano seized on this contradiction with particular force. How could a nation founded on the principle that "all men are created equal" sustain chattel slavery? The Revolution had, in effect, furnished abolitionists with their most potent rhetorical weapon: if liberty was a universal right, as the Americans claimed, then its denial to enslaved people was indefensible. Equiano's Narrative carried this argument to a broad readership on both sides of the Atlantic, appearing just as the new republic wrestled with the question at its Constitutional Convention. He corresponded with prominent reformers, petitioned Parliament, and undertook speaking tours across Britain and Ireland to promote his book and the abolitionist cause.
The success of the Interesting Narrative was extraordinary. Nine editions appeared during Equiano's lifetime, making him a wealthy man and one of the best-known Africans in the English-speaking world. His work contributed directly to shifting British public opinion against the slave trade, helping to lay the groundwork for the Slave Trade Act of 1807.
Key Figures
- Olaudah Equiano (Gustavus Vassa) - Formerly enslaved man, author, and leading abolitionist
- Granville Sharp - Abolitionist who supported Equiano and the Somerset case
- Ottobah Cugoano - Fellow formerly enslaved writer and abolitionist colleague of Equiano in London
What's There Today
A City of Westminster green plaque was unveiled at 73 Riding House Street in October 2000, marking the site where Equiano lived and wrote his autobiography. The plaque reads: "Olaudah Equiano 1745-1797 The African, lived here." The building itself is a standard London commercial premises in the heart of Fitzrovia, a walkable neighbourhood near the BBC Broadcasting House and the University of Westminster. While there is no museum or interior access, the plaque is freely visible from the street at any time.
The nearest tube stations are Oxford Circus (Central, Victoria, and Bakerloo lines), about a five-minute walk south, and Goodge Street (Northern line), a similar distance northeast. Fitzrovia offers a pleasant walking environment with numerous cafes and restaurants nearby.
Sources
- Equiano, Olaudah, The Interesting Narrative of the Life of Olaudah Equiano (1789; Penguin Classics edition, 2003)
- Carretta, Vincent, Equiano, the African: Biography of a Self-Made Man (University of Georgia Press, 2005)
- Gerzina, Gretchen, Black London: Life Before Emancipation (Rutgers University Press, 1995)
- Brown, Christopher Leslie, Moral Capital: Foundations of British Abolitionism (University of North Carolina Press, 2006)
- Open Plaques, "Olaudah Equiano green plaque," openplaques.org
Patience Wright's Studio Site
People
Historical Significance
Patience Lovell Wright was among the most improbable figures of the American Revolution: a Quaker farm wife from Bordentown, New Jersey, who became the first professionally recognized American sculptor, a London celebrity, and — according to strong circumstantial evidence — a spy who used her artistic career to funnel intelligence to the American cause. Her waxwork studio on Cockspur Street, near Charing Cross, was the base from which she operated for more than a decade.
Wright arrived in London in 1772, already in her early fifties, having built a reputation for wax portraiture in New York and Philadelphia after her husband's death left her to support five children. She modeled wax directly with her hands, working the warm material under her apron — a technique audiences found both fascinating and faintly scandalous. Her likenesses attracted sitters from the highest levels of British society, including George III and Queen Charlotte. Her figure of William Pitt the Elder was so admired that a version was placed in Westminster Abbey after his death in 1778.
Wright's studio attracted exactly the sort of well-connected visitors — members of Parliament, military officers, government officials — who possessed information of interest to the American cause. She was by all accounts voluble and politically outspoken, making no secret of her patriot sympathies, which was itself a form of camouflage; her openness made her seem artless rather than calculating. She maintained a regular correspondence with Benjamin Franklin in Paris, and her surviving letters in the Founders Online archive contain political and military observations that went well beyond casual commentary.
Her espionage tradecraft reportedly exploited her profession directly. As Sellers documents, Wright is said to have concealed written messages inside the hollow heads of wax busts and figures, which she then shipped to Franklin and other contacts on the Continent under the guise of routine artistic commerce. The wax medium was ideally suited to this purpose: figures required careful packing for transport, were bulky enough to discourage casual inspection, and moved regularly between Wright's studio and buyers or exhibitors abroad. Whether or not every detail of this method can be independently confirmed, the broader pattern — Wright as an active intelligence conduit — is well supported by her correspondence, by Franklin's evident reliance on her reporting, and by the suspicion she attracted from British authorities. As a woman and an artist, she operated outside the categories that British intelligence was accustomed to monitoring, making her an unusually effective agent.
Wright remained in London throughout the war and died there in 1786 after a fall, never returning to the independent nation she had helped to create.
Key Figures
- Patience Lovell Wright - First recognized American sculptor; Quaker from New Jersey who established a celebrated waxwork studio in London; alleged spy for the American cause who may have concealed intelligence inside wax figures; modeled George III, Queen Charlotte, and many leading political figures
- Benjamin Franklin - American envoy in Paris and Wright's principal correspondent; received her letters containing political intelligence and social observations from London; the two shared a network of contacts sympathetic to the American cause
- William Pitt the Elder, Earl of Chatham - Leading parliamentary defender of American rights whose wax effigy, modeled by Wright, was placed in Westminster Abbey; his death in 1778 during a House of Lords debate on the war made him a martyr figure for the pro-American cause in Britain
- George III - Sat for Wright despite her open American sympathies; their interactions, during which Wright reportedly addressed the King with startling informality, became part of her legend
What's There Today
There is no plaque or marker on Cockspur Street to indicate that Wright ever worked there. The street runs between Pall Mall East and Trafalgar Square, and its current buildings are largely Victorian and later structures with no physical connection to the eighteenth-century streetscape. The precise location of her studio is not recorded with certainty.
Despite the absence of a marker, Cockspur Street rewards a brief stop. It sits within a dense cluster of Revolution-related sites including the Admiralty, Horse Guards, and Downing Street. The nearest Underground station is Charing Cross (Northern and Bakerloo lines), with an exit directly onto the street. Visitors interested in Wright can see surviving wax effigies connected to her legacy at Westminster Abbey, a fifteen-minute walk south along Whitehall.
Sources
- Wright, Patience. Letters to John Adams and others, Founders Online, National Archives, https://founders.archives.gov
- "Patience Wright: Spy and Sculptor," American Battlefield Trust, https://www.battlefields.org
- Sellers, Charles Coleman. Patience Wright: American Artist and Spy in George III's London. Middletown, CT: Wesleyan University Press, 1976
- Prown, Jules David. "Patience Wright," in American Art to 1900. New Haven: Yale University Press, 2000
- Berkin, Carol. Revolutionary Mothers: Women in the Struggle for America's Independence. New York: Knopf, 2005
Paul Wentworth's House
People
Historical Significance
Poland Street in Soho was the London address of Paul Wentworth, one of the most consequential and least remembered figures of the American Revolution. Born in New Hampshire around 1736 and raised in the Caribbean, Wentworth was a wealthy colonial landowner, stock speculator, and man of considerable social ambition who chose to remain loyal to the Crown when the conflict erupted. His decision to serve British interests would place him at the centre of one of the most effective intelligence operations of the eighteenth century, one that penetrated the American diplomatic mission in Paris and fed critical information back to the British government throughout the war.
Wentworth's value to the British ministry lay in his extensive personal connections on both sides of the Atlantic. He knew many of the leading figures of the American cause personally, and he used those connections to recruit agents and informants. His most significant intelligence coup was the recruitment of Edward Bancroft, an American-born physician, scientist, and writer who served as secretary to the American commissioners in Paris, including Benjamin Franklin and Silas Deane. Bancroft was ideally placed to report on the most sensitive diplomatic negotiations of the war, and he did so with remarkable effectiveness. Operating under the code system Wentworth devised, Bancroft passed information about American treaty negotiations with France, military plans, and diplomatic strategy to the British Secret Service. His reports were deposited in a sealed bottle hidden in a hole in a tree on the south terrace of the Tuileries Gardens in Paris, collected by a British agent, and forwarded to London. Bancroft's espionage was not confirmed until nearly a century after his death, when documents in the British archives revealed the full extent of his betrayal.
From his base in London, Wentworth managed this network and reported to Lord North and William Eden, the under-secretary of state responsible for intelligence. North reportedly described Wentworth as "the most important and truest informer" available to the government. Wentworth's role went beyond mere intelligence gathering. In late 1777 and early 1778, as the British government grew alarmed at the prospect of a Franco-American alliance, Wentworth was dispatched to Paris to attempt to open direct negotiations with the American commissioners. He met with Silas Deane and attempted to persuade the Americans to abandon their pursuit of a French alliance in exchange for generous terms of reconciliation. The mission failed; Franklin and his colleagues were already committed to the French alliance, which was formalised in February 1778. Wentworth's intelligence had, ironically, helped alert the British to the danger of the Franco-American negotiations, but his diplomatic efforts came too late to prevent the alliance that would ultimately prove decisive in the war.
Wentworth's story illuminates the shadowy world of espionage and secret diplomacy that ran parallel to the military conflict. His Poland Street address was part of the infrastructure of British intelligence during the Revolution, a place where reports were received, agents were briefed, and strategy was discussed. That the street bears no marker or commemoration of his presence is perhaps fitting for a man whose greatest achievements were conducted in secret.
Key Figures
- Paul Wentworth - New Hampshire-born loyalist and chief British spy handler who ran an intelligence network from London, managing agents embedded in the American diplomatic mission in Paris.
- Edward Bancroft - American-born scientist and double agent recruited by Wentworth, who served as secretary to the American commissioners in Paris while secretly reporting to the British.
- Lord North - Prime Minister (1770-1782) who relied on Wentworth's intelligence reports and described him as the government's most important informer.
- Silas Deane - Connecticut merchant and diplomat, one of the American commissioners in Paris, whom Wentworth attempted to turn through direct negotiation in 1777-78.
What's There Today
Poland Street is a busy thoroughfare in the heart of Soho, running between Oxford Street and Broadwick Street. The street today is lined with a mixture of Georgian, Victorian, and modern buildings housing offices, restaurants, shops, and residential flats characteristic of this vibrant central London neighbourhood. No blue plaque or marker identifies Wentworth's former residence, and the specific building he occupied has almost certainly been demolished or substantially altered in the intervening centuries. The street itself, however, retains its eighteenth-century layout, and visitors can walk the same pavement that Wentworth trod as he managed his intelligence operations.
The nearest Underground station is Oxford Circus (Central, Victoria, and Bakerloo lines), approximately a five-minute walk north along Regent Street. Tottenham Court Road station (Central and Northern lines, plus the Elizabeth line) is also nearby. Poland Street is freely accessible at all times as a public road and can be easily incorporated into a walking tour of Soho's many historical sites.
Sources
- "Paul Wentworth," Wikipedia, https://en.wikipedia.org/wiki/Paul_Wentworth
- "Paul Wentworth," Encyclopedia.com, https://www.encyclopedia.com
- Schaeper, Thomas J., Edward Bancroft: Scientist, Author, Spy (New Haven: Yale University Press, 2011).
- Dull, Jonathan R., A Diplomatic History of the American Revolution (New Haven: Yale University Press, 1985).
Phillis Wheatley Publication Site, Aldgate
People
Historical Significance
In September 1773, the bookseller Archibald Bell at 8 Aldgate published Poems on Various Subjects, Religious and Moral by Phillis Wheatley -- the first book of poetry published by an African American woman. That Wheatley had to cross the Atlantic to find a publisher was itself a statement about the limits of colonial liberty. Boston's literary establishment refused to believe that an enslaved Black woman could have written the poems, and no American publisher would take the risk. It was London that gave Wheatley her voice.
Wheatley arrived in London on 17 June 1773 and spent nearly three months in the city. She met Benjamin Franklin, Granville Sharp (the abolitionist who took her to see the Tower of London), the Earl of Dartmouth, and Sir Brook Watson (the future Lord Mayor). The Countess of Huntingdon, Selina Hastings, served as the book's patron, lending her name to the frontispiece. Wheatley visited Westminster Abbey, the British Museum, and Greenwich Hospital and Observatory. She was called home before the publication date by the illness of her mistress, Susanna Wheatley, but the book appeared as planned. Shortly after her return to Boston, Phillis was freed -- possibly under pressure from her English admirers.
Wheatley's London triumph illuminates the contradictions at the heart of the Revolution. The book's frontispiece identified her as "a Negro Servant to Mr. John Wheatley, of Boston." A revolution fought in the name of liberty was being waged by a society that held people in bondage. Wheatley's 1775 poem to George Washington, and his appreciative response, placed her at the intersection of the fight for political independence and the struggle for human freedom.
Key Figures
- Phillis Wheatley (c.1753-1784) - First published African American poet; visited London 1773
- Archibald Bell - Bookseller at 8 Aldgate who published Wheatley's poems
- Selina Hastings, Countess of Huntingdon - Patron who lent her name to the publication
- Benjamin Franklin - Met Wheatley during her London visit
- Granville Sharp - Abolitionist who accompanied Wheatley to London landmarks
What's There Today
A Nubian Jak Community Trust blue plaque, unveiled on 16 July 2019 and sponsored by the American Embassy in London and Black History Walks, marks the publication site on the Hotel Saint (formerly Dorsett City London) at 9 Aldgate High Street. The plaque commemorates Bell's publication of Wheatley's poems as "the first work of an African American female writer published in English." The original Bell bookshop is gone, replaced by the modern hotel, but the plaque makes the site identifiable and visitable. The location is immediately adjacent to Aldgate tube station (Metropolitan and Circle lines) in the City of London.
Sources
- Carretta, Vincent, Phillis Wheatley: Biography of a Genius in Bondage (University of Georgia Press, 2011)
- Historic Royal Palaces, "Phillis Wheatley: The First Published African American Woman Visits the Tower"
- London Remembers, "Phillis Wheatley Memorial," londonremembers.com
- Black History Month UK, "Phillis Wheatley in London"
- Wheatley, Phillis, letter to Colonel David Wooster, 18 October 1773 (documenting her London itinerary)
Royal Botanic Gardens Kew
People
Historical Significance
The Royal Botanic Gardens at Kew are intimately connected to George III, the monarch who reigned throughout the American Revolution. George III's mother, Princess Augusta, founded the botanic garden in 1759, and George himself expanded and developed it significantly during his reign. The King maintained a residence at Kew Palace (the Dutch House) and spent considerable time at Kew, particularly during periods of political stress. The gardens were thus part of the personal landscape of the monarch against whom the American colonies rebelled.
Sir Joseph Banks, the naturalist and long-serving president of the Royal Society (1778-1820), was the driving force behind Kew's transformation into a world-class botanical institution. Banks served as an unofficial director of the gardens from 1773, advising George III on plant collecting and dispatching botanical expeditions across the globe. Banks's network of collectors operated in the American colonies and later in the independent United States, and his vision for Kew as a centre for economic botany was tied to Britain's imperial ambitions. The gardens received specimens from the Americas throughout the Revolutionary period, even as the political relationship collapsed.
Kew's connection to the Revolution is also symbolic. The gardens represent George III's interests as an Enlightenment monarch, a patron of science and agriculture who was simultaneously prosecuting a war against his own subjects. This duality, the cultured king and the obstinate sovereign, is central to understanding the British perspective on the Revolution. Kew Palace, where George III later suffered episodes of the illness that would eventually incapacitate him, provides a personal and poignant context for the broader political story.
Key Figures
- George III - King during the Revolution; developed the gardens and resided at Kew Palace
- Queen Charlotte - Consort of George III; maintained a cottage and gardens at Kew
- Sir Joseph Banks - President of the Royal Society and unofficial director of Kew; advised the King on botanical collecting
- Princess Augusta - George III's mother; founded the original botanic garden in 1759
- William Aiton - Head gardener at Kew from 1759; managed the gardens during the Revolutionary period
What's There Today
The Royal Botanic Gardens Kew is a UNESCO World Heritage Site and one of the world's leading botanical institutions. The gardens cover 300 acres and include historic structures from the Revolutionary period and earlier. Kew Palace (the Dutch House), the most intimate of the royal palaces, is open to visitors seasonally (typically April to September) and offers a direct connection to George III's personal life. The palace rooms include displays on the King and his family.
The gardens themselves contain several 18th-century structures, including the Great Pagoda (1762), the Orangery, and a number of smaller temples and follies designed by William Chambers. The iconic Palm House and Temperate House are Victorian additions. The gardens charge an admission fee, and Kew Palace has a separate charge (or is included with Historic Royal Palaces membership). Kew is easily accessible via Kew Gardens Underground station (District line), making it convenient to combine with a visit to the National Archives, which is a short walk away. The gardens offer a contemplative setting for reflecting on the personal dimensions of the Revolutionary story.
Sources
- Desmond, Ray, The History of the Royal Botanic Gardens Kew (Harvill Press, 1995)
- Gascoigne, John, Joseph Banks and the English Enlightenment (Cambridge University Press, 1994)
- Historic Royal Palaces, "Kew Palace," www.hrp.org.uk
- Royal Botanic Gardens Kew, www.kew.org
- Brooke, John, King George III (Constable, 1972)
St Mary's Church Battersea (Benedict Arnold Burial)
People
Historical Significance
Benedict Arnold remains one of the most controversial figures of the American Revolution. A talented and aggressive Continental Army general, Arnold played critical roles in the American capture of Fort Ticonderoga (1775), the invasion of Canada, and most notably the Battles of Saratoga (1777), where his battlefield leadership was instrumental in the American victory that brought France into the war. Yet his name became synonymous with treason after he conspired in 1780 to surrender the fortress at West Point to the British, a plot that was exposed when his British contact, Major John Andre, was captured carrying incriminating documents.
Arnold's defection stemmed from personal grievance and political frustration. He felt Congress had repeatedly overlooked him for promotion and subjected him to investigations over his finances. His marriage in 1779 to Margaret "Peggy" Shippen, from a Philadelphia family with Loyalist sympathies, may have reinforced his disillusionment. After the plot's discovery, Arnold escaped to British lines, was commissioned a brigadier general, and led raids in Virginia and Connecticut before sailing to England in December 1781.
Arnold's years in London were deeply unhappy. Though George III received him and granted a military pension, British society largely shunned him. Lord Surry reportedly told him that no gentleman in England would associate with a traitor, and Arnold struggled to gain the military employment he craved. He petitioned repeatedly for an active command during Britain's wars with Revolutionary France in the 1790s, but the War Office kept him at arm's length. A brief commercial venture in New Brunswick, Canada (1785-1791) ended in acrimony and a warehouse arson case that damaged his reputation further. Back in London, he speculated in privateering during the French wars, but these schemes yielded more debt than profit. His wife Peggy managed the family's precarious finances with a skill that contemporaries acknowledged exceeded his own.
By the late 1790s Arnold was in physical decline, suffering from gout and dropsy. He died on 14 June 1801 at his home in Gloucester Place. According to a persistent tradition, he asked on his deathbed to be dressed in his old Continental Army uniform, saying "Let me die in this old uniform... God forgive me for ever putting on any other." Whether or not the story is apocryphal, it captures the tragedy of a man who belonged fully to neither side. Peggy survived him until 1804. Both are buried in the crypt of St Mary's Church, Battersea.
The church's connection to Arnold is not prominently advertised, reflecting the enduring ambivalence that surrounds him — neither hero nor straightforward villain, his burial in an English parish church is a quiet footnote to one of the Revolution's most dramatic personal stories.
Key Figures
- Benedict Arnold — Continental Army general whose battlefield courage at Saratoga helped secure French alliance, before his 1780 defection to the British; died in London in 1801 and buried at St Mary's
- Margaret "Peggy" Shippen Arnold — Arnold's second wife, from a prominent Philadelphia family; managed the family's affairs in London and was buried alongside him in 1804
- George III — King of Great Britain who received Arnold after his defection and granted him a pension, though Arnold remained on the margins of British society
- Major John Andre — British intelligence officer and Arnold's co-conspirator, captured and hanged as a spy in 1780; his fate generated more British sympathy than Arnold's defection itself
What's There Today
St Mary's Church, Battersea is a Grade I listed building dating from 1775 (the present structure replaced a medieval predecessor), situated on the south bank of the Thames with views across the river. The church is notable for its handsome Georgian interior, with box pews and Venetian windows. Benedict Arnold is commemorated by a memorial plaque in the church, and he and Peggy Shippen Arnold are interred in the crypt. The church also has connections to other historical figures: J.M.W. Turner painted Thames views from the vestry, and the poet and artist William Blake married Catherine Boucher here in 1782.
The church is open to visitors, though hours vary and it is advisable to check before visiting. It is located on Battersea Church Road, a short walk from Battersea Park and accessible via bus or a walk from Clapham Junction rail station. The surrounding area has undergone significant redevelopment in recent years, but the church and its small churchyard retain a quieter character. For visitors following the American Revolution trail, the site offers a contemplative counterpoint to more triumphalist locations, raising questions about loyalty, betrayal, and the human costs of revolution.
Sources
- Martin, James Kirby, Benedict Arnold, Revolutionary Hero: An American Warrior Reconsidered (New York University Press, 1997)
- Philbrick, Nathaniel, Valiant Ambition: George Washington, Benedict Arnold, and the Fate of the American Revolution (Viking, 2016)
- Randall, Willard Sterne, Benedict Arnold: Patriot and Traitor (William Morrow, 1990)
- Brandt, Clare, The Man in the Mirror: A Life of Benedict Arnold (New York: Random House, 1994)
- St Mary's Church, Battersea, parish historical records and church guide
Thomas Gage Blue Plaque
People
Historical Significance
General Thomas Gage (1718/19-1787) served as Commander-in-Chief of British forces in North America from 1763 and as Military Governor of Massachusetts from 1774. From his headquarters in Boston, he dispatched the column of regulars toward Lexington and Concord on the night of April 18, 1775 -- the expedition that triggered the first armed engagements of the Revolutionary War. The resulting clashes at Lexington Green and North Bridge, followed by a devastating American pursuit of the retreating British column, transformed a political crisis into an armed rebellion.
Gage had commissioned architect James Adam to design 41 Portland Place during an earlier leave from America, and the house was completed during his absence. After the pyrrhic British victory at Bunker Hill in June 1775 -- which cost over a thousand British casualties -- Gage was replaced by General William Howe. He departed Boston on October 11, 1775, and arrived in London on November 14. He settled into Portland Place and lived here for the remaining twelve years of his life, retaining the nominal governorship of Massachusetts and the rank of full general.
The house at 41 Portland Place thus represents Gage's life after the war he helped start. He died here on April 2, 1787, and was buried in the family plot at Firle in Sussex. His Portland Place residence complements the existing trail site at Firle Place, offering visitors a London anchor for the Gage story.
Key Figures
- General Thomas Gage - Commander-in-Chief in North America (1763-1775); Governor of Massachusetts (1774-1775); ordered the march on Concord
- Margaret Kemble Gage - His American-born wife, suspected of leaking intelligence about the Concord expedition to patriot leaders
- James Adam - Architect who designed 41 Portland Place for Gage
- General William Howe - Gage's successor as Commander-in-Chief in North America
What's There Today
41 Portland Place is a Grade II* listed Georgian townhouse designed by James Adam in 1773. After serving as a private residence until 1939, it underwent a five million pound refurbishment in 2010 and is now home to the Academy of Medical Sciences. The building also operates as an events and conference venue, with eight versatile spaces accommodating five to 120 guests. The English Heritage blue plaque (1996) is prominently displayed on the exterior. While the interior is not generally open to casual visitors, the plaque is viewable from the street. The nearest tube stations are Great Portland Street and Regent's Park.
Sources
- English Heritage, "Thomas Gage" blue plaque page
- Alden, John R., General Gage in America: Being Principally a History of His Role in the American Revolution (Louisiana State University Press, 1948)
- American Battlefield Trust, "Thomas Gage" biography
- Fischer, David Hackett, Paul Revere's Ride (New York: Oxford University Press, 1994)
Tothill Fields Bridewell Gateway
People
Historical Significance
The imprisonment of John Trumbull at Tothill Fields Bridewell in the winter of 1780-81 is one of the most remarkable personal episodes of the American Revolution's London dimension. Trumbull, a Connecticut-born painter who had served as an aide-de-camp to George Washington and held the rank of colonel in the Continental Army, had traveled to London in 1780 to study painting under Benjamin West, the Pennsylvania-born artist who had become historical painter to King George III. It was an improbable arrangement -- an American military officer studying art in the enemy capital during wartime -- and it ended abruptly when Trumbull was arrested on 19 November 1780, charged with treason against the Crown, and confined in Tothill Fields Bridewell, the ancient house of correction in Westminster.
The timing of Trumbull's arrest was no coincidence. On 2 October 1780, Major John Andre, the British officer who had served as intermediary in Benedict Arnold's conspiracy to surrender West Point, was executed by the Continental Army as a spy. Andre was a popular and cultivated figure in British society, and his death provoked outrage in London. The government, seeking a reciprocal act, turned its attention to Trumbull, the most prominent American of military rank then present in Britain. Trumbull had arrived in London in July 1780 carrying letters of introduction from Franklin in Paris, which in the heated atmosphere of wartime London amounted to evidence of enemy connections. A warrant was issued for his arrest under the charge of high treason, which carried the death penalty.
Trumbull's confinement at Tothill Fields lasted approximately seven months, from November 1780 to June 1781. The Bridewell, located near Westminster Abbey on what is now the junction of Tothill Street and Strutton Ground, was not the Tower of London -- it was a working house of correction primarily used for petty offenders, vagrants, and debtors. The conditions, while not the worst that Georgian incarceration could offer, were grim. Trumbull later described the experience in his autobiography, recalling the damp cells and the company of common criminals. However, he was treated with a degree of consideration owing to his rank and connections, and he was permitted visitors.
The campaign for Trumbull's release brought together an unlikely coalition. Benjamin West, who despite his position at the Royal Court had never abandoned his sympathy for fellow Americans, lobbied vigorously on Trumbull's behalf. Edmund Burke, the great Whig orator and politician who had argued against the coercive policies that led to the war, also interceded. Charles James Fox and other opposition figures applied political pressure. Even King George III is said to have been involved in the final decision, reportedly telling West that Trumbull should be released on the condition that he leave the country. Trumbull was freed in June 1781 on bail and departed England shortly thereafter, returning to the Continent. He would come back to London after the war to study again with West, and it was during this second stay (1784-89) that he began the great historical paintings of the Revolution -- including The Declaration of Independence, The Battle of Bunker's Hill, and The Death of General Warren -- that would define American visual memory of the founding era. Without the London episode, including both the imprisonment and the artistic training, those paintings might never have existed.
Key Figures
- John Trumbull -- American painter and former Continental Army colonel, arrested in London in November 1780 and imprisoned at Tothill Fields as reprisal for the execution of Major Andre
- Major John Andre -- British Army officer executed as a spy in October 1780 after his role in the Benedict Arnold conspiracy was discovered; his death prompted Trumbull's arrest
- Benjamin West -- Pennsylvania-born painter and historical painter to the King, who lobbied for Trumbull's release and served as his artistic mentor
- Edmund Burke -- Whig statesman who interceded on Trumbull's behalf, consistent with his longstanding opposition to the government's American policies
- Charles James Fox -- Leading Whig politician who supported efforts to secure Trumbull's freedom
What's There Today
The Tothill Fields Bridewell was demolished in 1885, and the prison site is now occupied by residential streets and a primary school in the area around Francis Street and Morpeth Terrace, behind Westminster Cathedral. However, the seventeenth-century gateway of the original Bridewell survives. The gateway, an arched stone entrance dating from the 1618 rebuilding of the prison, was salvaged during demolition and relocated in 1969 to a position at Little Sanctuary, a small open area adjacent to the west front of Westminster Abbey. It now stands as an isolated architectural fragment -- a doorway leading nowhere -- but it is one of the few physical remnants of the old Bridewell system of houses of correction that once operated across London.
The gateway is freely accessible and visible at all times, standing in the open near the junction of Tothill Street and Broad Sanctuary. It is an easy addition to any visit to Westminster Abbey, which stands immediately adjacent. Interpretive information about the gateway is limited; there is no specific plaque mentioning Trumbull or the American Revolution connection. The nearest Underground station is Westminster (Jubilee, District, and Circle lines) or St James's Park (District and Circle lines), both within a five-minute walk. Visitors interested in Trumbull's artistic legacy can see his major works at the Yale University Art Gallery in New Haven, Connecticut, though several of his paintings also appear in British collections.
Sources
- Trumbull, John. The Autobiography of Colonel John Trumbull, Patriot-Artist, 1756-1843. Edited by Theodore Sizer. New Haven: Yale University Press, 1953.
- "Tothill Fields Bridewell." London Remembers. https://www.londonremembers.com/memorials/tothill-fields-bridewell
- Cooper, Helen A. John Trumbull: The Hand and Spirit of a Painter. New Haven: Yale University Art Gallery, 1982.
- Jaffe, Irma B. John Trumbull: Patriot-Artist of the American Revolution. Boston: New York Graphic Society, 1975.
- "John Trumbull." Oxford Dictionary of National Biography and American National Biography Online.
Westminster Abbey
People
Historical Significance
Westminster Abbey holds a direct connection to the American Revolution through the memorial to Major John Andre, the British officer hanged as a spy in 1780 after his involvement in Benedict Arnold's plot to surrender West Point. Andre's remains were originally buried at Tappan, New York, where he was executed, but in 1821 they were exhumed at the request of the Duke of York and reinterred in the Abbey's nave, near the monument that had been erected in 1782. The monument, carved by Robert Adam with a sculptural panel by Peter Scheemakers's workshop (some sources attribute it to Van Gelder), depicts General Washington receiving Andre's petition and Andre being led to execution. It was a controversial memorial even at the time, reflecting British sympathy for an officer widely regarded as having met an unjust fate.
The Abbey also contains monuments and burials of several figures connected to the Revolutionary period. These include William Pitt the Elder (Earl of Chatham), who died in 1778 after his dramatic collapse in the House of Lords during debate on American affairs, and Charles Watson-Wentworth, 2nd Marquess of Rockingham, whose brief ministry repealed the Stamp Act in 1766. The Abbey served as the coronation church for George III in 1761 and was a central institution of the British establishment against which the colonists rebelled.
It is worth noting that the Andre memorial has attracted mixed reactions over the centuries. American visitors have sometimes viewed it with discomfort, given that Andre was convicted and executed as a spy under the laws of war. The monument reflects the British perspective of the period, which regarded Andre as a gallant officer and victim of circumstances. This dual perspective makes the Abbey an important site for understanding how the Revolution was perceived on both sides of the Atlantic.
Key Figures
- Major John Andre - British intelligence officer executed as a spy in 1780; buried in the nave since 1821
- William Pitt the Elder (Earl of Chatham) - Opponent of colonial taxation; monument in the north transept
- Marquess of Rockingham - Prime Minister who repealed the Stamp Act; buried in the north aisle
- George III - Crowned in the Abbey in 1761; reigned throughout the Revolution
- King George II - Last monarch buried in the Abbey (1760); his reign saw the Seven Years' War that set the stage for Revolution
- James Wolfe - Monument to the general whose victory at Quebec in 1759 reshaped the colonial situation
What's There Today
Westminster Abbey is an active church and one of London's most visited historic sites. The Andre memorial is located in the nave and is accessible during normal visiting hours. The monuments to Chatham and other Revolutionary-era figures are spread throughout the building. The Abbey charges an admission fee for tourism visits (worship services are free). Audio guides and guided tours are available and cover the major monuments, though the Andre memorial may not feature prominently in standard tours, so visitors with a specific interest in the Revolution should seek it out independently.
The Abbey is located immediately adjacent to the Houses of Parliament, making it easy to combine visits to both sites. It is a short walk from Westminster Underground station. The Abbey's collections and library hold additional material related to the period, though these are not generally open to casual visitors. The building itself is a UNESCO World Heritage Site.
Sources
- Westminster Abbey, "Major John Andre" monument description, www.westminster-abbey.org
- Hatch, Robert McConnell, Major John Andre: A Gallant in Spy's Clothing (Houghton Mifflin, 1986)
- Westminster Abbey, official guide and monument inventory
- Weintraub, Stanley, Iron Tears: Rebellion in America, 1775-1783 (Free Press, 2005)
- Dean and Chapter of Westminster, Abbey archives
William Franklin's London Residence
People
Historical Significance
Bolsover Street in Marylebone, formerly known as Norton Street, was the London home of William Franklin, the last Royal Governor of New Jersey and the estranged son of Benjamin Franklin. William's story is one of the most personally compelling narratives of the American Revolution, a tale of filial loyalty and political conviction that tore apart one of the most famous families in American history. His decades-long exile in London, from 1782 until his death in 1813, represents the human cost of the Revolution for those who chose the losing side.
William was born around 1730, Benjamin Franklin's illegitimate son. Despite this, Benjamin raised him as his acknowledged heir, and the two were exceptionally close. William accompanied his father to London in 1757, studied law at the Middle Temple, and in 1763 was appointed Royal Governor of New Jersey through his father's political connections. He served with competence for more than a decade. As the imperial crisis deepened, however, father and son found themselves on opposite sides. Benjamin became one of the foremost advocates of independence; William remained loyal to the Crown.
The breach was final and bitter. William refused to resign his governorship and was arrested by the New Jersey Provincial Congress in 1776. He endured more than two years of harsh imprisonment in Connecticut, confined in close quarters with inadequate food, his health deteriorating. After his exchange in 1778, he became president of the Board of Associated Loyalists in New York, directing guerrilla operations against the patriots — some controversial, including the retaliatory execution of a captured patriot officer that strained relations with the British military command.
When the war ended, William sailed for England in 1782, one of tens of thousands of loyalists who left the new United States. He settled in London, eventually taking up residence on Norton Street (now Bolsover Street) in Marylebone. Like many exiled loyalists, William submitted claims to the Loyalist Claims Commission, the body Parliament established in 1783 to compensate those who had lost property through their allegiance to the Crown. William claimed losses exceeding 48,000 pounds for his confiscated New Jersey estates, but the Commission, which scrutinised claims rigorously and often reduced them dramatically, awarded him a fraction of that sum along with a modest annual pension. The experience was shared by thousands of loyalist refugees in London, many of whom found that British gratitude had firm financial limits.
He and his father met one final time, in 1785 in Southampton, when Benjamin was returning from his diplomatic posting in Paris. William attempted a reconciliation, writing that "nature" should overcome political differences. Benjamin was unmoved. The meeting was civil but cold, and Benjamin's will left William almost nothing, pointedly citing the "part he acted against me in the late War." The rupture between them has become one of the Revolution's most studied family tragedies, illustrating how the conflict forced impossible choices that severed the deepest personal bonds. William died in London in 1813, largely forgotten, a man who had sacrificed everything for a cause that lost.
Key Figures
- William Franklin - Last Royal Governor of New Jersey, Benjamin Franklin's son, and committed loyalist who chose the Crown over his father and spent his final three decades in London exile.
- Benjamin Franklin - William's father, Founding Father, diplomat, and scientist, whose political break with his son over the Revolution became one of the conflict's most poignant personal stories.
- William Temple Franklin - William's illegitimate son (and Benjamin's grandson), who served as Benjamin's secretary in Paris during the war and later spent years in London editing his grandfather's papers.
What's There Today
Bolsover Street is a relatively quiet residential and commercial street in Marylebone, running roughly north-south between Clipstone Street and New Cavendish Street, parallel to Great Portland Street. The street was renamed from Norton Street in the nineteenth century. The buildings along the street are a mixture of Georgian-era terraced houses and later Victorian and modern additions, typical of this part of Marylebone. No blue plaque or marker identifies William Franklin's specific residence, and the building he occupied may well have been altered or replaced in the intervening two centuries. The street retains its eighteenth-century layout and character, however, and the surrounding area preserves much of the Georgian fabric of Marylebone.
The nearest Underground station is Great Portland Street (Metropolitan, Circle, and Hammersmith & City lines), approximately a two-minute walk to the east. Oxford Circus (Central, Victoria, and Bakerloo lines) is about a ten-minute walk to the south. Bolsover Street is freely accessible as a public road and can be visited at any time. It makes a natural pairing with other Marylebone-area sites on the trail, including General Clinton's house on nearby Portland Place.
Sources
- "William Franklin," Founders Online, National Archives, https://founders.archives.gov
- "William Franklin," Wikipedia, https://en.wikipedia.org/wiki/William_Franklin
- Skemp, Sheila L., William Franklin: Son of a Patriot, Servant of a King (New York: Oxford University Press, 1990).
- Brands, H. W., The First American: The Life and Times of Benjamin Franklin (New York: Doubleday, 2000).
- Jasanoff, Maya, Liberty's Exiles: American Loyalists in the Revolutionary World (New York: Knopf, 2011).
25 Brook Street (Handel & Hendrix House area)
Diplomatic
Historical Significance
The Brook Street area of Mayfair, London, has a notable connection to the American Revolution through John Adams, who resided in the neighbourhood during his time as the first American Minister to the Court of St James's (1785-1788). While Adams's best-documented London address is on Grosvenor Square, the broader Mayfair district — including Brook Street and its environs — was the social and diplomatic milieu in which he operated. The area around 25 Brook Street is today best known as the location of the Handel Hendrix House museum (the former homes of George Frideric Handel and Jimi Hendrix), but its Georgian streetscape evokes the London that Adams and other American representatives navigated during the critical post-war years.
Adams arrived in London in 1785 charged with negotiating commercial treaties and resolving outstanding issues from the Treaty of Paris, including British retention of frontier posts and the recovery of debts owed to British creditors. His reception was cool. George III received him with measured politeness, but much of London society regarded the former rebel with suspicion or hostility. Adams found lodgings in the fashionable Mayfair district, befitting his diplomatic status, and conducted his business from there. His wife, Abigail Adams, wrote vivid letters describing their life in London — attending the theatre, navigating social slights, and observing British politics with a sharp eye.
It should be noted that the specific association of Adams with 25 Brook Street or the Handel Hendrix House building itself is not established in the historical record. Adams's confirmed London residence was at No. 9 (later renumbered) Grosvenor Square. The Brook Street area is included on the trail as representative of the Mayfair neighbourhood where Adams lived and worked, rather than as a specific Adams site. Visitors should understand this distinction.
Key Figures
- John Adams - First American Minister to Britain, resided in nearby Grosvenor Square 1785-1788
- Abigail Adams - Prolific correspondent who documented their London experience in detail
- Thomas Jefferson - Visited the Adamses in London in March-April 1786
- George III - Received Adams's credentials at St James's Palace, a short walk from Mayfair
- Colonel William Stephens Smith - Secretary to the American legation, married Adams's daughter Abigail (Nabby) in London in 1786
What's There Today
The Handel Hendrix House at 25 Brook Street is a museum celebrating the two famous former residents of the building: the composer George Frideric Handel, who lived at No. 25 from 1723 until his death in 1759, and the musician Jimi Hendrix, who lived in the upper floor of the adjoining No. 23 in 1968-1969. The museum is open to the public and offers a fascinating window into Georgian Mayfair domestic life, though its exhibits focus on music rather than Revolutionary-era diplomacy.
The surrounding Mayfair streets retain much of their Georgian character, and a walk from Brook Street to Grosvenor Square (a few minutes away) traces Adams's likely daily route. Grosvenor Square itself was later the site of the American Embassy for many decades, maintaining its connection to Anglo-American relations. The area is accessible from Bond Street Underground station. For visitors interested in Adams's London, the combination of the Mayfair neighbourhood, St James's Palace (where Adams presented his credentials), and the Houses of Parliament provides a meaningful itinerary.
Sources
- McCullough, David, John Adams (Simon & Schuster, 2001)
- Adams, Abigail, Letters of Mrs. Adams, ed. Charles Francis Adams (Little, Brown, 1848)
- Butterfield, L.H., ed., Adams Family Correspondence (Harvard University Press, 1963-)
- Survey of London, vol. 40, "The Grosvenor Estate in Mayfair, Part II" (Athlone Press, 1980)
- Handel Hendrix House, visitor information, www.handelhendrix.org
David Hartley's House, Putney
Diplomatic
Historical Significance
David Hartley the Younger (1731-1813) was the British signatory of the definitive Treaty of Paris on 3 September 1783, the document that formally ended the American Revolutionary War and recognised the independence of the United States. His home at Putney, on the south bank of the Thames, was the base from which he conducted the final diplomatic manoeuvres that brought the war to its legal conclusion. While Richard Oswald had negotiated the preliminary articles in 1782, it was Hartley who was entrusted by the Fox-North coalition government with the task of converting those preliminaries into a binding treaty -- a distinction that places him among the most consequential, if least remembered, figures of the Revolution's diplomatic endgame.
Hartley was the son of David Hartley the Elder, a philosopher and physician whose work on associationist psychology influenced both British and American Enlightenment thought. The younger Hartley was educated at Oxford and entered Parliament as MP for Kingston upon Hull in 1774, a seat he held until 1780 and again from 1782 to 1784. From the outset of his parliamentary career, he was a consistent and vocal critic of the war against the American colonies. He spoke repeatedly in the House of Commons against military operations, argued for conciliation, and worked to improve conditions for American prisoners of war held in Britain -- particularly at the notorious Mill Prison in Plymouth and Forton Prison near Gosport.
Hartley's concern for prisoners brought him into direct contact with Benjamin Franklin, with whom he developed a warm personal friendship conducted through extensive correspondence. Their letters, preserved in the Franklin papers and available through Founders Online, reveal a relationship grounded in mutual respect, shared intellectual curiosity, and a genuine desire for peace. Franklin trusted Hartley's sincerity and his commitment to a just settlement, which made Hartley the natural British choice for the final treaty negotiations when the Fox-North coalition took power in April 1783.
Hartley arrived in Paris in April 1783 and spent the summer negotiating the definitive treaty alongside the American commissioners -- Franklin, John Adams, and John Jay. The negotiations were more contentious than might be expected, given that the preliminary articles had already been agreed. Hartley attempted to secure commercial concessions, including a reciprocal trade agreement, that would have bound the two nations economically. The Americans were wary of such entanglements, and ultimately the definitive treaty closely followed the preliminary articles without the commercial provisions Hartley sought. He signed the treaty on 3 September 1783 -- exactly one year after the preliminary articles -- in a ceremony at the Hotel d'York in Paris.
After the treaty, Hartley returned to his Putney home and continued in Parliament until 1784. He remained interested in Anglo-American relations and in fire prevention (he was a noted inventor of fireproof building techniques who had presented his ideas to Franklin). He died in Bath in 1813. His role in ending the Revolutionary War, while known to diplomatic historians, has never received the public recognition afforded to other treaty negotiators, making his Putney residence a particularly fitting addition to a trail that seeks to recover lesser-known aspects of the Revolution's British story.
Key Figures
- David Hartley the Younger - MP for Hull, peace advocate, and British signatory of the definitive Treaty of Paris (1783); his friendship with Franklin and consistent opposition to the war made him the natural choice for the final negotiations
- Benjamin Franklin - American commissioner at the Paris peace negotiations and Hartley's close friend and correspondent; the warmth of their relationship eased the diplomatic process
- John Adams - American commissioner who participated in the treaty negotiations alongside Franklin and Jay; his diary records the signing ceremony
- John Jay - American commissioner and later first Chief Justice of the United States; joined Franklin and Adams in the Paris negotiations
- Charles James Fox - Foreign Secretary in the Fox-North coalition who appointed Hartley to conduct the definitive treaty negotiations, reflecting the new government's desire for a swift and generous peace
What's There Today
Putney is a residential area on the south bank of the Thames in southwest London, best known for its riverside setting and as the starting point of the annual Oxford-Cambridge Boat Race. Hartley's specific residence was on Putney Heath, in the area near the junction of the modern Putney Heath and Wildcroft Road. The house no longer stands; the area was developed with Victorian and later housing. No plaque or marker commemorates Hartley's residence.
The area retains green space on Putney Heath and the adjacent Wimbledon Common, and the riverside walk along the Thames at Putney offers pleasant views. The nearest Underground station is East Putney (District line), and Putney rail station (served by South Western Railway from Waterloo) is also close. The area is freely accessible. For trail visitors, the Putney site works best as part of a broader diplomatic-themed itinerary that includes Richard Oswald's house site on Great George Street and the Shelburne sites at Bowood House and Lansdowne House.
Sources
- Hartley, David, correspondence with Benjamin Franklin, Founders Online, National Archives, https://founders.archives.gov
- Ritcheson, Charles R., "David Hartley," Oxford Dictionary of National Biography (Oxford University Press, 2004)
- Morris, Richard B., The Peacemakers: The Great Powers and American Independence (New York: Harper & Row, 1965)
- Dull, Jonathan R., A Diplomatic History of the American Revolution (New Haven: Yale University Press, 1985)
- Hartley, David, Letters on the American War (London, 1778-1779)
Grosvenor Square (Adams Residence)
Diplomatic
Historical Significance
John Adams arrived in London in 1785 as the first American Minister to the Court of St. James's, a diplomatic posting of enormous symbolic weight. The man who had helped draft the Declaration of Independence was now presenting his credentials to the King against whom that declaration had been directed. Adams and his wife Abigail took a house on the northeast corner of Grosvenor Square, then as now one of London's most prestigious addresses, and lived there until 1788. The posting was a test of whether the former enemies could establish a functional diplomatic relationship, and the results were decidedly mixed.
Adams's formal audience with George III on 1 June 1785 was a carefully watched occasion. By Adams's own account, both men were visibly moved. The King told Adams he had been the last to consent to the separation but, the matter now settled, would be the first to welcome friendship with the United States. Adams replied with studied formality. Behind this courtesy, however, lay deep practical disagreements. Britain refused to evacuate its forts in the Northwest Territory, citing American failure to honour treaty obligations regarding Loyalist property and pre-war debts. Adams spent three frustrating years in London unable to negotiate a commercial treaty or resolve these disputes, and he ultimately concluded that Britain would not treat the new republic as a serious equal until it had a stronger central government — an experience that reinforced his support for the Constitution of 1787.
Abigail Adams's letters from London provide some of the most vivid first-person accounts of Anglo-American relations in this period. She described their social reception as generally cold, with much of London society unwilling to call on the American minister's wife. Yet her pen was sharp and her observations ranged widely. She attended the theatre and compared English and American dramatic tastes; she noted the extremes of wealth and poverty visible on London's streets, writing to her sister Mary Cranch that "the wretchedness of the poor in this country is beyond description." She commented on English women's fashions and education, visited country houses, and offered pointed assessments of the political figures she encountered at court. Her letters to Thomas Jefferson in Paris reveal a woman functioning as an informal diplomatic analyst, reporting on British public opinion and parliamentary manoeuvres. Abigail Adams's London correspondence, most fully accessible through the Massachusetts Historical Society's Adams Family Papers, remains an invaluable documentary record — the observations of a formidable intellect who found much to admire in English culture but never wavered in her republican convictions.
Grosvenor Square's association with American diplomacy extended far beyond the Adams years. The square became the site of the American Embassy in the twentieth century. A statue of Dwight D. Eisenhower now stands in the square. The Adams house itself no longer survives, but the location remains a potent marker of the Anglo-American diplomatic relationship that John and Abigail Adams helped to establish.
Key Figures
- John Adams — First American Minister to Britain (1785-1788) and later second President of the United States; his London posting tested whether peacetime diplomacy could succeed between former enemies
- Abigail Adams — John Adams's wife and intellectual partner, whose letters from London provide an invaluable account of the social and diplomatic challenges they faced
- George III — King of Great Britain who received Adams at court with formal courtesy but whose government proved unwilling to make significant diplomatic concessions
- Thomas Jefferson — American Minister to France during the same period, who corresponded frequently with Adams about their parallel diplomatic frustrations in Europe
What's There Today
Grosvenor Square is in the Mayfair district of central London. The Adams house has not survived; a commemorative plaque marks its approximate location on the northeast corner. The square retains its Georgian-era layout, though the surrounding architecture is now mixed. A statue of Dwight D. Eisenhower stands in the square, and the former American Embassy (Eero Saarinen, 1960) occupies the west side, though the Embassy relocated to Nine Elms in 2018.
The square is freely accessible and a short walk from Bond Street or Marble Arch Underground stations. Visitors may wish to combine this site with the National Archives at Kew, which holds British diplomatic correspondence from the period, or the Massachusetts Historical Society's online Adams Family Papers.
Sources
- McCullough, David, John Adams (Simon & Schuster, 2001)
- Adams, John, and Abigail Adams, The Letters of John and Abigail Adams, ed. Frank Shuffelton (Penguin Classics, 2004)
- Taylor, Robert J., et al., eds., Papers of John Adams (Harvard University Press, 1977-present), particularly volumes covering the London ministry
- Nagel, Paul C., The Adams Women: Abigail and Louisa Adams, Their Sisters and Daughters (Oxford University Press, 1987)
- Holton, Woody, Abigail Adams: A Life (Free Press, 2009)
- Massachusetts Historical Society, Adams Family Papers: An Electronic Archive, masshist.org/digitaladams
Joseph Brant (Thayendanegea) in London
Diplomatic
Historical Significance
In late 1775, as the American colonies moved toward open rebellion, Joseph Brant -- Thayendanegea, a Mohawk military and political leader -- arrived in London on a diplomatic mission that would shape the course of the war. His purpose was to secure British commitments to protect Haudenosaunee (Iroquois) lands in exchange for Six Nations military support against the American rebels. The alliance he negotiated made the Six Nations a decisive factor in the northern theatre of the Revolution.
Brant's London visit was a sensation. He sat for the painter George Romney at his studio in Cavendish Square on 29 March and 4 April 1776, producing one of the most iconic portraits of the eighteenth century -- a powerful image of a man in a complex blend of Mohawk and European dress, wearing a silver gorget from George III and holding a pipe tomahawk. He met Lord Germain, the Secretary of State for the Colonies, and presented Haudenosaunee grievances about land encroachment. Germain acknowledged the grievances but said nothing could be done until the rebellion was settled -- effectively binding the Mohawk to the British cause. Brant was received by George III at St James's Palace, dined with the Prince of Wales, and was interviewed by James Boswell for the London Magazine. He was also initiated into the Third Degree of Freemasonry at the Falcon Lodge near Leicester Square.
The consequences of this London diplomacy were devastating for the Haudenosaunee. The alliance Brant secured led to brutal frontier warfare, and regardless of which side won, Native nations faced catastrophic land loss. The Revolution's promise of liberty did not extend to the Indigenous peoples whose lands the new republic would claim.
Key Figures
- Joseph Brant / Thayendanegea (c.1743-1807) - Mohawk military and political leader; secured Six Nations alliance with Britain
- George Romney (1734-1802) - Painter who created the iconic Brant portrait at his Cavendish Square studio
- Lord George Germain (1716-1785) - Secretary of State for the Colonies; met Brant to discuss the alliance
- James Boswell (1740-1795) - Interviewed Brant for the London Magazine, July 1776
What's There Today
George Romney's studio was at 32 Cavendish Square, Marylebone, now demolished and replaced by commercial buildings on the south side of the square. A Westminster City Council heritage marker on the square commemorates Romney's residency (1776-1797) alongside other notable occupants, though it does not specifically mention Brant. The square garden survives as a public green space, freely accessible, near Oxford Circus tube station. The original Romney oil painting of Brant is held by the National Gallery of Canada in Ottawa; the National Portrait Gallery in London holds a mezzotint engraving by John Raphael Smith (1779) based on the painting. Brant's lodging at the Swan with Two Necks inn on Lad Lane (near modern Gresham Street) is also demolished.
Sources
- Dictionary of Canadian Biography, "Thayendanegea" entry
- Library of Congress, "The Two Georges" exhibition, "Thayendanegea"
- National Portrait Gallery London, Joseph Brant portrait (NPG D23312)
- Kelsay, Isabel T., Joseph Brant, 1743-1807: Man of Two Worlds (Syracuse University Press, 1984)
- Taylor, Alan, The Divided Ground: Indians, Settlers, and the Northern Borderland of the American Revolution (Knopf, 2006)
Lansdowne House (Earl of Shelburne) Blue Plaque
Diplomatic
Historical Significance
William Petty, 2nd Earl of Shelburne and 1st Marquess of Lansdowne (1737-1805), purchased this house in 1763 from the 3rd Earl of Bute, one year into its construction by Robert Adam. Initially known as Shelburne House, it became the setting for one of the Revolution's most consequential diplomatic episodes.
Shelburne had been sympathetic to the American cause for years. He first became acquainted with Benjamin Franklin in 1763, and as Secretary of State in 1767 he conferred with Franklin on colonial affairs. When Shelburne became Prime Minister in July 1782, following the fall of Rockingham's government, he took personal charge of the peace negotiations with America. He dispatched Richard Oswald to Paris to treat with the American commissioners -- Franklin, John Jay, John Adams, and Henry Laurens.
Crucially, some of the British preparations for the peace settlement took place at Lansdowne House itself. John Jay drafted portions of the treaty in the Round Room -- now the bar of the Lansdowne Club -- which survives as the only unaltered Adam room in the remaining structure. Shelburne saw an opportunity to split the United States from France and establish the new American nation as a valuable trading partner, and the generous terms he offered -- including all territory east of the Mississippi -- reflected this strategic vision. The preliminary articles were signed on November 30, 1782, and the definitive Treaty of Paris was signed September 3, 1783.
Key Figures
- Earl of Shelburne (1st Marquess of Lansdowne) - PM 1782-1783; negotiated the Treaty of Paris recognizing American independence
- Benjamin Franklin - American commissioner; Shelburne's friend and diplomatic interlocutor since 1763
- John Jay - American commissioner who drafted portions of the treaty at Lansdowne House
- Richard Oswald - Shelburne's envoy to the peace negotiations in Paris
What's There Today
The original Lansdowne House was partly demolished in 1930 when Westminster City Council widened the street. The front facade was set back 40 feet, and prominent rooms were dismantled and shipped to American museums: the First Drawing Room went to the Philadelphia Museum of Art (1943) and the Great Dining Room to the Metropolitan Museum of Art in New York (1954). Five original Adam-designed rooms were retained and incorporated into the Lansdowne Club, established in 1935 as a private members' club with an Art Deco exterior designed by Charles Fox. The building is Grade II* listed. The English Heritage blue plaque (2003) is on the exterior. The Lansdowne Club is a private members' establishment and not open to the general public, but the plaque is viewable from Fitzmaurice Place. Green Park tube is a six-minute walk.
Sources
- English Heritage, "William Petty" and "Lansdowne House" blue plaque pages
- Morris, Richard B., The Peacemakers: The Great Powers and American Independence (New York: Harper & Row, 1965)
- Norris, John, Shelburne and Reform (London: Macmillan, 1963)
- Founders Online (National Archives), Franklin-Shelburne correspondence, 1782
Richard Oswald's House Site
Diplomatic
Historical Significance
Richard Oswald was arguably the most consequential British civilian in ending the American Revolutionary War, yet his name remains largely unknown to the general public. A Scottish-born merchant who had amassed a fortune through transatlantic trade -- including, troublingly, the slave trade -- Oswald was selected by the Earl of Shelburne in the spring of 1782 to serve as Britain's chief negotiator in the peace talks that would become the Treaty of Paris. The choice was not arbitrary. Shelburne understood that the American commissioners, particularly Benjamin Franklin, would need to trust their British counterpart if negotiations were to succeed. Oswald and Franklin had known each other for years, having met through shared intellectual circles, and Franklin had specifically indicated that Oswald was a man with whom he could do business.
Oswald's house on Great George Street in Westminster placed him at the very centre of British political power, a short walk from the Houses of Parliament and the offices of government ministers who directed the war effort. From this address, Oswald departed for Paris in April 1782 carrying Shelburne's initial instructions, and to this address he returned to consult with the ministry as negotiations progressed through that momentous summer and autumn. The talks were extraordinarily complex, involving not merely Britain and the nascent United States but also France and Spain, each with their own territorial ambitions and war aims. Oswald's task was to detach the Americans from their French alliance by offering terms generous enough to satisfy Congress while preserving as much of Britain's imperial position as possible.
The resulting Treaty of Paris, signed on 3 September 1783, recognised American independence and established boundaries for the new nation that extended to the Mississippi River -- terms that many in Parliament considered far too generous. Oswald had conceded much, including valuable fishing rights off Newfoundland and a boundary settlement that gave the Americans vast western territories. His critics, including the opposition in Parliament, accused him of giving away the empire. Yet Shelburne and Oswald's broader strategy was forward-looking: by creating goodwill with the Americans, they hoped to establish a commercial relationship that would prove more valuable than political sovereignty. In many respects, this calculation proved correct. Anglo-American trade recovered rapidly after the war, and the generous peace terms laid a foundation for the relationship that would develop over the following two centuries.
Oswald's role in the negotiations also involved navigating a personal connection with Henry Laurens, the former president of the Continental Congress who had been captured at sea and imprisoned in the Tower of London. Laurens was eventually released partly on Oswald's surety and joined the American negotiating team in Paris in November 1782, just in time to contribute to the preliminary articles. The intertwined personal relationships among these men -- Oswald, Franklin, Laurens, and Shelburne -- shaped the contours of the peace in ways that purely institutional diplomacy might not have achieved.
Key Figures
- Richard Oswald (1705-1784) -- Scottish merchant and Britain's lead peace commissioner in the Treaty of Paris negotiations; chosen for his personal rapport with Benjamin Franklin
- William Petty, 2nd Earl of Shelburne (1737-1805) -- Prime Minister from July 1782 who directed British peace strategy and selected Oswald as negotiator
- Benjamin Franklin (1706-1790) -- Senior American peace commissioner in Paris who personally requested Oswald as his negotiating counterpart
- Henry Laurens (1724-1792) -- Former president of the Continental Congress, imprisoned in the Tower of London 1780-1781, released on Oswald's surety and joined the Paris negotiations
What's There Today
The site of Oswald's house on Great George Street is today occupied by One Great George Street, the headquarters of the Institution of Civil Engineers. The current building, an imposing Edwardian Baroque structure designed by James Miller, was constructed between 1910 and 1913 and is Grade II* listed. The Institution hosts events and conferences and the building is occasionally open for heritage tours, particularly during Open House London each September. Its grand interiors, including the Great Hall with its barrel-vaulted ceiling, make it one of Westminster's more impressive Edwardian buildings, though nothing within commemorates the site's earlier association with Oswald or the Treaty of Paris negotiations.
There is no blue plaque or marker of any kind indicating that Richard Oswald lived here. Given that this street was the home base for the man who negotiated the end of the American Revolutionary War, the absence is notable. The building stands on the south side of Great George Street, between Parliament Square and St James's Park, making it easily accessible on foot from Westminster Underground station (Jubilee, District, and Circle lines) or St James's Park station (District and Circle lines). Visitors walking from the Houses of Parliament to St James's Park will pass directly by the site. The surrounding area is rich in related sites, including the Houses of Parliament where the peace terms were debated, and the Privy Council chamber at the nearby Cabinet Office where wartime strategy was directed.
Sources
- "Richard Oswald." Dictionary of National Biography. Oxford University Press.
- Morris, Richard B. The Peacemakers: The Great Powers and American Independence. New York: Harper & Row, 1965.
- "Richard Oswald (Diplomat)." Wikipedia. Wikimedia Foundation. https://en.wikipedia.org/wiki/Richard_Oswald_(diplomat)
- Stockley, Andrew. Britain and France at the Birth of America: The European Powers and the Peace Negotiations of 1782-1783. Exeter: University of Exeter Press, 2001.
Savile House Site
Diplomatic
Historical Significance
Savile House, located on the north side of Leicester Square, served as the residence of American diplomats in London during the period following the American Revolution. Most notably, John Adams — the first American Minister Plenipotentiary to the Court of St James's — took up residence in the area upon his arrival in London in 1785. Adams presented his credentials to George III in June 1785 in what was, by all accounts, an emotionally charged meeting for both men. Adams served in London until 1788, working to establish diplomatic and commercial relations between the new United States and its former colonial power.
The posting was not an easy one. Adams found himself largely shunned by London society, and the British government was slow to reciprocate diplomatic courtesies or negotiate outstanding issues from the Treaty of Paris (1783), including the continued British occupation of frontier posts and the unresolved matter of pre-war debts owed to British creditors. Adams's wife, Abigail Adams, wrote extensively about their time in London, providing vivid accounts of English society, politics, and their sometimes uncomfortable position as representatives of a former rebel nation. Their London residence thus became an early outpost of American diplomacy in Europe.
It should be noted that the precise identification of the Adams residence with "Savile House" involves some uncertainty in the historical record. Some sources place the Adams household at different addresses in the Grosvenor Square area rather than Leicester Square. The Leicester Square connection may relate to other American diplomatic or commercial figures in the post-war period. Visitors should be aware that the specific building no longer survives — the north side of Leicester Square was substantially redeveloped in the 19th and 20th centuries.
Key Figures
- John Adams - First American Minister to Britain 1785-1788, later second President of the United States
- Abigail Adams - Wife of John Adams, prolific correspondent who documented their London experience
- Thomas Jefferson - Visited Adams in London in 1786; the two toured English gardens together
- John Jay - Secretary for Foreign Affairs who directed Adams's diplomatic instructions from New York
- George III - Received Adams's credentials in a significant moment of post-war reconciliation
What's There Today
Leicester Square today is one of London's busiest entertainment districts, dominated by cinemas, restaurants, and the TKTS theatre ticket booth in the central garden. The historic buildings of the 18th century have been almost entirely replaced by Victorian and modern commercial structures. The square's central garden contains a statue of Shakespeare and busts of notable former residents, including William Hogarth and Sir Joshua Reynolds. There is no specific marker for Savile House or the American diplomatic presence, though the area's historical character as a fashionable residential square in the Georgian period is well documented.
The site is immediately accessible from Leicester Square Underground station. While there is little physical evidence of the 18th-century square, visitors can appreciate the location's centrality to Georgian London — it was a short walk from the political world of Westminster and the commercial City. For those tracing American diplomatic history in London, a visit here pairs well with the American Embassy's historic locations and the Adams residences in Grosvenor Square.
Sources
- McCullough, David, John Adams (Simon & Schuster, 2001)
- Adams, John, The Works of John Adams, ed. Charles Francis Adams (Little, Brown, 1856), vol. 8
- Adams, Abigail, Letters of Mrs. Adams, ed. Charles Francis Adams (Little, Brown, 1848)
- Survey of London, vols. 33-34, "The Parish of St. Anne, Soho" (London County Council, 1966)
- Butterfield, L.H., ed., Adams Family Correspondence (Harvard University Press, 1963-)
St James's Palace
Diplomatic
Historical Significance
St James's Palace holds a singular place in the history of Anglo-American relations as the site where John Adams, the first American minister to Great Britain, presented his credentials to King George III on 1 June 1785. This was a moment of profound symbolic importance: the representative of a nation that had fought a war of independence stood before the monarch against whom that war had been waged. Both men were visibly moved. Adams's account of the audience, recorded in his diary and letters, describes George III as gracious, stating that he would be the first to welcome the friendship of the United States as an independent power. Adams himself was nearly overcome with emotion.
The palace had served as the sovereign's official court since the reign of Henry VIII, and foreign ambassadors were (and still are) formally accredited to the "Court of St James's." During the Revolutionary period, it was the setting for audiences and levees where colonial agents, and later American diplomats, conducted business. The palace was where the political relationship between Britain and its American colonies was mediated at the highest level. Benjamin Franklin, as colonial agent, would have attended functions here before the breach became irreparable.
Adams's reception at St James's marked the beginning of the formal diplomatic relationship between the United States and Great Britain. His tenure as minister (1785-1788) was often frustrating, as British officials were slow to implement terms of the Treaty of Paris and trade negotiations proved difficult. Nevertheless, the initial audience remains one of the most important ceremonial moments in the history of the "special relationship." Adams later reflected on the experience in letters to John Jay, then Secretary of Foreign Affairs.
Key Figures
- John Adams - First American minister to Great Britain; presented credentials at St James's on 1 June 1785
- King George III - Received Adams and acknowledged American independence
- Abigail Adams - Accompanied John Adams to London; presented to the King and Queen at court
- Benjamin Franklin - Attended the court as colonial agent before the Revolution
- Thomas Jefferson - Visited Adams in London in 1786 and was also presented at court
What's There Today
St James's Palace remains a working royal palace and is the senior palace of the sovereign, though the monarch's primary residence shifted to Buckingham Palace in 1837. Foreign ambassadors are still formally accredited to the Court of St James's. The palace is not regularly open to the public, making it one of the more difficult sites on the trail to visit. However, its Tudor gatehouse on Pall Mall is one of London's most recognisable landmarks and can be viewed from the street.
The exterior of the palace, including the gatehouse, the Chapel Royal, and the state apartments, retains much of its historic character. Changing of the Guard ceremonies take place in the adjacent Friary Court and can be observed by the public. The Chapel Royal is occasionally open for Sunday services. The palace is located between Pall Mall and The Mall, a short walk from Green Park Underground station. Visitors can combine a visit with nearby sites including Buckingham Palace, the Mall, and St James's Park.
Sources
- Adams, John, The Works of John Adams, ed. Charles Francis Adams (Little, Brown, 1856), vol. 8
- Adams Family Papers, Massachusetts Historical Society, "John Adams to John Jay, 2 June 1785"
- Butterfield, L.H., ed., Diary and Autobiography of John Adams (Harvard University Press, 1961)
- Historic Royal Palaces, "St James's Palace," www.hrp.org.uk
- McCullough, David, John Adams (Simon & Schuster, 2001)
All Hallows by the Tower
Commercial
Historical Significance
All Hallows by the Tower, founded in AD 675, is the oldest church in the City of London and occupies a site of extraordinary significance to British-American history. Its position on Byward Street, overlooking the Tower of London and adjacent to the historic Custom House and the wharves of the Port of London, places it at the commercial heart of the transatlantic trading world that ultimately gave rise to the American Revolution.
The church's most direct American connection predates the Revolution by more than a century: William Penn, the founder of Pennsylvania, was baptised here on October 23, 1644. His father, Admiral Sir William Penn, saved the church during the Great Fire of London in 1666 by ordering his men to blow up surrounding buildings to create firebreaks. Penn received his early schooling in the church schoolroom before going on to establish the colony that would become one of the most important of the thirteen rebellious provinces.
The church's post-war American connection is equally notable: John Quincy Adams, who would become the sixth President of the United States, married Louisa Catherine Johnson at All Hallows on July 26, 1797. Adams was then serving as American Minister to the Netherlands and was in London on diplomatic business. Both the Penn baptismal register and the Adams marriage register are on display in the church's Undercroft Museum, providing tangible documentary links between this ancient London church and the founding of America.
Key Figures
- William Penn - Founder of Pennsylvania; baptised at All Hallows 1644
- Admiral Sir William Penn - Father of William Penn; saved the church from the Great Fire of 1666
- John Quincy Adams - Sixth President of the United States; married Louisa Catherine Johnson at All Hallows in 1797
- Louisa Catherine Johnson - American-born wife of John Quincy Adams; married at All Hallows
What's There Today
All Hallows by the Tower is an active Anglican parish church, open to visitors Monday through Friday 8am-6pm and weekends 10am-5pm. Admission is free, with a donations box available. The Undercroft Museum houses a remarkable collection spanning the church's entire history, including a Roman tessellated floor from the second century, Saxon artefacts, and the historic church registers recording Penn's baptism and Adams's marriage. A replica of Penn's baptismal font is displayed near the crypt exit (the original font is now in Christ Church, Pennsylvania). Volunteer guides are available most weekdays from 10:30am to 4pm and can offer short tours. The church is the guild church of Toc H, an international Christian movement. The nearest tube station is Tower Hill (District and Circle lines), which has step-free access via lifts.
Sources
- All Hallows by the Tower, official website (ahbtt.org.uk)
- "All Hallows-by-the-Tower," Wikipedia
- Britain Express, "All Hallows-by-the-Tower"
- "William Penn: The Birth, Baptism, and Burial of Pennsylvania's Founder," Anglo-American Almanac (2023)
Bank of England
Commercial
Historical Significance
The Bank of England played a central, if often overlooked, role in the American Revolution by financing the British war effort. The enormous cost of prosecuting a war three thousand miles across the Atlantic -- estimated at over 100 million pounds, a staggering sum for the period -- was managed through government borrowing, and the Bank was the primary mechanism through which the national debt was administered. The Bank underwrote government bonds, managed debt instruments, and ensured that the Treasury could continue to fund military operations, naval expeditions, and the supply chains that sustained British forces in America.
The financial strain of the American war had profound consequences. Britain's national debt roughly doubled during the conflict, a burden that shaped fiscal policy for decades afterward. The difficulty of sustaining this level of expenditure was one of the factors that eroded political support for continuing the war. The Chancellor of the Exchequer, Lord North (who doubled as Prime Minister), faced persistent parliamentary criticism over war costs. The Bank's role in managing this financial crisis was essential but largely invisible to the public -- its clerks and directors enabling the military campaigns that generals and admirals conducted on the other side of the Atlantic.
It is worth noting the irony that the American war was in part provoked by Britain's attempts to recoup the costs of the Seven Years' War through colonial taxation. The Stamp Act, Townshend duties, and tea tax were all designed to generate revenue to service the national debt -- a debt managed by the Bank of England. The war that resulted from these taxation disputes then generated far greater debt than the original sums Parliament had sought to raise, a fiscal circle that the Bank had to manage throughout.
Key Figures
- Lord North (Frederick North) - Prime Minister and Chancellor of the Exchequer who managed war finances through Parliament
- Bank of England directors - The Court of Directors oversaw the institution's operations during the war period
- Charles Jenkinson - Secretary at War and later President of the Board of Trade, closely involved in war financing
- Isaac Barre - Opposition MP who challenged government spending on the war
What's There Today
The Bank of England remains at its historic location on Threadneedle Street in the City of London. The current building, designed by Sir Herbert Baker in the 1920s-1930s, incorporates elements of Sir John Soane's earlier structure, though Soane's Bank (built 1788-1833) itself post-dates the Revolutionary period. The Bank's outer curtain wall, designed by Soane, survives and gives a sense of the institution's imposing presence.
The Bank of England Museum, located within the building, is free to visit and open Monday to Friday. The museum covers the Bank's history from its founding in 1694 to the present and includes displays on the 18th-century financial system. While the exhibits do not focus specifically on the American Revolution, they provide essential context for understanding how Britain financed its military campaigns. The museum is accessible from Bank Underground station. For Heritage Trail visitors, this site pairs naturally with nearby sites including the East India House Site, Lloyd's Coffee House Site, and the Guildhall.
Sources
- Clapham, Sir John, The Bank of England: A History, 2 vols. (Cambridge University Press, 1944)
- Brewer, John, The Sinews of Power: War, Money and the English State, 1688-1783 (Unwin Hyman, 1989)
- Dickson, P.G.M., The Financial Revolution in England: A Study in the Development of Public Credit, 1688-1756 (Macmillan, 1967)
- Bank of England Museum, bankofengland.co.uk/museum
- Conway, Stephen, The British Isles and the War of American Independence (Oxford University Press, 2000)
Carolina Coffee House Site
Commercial
Historical Significance
The Carolina Coffee House on Birchin Lane in the City of London was, for more than a century, the primary commercial nerve center connecting Britain to the Carolina colonies. Established in the 1670s, shortly after the founding of the Carolina proprietary colony, it served as the London headquarters for merchants, planters, ship captains, and agents whose livelihoods depended on transatlantic trade with Charles Town (Charleston) and the Carolina lowcountry. By the time of the American Revolution, the Carolina Coffee House had accumulated over a hundred years of commercial relationships, making it one of the most significant sites in London for understanding the economic dimensions of the Anglo-American rupture.
The coffeehouse operated on the model common to the City of London's commercial district, where specific houses served as informal exchanges for particular trades and regions. Just as Lloyd's Coffee House served marine insurance brokers and Jonathan's Coffee House served stock jobbers, the Carolina Coffee House was where anyone with business in the Carolinas -- whether buying rice, arranging shipping, negotiating debts, or seeking news from the colony -- came to transact. Letters from Carolina were directed to the coffeehouse, ship departure notices were posted there, and merchants maintained their London correspondence addresses at the house. It functioned, in effect, as an unofficial consulate and chamber of commerce for the Carolina trade, decades before such institutions existed in formal terms.
Henry Laurens, the South Carolina planter, merchant, and future president of the Continental Congress, was among the most prominent Americans to conduct business at the Carolina Coffee House during his time in London. Laurens spent extended periods in England during the 1770s, managing his commercial interests and overseeing the education of his sons. His time in London gave him a firsthand understanding of the metropolitan end of the colonial trading system -- the networks of credit, commission agents, and shipping firms that linked Carolina's rice and indigo plantations to European markets. Laurens's later prominence in the Revolution, including his capture at sea by the British in 1780 and his imprisonment in the Tower of London, gave his earlier London commercial life a retrospective significance. The connections he maintained through venues like the Carolina Coffee House were the same connections that war would sever.
The Carolina trade that the coffeehouse facilitated was inseparable from the institution of slavery. Carolina's primary exports -- rice, indigo, and naval stores -- were produced by enslaved African labor, and the merchants who gathered at Birchin Lane were participants in an economic system built on human bondage. Some of the same merchants also had interests in the transatlantic slave trade itself. The Carolina Coffee House thus represents a dimension of the Revolution's London story that is often overlooked: the war disrupted not only political relationships but also deeply entrenched commercial networks that had enriched both colonial planters and London merchants for generations. When the war severed trade between Britain and the rebelling colonies, the Carolina Coffee House's century-old function as a hub for that commerce became obsolete. The coffeehouse survived into the nineteenth century but never regained its earlier importance. The postwar reorganization of Atlantic trade, with the new United States developing direct commercial relationships outside the old colonial framework, rendered the colonial-era coffeehouses redundant.
Key Figures
- Henry Laurens -- South Carolina planter, merchant, and president of the Continental Congress (1777-78), who used the Carolina Coffee House as a base for commercial operations during his years in London
- Carolina merchants and factors -- The unnamed community of traders, commission agents, and ship captains who constituted the regular clientele and maintained the coffeehouse's role as the commercial hub for Carolina trade
- Plantation traders -- Merchants involved in the rice, indigo, and naval stores trades that formed the economic backbone of the Carolina colonies and drove transatlantic commerce through the City of London
- Ralph Izard -- South Carolina planter and diplomat who moved in the same London circles as Laurens and later served as a commissioner to the court of Tuscany during the Revolution
What's There Today
Nothing remains of the Carolina Coffee House. Birchin Lane, a narrow street running south from Cornhill in the heart of the City of London, has been entirely rebuilt since the eighteenth century. The address at 25 Birchin Lane -- the approximate site of the coffeehouse -- is now occupied by modern office buildings that serve the financial services firms concentrated in this part of the Square Mile. There is no plaque, marker, or interpretive signage commemorating the coffeehouse or its role in transatlantic commerce. The street name survives, and Birchin Lane retains its character as a narrow City lane, but the buildings, trades, and atmosphere of the eighteenth century have been entirely replaced.
Despite the absence of physical remains, Birchin Lane is worth visiting as part of a walk through the City of London's historic coffeehouse district. The lane is located between the Bank of England and the Royal Exchange to the west and Leadenhall Street to the east, in an area that was the epicenter of London's global commercial networks in the seventeenth and eighteenth centuries. Lloyd's of London originated in a coffeehouse on nearby Lombard Street. The East India Company's headquarters were a short walk away on Leadenhall Street. This concentration of commercial sites helps visitors understand the economic infrastructure of empire that the American Revolution disrupted. The nearest Underground station is Bank (Central, Northern, Waterloo & City, and Elizabeth lines), approximately three minutes' walk to the west. Monument (District and Circle lines) is also nearby. The area is busiest on weekdays during business hours and considerably quieter on weekends.
Sources
- Pearson, Edward A. "The Heart of the Maritime World: Carolina Merchants in London." In The Atlantic World, Oxford Academic, 2021.
- "Carolina Coffee House." Charleston County Public Library, South Carolina Room Digital Collections.
- Cowan, Brian. The Social Life of Coffee: The Emergence of the British Coffeehouse. New Haven: Yale University Press, 2005.
- Hamer, Philip M., et al., eds. The Papers of Henry Laurens. 16 vols. Columbia: University of South Carolina Press, 1968-2003.
- Hancock, David. Citizens of the World: London Merchants and the Integration of the British Atlantic Community, 1735-1785. Cambridge: Cambridge University Press, 1995.
Custom House
Commercial
Historical Significance
The Custom House on Lower Thames Street stands at the administrative heart of the trade disputes that drove the American colonies toward revolution. For centuries, this stretch of the Thames waterfront served as the headquarters of His Majesty's Customs, the bureaucratic apparatus responsible for collecting duties on all goods entering and leaving British ports. Every barrel of Virginia tobacco, every bale of Carolina indigo, every cask of New England rum that arrived in London passed through the regulatory oversight exercised from this site. The Customs Board, sitting in their chambers here, issued the instructions, appointed the collectors, and designed the enforcement mechanisms that colonists came to regard as instruments of economic oppression.
The relationship between the Custom House and the American Revolution is not one of dramatic single events but of cumulative administrative pressure that built over decades. The Navigation Acts, first enacted under Cromwell and refined through the Restoration period, required that colonial trade flow through British ports and British ships. Enforcement was lax for much of the early eighteenth century, a period of what Edmund Burke later called "salutary neglect." But after the Seven Years' War ended in 1763, the British government, burdened with enormous war debts, resolved to tighten collection and extract greater revenue from colonial trade. The Sugar Act of 1764, the Stamp Act of 1765, and the Townshend Duties of 1767 all represented efforts to make the colonies pay a larger share of imperial expenses, and the machinery for enforcing these measures radiated outward from the Custom House.
It was the Customs Board, operating from this site, that dispatched the commissioners and collectors who became some of the most hated figures in colonial America. The American Board of Customs Commissioners, established in 1767 and headquartered in Boston, reported back to London and implemented policies devised in these riverside offices. When colonial merchants evaded duties through smuggling, it was the Custom House that authorized the use of writs of assistance, the general search warrants that allowed customs officers to enter private homes and warehouses without specific cause. James Otis's famous 1761 speech against the writs, which John Adams later called "the first scene of the first act of opposition to the arbitrary claims of Great Britain," was an argument directed ultimately against the authority emanating from this building. The seizure of John Hancock's sloop Liberty in Boston Harbor in 1768, which provoked riots and hastened the deployment of British troops to Boston, was carried out under orders that traced back to the commissioners in London.
The Custom House also figured in the broader economic warfare that accompanied the Revolution. After hostilities began, the Customs Board managed the commercial blockade of the rebellious colonies, issued licenses for privateers, and oversaw the complex business of prize goods, confiscated cargoes brought into British ports by the Royal Navy and loyalist privateers. The building was, in effect, the financial front line of the war, the place where economic pressure was designed, calibrated, and applied against the American insurgency.
Key Figures
- Charles Townshend - Chancellor of the Exchequer who devised the Townshend Revenue Acts of 1767, imposing duties on glass, lead, paint, paper, and tea imported into the colonies; the enforcement apparatus ran through the Customs Board headquartered here
- Customs Commissioners - The five-member American Board of Customs Commissioners, established 1767 in Boston, answered to the London Customs Board and became a lightning rod for colonial resistance
- John Hancock - Boston merchant whose sloop Liberty was seized by customs officers in 1768 for alleged smuggling, an enforcement action authorized through the London customs hierarchy; later became the first signer of the Declaration of Independence
- Colonial merchants and smugglers - Traders throughout British America who evaded, protested, and ultimately rejected the trade regulations administered from this building
What's There Today
The current Custom House is not the building that stood during the American Revolution. The eighteenth-century structure was replaced by the present building, designed by David Laing and completed between 1813 and 1817, with a grand river facade later added by Sir Robert Smirke in the 1820s. It is a Grade I listed building, recognized by Historic England (listing 1359193) as one of London's most significant neoclassical public buildings. The Long Room on the first floor, where customs business was conducted, stretches nearly 60 meters and is one of the most impressive interior spaces in the City of London.
HM Revenue and Customs vacated the building in 2021, ending centuries of continuous customs use on this site. As of the most recent reports, the building is undergoing planned conversion into a luxury hotel, though its listed status ensures that its principal architectural features will be preserved. The exterior and river frontage remain visible and impressive. The building sits on Lower Thames Street, between London Bridge and the Tower of London, and is easily reached from Monument Underground station (District and Circle lines), a three-minute walk to the west, or Tower Hill station (District and Circle lines), approximately five minutes to the east. The riverside walk along the Thames Path offers excellent views of the facade. Visitors should note that interior access depends on the progress of the redevelopment; checking current status before visiting is advisable.
Sources
- Historic England, "Custom House, City of London," listing entry 1359193, https://historicengland.org.uk/listing/the-list/list-entry/1359193
- Thomas, Peter D.G. The Townshend Duties Crisis: The Second Phase of the American Revolution, 1767-1773. Oxford: Clarendon Press, 1987
- Barrow, Thomas C. Trade and Empire: The British Customs Service in Colonial America, 1660-1775. Cambridge, MA: Harvard University Press, 1967
- "Custom House," in Survey of London, vols. 15 and 29. London County Council / Greater London Council
East India House Site
Commercial
Historical Significance
The East India Company, one of the most powerful commercial enterprises in history, played a direct and catalytic role in triggering the American Revolution. In 1773, the Company was in severe financial difficulty, holding an enormous surplus of tea in its London warehouses. To rescue the Company, Lord North's government passed the Tea Act (1773), which allowed the East India Company to sell tea directly to the American colonies, bypassing colonial merchants and undercutting their prices. While the Act actually made tea cheaper for American consumers, it was perceived as a device to establish the principle of parliamentary taxation and to create a monopoly that threatened colonial commerce. The result was the Boston Tea Party of 16 December 1773, when colonists in Boston destroyed 342 chests of East India Company tea -- an act of defiance that set in motion the chain of events leading to war.
East India House on Leadenhall Street was the Company's headquarters, where its directors met, its vast correspondence was managed, and the decisions were made that shaped commerce across Asia and, inadvertently, the fate of the American colonies. The Company's political influence in Parliament was substantial: many MPs held Company stock or had commercial interests tied to its operations. This influence helped secure passage of the Tea Act, a legislative intervention that solved the Company's short-term financial problems while creating a long-term political catastrophe.
The East India Company's role in the American Revolution illustrates how interconnected the British Empire's commercial and political networks were. A financial crisis affecting trade with India and China produced legislation that provoked resistance in Boston, which in turn led to the Coercive Acts, the Continental Congress, and ultimately independence. The Company's Leadenhall Street headquarters was the node where these global commercial and political forces intersected.
Key Figures
- Lord North - Prime Minister whose government passed the Tea Act to rescue the Company
- East India Company Directors - The Court of Directors who lobbied for relief from their tea surplus
- Samuel Adams - American patriot who helped organise resistance to the Tea Act in Boston
- Frederick, Lord North - Designed the Tea Act as both a commercial rescue and a revenue measure
- Governor Thomas Hutchinson - Royal Governor of Massachusetts who insisted the tea be landed, precipitating the crisis
What's There Today
East India House was demolished in 1861, and the site on Leadenhall Street is now occupied by the Lloyd's of London building (Richard Rogers, 1986) and surrounding modern commercial buildings. A heritage plaque marks the approximate location of the original East India House. No physical remains of the Company's headquarters survive above ground.
The site is in the heart of the City of London's financial district, easily accessible from Bank or Aldgate Underground stations. While there is nothing to enter or tour at the site itself, the heritage plaque provides a marker for Heritage Trail visitors. The nearby Leadenhall Market, a Victorian covered market on the site of the medieval market, adds visual interest to the area. For a deeper understanding of the East India Company's history, visitors can explore collections at the British Library (which holds the Company's archives) and the Victoria and Albert Museum. This site pairs well with the Bank of England and Lloyd's Coffee House Site for a walking tour of the commercial forces behind the Revolution.
Sources
- Labaree, Benjamin Woods, The Boston Tea Party (Oxford University Press, 1964)
- Bowen, H.V., The Business of Empire: The East India Company and Imperial Britain, 1756-1833 (Cambridge University Press, 2006)
- Thomas, Peter D.G., The Townshend Duties Crisis (Oxford University Press, 1987)
- Unger, Harlow Giles, American Tempest: How the Boston Tea Party Sparked a Revolution (Da Capo Press, 2011)
- Sutherland, Lucy S., The East India Company in Eighteenth-Century Politics (Oxford University Press, 1952)
Jamaica Wine House
Commercial
Historical Significance
The Jamaica Wine House stands on one of the most historically layered commercial sites in the City of London. Its story begins in 1652, when Pasqua Rosee, an Armenian or Greek servant of a Levant merchant named Daniel Edwards, opened London's first coffee house in St Michael's Alley. The establishment quickly became a gathering place for merchants, ship captains, and traders, establishing a pattern of commerce conducted over cups of coffee that would define London's financial district for centuries. By the late seventeenth century, the coffee house had become closely associated with Caribbean trade and was known as the Jamaica Coffee House, reflecting the growing dominance of West Indian commerce in the life of the City.
Throughout the eighteenth century, the Jamaica Coffee House served as the unofficial headquarters for merchants, planters, ship owners, and insurance underwriters engaged in trade with the West Indies. It was here that news from Jamaica, Barbados, and the other sugar islands arrived first, where cargoes were bought and sold, and where the intricate financial arrangements underpinning the Atlantic economy were negotiated. The coffee house functioned as a commodities exchange, an insurance office, and an intelligence hub rolled into one. Merchants dealing in sugar, rum, tobacco, and enslaved people conducted their business within its walls, making it a central node in the same transatlantic mercantile network that the American Revolution would profoundly disrupt.
When the American colonies declared independence and war broke out, the commercial world centred on the Jamaica Coffee House felt the consequences acutely. American privateers and the Continental Navy threatened West Indian shipping lanes, disrupting the flow of goods between the Caribbean, North America, and Britain. The sugar islands, heavily dependent on North American timber, grain, and livestock for provisioning, faced severe shortages. French entry into the war in 1778 further imperilled Caribbean trade, as France and later Spain and the Dutch Republic attacked British possessions in the West Indies. The merchants who gathered at the Jamaica Coffee House watched their profits shrink and their ships fall prey to enemy action. Insurance rates soared, and the underwriters who had long done business at the coffee house faced mounting claims. The Revolution thus struck at the heart of the commercial ecosystem that the Jamaica Coffee House represented, severing the established trade routes between the North American colonies, the Caribbean, and the mother country that had enriched the City of London for generations.
The site also illuminates how Britain's commercial classes responded to the crisis. Many West Indies merchants initially supported conciliation, recognising that disrupted trade harmed their interests. As the war dragged on, opinion fractured: some profited from wartime contracts and privateering, while others faced ruin. The wealth debated and defended at the Jamaica Coffee House rested overwhelmingly on enslaved labour. The sugar that made the West Indies so valuable was produced under conditions of extraordinary brutality, and the planters' lobby that gathered here wielded outsized influence over war policy precisely because Caribbean revenues were vital to the Treasury. The Revolution's rhetoric of liberty thus circulated in a commercial space whose entire reason for existence was an economy built on human bondage.
Key Figures
- Pasqua Rosee - Armenian or Greek immigrant who opened London's first coffee house on this site in 1652, establishing the tradition of commercial life conducted in coffee houses that would define the City for centuries.
- West Indies merchants and planters - The collective community of traders, sugar planters, and ship owners who used the Jamaica Coffee House as their unofficial exchange, and whose livelihoods were disrupted by the Revolution's impact on Atlantic trade.
- Caribbean traders and underwriters - Insurance underwriters and commodity dealers who assessed risk and set prices for West Indian trade at the coffee house, facing escalating losses as the war expanded across the Atlantic.
What's There Today
The Jamaica Wine House occupies the same narrow site in St Michael's Alley, a pedestrian passage running between Cornhill and St Michael's Cornhill churchyard in the heart of the City of London. The current building dates from the Victorian era and is Grade II listed, featuring an attractive facade of dark wood and etched glass that evokes the atmosphere of a traditional City establishment. The pub retains its historic name and continues to operate as a popular drinking spot for City workers, serving food and drink in a series of intimate, wood-panelled rooms. A plaque on the exterior wall commemorates the site as the location of London's first coffee house, providing a direct link to its seventeenth-century origins.
The Jamaica Wine House is open during standard pub hours, typically Monday to Friday, catering primarily to the City lunch and after-work crowd; it is generally closed on weekends. The nearest Underground station is Bank (Central, Northern, Waterloo & City, and DLR lines), a short walk south along Cornhill. The pub sits within the wider network of historic alleys and courts between Cornhill and Lombard Street, an area rich in financial history and well worth exploring on foot. No admission is charged.
Sources
- Jamaica Wine House official website, https://www.jamaicawinehouse.co.uk
- "Jamaica Wine House," Atlas Obscura, https://www.atlasobscura.com/places/jamaica-wine-house
- Ellis, Markman, The Coffee House: A Cultural History (London: Weidenfeld & Nicolson, 2004).
- Cowan, Brian, The Social Life of Coffee: The Emergence of the British Coffeehouse (New Haven: Yale University Press, 2005).
- Sheridan, Richard B., Sugar and Slavery: An Economic History of the British West Indies, 1623-1775 (Baltimore: Johns Hopkins University Press, 1974).
Lloyd's Coffee House Site
Commercial
Historical Significance
Lloyd's Coffee House, originally established by Edward Lloyd in the 1680s on Tower Street and later relocated to Lombard Street in the City of London, was the birthplace of the marine insurance market that underwrote the vast maritime enterprise of the British Empire. During the American Revolutionary War, Lloyd's was the central venue where underwriters assessed and accepted the risks of insuring ships and cargoes traversing the Atlantic and other waters made perilous by war. The conflict dramatically increased the dangers facing British merchant shipping, as American privateers and, after 1778, the French and Spanish navies posed serious threats to commercial vessels.
The American war transformed the insurance market at Lloyd's. Premiums soared as losses to privateers and enemy warships mounted. American privateers proved devastatingly effective, capturing an estimated 3,000 British merchant vessels over the course of the war (though precise figures remain debated among historians). Underwriters at Lloyd's bore a significant share of these losses, and the escalating cost of insurance contributed to the economic pressure on the British government to end the conflict. Lloyd's also published Lloyd's List, a shipping intelligence bulletin that tracked vessel movements and losses, providing the mercantile community with essential information about the progress and impact of the war at sea.
Lloyd's Coffee House was more than an insurance market; it was a hub of commercial intelligence and maritime news. Merchants, ship owners, captains, and government officials gathered there to exchange information about convoy schedules, enemy fleet movements, and the fate of individual vessels. By the 1770s, Lloyd's had evolved from a simple coffee house into a structured market with its own rules and practices, and during the American war it moved (in 1774) to new premises in the Royal Exchange, solidifying its institutional character.
Key Figures
- John Julius Angerstein - Leading Lloyd's underwriter during the American war period, later instrumental in the market's formalisation; his art collection formed the nucleus of the National Gallery
- Brook Watson - Prominent London merchant and Lloyd's subscriber, later Lord Mayor of London; had personal connections to North America (he lost a leg to a shark in Havana harbour as a youth, famously depicted by John Singleton Copley)
- Lord Sandwich - First Lord of the Admiralty, whose naval strategy directly affected the risks underwritten at Lloyd's
- American privateer captains - Including John Paul Jones, whose raids in British waters caused particular alarm among Lloyd's underwriters
What's There Today
The Lombard Street site of Lloyd's Coffee House is marked by a blue plaque, though the original building no longer survives. The coffee house's 1774 move to the Royal Exchange is commemorated within that building, which still stands at the junction of Threadneedle Street and Cornhill. The modern Lloyd's of London operates from the striking Richard Rogers-designed building (opened 1986) on Lime Street, a short walk from the original sites.
The Lloyd's building itself is not generally open to the public, but its dramatic inside-out architecture is a notable sight from the street. The Royal Exchange, where Lloyd's operated from 1774 to 1928, is now a luxury shopping arcade and is open to visitors. The Bank of England Museum nearby covers the financial history of the City during the 18th century. The area around Lombard Street and Cornhill retains the historic street pattern of the City, though virtually all buildings postdate the American war. The site is accessible from Bank Underground station.
Sources
- Wright, Charles, and C. Ernest Fayle. A History of Lloyd's. Macmillan, 1928.
- Kingston, Christopher. "Marine Insurance in Britain and America, 1720-1844." Journal of Economic History 67, no. 2 (2007): 379-409.
- Sutton, Jean. Lords of the East: The East India Company and Its Ships. Conway Maritime Press, 2000. (Covers Lloyd's role in broader maritime insurance context.)
- Patton, Robert H. Patriot Pirates: The Privateer War for Freedom and Fortune in the American Revolution. Pantheon, 2008.
- Lloyd's List, historical editions (available at the Guildhall Library, London).
New England Coffee House Site
Commercial
Historical Significance
In the eighteenth century, London's coffee houses were far more than places to drink coffee. They served as the primary nodes of Britain's commercial and political intelligence networks, each house attracting a particular clientele and specialising in a particular trade or interest. The New England Coffee House on Threadneedle Street, in the heart of the City of London, was the most important venue for intelligence and commerce relating to Britain's North American colonies. Situated steps from the Bank of England and the Royal Exchange, it occupied a central position in the financial district where merchants, ship captains, colonial agents, and government officials gathered to exchange news, negotiate contracts, and conduct the business of empire.
For those tracking the escalating crisis between Britain and her American colonies, the New England Coffee House was where the news broke first. When ships arrived from Boston, New York, or Philadelphia, their captains and passengers made their way to Threadneedle Street to report what they had seen and heard. It was here that London first learned of colonial reactions to the Stamp Act, the Boston Massacre, the Tea Party, and eventually the outbreak of armed hostilities at Lexington and Concord. The house functioned as an unofficial newsroom, with its patrons constituting an informed public whose reactions helped shape both commercial and political responses to the unfolding revolution. Merchants assessed the impact of non-importation agreements on their bottom lines, insurance underwriters recalculated risks for transatlantic shipping, and colonial agents gauged the political mood before lobbying Parliament and the ministry.
The coffee house also served as a node in the intelligence networks that both sides exploited during the conflict. The line between commercial intelligence and espionage was often blurred in the eighteenth century. Ship captains carried letters, newspapers, and verbal reports alongside their cargoes, and the information they delivered to venues like the New England Coffee House shaped decisions made by merchants, ministers, and military planners alike. Colonial agents such as Benjamin Franklin, before his departure from London in 1775, frequented the City's coffee houses to stay informed and to cultivate relationships with sympathetic merchants. The house was also a key venue for the New England merchant community resident in London, who maintained ties to their colonial counterparts and facilitated the flow of goods, capital, and information across the Atlantic.
The broader network of American-themed coffee houses along Threadneedle Street -- including the Virginia and Baltick Coffee House nearby -- together constituted what historians have called the heart of London's maritime commercial world. These establishments collectively handled much of the practical business of transatlantic trade, from arranging shipping and insurance to settling debts and recruiting crews. The disruption of this commercial ecosystem by the Revolutionary War had profound consequences for the City of London, contributing to the economic pressures that eventually pushed many merchants toward supporting a negotiated peace.
Key Figures
- New England merchants -- London-based traders in colonial goods who used the coffee house as their primary commercial venue and intelligence exchange
- Colonial agents -- Official representatives of colonial assemblies in London who frequented City coffee houses to monitor commercial and political developments
- Ship captains -- Masters of transatlantic vessels who delivered news, letters, and intelligence from the colonies alongside their cargoes
- Lloyd's underwriters -- Marine insurance brokers operating nearby whose risk assessments for American trade were shaped by intelligence gathered at such venues
What's There Today
The site of the New England Coffee House at 60-61 Threadneedle Street is today occupied by a modern office building that serves as the London offices of Berenberg Bank, one of the world's oldest banks. The original coffee house, like most of its eighteenth-century neighbours, was swept away by successive waves of Victorian and twentieth-century redevelopment in the City of London. There is no blue plaque, marker, or any other indication that this was once the primary intelligence hub for American colonial affairs in the British capital. The absence of any commemoration is striking given the site's significance as the place where London first learned of many of the key events of the American Revolution.
The site is easily reached on foot from Bank Underground station (Central, Northern, Waterloo & City, and Elizabeth lines, plus the DLR), which is less than a minute's walk away. The surrounding area retains its character as the financial heart of London, with the Bank of England directly to the west and the former Royal Exchange building -- now a luxury shopping arcade -- across the street. Visitors interested in the coffee house culture that shaped the Revolutionary era can explore several related sites within a few minutes' walk, including the nearby site of the Virginia and Baltick Coffee House and the area around the Royal Exchange where Lloyd's of London originated. The Museum of London Docklands at West India Quay, accessible via the DLR from Bank, provides broader context on London's maritime trading history.
Sources
- Sheryllynne Haggerty. "Heart of the Maritime World: London's Commercial Coffee Houses and the Geography of Atlantic Trade." In Spaces of Global Knowledge: Exhibition, Encounter and Exchange in an Age of Empire, edited by Diarmid A. Finnegan and Jonathan Jeffrey Wright. Oxford Academic, 2021.
- "Coffee Houses and Postal History." Royal Philatelic Society London, Standing Display, 2019.
- Cowan, Brian. The Social Life of Coffee: The Emergence of the British Coffeehouse. New Haven: Yale University Press, 2005.
- Ellis, Markman. The Coffee House: A Cultural History. London: Weidenfeld & Nicolson, 2004.
Royal Exchange
Commercial
Historical Significance
The Royal Exchange has stood at the commercial heart of London since its founding by Sir Thomas Gresham in 1565, modelled on the bourse in Antwerp. Designed as a covered marketplace where merchants could conduct business sheltered from the weather, it rapidly became the centre of London's commercial and financial life. By the eighteenth century, the Exchange was the most important gathering place for the mercantile community in the British Empire. Different groups of merchants claimed particular areas of the building's arcaded courtyard, and the southwest corner of the Exchange was the recognised meeting place for American merchants and traders involved in colonial commerce. Here, news from the American colonies was exchanged, partnerships were formed, and the business of transatlantic trade was conducted. The Royal Exchange was, in effect, the place where London's relationship with its American colonies was most visibly transacted.
As tensions between Britain and the colonies escalated in the 1770s, the Royal Exchange became a stage for public demonstrations of loyalty and political conviction. One of the most dramatic episodes occurred in 1775, when copies of The Crisis, a radical pamphlet sympathetic to the American cause and sharply critical of the government, were publicly burned at the Royal Exchange by order of the authorities. The pamphlet series, which appeared anonymously between January 1775 and October 1776, attacked the North ministry and defended the rights of the colonists in language that anticipated the arguments of Thomas Paine's more famous pamphlet of the same name. The public burning at the Exchange was intended as a demonstration of official displeasure and a warning to those who sympathised with the American position, but it also illustrated how deeply the American crisis had penetrated the consciousness of London's commercial establishment.
The American merchants who had gathered at the southwest corner of the Exchange found their position increasingly difficult as the conflict deepened. Some were loyalists who supported the Crown, while others had sympathies with the colonial cause. The outbreak of war disrupted the established patterns of trade that had been negotiated on the Exchange floor for decades. American goods became scarce, debts owed by colonial merchants went unpaid, and the insurance costs for transatlantic shipping rose sharply. The Royal Exchange, as the physical hub of this commercial world, felt the impact of every development in the conflict. News of battles, political manoeuvres, and diplomatic initiatives rippled through the Exchange as soon as ships arrived with dispatches from across the Atlantic.
The Exchange also played a role in the broader political discourse surrounding the war. It was a place where petitions were organised, where merchants debated the wisdom of the government's policies, and where the economic consequences of the conflict were most immediately felt. The City of London's mercantile community was not uniformly supportive of the war, and the Exchange was one of the places where dissent could be expressed, albeit cautiously. The burning of The Crisis pamphlet demonstrated that the authorities were alert to the dangers of such dissent, but it could not suppress the underlying economic anxieties that the war provoked among the men who did business at the Royal Exchange.
Key Figures
- Sir Thomas Gresham - Tudor-era merchant and financial agent who founded the original Royal Exchange in 1565, establishing the site as the centre of London's commercial life.
- Thomas Paine - Often associated with The Crisis due to his later pamphlet of the same name; the London pamphlet series burned at the Exchange in 1775 preceded Paine's American work but shared its radical political sympathies.
- American merchants - The community of colonial traders who gathered at the southwest corner of the Exchange, whose commercial networks were fractured by the Revolution.
What's There Today
The current Royal Exchange building is the third on the site, designed by Sir William Tite and opened in 1844 after the second Exchange was destroyed by fire in 1838. It is a grand neoclassical structure with a commanding eight-column portico facing Bank Junction, one of the most recognisable buildings in the City of London. The building ceased to function as a trading exchange in 1939 and was subsequently converted into a luxury retail and dining destination. The interior courtyard, once the open-air meeting place of merchants, is now a covered atrium housing high-end shops and a central bar and restaurant. The building is publicly accessible during shopping and dining hours, and visitors can admire the architecture, including the painted frieze depicting scenes from London's commercial history, without charge.
The Royal Exchange stands at Bank Junction, directly opposite the Bank of England and adjacent to Mansion House. The nearest Underground station is Bank (Central, Northern, Waterloo & City, and DLR lines), with the station exit opening almost directly onto the Exchange's steps. The building is typically open Monday to Saturday for shopping and dining, with some restaurants also open on Sundays. No admission fee is required to enter and explore the building.
Sources
- "Royal Exchange, London," Wikipedia, https://en.wikipedia.org/wiki/Royal_Exchange,_London
- "The Royal Exchange," London Museum, https://www.londonmuseum.org.uk
- Saunders, Ann, The Royal Exchange (London: Guardian Royal Exchange, 1997).
- The Crisis, pamphlet series (London, 1775-1776), held in various collections including the British Library.
Virginia and Baltick Coffee House Site
Commercial
Historical Significance
The Virginia and Baltick Coffee House on Threadneedle Street was one of the most important commercial venues for the transatlantic trade that bound Britain to her American colonies, and its very name change during the Revolutionary War tells the story of how that conflict reshaped London's commercial geography. Originally known as the Virginia Coffee House, the establishment served as the primary meeting place for merchants engaged in the tobacco and plantation trades with Virginia and Maryland. Here, deals were struck for the purchase and sale of tobacco, the chartering of ships, the arrangement of credit, and the settlement of the countless commercial transactions that sustained the colonial economy. The house's transformation into the Virginia and Baltick Coffee House, and eventually into the ancestor of the Baltic Exchange, reflects the dramatic commercial reorientation forced upon London's merchant community by the American Revolution.
The Virginia tobacco trade was one of the pillars of British Atlantic commerce in the eighteenth century. Virginia and Maryland together supplied the vast majority of tobacco consumed in Britain and re-exported to continental Europe, generating enormous wealth for the merchants, factors, and ship owners who managed the trade. The Virginia Coffee House was where these men conducted their daily business, reviewing cargo manifests, checking tobacco prices, reading colonial newspapers, and exchanging the commercial intelligence that was the lifeblood of their trade. The house also served as a social hub for the Virginia merchant community, a place where newcomers were introduced, partnerships were formed, and the informal bonds of trust that underpinned eighteenth-century commerce were maintained.
The outbreak of the Revolutionary War disrupted this trade catastrophically. The non-importation agreements adopted by the Continental Congress, followed by the outbreak of hostilities and the British naval blockade, severed the commercial links that had sustained the Virginia Coffee House's clientele for generations. Merchants who had built their fortunes on American tobacco found themselves facing ruin as their cargoes were confiscated, their debts went uncollected, and their ships were seized or diverted. In response, many of these merchants pivoted to new trades, particularly the growing commerce with the Baltic states, which supplied timber, hemp, tar, and other naval stores that Britain desperately needed for its wartime fleet. The coffee house's name change to the Virginia and Baltick Coffee House, and later simply the Baltic Coffee House, traced this commercial migration in real time. The institution eventually evolved into the Baltic Exchange, which by the nineteenth century had become the world's premier marketplace for shipping and freight.
The story of the Virginia Coffee House thus encapsulates the broader economic consequences of the American Revolution for the City of London. The war did not merely sever a political connection; it destroyed established commercial networks, bankrupted merchants, and forced the reorientation of British trade toward new markets and commodities. The human cost of this disruption -- the Virginia merchants who lost their livelihoods, the planters whose debts were never repaid, the workers in the tobacco processing and shipping industries who lost their employment -- was substantial, and it contributed to the growing war-weariness that eventually made a negotiated peace politically feasible.
Key Figures
- Virginia tobacco merchants -- London-based traders in Virginia and Maryland tobacco who used the coffee house as their primary commercial exchange and were devastated by the wartime disruption of trade
- Maryland planters and factors -- Colonial producers and their London agents who conducted business at the Virginia Coffee House and struggled to recover debts owed by colonial partners after the war
- Baltic Exchange members -- Successors to the Virginia merchants who pivoted to Baltic trade during the Revolution, eventually establishing the world's leading shipping marketplace
- Ship owners and captains -- Maritime operators who arranged the chartering, insuring, and provisioning of transatlantic and Baltic trading vessels at the coffee house
What's There Today
The history of the Virginia and Baltick Coffee House's physical site is one of multiple relocations and eventual dramatic destruction. The original Threadneedle Street premises gave way as the institution grew, and by the nineteenth century the Baltic Exchange had established itself in purpose-built premises in the City. The Baltic Exchange's final home, at 30 St Mary Axe, was devastated by an IRA bomb on 10 April 1992, killing three people and causing massive structural damage. The site was subsequently cleared and is now occupied by 30 St Mary Axe, popularly known as the Gherkin, Norman Foster's iconic glass tower completed in 2004. The Baltic Exchange itself relocated and continues to operate as a maritime marketplace, though it no longer occupies a single prominent building.
The original Threadneedle Street site at number 58 is in the heart of the City's financial district, within the dense cluster of banks and financial institutions surrounding the Bank of England. The nearest Underground station is Bank (Central, Northern, Waterloo & City, and Elizabeth lines, plus the DLR), less than two minutes' walk away. The Gherkin at 30 St Mary Axe, the most visible successor to the Baltic Exchange, is approximately a five-minute walk to the northeast and is one of London's most recognisable landmarks. Visitors can view the Gherkin's exterior freely, and its upper-floor restaurant is accessible by reservation. The surrounding streets -- Threadneedle Street, Cornhill, and Lombard Street -- retain their character as the historic heart of London's financial world, and a walk through this area connects several sites associated with the commercial dimensions of the Revolutionary War, including the nearby site of the New England Coffee House and the Bank of England itself.
Sources
- "History of the Baltic Exchange." Baltic Exchange official website. https://www.balticexchange.com/en/about-us/history.html
- "Virginia and Baltick Coffee House." Layers of London. Institute of Historical Research, University of London. https://www.layersoflondon.org
- Lillywhite, Bryant. London Coffee Houses: A Reference Book of Coffee Houses of the Seventeenth, Eighteenth, and Nineteenth Centuries. London: George Allen & Unwin, 1963.
- Barney, William L. The Oxford Encyclopedia of the Civil War. New York: Oxford University Press, 2011. (For context on Anglo-American trade networks.)
Protest & Dissent
15 sites
Bow Church (St Mary-le-Bow)
Protest & Dissent
Historical Significance
St Mary-le-Bow, commonly known as Bow Church, stands on Cheapside in the heart of the City of London, an area that during the American Revolutionary War was a centre of pro-American political sentiment and radical agitation. The City of London, governed by its own Corporation and fiercely protective of its traditional liberties, was broadly sympathetic to the American colonists' grievances about taxation without representation. The area around Cheapside, the City's principal commercial thoroughfare, was home to merchants, tradespeople, and artisans whose livelihoods were tied to transatlantic trade and who saw in the American cause a reflection of their own struggles against overbearing executive power.
The City of London Corporation repeatedly petitioned the Crown and Parliament against the war during the 1770s. In 1775, the City presented a remonstrance to George III opposing coercive measures against the American colonies, and the Lord Mayor, John Wilkes, was among the most vocal critics of the government's American policy. Wilkes, who had earlier championed popular liberty and press freedom in his own battles with the Crown, drew explicit parallels between his cause and that of the American colonists. The Cheapside area, as the commercial heart of the City, was where this radical political culture was most visibly expressed, through pamphlets, public meetings, and the lively discourse of coffee houses and taverns.
Bow Church itself was a landmark of civic and ecclesiastical significance. By tradition, only those born within earshot of its bells could claim to be true "Cockneys." While the church was not itself a venue for political meetings during the American war, its prominence as a City of London landmark places it at the centre of the district most associated with pro-American sentiment in the British capital. It should be noted that opinion within the City was not monolithic; while the Corporation's official stance was broadly critical of the war, individual merchants and traders held varying views, particularly as the conflict disrupted their commercial interests in unpredictable ways.
Key Figures
- John Wilkes - Lord Mayor of London (1774-1775) and MP for Middlesex, champion of American colonial rights and popular liberty
- William Beckford - Lord Mayor (d. 1770), earlier champion of City liberties whose political legacy influenced the pro-American stance of the Corporation during the war
- Brass Crosby - Lord Mayor (1770-1771), defended press freedom and the City's independence from Crown interference
- Stephen Sayre - American-born merchant and banker in the City, briefly Sheriff of London, alleged (controversially) to have plotted to seize George III in 1775
- Arthur Lee - American agent in London, maintained contacts in the City's radical circles
What's There Today
St Mary-le-Bow was rebuilt by Sir Christopher Wren after the Great Fire of 1666, and Wren's magnificent steeple, one of his finest, remains a landmark on Cheapside. The church was severely damaged by bombing in 1941 during the Blitz and was reconstructed in the 1950s-1960s by Laurence King, retaining Wren's exterior and steeple while creating a modern interior. The church is an active Church of England parish and is open to visitors during the week; the Norman crypt, which survived both the Great Fire and the Blitz, houses a cafe and chapel.
Cheapside today is a busy commercial street in the City of London, and while the 18th-century streetscape has been replaced by modern offices and shops, the street's layout and Bow Church's position upon it have remained constant since the medieval period. The Guildhall, where the City Corporation debated American policy, is a short walk north. The Bank of England, the Royal Exchange, and the Mansion House (Lord Mayor's residence, built 1739-1752) are all nearby, providing further context for understanding the City's role during the American crisis. The nearest Underground stations are Bank and St Paul's.
Sources
- Rudé, George. Wilkes and Liberty: A Social Study of 1763 to 1774. Oxford University Press, 1962.
- Sainsbury, John. Disaffected Patriots: London Supporters of Revolutionary America 1769-1782. McGill-Queen's University Press, 1987.
- Bradley, Simon, and Nikolaus Pevsner. The Buildings of England: London 1, The City of London. Yale University Press, 1997.
- Conway, Stephen. The British Isles and the War of American Independence. Oxford University Press, 2000.
- The London Metropolitan Archives: Corporation of London records relating to petitions and remonstrances, 1774-1783.
Dr Johnson's House
Protest & Dissent
Historical Significance
Samuel Johnson — poet, essayist, lexicographer, and the dominant literary figure of mid-eighteenth-century England — lived at 17 Gough Square from 1748 to 1759. It was here that he undertook the monumental labour of compiling A Dictionary of the English Language (1755), working in the garret with a team of six copyists. Though Johnson's residence at Gough Square predates the American Revolution by two decades, his connection to the conflict is direct and forceful. In 1775, as the crisis between Britain and its American colonies reached its breaking point, Johnson published Taxation No Tyranny, one of the most combative and intellectually provocative defences of Parliament's right to tax the colonies without their direct representation.
Taxation No Tyranny was commissioned by the government of Lord North as part of a pamphlet war against the Americans and their British sympathizers. Johnson's central argument was that the colonists, having voluntarily emigrated to a territory under British sovereignty, had implicitly consented to the authority of Parliament. He dismissed the American cry of "no taxation without representation" as self-serving rhetoric, noting pointedly that the colonists had shown little interest in representation until they were asked to pay for their own defence. The pamphlet's most famous and devastating line exposed what Johnson saw as the fundamental hypocrisy of the American position: "How is it that we hear the loudest yelps for liberty among the drivers of negroes?" This observation, uncomfortable for the American revolutionaries then and since, struck at the moral contradiction at the heart of a slaveholding society proclaiming universal freedom.
Johnson's opposition to the American cause was rooted in consistent principles rather than mere Tory partisanship. He was a firm believer in Parliamentary sovereignty and deeply sceptical of what he regarded as the colonists' selective invocation of English constitutional rights. At the same time, Johnson was no uncritical supporter of British government policy; he had attacked government corruption and incompetence throughout his career. His position on America was of a piece with his broader political philosophy: authority, properly constituted, must be obeyed, and rebellion against it required a far stronger justification than the Americans had offered.
Johnson's Gough Square house thus represents the intellectual opposition to the American Revolution — the British literary and philosophical tradition that regarded the colonial rebellion as unjustified and its rhetoric as hypocritical. Visiting the house complements the trail's site at Johnson's birthplace in Lichfield, which covers his early life. Together, the two sites offer a full picture of a towering literary figure whose sharp pen served the British cause in the war of ideas that accompanied the military conflict.
Key Figures
- Samuel Johnson — Lexicographer, essayist, and literary critic; author of Taxation No Tyranny (1775), one of the most forceful British intellectual responses to American revolutionary arguments
- James Boswell — Scottish lawyer and Johnson's biographer, whose Life of Samuel Johnson (1791) is the most celebrated biography in the English language; Boswell recorded Johnson's many sharp remarks on the American question
- Frederick, Lord North — Prime Minister whose government commissioned Taxation No Tyranny as part of its public case against the American colonies
- Edmund Burke — Whig politician whose arguments for conciliation with America stood in direct opposition to Johnson's position, representing the other side of the British intellectual debate
What's There Today
Dr Johnson's House at 17 Gough Square is one of the few surviving residential buildings from this part of eighteenth-century London. The house dates from around 1700 and is a fine example of a modest but respectable townhouse of the period. It has been preserved as a museum since 1914 and is open to the public (an admission fee applies; check the website for current hours, as the house is generally closed on Sundays). The interior has been furnished to evoke Johnson's period, and the garret where the Dictionary was compiled is accessible. Displays include first editions, period objects, and information about Johnson's life and work, including his political writings on the American crisis.
Gough Square is a small courtyard tucked between Fleet Street and Holborn, in the historic heart of London's publishing and legal district. The area retains a sense of the labyrinthine lanes and courts that characterized the City of London in Johnson's day, though much of the surrounding built environment dates from later periods, particularly the post-Blitz reconstruction. A statue of Johnson's cat, Hodge, sits outside the house. The site is a short walk from Chancery Lane or Blackfriars Underground stations. For heritage trail visitors, Johnson's House pairs naturally with other City of London sites, and the contrast between Johnson's robust defence of British authority and the revolutionary arguments encountered elsewhere on the trail provides a valuable intellectual counterpoint.
Sources
- Bate, Walter Jackson, Samuel Johnson (Harcourt Brace Jovanovich, 1977) — the standard modern biography and winner of the Pulitzer Prize
- Boswell, James, The Life of Samuel Johnson, LL.D. (1791; numerous modern editions)
- Johnson, Samuel, Taxation No Tyranny: An Answer to the Resolutions and Address of the American Congress (1775)
- DeMaria, Robert, Jr., The Life of Samuel Johnson: A Critical Biography (Blackwell, 1993)
- Dr Johnson's House Trust, museum guidebook and interpretive materials
Essex Street Chapel (Essex Hall)
Protest & Dissent
Historical Significance
The Essex Street Chapel holds a distinctive place in both religious history and the story of the American Revolution. When Theophilus Lindsey opened its doors on 17 April 1774, it became the first explicitly Unitarian place of worship in England -- a congregation that rejected the doctrine of the Trinity openly and by name, at a time when doing so carried serious legal and social consequences. Among the congregation gathered for that inaugural service was Benjamin Franklin, then in London as colonial agent for Pennsylvania, Georgia, New Jersey, and Massachusetts. Franklin's presence was no accident. The Dissenting networks that produced Unitarianism overlapped extensively with the circles of political radicalism that sympathized with the American colonial cause, and Essex Street Chapel quickly became a node in that transatlantic web of reformist thought.
Lindsey had been an Anglican clergyman in Yorkshire before his conscience forced a break. Influenced by the biblical scholarship of men like Samuel Clarke and the scientific rationalism of his close friend Joseph Priestley, Lindsey concluded that the worship of Christ as God lacked scriptural warrant. In 1773, he resigned his comfortable living at Catterick and moved to London to establish a congregation on openly Unitarian principles. The timing was significant. The Feathers Tavern Petition of 1772, which had sought to relax the requirement that Anglican clergy subscribe to the Thirty-Nine Articles, had been defeated in Parliament, making clear that the established Church would not accommodate theological liberalism from within. Lindsey's decision to leave and build something new mirrored, in the religious sphere, the colonial argument that reform within the existing system had become impossible.
Franklin's attendance at the chapel's opening connected Essex Street directly to the American crisis. By April 1774, Franklin's position in London had become increasingly fraught. In January of that year, he had been publicly humiliated before the Privy Council by Solicitor General Alexander Wedderburn over the Hutchinson letters affair. He was being watched by government agents and was persona non grata in official circles. Yet he remained deeply embedded in London's Dissenting intellectual community. Priestley, who had encouraged Lindsey's break from the Church of England, was also a friend and scientific collaborator of Franklin's. The congregation at Essex Street included merchants, professionals, and politicians who viewed the American cause with sympathy, seeing in the colonists' resistance to arbitrary taxation the same principles of natural rights and rational governance that drove their own rejection of religious orthodoxy. The chapel's founding in 1774 -- the same year as the Coercive Acts and the First Continental Congress -- placed it squarely at the intersection of religious dissent and political revolution.
The Dissenting tradition represented by Essex Street Chapel provided much of the intellectual infrastructure for pro-American sentiment in Britain during the Revolution. Richard Price, the Welsh moral philosopher who would later write Observations on the Nature of Civil Liberty (1776) in support of American independence, moved in the same circles. Joseph Priestley, who conducted his groundbreaking scientific work alongside tireless advocacy for civil and religious liberty, would eventually emigrate to Pennsylvania in 1794 after a Birmingham mob burned his house. The theological argument that individuals could interpret scripture for themselves, without the mediation of an established church, mapped naturally onto the political argument that colonists could govern themselves without the mediation of Parliament. Essex Street Chapel was where these ideas found congregational form.
Key Figures
- Theophilus Lindsey -- Former Anglican clergyman who founded the first explicitly Unitarian chapel in England, creating a congregation that became closely associated with pro-American political sympathies
- Benjamin Franklin -- Colonial agent and polymath who attended the chapel's inaugural service in April 1774, connecting it to the American revolutionary cause
- Joseph Priestley -- Scientist, theologian, and political radical who encouraged Lindsey's break from the Church of England and whose advocacy for natural rights aligned with American principles
- Richard Price -- Dissenting minister and moral philosopher whose pro-American writings emerged from the same intellectual milieu as Essex Street Chapel
- John Disney -- Lindsey's successor at Essex Street, who continued the chapel's tradition of liberal theology and political engagement
What's There Today
The original Essex Street Chapel was destroyed during the Blitz in 1944. The current building, Essex Hall, was constructed on the same site in 1958 and serves as the headquarters of the General Assembly of Unitarian and Free Christian Churches. Located at 1-6 Essex Street, just off the Strand in central London, Essex Hall is a modest mid-century building that houses offices, a meeting hall, and a bookshop specializing in Unitarian and liberal religious literature. A plaque on the exterior commemorates Theophilus Lindsey and the founding of the original chapel. The building is generally open during weekday business hours; visitors interested in seeing the interior or learning about the congregation's history should contact the Unitarian headquarters in advance, as it functions primarily as an office rather than a public heritage site. Services are held at nearby Unitarian churches rather than at Essex Hall itself.
Essex Street is a quiet lane running south from the Strand toward the Thames. The street retains some of its eighteenth-century character, with a mix of Georgian and later buildings. The nearest Underground station is Temple (District and Circle lines), a two-minute walk south. Covent Garden (Piccadilly line) and Charing Cross (Northern and Bakerloo lines, plus National Rail) are also within easy walking distance. The site pairs well with visits to nearby Revolution-era locations including Somerset House, the Middle Temple, and Dr Johnson's House.
Sources
- Ditchfield, G. M. Theophilus Lindsey: From Anglican to Unitarian. Woodbridge: Boydell Press, 1998.
- Franklin, Benjamin. Papers of Benjamin Franklin, Founders Online, National Archives. https://founders.archives.gov/
- "Theophilus Lindsey." London Remembers. https://www.londonremembers.com/memorials/theophilus-lindsey
- Holt, Raymond V. The Unitarian Contribution to Social Progress in England. London: Lindsey Press, 1952.
- Seed, John. Dissenting Histories: Religious Division and the Politics of Memory in Eighteenth-Century England. Edinburgh: Edinburgh University Press, 2008.
Friends House (Quaker HQ)
Protest & Dissent
Historical Significance
Friends House on Euston Road is the headquarters of the Religious Society of Friends (Quakers) in Britain, and while the current building dates from 1926, it stands as the institutional successor to Devonshire House, the Quaker meeting house that served as the centre of British Quaker life throughout the American Revolutionary period. The Quaker movement's connection to the Revolution is complex and profound, touching on questions of pacifism, abolition, transatlantic religious networks, and the moral arguments that underpinned the American cause. Understanding the Quaker role requires grasping the unique position these communities occupied -- rooted in both Britain and the American colonies, committed to principles of equality and conscience that would fuel revolutionary ideals, yet bound by a peace testimony that made armed rebellion deeply problematic.
The London Yearly Meeting, which gathered at Devonshire House and whose records are now preserved at Friends House, was the most authoritative Quaker body in the world during the eighteenth century. In 1767, the Meeting for Sufferings -- the standing committee that acted on behalf of the Yearly Meeting between its annual sessions -- took the significant step of distributing anti-slavery tracts to Members of Parliament. This was a deliberate act of political lobbying on a moral issue that was deeply intertwined with the revolutionary crisis. The economic system that bound Britain to her American colonies was inseparable from the institution of slavery, and Quaker opposition to the slave trade challenged the moral foundations of the imperial relationship. The tracts distributed in 1767 drew heavily on the work of Anthony Benezet, a Philadelphia Quaker whose writings against slavery circulated on both sides of the Atlantic and influenced a generation of abolitionists.
The transatlantic Quaker network was one of the most effective channels of communication and mutual influence between Britain and the American colonies. London and Philadelphia Friends maintained close correspondence, exchanged travelling ministers, and coordinated policy on issues from slavery to relations with Indigenous peoples. This network meant that British Quakers were among the best-informed Londoners about conditions in the colonies. It also meant that the moral and philosophical arguments developing in American Quaker circles -- about equality, the inner light, and the illegitimacy of coercive authority -- flowed directly into British intellectual life. When the Revolution came, Quakers on both sides of the Atlantic faced agonising choices. Their peace testimony prohibited participation in war, and many American Quakers attempted to remain neutral, suffering persecution from both sides as a result. British Quakers, meanwhile, watched with dismay as their co-religionists were caught between warring parties, and used their networks to provide relief and maintain communication across enemy lines.
The Quaker contribution to the intellectual climate that produced the Revolution should not be underestimated. Quaker insistence on the equality of all persons before God, their rejection of hereditary rank and deference, and their practice of making decisions through collective discernment rather than hierarchical authority all contributed to the egalitarian ideals that animated the revolutionary movement. These ideas flowed freely through Quaker networks between London, Philadelphia, and other centres, helping to create the shared transatlantic culture of dissent from which the Revolution emerged.
Key Figures
- London Yearly Meeting -- The supreme governing body of British Quakers, which coordinated anti-slavery advocacy and maintained transatlantic communication networks throughout the Revolutionary period
- Anthony Benezet (1713-1784) -- Philadelphia Quaker educator and abolitionist whose anti-slavery writings were distributed by London Quakers to Members of Parliament in 1767
- Meeting for Sufferings -- The standing executive committee of the London Yearly Meeting that directed Quaker political engagement, including the 1767 distribution of anti-slavery tracts
- John Fothergill (1712-1780) -- Prominent London Quaker physician who attempted to mediate between the British government and American colonists in the early 1770s, working alongside Benjamin Franklin
What's There Today
Friends House at 173-177 Euston Road is a Grade II listed building designed by Hubert Lidbetter and completed in 1926. It is a handsome example of inter-war institutional architecture, with a restrained Neo-Georgian facade in brick and Portland stone. The building serves as the administrative headquarters of Britain Yearly Meeting (the modern name for the London Yearly Meeting) and houses the Library of the Religious Society of Friends, which holds extensive archival collections documenting Quaker history from the seventeenth century onward. These archives include records of the Meeting for Sufferings, correspondence between British and American Quakers during the Revolutionary period, and materials relating to the anti-slavery campaign. The library is open to researchers by appointment, and the building's ground-floor areas, including the bookshop and cafe, are open to the public.
Friends House is directly opposite Euston railway station, making it one of the most accessible sites on the trail. Euston is served by the Northern and Victoria Underground lines as well as National Rail services from the Midlands and the North. Euston Square station (Metropolitan, Hammersmith & City, and Circle lines) is also a short walk away. The building regularly hosts events, lectures, and exhibitions relating to Quaker history and peace activism. Visitors interested in the Quaker dimension of the Revolutionary story will find that the library staff are knowledgeable and welcoming, and the bookshop stocks relevant publications on Quaker history and peace testimony.
Sources
- "Friends House." Heritage report and building information. Britain Yearly Meeting, Religious Society of Friends.
- "Friends House, London." Wikipedia. Wikimedia Foundation. https://en.wikipedia.org/wiki/Friends_House
- Soderlund, Jean R. Quakers and Slavery: A Divided Spirit. Princeton: Princeton University Press, 1985.
- Jackson, Maurice. Let This Voice Be Heard: Anthony Benezet, Father of Atlantic Abolitionism. Philadelphia: University of Pennsylvania Press, 2009.
John Almon's Bookshop Site
Protest & Dissent
Historical Significance
At 176 Piccadilly, in a shop just opposite the entrance to Burlington House, the Irish-born publisher John Almon ran what was arguably the most important pro-American printing operation in London during the years of the Revolutionary crisis. From the late 1760s through the end of the war, Almon's bookshop served as a clearinghouse for opposition political literature, American pamphlets, and parliamentary intelligence that gave British readers access to the colonists' arguments in their own words. His publication of the London edition of Thomas Paine's Common Sense in 1776 was perhaps the single most consequential act of pro-American publishing undertaken on British soil during the entire war.
Almon had entered the London book trade in the early 1760s, establishing himself at Piccadilly by 1763. His early career was shaped by his close alliance with John Wilkes, the radical politician whose battles with the Crown over press freedom, parliamentary privilege, and the rights of electors made him a hero to American colonists and British reformers alike. Almon published Wilkes's speeches and political writings, and he was prosecuted alongside Wilkes in connection with the publication of the North Briton No. 45 in 1763. This experience gave Almon both a martyr's credentials among the opposition and a practical education in the risks and rewards of political publishing. By the time the American crisis escalated in the 1770s, Almon was the natural conduit for getting American arguments before the British public.
Almon's most significant contribution was his role in publishing and distributing American political writings in Britain. He published the London editions of key American texts including, most famously, Common Sense, which appeared in London in early 1776 shortly after its Philadelphia debut. Paine's pamphlet, with its uncompromising argument for independence and its withering attack on monarchy, was incendiary material in a nation at war. Almon also published the Parliamentary Register, an unauthorized record of debates in both Houses of Parliament at a time when official reporting of parliamentary proceedings was restricted. This publication was invaluable to the American cause because it allowed colonists and their supporters to track exactly who in Parliament was arguing for and against coercive measures. Almon's Remembrancer, a compendium of documents related to the American dispute, provided another essential reference for anyone following the conflict.
Beyond publishing specific works, Almon's shop functioned as an informal intelligence center for the pro-American network in London. Members of the Whig opposition, City of London radicals, Dissenting clergymen, and visiting Americans all passed through his premises. He maintained contacts with American agents in London and on the Continent, and he was suspected by the government of involvement in the leaking of official correspondence -- suspicions that were probably well founded. Almon was prosecuted multiple times for seditious libel and breach of parliamentary privilege, and he spent periods in prison, but he continued publishing throughout the war. His willingness to absorb legal and financial punishment made him indispensable to the opposition cause. The historian Robert Rea, in his study of the English press during this period, identified Almon as the single most important figure connecting the London press to the American revolutionary movement.
Key Figures
- John Almon -- Irish-born publisher and bookseller whose Piccadilly shop was the most significant outlet for pro-American political literature in wartime London
- Thomas Paine -- Author of Common Sense, the London edition of which was published by Almon in 1776, bringing the case for American independence directly to British readers
- John Wilkes -- Radical politician and champion of press freedom whose alliance with Almon dated from the 1760s and shaped the publisher's career of political defiance
- Lord Shelburne -- Whig opposition leader who used Almon as an unofficial publisher and intelligence conduit
- Edmund Burke -- Whig statesman whose speeches against the American war reached wider audiences through Almon's publications
What's There Today
The original building at 176 Piccadilly where Almon operated his bookshop no longer stands. The premises were rebuilt around 1860 as part of the Victorian redevelopment of Piccadilly's south side, and the site is now occupied by later commercial buildings. There is no plaque, marker, or interpretive signage commemorating Almon or his role in the American Revolution. The location sits on the south side of Piccadilly, almost directly opposite the Royal Academy of Arts in Burlington House, making it easy to identify. The stretch of Piccadilly between the Academy and Green Park retains its character as one of London's grand commercial streets, though none of the buildings Almon would have known survive.
Despite the absence of a physical marker, the site is worth visiting for its proximity to other Revolution-era locations. The Royal Academy itself was founded in 1768 -- during the period of Almon's activity -- and its first president, Sir Joshua Reynolds, painted portraits of several figures connected to the American war. Green Park, immediately to the south, and St James's Street, running south toward St James's Palace, place the visitor in the heart of the Georgian political landscape. The nearest Underground stations are Green Park (Jubilee, Victoria, and Piccadilly lines) and Piccadilly Circus (Piccadilly and Bakerloo lines), both within a short walk. The area is well served by buses along Piccadilly.
Sources
- Rea, Robert R. The English Press in Politics, 1760-1774. Lincoln: University of Nebraska Press, 1963.
- Deborah Harding, "John Almon." Oxford Dictionary of National Biography. Oxford University Press, 2004.
- "John Almon, Printer and Bookseller." Museum of the American Revolution, Digital Resources.
- Survey of London, vol. 29 and 30: St James Westminster, Part 1 and Part 2. London: London County Council, 1960.
- Sainsbury, John. Disaffected Patriots: London Supporters of Revolutionary America, 1769-1782. Kingston and Montreal: McGill-Queen's University Press, 1987.
John Wilkes House Site
Protest & Dissent
Historical Significance
John Wilkes (1725-1797) was one of the most colourful and consequential radical politicians in 18th-century Britain, and his cause became inextricably linked with the American struggle for liberty. A journalist, MP, and agitator, Wilkes first gained notoriety in 1763 when his newspaper The North Briton (issue No. 45) attacked the King's speech, leading to his arrest under a general warrant. His subsequent legal battles established important precedents for press freedom and protection against arbitrary arrest -- principles that resonated powerfully in the American colonies, where "Wilkes and Liberty" became a rallying cry.
Wilkes served as Lord Mayor of London in 1774 and as an alderman of the City for many years. From these positions he was a persistent thorn in the government's side, vocally supporting the American colonists and opposing the war. The City of London under his influence became a centre of pro-American sentiment, passing resolutions against the government's coercive policies. American patriots saw Wilkes as a kindred spirit: the Sons of Liberty toasted him, and several American places and institutions bear his name (Wilkes-Barre, Pennsylvania, is named partly for him). Wilkes corresponded with American leaders and was one of the few British public figures to maintain consistent support for the colonial cause.
It is worth noting that Wilkes was a complex and contradictory figure -- a libertine, a debtor, and an opportunist as well as a principled defender of liberty. His radicalism was driven by a mixture of genuine conviction and personal grievance against the establishment. Nonetheless, his impact on transatlantic political culture was real and significant. He helped establish the idea that the American cause and the cause of English liberty were one and the same.
Key Figures
- John Wilkes - Radical politician, journalist, Lord Mayor of London (1774), champion of American rights
- William Beckford - Twice Lord Mayor of London and ally of Wilkes in supporting colonial rights
- George III - The King whom Wilkes persistently antagonised
- Earl of Sandwich - Wilkes's personal and political enemy who read his private writings aloud in the House of Lords to discredit him
What's There Today
The site associated with Wilkes near Gresham Street in the City of London has been redeveloped, and no original structures connected to Wilkes survive at this location. The area is in the heart of the financial district, surrounded by modern office buildings. There are no heritage markers or interpretation panels specifically identifying the site's connection to Wilkes at present.
For Heritage Trail visitors, the Wilkes story is better appreciated in the broader context of the City of London. The nearby Guildhall, where Wilkes served as alderman and Lord Mayor, is accessible and offers a tangible connection to his political career. The Museum of London (relocated to Smithfield as the London Museum) also holds material related to Wilkes and 18th-century London radicalism. Visitors should treat this site as a point on the map rather than a destination with physical remains, and consider pairing it with visits to the Guildhall and other City sites on the Heritage Trail.
Sources
- Cash, Arthur H., John Wilkes: The Scandalous Father of Civil Liberty (Yale University Press, 2006)
- Thomas, Peter D.G., John Wilkes: A Friend to Liberty (Oxford University Press, 1996)
- Sainsbury, John, Disaffected Patriots: London Supporters of Revolutionary America, 1769-1782 (McGill-Queen's University Press, 1987)
- Brewer, John, Party Ideology and Popular Politics at the Accession of George III (Cambridge University Press, 1976)
- Rudé, George, Wilkes and Liberty (Oxford University Press, 1962)
London Tavern Site
Protest & Dissent
Historical Significance
The London Tavern on Bishopsgate was one of the most important public meeting venues in Georgian London, and its connection to the American Revolution runs through one of the era's most significant radical political movements. It was here, on 20 February 1769, that the Society of Supporters of the Bill of Rights was founded -- an organisation that forged direct ideological and financial links between British radical politics and the American revolutionary cause. The Society grew out of the political crisis surrounding John Wilkes, the firebrand MP and journalist whose repeated expulsion from Parliament for seditious libel had made him a cause celebre on both sides of the Atlantic.
The founding of the Society at the London Tavern was a watershed moment in the development of organised political opposition in Britain. Its members committed themselves to defending the constitutional liberties they believed were under assault by George III's government -- the same liberties that American colonists were simultaneously invoking to resist Parliamentary taxation. The Society's programme included Parliamentary reform, freedom of the press, and the defence of individual rights against arbitrary government power. These principles resonated powerfully with American patriots, who saw in the Wilkes movement a parallel struggle against the same ministerial tyranny. The famous American rallying cry "Wilkes and Liberty" demonstrated how deeply the British radical's cause had penetrated colonial political consciousness. When Wilkes was imprisoned, the Sons of Liberty in Boston sent him gifts and expressions of solidarity, and the South Carolina assembly voted him a donation of 1,500 pounds sterling.
John Horne Tooke, the Society's most intellectually formidable member, was instrumental in directing its energies toward supporting the American cause. A clergyman turned political agitator, Horne Tooke organised fundraising for the families of Americans killed at Lexington and Concord in 1775 -- an act for which he was prosecuted and convicted of seditious libel. His willingness to suffer personal consequences for supporting the American cause illustrated the depth of commitment that some British radicals felt toward the revolutionary movement. The Society's activities at the London Tavern and elsewhere demonstrated that the American Revolution was not simply a colonial rebellion but part of a broader transatlantic struggle over the nature of representative government and individual liberty.
The London Tavern itself was a substantial establishment that had opened in 1768, the year before the Society's founding, and quickly became one of the City of London's premier venues for public meetings, banquets, and political gatherings. Its large assembly rooms could accommodate hundreds of guests, making it suitable for the kind of mass political organising that the Wilkites pioneered. The tavern's location in Bishopsgate, within the City of London where Wilkes enjoyed strong support among the merchant and artisan classes, was strategically significant. The City's ancient corporate liberties gave its residents a degree of political independence from the Crown that made it a natural base for opposition politics. The London Tavern served this radical community as both meeting place and symbol of the City's tradition of defending its rights against royal encroachment.
Key Figures
- John Wilkes (1725-1797) -- Radical MP, journalist, and Lord Mayor of London whose struggle against government persecution became a rallying cause for both British reformers and American patriots
- John Horne Tooke (1736-1812) -- Clergyman and radical activist who co-founded the Society of Supporters of the Bill of Rights and was prosecuted for raising funds for Americans killed at Lexington and Concord
- Society of Supporters of the Bill of Rights -- Political organisation founded at the London Tavern in 1769 that championed Parliamentary reform and supported the American revolutionary cause
- James Townsend (1737-1787) -- City of London alderman and MP, founding member of the Society who used his civic position to advance the radical programme
What's There Today
The London Tavern was demolished in 1876, a casualty of the Victorian rebuilding that transformed much of the City of London. The site at 1-3 Bishopsgate is now occupied by modern commercial buildings housing HSBC offices, part of the dense cluster of financial institutions that characterises this part of the City. There is no plaque or marker indicating that this was once the birthplace of an organisation that helped connect British radicalism to the American Revolution. The demolition of the tavern and the absence of any commemoration reflect the broader pattern by which London's Revolutionary-era sites have been effaced by successive waves of urban development.
The site is easily accessible from Liverpool Street station (Central, Elizabeth, Hammersmith & City, Metropolitan, and Circle lines, plus National Rail), which is approximately a two-minute walk to the north. Bishopsgate itself is a major thoroughfare running north from the Bank of England intersection, and the site sits in the stretch between Liverpool Street and Threadneedle Street. Visitors interested in the Wilkes story can combine a visit to this site with nearby locations connected to City of London radicalism, including the Guildhall where Wilkes served as Lord Mayor, and the Mansion House where the Lord Mayor's civic authority was exercised. The Monument, erected to commemorate the Great Fire of 1666 but also a landmark of the City's independent spirit, is a short walk to the south.
Sources
- "Society of Supporters of the Bill of Rights." Wikipedia. Wikimedia Foundation. https://en.wikipedia.org/wiki/Society_of_Supporters_of_the_Bill_of_Rights
- "The London Tavern, Bishopsgate." Londonist. https://londonist.com
- Rude, George. Wilkes and Liberty: A Social Study of 1763 to 1774. Oxford: Clarendon Press, 1962.
- Sainsbury, John. Disaffected Patriots: London Supporters of Revolutionary America, 1769-1782. Kingston: McGill-Queen's University Press, 1987.
Lord George Gordon's House
Protest & Dissent
Historical Significance
Lord George Gordon, the volatile and eccentric third son of the Duke of Gordon, lived at 64 Welbeck Street in Marylebone during the period when he instigated the most destructive civil disturbance in London's history. The Gordon Riots of June 1780 convulsed the capital for a week, left an estimated 285 people dead, caused enormous property damage, and exposed the fragility of civil order in a nation stretched thin by its war against the American colonies. From his Welbeck Street residence, Gordon organized the mass petition and the march on Parliament that spiraled into an explosion of violence far beyond anything he intended or could control.
Gordon had entered Parliament in 1774 as MP for Ludgershall, an undistinguished pocket borough. He was an unlikely rabble-rouser: a Scottish aristocrat educated at Eton with a commission in the Royal Navy. But Gordon was also temperamentally unstable, possessed of fierce enthusiasms and a gift for inflammatory rhetoric. He found his cause in opposition to the Papists Act of 1778, which had modestly relaxed some of the legal disabilities imposed on Roman Catholics in Britain. The Act had been passed partly for pragmatic military reasons: with the war in America demanding ever more soldiers, the government wanted to open military recruitment to Catholics, particularly in the Scottish Highlands and Ireland. Gordon, as president of the Protestant Association, whipped up popular fear that Catholic emancipation would undermine the Protestant constitution, and on 2 June 1780 he led a crowd estimated at 50,000 to 60,000 from St George's Fields across the river to Parliament to present a petition demanding repeal.
The march itself was orderly, but its aftermath was catastrophic. Over the following days, mobs attacked Catholic chapels, the houses of prominent Catholics and their political allies, prisons (including Newgate, which was burned and its prisoners released), distilleries, and the Bank of England. Lord Mansfield's house in Bloomsbury Square was gutted. The violence was indiscriminate and fueled by a toxic mixture of religious bigotry, political frustration, and social resentment. Historians, notably George Rudé, have demonstrated that the rioters were drawn from London's working population, journeymen, apprentices, servants, and laborers, and that their anger reflected grievances extending well beyond anti-Catholicism. The American war, then in its sixth year with no end in sight, had brought economic hardship, impressment, and a pervasive sense that the government was incompetent. The riots were, in part, a domestic eruption of the pressures created by an imperial crisis that Britain was losing.
The military suppression of the riots required the deployment of over 10,000 troops in London, a force comparable in scale to many of the armies fighting in America. The irony was not lost on contemporaries: while Britain could not muster sufficient forces to subdue the rebellion across the Atlantic, it had to mobilize a small army to restore order in its own capital. Gordon himself was arrested and charged with high treason but was acquitted in 1781, largely because it could not be proven that he had intended the violence that followed the march. His later life was marked by increasing eccentricity, including a conversion to Judaism. He was imprisoned in 1788 for libeling the Queen of France and Marie Antoinette and died in Newgate Prison in 1793, during the early stages of the French Revolution, another upheaval that owed something to the precedent set in America.
Key Figures
- Lord George Gordon - Third son of the Duke of Gordon; MP for Ludgershall (1774-1780); president of the Protestant Association; instigator of the Gordon Riots of June 1780; acquitted of treason in 1781; died in Newgate Prison in 1793
- Protestant Association members - The organization whose mass petition against the Papists Act provided the catalyst for the riots; its leadership was largely middle-class and Protestant, but the crowds it mobilized drew from a broader cross-section of London's population
- George III - Personally authorized the use of military force to suppress the riots after civil magistrates proved unable to restore order; his decision to deploy troops in London underscored the severity of the crisis
What's There Today
Welbeck Street runs through the heart of Marylebone, a prosperous residential and commercial district north of Oxford Street. The street retains a number of period Georgian and early Victorian buildings, and the general character of the streetscape is not entirely unlike what Gordon would have known, though individual buildings have been altered, rebuilt, or replaced over the intervening centuries. The exact survival of the building at number 64 is uncertain. Architectural surveys, including those conducted by UCL's Bartlett School, have catalogued the street's building stock, but definitive identification of Gordon's specific residence within the current fabric has not been established with certainty.
There is no blue plaque or marker on Welbeck Street to commemorate Gordon or the events of 1780. The street is easily accessible, located between Wigmore Street and New Cavendish Street, and the nearest Underground station is Bond Street (Central, Elizabeth, and Jubilee lines), roughly a five-minute walk to the south. Baker Street station (Hammersmith and City, Circle, Jubilee, and Metropolitan lines) is a similar distance to the west. The Marylebone area offers a pleasant walking environment, and Welbeck Street can be combined with visits to nearby sites of eighteenth-century interest, including the Wallace Collection on Manchester Square, which houses one of London's finest collections of art and arms from the period.
Sources
- UCL Bartlett School of Architecture, survey of Marylebone streetscapes and building histories
- "Gordon Riots," Wikipedia, https://en.wikipedia.org/wiki/Gordon_Riots
- Rudé, George. Paris and London in the Eighteenth Century: Studies in Popular Protest. London: Collins, 1970
- Haywood, Ian, and John Seed, eds. The Gordon Riots: Politics, Culture and Insurrection in Late Eighteenth-Century Britain. Cambridge: Cambridge University Press, 2012
- Hibbert, Christopher. King Mob: The Story of Lord George Gordon and the Riots of 1780. London: Longmans, 1958
Lord Mansfield's House Site (Bloomsbury Square)
Protest & Dissent
Historical Significance
William Murray, 1st Earl of Mansfield, served as Lord Chief Justice of England and Wales from 1756 to 1788, making him one of the most powerful judicial figures in British history during the entire arc of the American crisis. His legal rulings shaped the constitutional framework within which the dispute between Britain and her American colonies unfolded. Mansfield consistently upheld parliamentary sovereignty over the colonies, and his judgments on matters of taxation, trade law, and legislative authority provided the judicial underpinning for policies that colonists regarded as tyrannical. To American patriots and their sympathizers in London, Mansfield was not merely a judge but an architect of the legal rationale for imperial control.
Mansfield's townhouse at 28-29 Bloomsbury Square became the target of one of the most dramatic episodes of domestic upheaval during the American war years. On the evening of 6 June 1780, during the Gordon Riots, a mob descended on the square and systematically destroyed the house. The rioters broke in, smashed furniture, and set the building ablaze. The fire consumed Mansfield's extraordinary private library, one of the finest legal collections in England, along with irreplaceable manuscripts, personal papers, and notes accumulated over decades of judicial work. Mansfield and his wife barely escaped with their lives, fleeing through a back entrance as the crowd surged through the front. The destruction was so thorough that virtually nothing of the house's contents survived.
The Gordon Riots of June 1780 are often remembered as an anti-Catholic disturbance, sparked by Lord George Gordon's campaign against the Papists Act of 1778. But historians have long recognized that the riots drew energy from a much broader well of popular frustration. Britain was deep into its sixth year of war in America, and the conflict was going badly. France had entered the war in 1778, Spain in 1779, and by 1780 the British found themselves fighting a global conflict with no clear path to victory. War taxes, impressment of sailors, rising food prices, and a general sense that the government was incompetent all fueled the rage that exploded in early June. The attack on Mansfield's home was not random; it was a targeted assault on a man whom many Londoners associated with the authoritarian policies that had led Britain into an unwinnable war. The destruction of his legal papers was, in a sense, a symbolic destruction of the judicial authority that had sustained the imperial project.
The Gordon Riots represented the worst civil disturbance in London's history, with an estimated 285 people killed during the week of violence. The army was called in to restore order, and over 20,000 troops were eventually deployed in the capital, a force larger than many of the armies operating in America at the time. The irony was stark: while Britain struggled to suppress a rebellion across the Atlantic, rebellion had erupted at home. The riots demonstrated that the American war had destabilized not just the empire's periphery but its very center. For Mansfield personally, the loss was devastating. He continued to serve as Lord Chief Justice for another eight years, but the destruction of his library and papers represented an intellectual loss from which he never fully recovered.
Key Figures
- William Murray, 1st Earl of Mansfield - Lord Chief Justice of England and Wales (1756-1788); upheld parliamentary sovereignty over the colonies; his legal rulings provided judicial support for British taxation and trade policies in America; also famous for his landmark ruling in the Somerset case (1772) regarding slavery
- Lord George Gordon - Protestant Association leader who instigated the riots of June 1780; organized a mass petition against Catholic relief legislation, which spiraled into a week of violence across London; later convicted of libel and died in Newgate Prison in 1793
- George III - King who ultimately authorized military force to suppress the Gordon Riots; his personal determination to continue the American war was a significant factor in the public frustrations that fueled the disturbances
What's There Today
The site of Mansfield's townhouse at 28-29 Bloomsbury Square is now occupied by Victoria House, a large Portland stone office building constructed in the 1920s. The building, designed by architects Trehearne and Norman, is a handsome example of interwar commercial architecture but bears no reference to its predecessor or to the dramatic events of June 1780. There is no blue plaque or marker of any kind to indicate that this was once the home of one of England's most important judges or the site of one of the most notorious acts of destruction during the Gordon Riots.
Bloomsbury Square itself, however, retains its historic garden, which is accessible to the public as a small park. The square was one of the first to be laid out in London, dating to the 1660s, and its central garden offers benches and shade trees amid the bustle of Bloomsbury. The nearest Underground station is Holborn, approximately a five-minute walk to the south on the Central and Piccadilly lines. Russell Square station on the Piccadilly line is a similar distance to the north. The square sits within the broader Bloomsbury district, home to the British Museum and University of London, making it easy to incorporate into a wider walking tour. Visitors interested in Mansfield's legacy can also visit Kenwood House on Hampstead Heath, his beautifully preserved country villa, where Robert Adam interiors and a fine art collection provide a more tangible connection to the Lord Chief Justice's life and tastes.
Sources
- "Lord Mansfield and the Gordon Riots," History of Parliament blog, https://www.historyofparliamentonline.org
- Lincoln's Inn Library, "The Gordon Riots of 1780," research guide
- Rudé, George. "The Gordon Riots: A Study of the Rioters and Their Victims." Transactions of the Royal Historical Society, 5th ser., vol. 6 (1956): 93-114
- Poser, Norman S. Lord Mansfield: Justice in the Age of Reason. Montreal: McGill-Queen's University Press, 2013
- Haywood, Ian, and John Seed, eds. The Gordon Riots: Politics, Culture and Insurrection in Late Eighteenth-Century Britain. Cambridge: Cambridge University Press, 2012
Newgate Prison / Old Bailey
Protest & Dissent
Historical Significance
Newgate Prison, which stood at the corner of Newgate Street and Old Bailey in the City of London, was one of the most feared institutions in eighteenth-century England. A place of incarceration since at least the twelfth century, by the time of the American Revolution it had become synonymous with squalor, cruelty, and the harsh realities of Georgian criminal justice. The prison held debtors, felons, and political prisoners alike in conditions that reformers such as John Howard documented with horror. But Newgate's most dramatic connection to the American Revolution came not through the prisoners it held but through the extraordinary events of June 1780, when it was stormed and burned by a mob during the Gordon Riots, the most destructive episode of civil disorder in London's modern history.
The Gordon Riots were triggered by Lord George Gordon's campaign against the Catholic Relief Act of 1778, which had eased some of the legal disabilities imposed on Roman Catholics in Britain. Gordon, the eccentric and volatile president of the Protestant Association, led a mass petition to Parliament on 2 June 1780, and the demonstration rapidly spiralled into days of rioting that convulsed the capital. On the evening of 6 June, the mob turned its attention to Newgate Prison. Rioters attacked the keeper's house with sledgehammers and set fire to the building. As the flames spread, they broke open the cells and freed more than three hundred prisoners, many of whom joined the rioters in further acts of destruction across the city. The burning of Newgate was the most spectacular single act of the riots, and contemporary accounts describe the scene in apocalyptic terms: the massive stone walls silhouetted against the flames, prisoners streaming out in chains, and the mob cheering as the symbol of state authority was consumed by fire.
The connection between the Gordon Riots and the American Revolution runs deeper than chronological coincidence. By June 1780, Britain had been at war with the American colonies for five years, and the conflict had expanded to include France, Spain, and the Dutch Republic. The war was going badly. The British army was bogged down in a costly and seemingly unwinnable struggle in North America, while enemy fleets threatened the home islands. The Catholic Relief Act that sparked Gordon's campaign had itself been motivated partly by the war: the government needed to recruit Catholic soldiers from Scotland and Ireland to replenish its overstretched forces. The riots thus grew directly out of the strains that the American war placed on British society. The underlying tensions, including economic hardship, political disillusionment, and resentment of a government perceived as incompetent, were all exacerbated by the seemingly endless conflict across the Atlantic.
The authorities eventually suppressed the riots by deploying regular troops, who fired on the crowds and killed an estimated 285 people. Lord George Gordon was arrested and tried for treason but acquitted; however, many of the rioters were convicted and executed. The episode shook the political establishment profoundly and demonstrated the fragility of public order in a nation stretched by the demands of an unpopular war. Lord Mansfield, the Lord Chief Justice whose Bloomsbury Square house was sacked during the riots, was himself a figure connected to the American crisis through his legal opinions on colonial rights. The Gordon Riots remain a vivid illustration of how the American Revolution destabilised not only the colonies but the imperial metropole itself.
Key Figures
- Lord George Gordon - President of the Protestant Association whose anti-Catholic agitation sparked the 1780 riots; acquitted of treason but later imprisoned for libel, dying in Newgate itself in 1793.
- Lord Mansfield (William Murray) - Lord Chief Justice whose home was destroyed during the riots; a key legal figure whose rulings intersected with questions of colonial and personal liberty.
- The rioters - Drawn from London's working poor and disaffected classes, the men and women who stormed Newgate expressed frustrations deepened by the economic and social pressures of the American war.
What's There Today
Newgate Prison was demolished in 1902, and the Central Criminal Court of England and Wales, universally known as the Old Bailey, was built on its site and opened in 1907. The current building, designed by Edward William Mountford, is a Grade II* listed Edwardian Baroque structure topped by the famous bronze statue of Lady Justice holding her sword and scales. A later extension, added in the 1970s, occupies additional space along the street. The Old Bailey remains one of the most important criminal courts in England and regularly hears the most serious cases in the jurisdiction.
Members of the public can observe proceedings from the public galleries free of charge, though access is subject to security screening and availability. No cameras, phones, or bags are permitted inside. The public entrance is on Warwick Passage, off Old Bailey street. Courts are generally in session Monday to Friday. The nearest Underground stations are St Paul's (Central line), a short walk east, and City Thameslink (Thameslink rail services), which is immediately adjacent. Visitors should note that there is no visitor centre or museum on site, but the exterior of the building and the surrounding streets can be explored freely.
Sources
- "Newgate Prison," Wikipedia, https://en.wikipedia.org/wiki/Newgate_Prison
- "Gordon Riots," Wikipedia, https://en.wikipedia.org/wiki/Gordon_Riots
- Babington, Anthony, The English Bastille: A History of Newgate Gaol and Prison Conditions in Britain, 1188-1902 (London: Macdonald, 1971).
- Hibbert, Christopher, King Mob: The Story of Lord George Gordon and the Riots of 1780 (London: Longmans, 1958).
Newington Green Unitarian Church
Protest & Dissent
Historical Significance
Newington Green Unitarian Church, tucked away on a quiet green in the London borough of Islington, is the oldest surviving Nonconformist chapel in London, its brick facade dating from 1708. Its significance to the American Revolution centres on one minister: Richard Price (1723-1791), a Welsh-born moral philosopher, mathematician, and Dissenting clergyman who served the Newington Green congregation from 1758 and became one of the most influential British defenders of the American cause.
In February 1776 — months before the Declaration of Independence — Price published Observations on the Nature of Civil Liberty, the Principles of Government, and the Justice and Policy of the War with America. The pamphlet was a sensation. It sold roughly 60,000 copies in its first year, went through multiple editions, and was widely reprinted in the American colonies. Price argued from first principles that all civil government derives its authority from the consent of the governed, that taxation without representation was a violation of natural rights, and that Britain's war against the colonies was both unjust and self-defeating. The pamphlet's impact was immediate and enormous: it influenced public opinion in Britain, bolstered American morale, and attracted the attention of the Continental Congress.
Price's connections to the American revolutionary leadership were direct and sustained. He corresponded with Benjamin Franklin during Franklin's years in London and maintained an exchange of letters with John Adams, Thomas Jefferson, and other American figures after independence. In 1778, Congress passed a resolution inviting Price to emigrate to America and assist in establishing the new nation's financial system — a tribute to his expertise in public finance as well as his political sympathies. Price declined, citing age and attachment to his congregation, but continued to advocate for the American republic from his London pulpit.
The broader Newington Green community reinforced the chapel's connection to radical and reformist politics. The area had long been a centre of Dissenting intellectual life, home to academies that educated those barred from Oxford and Cambridge by religious tests. Mary Wollstonecraft established a school near the Green in the 1780s and attended Price's sermons; his ideas on liberty and rational inquiry influenced her developing feminism. The chapel thus sits at the intersection of multiple strands of eighteenth-century radicalism — religious dissent, political reform, American independence, and the early stirrings of the rights of women.
Key Figures
- Richard Price — Moral philosopher, mathematician, and Unitarian minister at Newington Green; author of the hugely influential pamphlet defending American liberty (1776); correspondent of Franklin, Adams, and Jefferson
- Benjamin Franklin — American diplomat and colonial agent in London who cultivated a friendship with Price and connected him to the broader network of pro-American sympathizers in Britain
- Thomas Jefferson — Corresponded with Price on questions of liberty, government, and the rights of man; drew on similar intellectual traditions of natural rights philosophy
- Mary Wollstonecraft — Writer and early feminist who lived near Newington Green in the 1780s and was influenced by Price's sermons on rational liberty
What's There Today
Newington Green Unitarian Church continues to function as an active Unitarian congregation, holding regular services and community events. The 1708 building is modest in scale but architecturally significant — a simple, dignified brick chapel that has survived more than three centuries largely intact. A blue plaque on the building commemorates Richard Price, and the church has embraced its historical heritage, hosting occasional lectures, exhibitions, and events related to its radical past. The interior retains much of its original character, with box pews and a gallery that evoke the Dissenting meeting-house tradition.
Newington Green itself is a pleasant urban square in Islington, easily reached from central London. The surrounding area has changed greatly since Price's day, but the Green retains its village-like character, and the church's position on its northern side gives a sense of the eighteenth-century community that gathered here. A statue of Mary Wollstonecraft was unveiled nearby in 2020, adding another layer to the area's association with radical thought. For visitors tracing the American Revolution's British connections, the church offers an intimate and evocative site — a place where ideas about liberty, consent, and the rights of peoples were preached to a congregation that included some of the era's most consequential thinkers.
Sources
- Thomas, D. O. The Honest Mind: The Thought and Work of Richard Price. Oxford: Clarendon Press, 1977.
- Laboucheix, Henri. Richard Price as Moral Philosopher and Political Theorist. Oxford: Voltaire Foundation, 1982.
- Fruchtman, Jack Jr. The Apocalyptic Politics of Richard Price and Joseph Priestley. Philadelphia: American Philosophical Society, 1983.
- Peach, W. Bernard, ed. Richard Price and the Ethical Foundations of the American Revolution. Durham, NC: Duke University Press, 1979.
Richard Price House
Protest & Dissent
Historical Significance
Richard Price, the Welsh-born moral philosopher and Dissenting minister, lived at 54 Newington Green from 1758 until his death in 1791. From this address, he wrote one of the most influential pamphlets of the American Revolution: Observations on the Nature of Civil Liberty, the Principles of Government, and the Justice and Policy of the War with America, published in February 1776 -- just months before the Declaration of Independence. The pamphlet sold an astonishing 60,000 copies in its first year, making Price one of the best-known defenders of the American cause in Britain. He argued that communities had a natural right to govern themselves and that Britain's war against the colonies was both unjust and self-defeating.
Price's influence on the American founding went far beyond a single pamphlet. The Continental Congress was so impressed that it invited him to emigrate and help manage the new nation's finances -- an offer he declined on grounds of age and health. He corresponded extensively with Benjamin Franklin, Thomas Jefferson, John Adams, and Benjamin Rush, and his ideas about public debt and financial reform helped shape early American economic policy. His 1778 pamphlet on the national debt was admired by the framers of the Constitution, and Yale and Harvard both awarded him honorary degrees. Price was also a Fellow of the Royal Society and a pioneer of actuarial science, but it was his political writing that made him famous.
At Newington Green, Price was at the centre of a remarkable Dissenting community that included Mary Wollstonecraft, who opened her first school nearby and was deeply influenced by Price's ideas about liberty and rational religion. The terrace at 54 Newington Green, where Price lived for over thirty years, is believed to be the oldest surviving brick terrace in London, dating from around 1658.
Key Figures
- Richard Price - Moral philosopher, Dissenting minister, and champion of the American cause
- Benjamin Franklin - Close friend and correspondent who visited Price at Newington Green
- Thomas Jefferson - Corresponded with Price on civil liberty and governance
- Mary Wollstonecraft - Feminist pioneer who lived nearby and was influenced by Price's circle
What's There Today
An English Heritage blue plaque was installed on the wall at 54 Newington Green in February 2023, honouring Price as a "Moral Philosopher, Writer & Campaigner." The terrace itself is a striking survival -- a row of 17th-century brick houses that have witnessed over 350 years of London history. The adjacent Newington Green Unitarian Church, where Price preached, still holds regular services and is the oldest Nonconformist chapel in London still in use. The church has its own connections to the American Revolution and is listed separately on this trail.
Newington Green is in the London Borough of Islington, served by the 73 and 476 bus routes. The nearest rail stations are Canonbury (Overground) and Dalston Kingsland (Overground), both about a 10-minute walk. The green itself is a pleasant open space with benches, and the surrounding streets offer a variety of independent shops and cafes.
Sources
- Thomas, D.O., The Honest Mind: The Thought and Work of Richard Price (Clarendon Press, 1977)
- Laboucheix, Henri, Richard Price as Moral Philosopher and Political Theorist (Oxford, Voltaire Foundation, 1982)
- English Heritage, "Richard Price Blue Plaque," english-heritage.org.uk
- Price, Richard, Observations on the Nature of Civil Liberty (1776; Liberty Fund edition, 2004)
St George's Fields Massacre Site
Protest & Dissent
Historical Significance
On 10 May 1768, a crowd estimated at 15,000 people gathered in St George's Fields, a large open space in Southwark on the south bank of the Thames, to support the radical politician John Wilkes. Wilkes had just been elected MP for Middlesex but was imprisoned in the King's Bench Prison, which bordered the fields, on charges related to his earlier publication of the seditious North Briton No. 45. The crowd assembled to cheer Wilkes and protest his imprisonment, and what followed became one of the defining episodes in the chain of events linking British domestic radicalism to the American Revolution. Soldiers of the Third Regiment of Foot Guards, reinforced by a detachment of Scottish troops, opened fire on the crowd, killing at least six people and wounding many more. Among the dead was William Allen, a young man whose killing became a cause celebre and whose name was invoked in radical pamphlets for years afterward.
The St George's Fields Massacre, as it was immediately labeled by Wilkes's supporters, sent shockwaves through British and American political life. The deliberate use of the word "massacre" to describe the killing of civilians by soldiers was a political choice, designed to cast the government as a tyrannical force willing to shed the blood of its own people to silence dissent. This terminology was not lost on observers in the American colonies. When British soldiers fired on a crowd in Boston on 5 March 1770, killing five people, the event was immediately and deliberately described as the "Boston Massacre," a direct echo of the language used two years earlier in London. The parallel was intentional: American radicals, including Samuel Adams and Paul Revere, understood that framing the Boston killings as a "massacre" connected their struggle to the broader Anglo-American tradition of resistance to standing armies and arbitrary government power that Wilkes represented.
John Wilkes himself was a figure of enormous importance to the political culture of the American Revolution, even though he never set foot in the colonies. His battles with the government over press freedom, parliamentary privilege, and the rights of electors made him a transatlantic hero. "Wilkes and Liberty" was a rallying cry heard in London taverns and Boston meeting houses alike. The Sons of Liberty in America explicitly modeled themselves on Wilkes's supporters, and the number 45, a reference to his notorious publication, became a sacred numeral in radical iconography on both sides of the Atlantic. Towns in America were named after him, and colonial legislatures sent him gifts and letters of solidarity. The St George's Fields incident was a critical moment in Wilkes's transformation from a clever provocateur into a symbol of popular resistance to government tyranny, a symbol that Americans eagerly adopted and amplified.
The massacre also raised the fundamental question of whether regular soldiers should be used to police civilian populations, a question that resonated powerfully in the colonies. The deployment of troops to maintain order in London in 1768 paralleled the British decision to station regular troops in Boston that same year, a decision that led directly to the Boston Massacre. In both cases, the presence of soldiers among a hostile civilian population created a volatile situation that erupted into lethal violence. The lesson drawn by many in both Britain and America was that standing armies were instruments of tyranny, a conviction that shaped the Second and Third Amendments to the United States Constitution and remains embedded in American political culture to this day.
Key Figures
- John Wilkes - Radical MP for Middlesex; journalist; champion of press freedom and electoral rights; imprisoned in King's Bench Prison at the time of the massacre; his cause became a rallying point for both British and American radicals and directly influenced the political vocabulary of the Revolution
- William Allen - Young man killed by soldiers during the St George's Fields incident; his death became a symbol of government brutality and was memorialized in radical publications; the coroner's jury initially returned a verdict of murder against the soldiers involved
- Scottish soldiers (Third Regiment of Foot Guards) - The troops who fired on the crowd; their Scottish identity inflamed anti-Scottish sentiment among London radicals, echoing broader resentments against the perceived influence of Scots in government under Lord Bute and his successors
What's There Today
The open fields where the massacre took place have long since been built over. The area is now dominated by the Imperial War Museum, housed in the former Bethlem Royal Hospital building, which was constructed on part of St George's Fields in 1815. The museum's surrounding park, Geraldine Mary Harmsworth Park, occupies much of what was once the open ground where the crowd gathered in May 1768. The King's Bench Prison, where Wilkes was held and which stood at the edge of the fields, was demolished in 1880, and its site is now part of the surrounding residential streets of Southwark.
There is no plaque, monument, or marker of any kind to commemorate the St George's Fields Massacre. The event, despite its significance in the political history of both Britain and America, has left no physical trace in the modern landscape. The Imperial War Museum, while dedicated to conflict and its consequences, focuses on the twentieth and twenty-first centuries and does not address the eighteenth-century events that took place on its grounds. The site is easily reached from Lambeth North Underground station (Bakerloo line), a two-minute walk to the west, or from Elephant and Castle station (Northern and Bakerloo lines, as well as National Rail), approximately a ten-minute walk to the south. The museum itself is free to enter and is open daily from 10:00 to 18:00, making the area a convenient stop even though the massacre is not interpreted on site.
Sources
- "The 'Massacre' of St George's Fields," UK Parliament, Parliamentary Archives, https://www.parliament.uk
- "1768 St George's Fields Massacre," Wikipedia, https://en.wikipedia.org/wiki/St_George%27s_Fields_Massacre
- Rudé, George. Wilkes and Liberty: A Social Study of 1763 to 1774. Oxford: Clarendon Press, 1962
- Maier, Pauline. "John Wilkes and American Disillusionment with Britain." William and Mary Quarterly, 3rd ser., vol. 20, no. 3 (1963): 373-395
- Brewer, John. "The Wilkites and the Law, 1763-74," in An Ungovernable People: The English and Their Law in the Seventeenth and Eighteenth Centuries. London: Hutchinson, 1980
Wesley's Chapel and Museum of Methodism
Protest & Dissent
Historical Significance
Wesley's Chapel, standing on City Road in London since 1778, is the mother church of world Methodism and a site whose connections to the American Revolution are both deep and paradoxical. John Wesley (1703-1791), the Anglican clergyman who founded the Methodist movement, spent formative years in the American colonies and built a transatlantic religious network that became one of the largest popular movements in pre-revolutionary America. Yet when the imperial crisis came, Wesley publicly opposed the colonial cause — a stance that fractured his American following and forced the Methodist movement to navigate the treacherous crosscurrents of revolution and loyalty.
Wesley's direct American experience began in 1735, when he sailed to the new colony of Georgia as a missionary, remaining until 1737. Though his Georgia ministry was largely unsuccessful in conventional terms, the experience profoundly shaped his spiritual development and his understanding of the colonial world. In the decades that followed, Methodism spread rapidly through the American colonies, carried by itinerant preachers who brought Wesley's message of personal salvation, disciplined living, and social concern to communities from New England to the Southern backcountry. By the early 1770s, American Methodism counted thousands of adherents and was growing faster than in Britain itself.
The political rupture came in 1775, when Wesley published A Calm Address to Our American Colonies, a pamphlet that drew heavily — and, critics charged, without adequate acknowledgment — on Samuel Johnson's Taxation No Tyranny. Wesley's argument was blunt: the colonists had no right to resist Parliamentary authority, and their claims of liberty were hypocritical given their dependence on enslaved labor. The pamphlet infuriated American Methodists and placed the movement in an acutely difficult position. Most of Wesley's English preachers in America returned home during the war, and American Methodists were left to chart their own course — a process that culminated in the establishment of the independent Methodist Episcopal Church at the Christmas Conference in Baltimore in 1784, with Francis Asbury as its first bishop.
Wesley opened the Chapel on City Road on November 1, 1778, in the midst of the war. The timing was coincidental — Wesley had been planning the chapel for years — but the building's inauguration during the conflict underscores the degree to which the Revolution formed the backdrop of Wesley's later career. His house, adjacent to the chapel, is where he spent his final years, and his tomb stands in the burial ground behind the building. The chapel thus embodies both Wesley's personal story and the larger narrative of how a transatlantic religious movement was reshaped by political revolution.
Key Figures
- John Wesley — Founder of Methodism, former Georgia missionary, and author of A Calm Address to Our American Colonies (1775), which opposed the revolutionary cause and divided his American followers
- Francis Asbury — Wesley's appointed superintendent for American Methodism who remained in America throughout the Revolution and became the first bishop of the independent Methodist Episcopal Church in 1784
- George Whitefield — Evangelist and associate of Wesley whose itinerant preaching across the colonies in the 1730s and 1740s helped lay the groundwork for the Great Awakening and the spread of popular religious movements that shaped revolutionary-era America
- Thomas Coke — Welsh clergyman ordained by Wesley to serve as joint superintendent of American Methodism alongside Asbury; carried Wesley's instructions to the 1784 Christmas Conference in Baltimore
What's There Today
Wesley's Chapel remains an active Methodist place of worship, holding regular services and welcoming visitors throughout the week. The chapel interior, restored to its eighteenth-century elegance, features columned galleries, a fine pulpit, and memorials to Wesley and other Methodist leaders. Adjacent to the chapel, Wesley's House is preserved as a museum containing his personal belongings, furniture, books, and correspondence — including material related to the American colonies and the crisis of the 1770s. The Museum of Methodism, located in the chapel's crypt, offers a comprehensive account of the movement's history from its origins through its global expansion, with attention to the American dimension of the story.
The chapel complex sits on City Road, opposite Bunhill Fields, the historic Nonconformist burial ground where Daniel Defoe, William Blake, and John Bunyan are interred. Wesley's own tomb is in the small burial ground behind the chapel. The surrounding area of the City of London has been transformed by modern development, but the chapel precinct retains an atmosphere of Georgian calm. For visitors following the American Revolution heritage trail, Wesley's Chapel offers a distinctive perspective — not of political radicalism or military command, but of how a religious movement born in England became entangled with the political upheaval of American independence, ultimately emerging as one of the defining institutions of the new republic.
Sources
- Rack, Henry D. Reasonable Enthusiast: John Wesley and the Rise of Methodism. London: Epworth Press, 1989.
- Hempton, David. Methodism: Empire of the Spirit. New Haven: Yale University Press, 2005.
- Wigger, John. American Saint: Francis Asbury and the Methodists. New York: Oxford University Press, 2009.
- Andrews, Dee E. The Methodists and Revolutionary America, 1760-1800: The Shaping of an Evangelical Culture. Princeton: Princeton University Press, 2000.
Whitefield's Tabernacle Site (Moorfields)
Protest & Dissent
Historical Significance
George Whitefield (1714-1770) was the most famous evangelical preacher of the 18th century and a figure whose ministry helped forge the transatlantic religious culture that connected Britain and America in the decades before the Revolution. Whitefield made seven preaching tours of the American colonies between 1738 and 1770, drawing enormous crowds from Georgia to New England. His Tabernacle in Moorfields, London, established around 1741, served as his principal base in Britain and as a hub for the network of evangelical congregations that spanned the Atlantic world.
The religious connections that Whitefield and his fellow evangelicals cultivated between Britain and America were a crucial, often underappreciated, dimension of the pre-Revolutionary relationship. The Great Awakening, which Whitefield did more than anyone to ignite, created a shared spiritual language and a culture of popular participation that had political implications. Evangelicalism encouraged ordinary people to question established authority, to value individual conscience, and to organise outside traditional institutional structures -- habits of mind that found expression in Revolutionary politics. While Whitefield himself died in 1770, before the outbreak of hostilities, his legacy shaped the religious landscape in which the Revolution took place.
It should be noted that Whitefield's legacy is complicated by his support for the institution of slavery. He campaigned for the legalisation of slavery in Georgia and owned enslaved people, a fact that sits uneasily alongside his role as a champion of spiritual equality. Any assessment of his contribution to the transatlantic culture that produced the Revolution must reckon with this contradiction. The Tabernacle community in Moorfields continued after Whitefield's death and maintained connections with American congregations through the Revolutionary period, though the degree of its direct political engagement with the American cause is not well documented.
Key Figures
- George Whitefield - Evangelical preacher, founder of the Tabernacle, and architect of the transatlantic Great Awakening
- John Wesley - Fellow Methodist leader (though he and Whitefield disagreed on theological points); Wesley opposed the American Revolution
- Selina Hastings, Countess of Huntingdon - Patron of Whitefield and supporter of the evangelical movement on both sides of the Atlantic
- Benjamin Franklin - Friend of Whitefield despite their different worldviews; published Whitefield's sermons in America
What's There Today
The site of Whitefield's Tabernacle near Finsbury Square in London has been completely redeveloped. No visible remains of the Tabernacle survive, and there are currently no heritage markers or interpretation panels at the site identifying its historical significance. The area is now part of the commercial district near Moorgate, characterised by modern office buildings.
For Heritage Trail visitors, this is a site of historical resonance rather than physical remains. The story it tells -- of the evangelical networks that bound Britain and America together before the Revolution tore them apart -- is significant but intangible at this location. Visitors interested in Whitefield's legacy might consider visiting his memorial in the crypt of the Wesley Chapel on City Road (about a ten-minute walk away), which commemorates the broader Methodist and evangelical movement in London. The site is easily accessible via Moorgate Underground station. It pairs well with other City of London sites on the Heritage Trail.
Sources
- Kidd, Thomas S., George Whitefield: America's Spiritual Founding Father (Yale University Press, 2014)
- Stout, Harry S., The Divine Dramatist: George Whitefield and the Rise of Modern Evangelicalism (Eerdmans, 1991)
- Lambert, Frank, "Pedlar in Divinity": George Whitefield and the Transatlantic Revivals (Princeton University Press, 1994)
- Noll, Mark A., The Rise of Evangelicalism: The Age of Edwards, Whitefield, and the Wesleys (InterVarsity Press, 2003)
- Dallimore, Arnold A., George Whitefield (Banner of Truth, 1970-1980)
St Paul's Cathedral
Commemoration
Historical Significance
St Paul's Cathedral, Sir Christopher Wren's masterpiece completed in 1710, serves as a national memorial to British military achievement — including several figures who played significant roles in the American Revolutionary War. While the cathedral itself was not directly involved in wartime events, its collection of monuments and memorials to military commanders makes it an important site for understanding how Britain commemorated and processed the conflict.
Among the most notable Revolutionary War-connected memorials are monuments to officers who served in the American theatre. Major General the Marquess Cornwallis, though best remembered in American history for his surrender at Yorktown in 1781, went on to a distinguished later career as Governor-General of India and Lord Lieutenant of Ireland, and is commemorated in the cathedral. Monuments to naval officers who served during the broader conflict of the 1770s-1780s — when Britain fought not only the American colonies but also France, Spain, and the Netherlands — also reflect the war's global scope. The cathedral's memorials tend to emphasise the later achievements of these figures rather than the American war itself, which was, from the British perspective, a conflict the nation preferred not to dwell upon.
St Paul's thus offers a distinctly British perspective on the Revolutionary War — one shaped by loss, imperial recalibration, and the subsequent wars that overshadowed the American conflict in British memory. The cathedral's memorials remind visitors that many British officers who fought in America went on to serve in the French Revolutionary and Napoleonic Wars, and it was those later conflicts that dominated British public commemoration. The relative silence about the American war in a building full of military monuments is itself historically revealing.
Key Figures
- Charles Cornwallis, 1st Marquess Cornwallis - Surrendered at Yorktown 1781; later Governor-General of India; commemorated in the cathedral
- Sir William Howe - Commander-in-Chief of British forces in America 1775-1778 (buried at their family plot, though his memorial connections to St Paul's are less direct)
- Admiral Richard Howe, 1st Earl Howe - Commander of the North American naval station 1776-1778; commemorated for later achievements including the Glorious First of June (1794)
- Sir Guy Carleton (Lord Dorchester) - Defended Quebec 1775-1776 and served as last British Commander-in-Chief in America; less directly memorialised at St Paul's but part of the broader military milieu commemorated there
What's There Today
St Paul's Cathedral remains an active place of worship and one of London's most visited landmarks. The cathedral is open to visitors daily (except during services), with an admission charge for sightseeing visits. The interior contains an extraordinary collection of monuments, tombs, and memorials spanning several centuries. The most famous military memorials are to Wellington and Nelson (from the Napoleonic era), but visitors interested in the Revolutionary period can seek out the less prominent memorials to officers who served in the American war.
The cathedral's crypt contains additional monuments and the OBE Chapel. Guided tours and audio guides are available, though they tend to focus on architecture and the major Napoleonic-era memorials rather than the American Revolution specifically. The Whispering Gallery, Stone Gallery, and Golden Gallery offer spectacular views of London. St Paul's is accessible from St Paul's Underground station (Central line) and is a short walk from the City Thameslink rail station. The cathedral's website provides current visiting information and a searchable database of memorials.
Sources
- Keane, John, St Paul's: The Cathedral (English Heritage, 2015)
- Weinreb, Ben, and Hibbert, Christopher, eds., The London Encyclopaedia (Macmillan, 3rd ed., 2008)
- Wickwire, Franklin and Mary, Cornwallis: The Imperial Years (University of North Carolina Press, 1980)
- St Paul's Cathedral, "Memorials and Monuments," www.stpauls.co.uk
- Syrett, David, The Royal Navy in American Waters 1775-1783 (Scolar Press, 1989)
Whitechapel Bell Foundry
Commemoration
Historical Significance
The Whitechapel Bell Foundry's connection to the American Revolution rests on a single, famous object: the Liberty Bell. Cast at the foundry in 1752 by master founder Thomas Lester, the bell was commissioned by the Pennsylvania Provincial Assembly for the State House (now Independence Hall) in Philadelphia. The inscription chosen for the bell -- "Proclaim LIBERTY Throughout All the Land Unto All the Inhabitants Thereof," from Leviticus 25:10 -- was selected by Isaac Norris, Speaker of the Pennsylvania Assembly, to commemorate the fiftieth anniversary of William Penn's 1701 Charter of Privileges. At the time of its casting, the bell had no connection to revolution or independence; it was a civic bell for a colonial legislature. Yet the words Norris chose proved prophetic. By the 1830s, the bell had been adopted by the abolitionist movement as a symbol of freedom, and it has since become one of the most recognized icons of American independence worldwide.
The bell's journey from Whitechapel to Philadelphia was not straightforward. When the original casting arrived in Philadelphia in 1753, it cracked during testing. Two local metalworkers, John Pass and John Stow, melted it down and recast it, adding copper to make the alloy less brittle. Their first recast was criticized for its tone, so they melted and recast it a second time. It is this third version -- twice recast from the Whitechapel original -- that hangs today in the Liberty Bell Center in Philadelphia. The foundry meanwhile cast a replacement bell, which also arrived in Philadelphia and was hung in the State House steeple, where it served as the primary bell for everyday use while the Pass and Stow bell was used for special occasions. The Whitechapel replacement bell remains in Independence Hall today.
The Liberty Bell's symbolic association with the American Revolution developed gradually. There is no contemporaneous evidence that the bell was rung on 4 July 1776 to announce the Declaration of Independence, despite the popular legend. The State House bell (or bells -- both the Pass and Stow bell and the Whitechapel replacement were present) was likely rung on 8 July 1776 for the first public reading of the Declaration in Philadelphia, along with other church bells across the city. The famous crack in the bell developed over years of use, with the final irreparable split traditionally dated to 1846, when it cracked while being rung for a Washington's Birthday celebration. The bell was already being called the "Liberty Bell" by that time, a name given to it by abolitionists in the 1830s who saw in its inscription a universal message about human freedom that condemned the institution of slavery.
The Whitechapel Bell Foundry itself had a history stretching back to at least 1570, making it one of the oldest manufacturing businesses in Britain. Over the centuries it cast bells for churches, civic buildings, and notable structures across the world, including Big Ben (the Great Bell of the clock tower at the Palace of Westminster) in 1858. The foundry's role in producing the Liberty Bell connected it to the founding mythology of the United States in a way that no other British manufacturing site could claim. The irony was not lost on observers: one of the most potent symbols of American freedom from British rule was made in Britain, in the East End of London, by British craftsmen, and inscribed with a biblical verse chosen by a Quaker colonial legislator. The bell's origin at Whitechapel is a reminder that the American Revolution grew out of, and remained deeply entangled with, British culture, industry, and ideas.
Key Figures
- Thomas Lester -- Master founder at the Whitechapel Bell Foundry who cast the original Liberty Bell in 1752
- Isaac Norris -- Speaker of the Pennsylvania Provincial Assembly who commissioned the bell and selected its inscription from Leviticus
- John Pass and John Stow -- Philadelphia metalworkers who twice recast the cracked Whitechapel bell, producing the version now known as the Liberty Bell
- Robert Mears -- Whitechapel founder who cast a replacement bell for the Pennsylvania State House after the original cracked
- The founding fathers -- Though no individual founder is uniquely associated with the bell, its presence at Independence Hall during the debates of 1776 placed it at the physical center of the revolutionary moment
What's There Today
The Whitechapel Bell Foundry closed in June 2017 after nearly 450 years of continuous operation, making its closure a significant loss to London's industrial heritage. The foundry buildings at 32-34 Whitechapel Road, dating primarily from the eighteenth and nineteenth centuries, are Grade II* listed by Historic England, recognizing their exceptional architectural and historical importance. The listing covers the Georgian street frontage, the foundry workshops to the rear, and the courtyard where bells were loaded onto carts for transport to the docks. Since the foundry's closure, the site has been the subject of a contentious planning dispute. Proposals to redevelop the site for mixed commercial use, including a hotel, were rejected by Tower Hamlets Council following a vigorous campaign by preservation groups, including the Whitechapel Bell Foundry Campaign, who argued that the site should be preserved as a working foundry or heritage museum. As of 2025, the site's future use remains under discussion.
The exterior of the foundry is visible from Whitechapel Road and can be viewed at any time. The blue-painted Georgian shopfront at number 34, with its bell motif, is one of the most photographed facades in East London. However, the building is not currently open to the public, and access to the interior workshops and foundry floor depends on whatever arrangement is eventually reached regarding the site's future. Before its closure, the foundry offered public tours that were consistently oversubscribed, suggesting strong potential demand for heritage access if the buildings are reopened in some form. The nearest Underground station is Whitechapel (District, Hammersmith & City, and Elizabeth lines), directly adjacent to the foundry site. Aldgate East (District and Hammersmith & City lines) is also within a two-minute walk. The surrounding area includes other sites of historical interest, including the Royal London Hospital and the historic Whitechapel Market.
Sources
- "Whitechapel Bell Foundry." Historic England, List Entry 1357387. https://historicengland.org.uk/listing/the-list/list-entry/1357387
- "Whitechapel Bell Foundry." Wikipedia. https://en.wikipedia.org/wiki/Whitechapel_Bell_Foundry
- Nash, Gary B. The Liberty Bell. New Haven: Yale University Press, 2010.
- "Liberty Bell." American Battlefield Trust. https://www.battlefields.org/
- Cadbury, Deborah. The Lost Bell: How an American Icon Was Made in London's East End. London: William Collins, 2019.
Dilly Brothers' Bookshop, The Poultry
Press
Historical Significance
The bookshop of Edward and Charles Dilly at 22 The Poultry, near the Mansion House in the City of London, was one of the most important publishing houses in eighteenth-century Britain and a vital node in the transatlantic network that connected American revolutionary thought with the British reading public. The Dilly brothers published some of the most consequential political works of the era, including London editions of American writings that brought the colonists' arguments directly into the hands of British readers at the height of the imperial crisis.
Edward Dilly (1732-1779) and his younger brother Charles (1739-1807) were originally from Southill in Bedfordshire and established themselves in the London book trade in the early 1760s. Their shop on The Poultry, a street running east from the Bank of England junction toward Cheapside, became a centre of intellectual and political life. The brothers were committed Dissenters and Whigs, and their publishing list reflected their convictions. They were close to the circle of radical politicians, Dissenting clergymen, and pro-American sympathisers who opposed the government's coercive policies toward the colonies.
The Dillys' most significant contribution to the American cause was their publication of the London edition of John Dickinson's Letters from a Farmer in Pennsylvania in 1768. Dickinson's letters, originally published in American newspapers, were the most widely read American political text before Thomas Paine's Common Sense. They argued that Parliament had no right to tax the colonies for revenue and articulated a constitutional position that became the foundation of colonial resistance. The London edition, published by the Dillys, ensured that Dickinson's arguments reached British politicians, journalists, and the politically engaged public. Benjamin Franklin wrote a preface for the London edition, lending his prestige to the work and signalling to British readers that the American position was not merely the complaint of a provincial rabble but a serious constitutional argument.
Beyond Dickinson, the Dillys published works by other figures connected to the revolutionary movement. They were the principal London publishers of James Boswell, whose Life of Samuel Johnson (1791) was published by Charles after Edward's death. More relevantly to the American crisis, they published works by Dissenting intellectuals including Joseph Priestley and Richard Price, both of whom were prominent defenders of the American cause. Price's Observations on the Nature of Civil Liberty (1776), which sold 60,000 copies and was one of the most influential pro-American pamphlets published in Britain, was printed by Thomas Cadell but distributed through networks that included the Dillys.
The bookshop was also a noted gathering place. Charles Dilly hosted regular dinners above the shop that brought together writers, politicians, and intellectuals. Boswell's journals record numerous dinners at the Dillys' where Samuel Johnson, Edward Gibbon, and other literary figures debated the issues of the day. These gatherings provided a space where pro-American views could be aired and connections made among the opposition network that sustained intellectual resistance to the war.
Edward Dilly died in 1779, during the war, and Charles continued the business alone until his retirement in 1800. The firm's consistent willingness to publish politically controversial material, at a time when government prosecution of seditious libel was a real threat, made them indispensable to the broader ecosystem of dissent that sustained the American cause in Britain.
Key Figures
- Edward Dilly - Senior partner of the Dilly publishing house; committed Dissenter and Whig whose publishing decisions brought American political arguments to the British public
- Charles Dilly - Edward's younger brother and business partner; continued the firm after Edward's death and maintained its reputation as a centre of intellectual and political life
- John Dickinson - Philadelphia lawyer and author of Letters from a Farmer in Pennsylvania, the most widely circulated American political text of the pre-independence period, published in London by the Dillys
- Benjamin Franklin - Wrote the preface for the Dillys' London edition of Dickinson's Letters, lending his authority to the work and ensuring it received serious attention in Britain
- James Boswell - Scottish lawyer, biographer of Samuel Johnson, and regular guest at the Dillys' dinners; his journals provide the most detailed surviving accounts of the social and intellectual life that centred on the bookshop
What's There Today
The Poultry is a short street in the City of London running between the Bank of England junction and Cheapside. The original eighteenth-century buildings, including the Dillys' shop at No. 22, were demolished in the nineteenth and twentieth centuries as the area was redeveloped for banking and commercial use. The site is now occupied by No. 1 Poultry, a postmodern commercial building designed by James Stirling and completed in 1997. There is no plaque or marker commemorating the Dilly brothers or their publishing house.
Despite the physical transformation, the location remains significant for its proximity to other Revolution-era sites. The Bank of England, the Royal Exchange, and the Mansion House are all within a few steps, placing the visitor at the commercial and financial heart of the city that financed the war. The nearest Underground station is Bank (Central, Northern, Waterloo & City, and DLR lines), with an exit directly onto The Poultry. The area is freely accessible at all times, though it is primarily a weekday business district.
Sources
- Boswell, James, Life of Samuel Johnson (London: Charles Dilly, 1791); various modern editions
- Dickinson, John, Letters from a Farmer in Pennsylvania (London: J. Almon [and others including Dilly], 1768)
- "Dilly, Edward and Dilly, Charles," Oxford Dictionary of National Biography (Oxford University Press, 2004)
- Raven, James, The Business of Books: Booksellers and the English Book Trade, 1450-1850 (New Haven: Yale University Press, 2007)
- Sainsbury, John, Disaffected Patriots: London Supporters of Revolutionary America, 1769-1782 (Kingston and Montreal: McGill-Queen's University Press, 1987)
Public Advertiser, Fleet Street
Press
Historical Significance
The Public Advertiser, published from offices on Fleet Street, was one of the most politically consequential newspapers in London during the American revolutionary era. Under the ownership and editorship of Henry Sampson Woodfall, the paper served as the principal platform for the pseudonymous "Junius" letters (1769-1772), a series of devastating political attacks on the government that electrified British public opinion and established press freedom precedents that resonated directly with the American cause. The paper's subsequent coverage of the American crisis made it one of the most important media outlets through which British readers encountered arguments sympathetic to the colonists.
The Public Advertiser operated from premises on Fleet Street, the traditional centre of London's newspaper and printing trade. Woodfall inherited the paper from his father, also Henry Woodfall, in 1760, and transformed it from a straightforward advertising sheet into a vehicle for political commentary. The paper's format was typical of eighteenth-century newspapers: a broadsheet mixing advertisements, shipping news, and political intelligence, but Woodfall's willingness to publish controversial material set it apart from more cautious competitors.
The Junius letters, published between 21 January 1769 and 21 January 1772, were the most explosive political journalism of the era. Written by an author whose identity has never been conclusively established -- though Sir Philip Francis is the most widely accepted candidate -- the letters attacked the government of the Duke of Grafton and later Lord North with a savagery and insider knowledge that suggested the author had access to the highest levels of power. Junius defended John Wilkes, attacked the government's treatment of the American colonies, and argued for constitutional principles of representation and accountability that were central to the American position. Letter XXXV, addressed directly to George III, warned the King that he risked the fate of the Stuarts if he continued to override the rights of his subjects -- a remarkable public challenge to the monarchy.
The government prosecuted Woodfall for seditious libel in 1770 over the publication of the letter to the King. The resulting trial, Rex v. Woodfall, became a landmark in press freedom. The jury returned a verdict of "guilty of printing and publishing only" -- effectively refusing to convict on the seditious libel charge and asserting the jury's right to judge not only the fact of publication but the question of criminal intent. The verdict was a major victory for press freedom, contributing to the movement that culminated in Fox's Libel Act of 1792, which formally established the jury's right to decide on the libellous nature of a publication.
The Public Advertiser continued to provide a platform for opposition voices throughout the American war. Benjamin Franklin, during his years in London as colonial agent, used the paper to publish essays under various pseudonyms defending American rights. His satirical pieces, including "Rules by Which a Great Empire May Be Reduced to a Small One" (1773), appeared in the Public Advertiser and were widely reprinted. The paper's letters column provided a public forum for debate on American policy, and Woodfall's editorial tolerance ensured that pro-American as well as pro-government views found an audience.
Woodfall continued to edit the paper until 1793, covering the entirety of the American conflict and its aftermath. He died in 1805. The Public Advertiser itself ceased publication in 1794, but its legacy in establishing the principle that the press could challenge government policy with relative impunity had lasting consequences for both British and American conceptions of press freedom.
Key Figures
- Henry Sampson Woodfall - Editor and publisher of the Public Advertiser from 1760 to 1793; his willingness to publish the Junius letters and other politically controversial material made the paper a key outlet for opposition to government American policy
- "Junius" - Pseudonymous author of the most celebrated political letters of the eighteenth century, widely (though not conclusively) identified as Sir Philip Francis; his attacks on government policy and defence of constitutional liberty directly paralleled American arguments
- Benjamin Franklin - Used the Public Advertiser to publish pseudonymous essays defending colonial rights during his years as colonial agent in London, reaching the British reading public directly
- John Wilkes - Radical politician and champion of liberty whose cause Junius championed in the Public Advertiser; Wilkes's struggles for press freedom and parliamentary rights were closely followed in the American colonies
What's There Today
Fleet Street has undergone wholesale transformation since the eighteenth century. The specific premises where Woodfall published the Public Advertiser no longer survive, and the street's historic association with newspaper publishing ended in the 1980s when the major papers relocated to Docklands and other locations. The street is now occupied primarily by legal offices, banks, and commercial properties. No plaque commemorates Woodfall or the Public Advertiser.
Nevertheless, Fleet Street retains landmarks that evoke its journalistic heritage. St Bride's Church, the "journalists' church," stands just off Fleet Street, and several historic pub buildings survive from the eighteenth century. The street runs between Ludgate Circus and the Strand, passing the Royal Courts of Justice and the entrance to the Temple. The nearest Underground stations are Blackfriars (District, Circle lines) and Temple (District, Circle lines), each within a five-minute walk. City Thameslink rail station is also adjacent. Fleet Street pairs naturally with other press and publishing sites on the trail, including the Dilly bookshop on The Poultry and Almon's bookshop on Piccadilly.
Sources
- Bickham, Troy, Making Headlines: The American Revolution as Seen through the British Press (DeKalb: Northern Illinois University Press, 2009)
- Cannon, John, ed., The Letters of Junius (Oxford: Clarendon Press, 1978)
- Franklin, Benjamin, "Rules by Which a Great Empire May Be Reduced to a Small One," The Public Advertiser, 11 September 1773; reprinted in Founders Online, National Archives
- Werkmeister, Lucyle, The London Daily Press, 1772-1792 (Lincoln: University of Nebraska Press, 1963)
- "Rex v. Woodfall (1770)," in English Reports, vol. 98 (Lofft 776)
St John's Gate, Clerkenwell
Press
Historical Significance
St John's Gate in Clerkenwell was the home of the Gentleman's Magazine, the most widely read periodical in eighteenth-century Britain, and the publication that brought sustained, detailed reporting of the American crisis into the homes of the British reading public. Founded in 1731 by Edward Cave, the magazine operated from this medieval gateway for over a century. During the years of the American Revolution, under the editorship of David Henry (Cave's brother-in-law and successor) and later John Nichols, the Gentleman's Magazine published extensive coverage of the conflict that shaped British public understanding of the war.
The Gentleman's Magazine was not a newspaper in the modern sense but a monthly compendium of news, essays, poetry, parliamentary proceedings, and miscellaneous intelligence. Its format made it particularly important for coverage of a distant war: while daily newspapers carried brief dispatches, the Gentleman's Magazine provided the longer analyses, reprinted documents, maps, and contextual reporting that allowed readers to follow the conflict in depth. Its circulation, estimated at around 10,000 copies per month during the 1770s, reached a readership far larger through coffeehouses, lending libraries, and shared copies -- making it arguably the single most important vehicle for sustained public engagement with the American war in Britain.
The magazine's coverage of the Revolution was extensive and, by the standards of the era, relatively balanced. It published official dispatches from British commanders, reprinted American declarations and resolves, carried parliamentary debates on war policy, and printed letters from correspondents on both sides of the Atlantic. Readers could follow the progression from the Stamp Act crisis through the battles of Lexington and Bunker Hill, the Declaration of Independence, Saratoga, and Yorktown through its pages. The magazine also published maps of American battlefields and territories that provided British readers with their primary geographic understanding of the theatre of war.
The magazine's editorial stance shifted over the course of the conflict. In the early years, it generally supported the government's position that parliamentary authority must be maintained. As the war dragged on and the costs mounted, its coverage reflected growing public weariness and scepticism. After Yorktown, the magazine's reporting took on a tone of resignation and pragmatic acceptance that the colonies were lost. This editorial arc mirrored the broader shift in British public opinion documented by historians including Troy Bickham, whose Making Headlines: The American Revolution as Seen through the British Press identifies the Gentleman's Magazine as a key barometer of British attitudes.
The choice of St John's Gate as the magazine's headquarters was itself significant. The gate, dating from 1504, was the surviving entrance to the medieval Priory of the Knights of St John (the Hospitallers). By the eighteenth century it had become commercial property, and Cave leased it as both an editorial office and printing premises. The building gave the magazine a distinctive identity -- its logo featured an image of the gate -- and provided a recognisable address for the vast correspondence network that fed the publication with news and intelligence from across the British world.
Key Figures
- Edward Cave - Founder of the Gentleman's Magazine in 1731 and its editor until his death in 1754; established the publication at St John's Gate and created the monthly magazine format that became a model for periodical publishing worldwide
- David Henry - Cave's brother-in-law and successor as editor; oversaw the magazine's coverage during the critical years of the American crisis from the Stamp Act through the early years of the war
- John Nichols - Printer, antiquarian, and later editor of the Gentleman's Magazine; managed the publication through the later years of the Revolution and into the post-war period
- Samuel Johnson - Literary giant who began his London career writing parliamentary reports for the Gentleman's Magazine in the 1740s; his later pamphlet Taxation No Tyranny (1775) defended the government's American policy
What's There Today
St John's Gate is a remarkably well-preserved Tudor gatehouse standing at the junction of St John's Lane and Clerkenwell Road. The building now houses the Museum of the Order of St John, which tells the history of the Knights Hospitaller and the St John Ambulance organisation. The museum is free to enter and includes exhibits on the building's history, though the Gentleman's Magazine connection is not a primary focus of interpretation. The gate itself -- a two-storey stone structure with a central archway -- is immediately recognisable and retains much of its sixteenth-century fabric.
The nearest Underground station is Farringdon (Metropolitan, Circle, Hammersmith & City, and Elizabeth lines), approximately a five-minute walk south. Barbican (Metropolitan, Circle, and Hammersmith & City lines) is also nearby. The museum is open Tuesday to Saturday, with guided tours available. The surrounding Clerkenwell area has a rich history of printing and radical politics, making St John's Gate a natural anchor for a walking tour focused on the press and the Revolution.
Sources
- Bickham, Troy, Making Headlines: The American Revolution as Seen through the British Press (DeKalb: Northern Illinois University Press, 2009)
- Kuist, James M., The Nichols File of The Gentleman's Magazine: Attributions of Authorship and Other Documentation (Madison: University of Wisconsin Press, 1982)
- Gentleman's Magazine, vols. 44-53 (1774-1783), available digitally via HathiTrust and Internet Archive
- Carlson, C. Lennart, The First Magazine: A History of The Gentleman's Magazine (Providence: Brown University Press, 1938)
- Museum of the Order of St John, historical guide and exhibition materials, www.museumstjohn.org.uk
British Museum
Museums
Historical Significance
The British Museum, founded in 1753 and opened to the public in 1759, was already an established institution during the American Revolutionary period. Its collections intersect with the Revolution in several ways. The museum held natural history specimens, ethnographic objects, and curiosities from the American colonies, many acquired through networks of collectors, explorers, and colonial administrators that included figures connected to the Revolutionary story. The museum's founding collection, based on the cabinet of Sir Hans Sloane, included significant material from the Americas.
During the Revolutionary era, the museum was part of the broader intellectual culture in which ideas about natural rights, governance, and the relationship between metropole and colony were debated. Benjamin Franklin, a Fellow of the Royal Society and a regular figure in London's intellectual circles during his years at Craven Street, had connections to the museum's scholarly community. The museum also later acquired important documentary material related to the Revolution, including maps, prints, and manuscripts. The King's Library, donated by George IV in 1823, contained George III's personal collection of books and pamphlets, some relating to the American crisis.
It is worth noting that the British Museum's connection to the Revolution is primarily contextual and collections-based rather than event-driven. No single dramatic event of the Revolution occurred here. However, the museum's holdings of 18th-century maps of the American colonies, political cartoons, prints, and related material make it a valuable research resource, and its role in the Enlightenment intellectual world that shaped both British and American political thought gives it broader significance.
Key Figures
- Sir Hans Sloane - Founder whose collections included American material
- George III - His personal library, including material on the American crisis, was later donated to the museum
- Joseph Banks - Naturalist and president of the Royal Society; closely connected to the museum's natural history collections and to George III
- Benjamin Franklin - Connected to the museum through London's intellectual and scientific networks
What's There Today
The British Museum in Bloomsbury is one of the world's great museums and is free to enter. Its collections relevant to the American Revolution are spread across several departments. The Department of Prints and Drawings holds political cartoons and satirical prints from the Revolutionary period, including works by James Gillray and others. The Americas galleries contain ethnographic material from Native American cultures that were affected by the Revolution and its aftermath. The Enlightenment Gallery (Room 1), housed in the former King's Library, provides context for the intellectual world of the 18th century.
The museum is open daily and is located near Tottenham Court Road, Holborn, and Russell Square Underground stations. Specific Revolutionary-era items may not always be on display, as the museum rotates its collections. Researchers can access the Prints and Drawings study room and other departmental collections by appointment. The museum shop and online collections database can help visitors identify relevant material before a visit. Temporary exhibitions occasionally address themes related to the Revolutionary period.
Sources
- British Museum, collections database, www.britishmuseum.org/collection
- Caygill, Marjorie, The Story of the British Museum (British Museum Press, 2002)
- George, M. Dorothy, Catalogue of Political and Personal Satires in the British Museum, vols. 5-6 (British Museum, 1935-1938)
- Wilson, David M., The British Museum: A History (British Museum Press, 2002)
National Army Museum
Museums
Historical Significance
The National Army Museum, situated adjacent to the Royal Hospital Chelsea in London, is the principal museum of the British Army and holds one of the most significant collections of material relating to the American Revolution from the British perspective. While the American war is well documented in American museums and archives, the British side of the conflict — its uniforms, weapons, maps, orders, and personal effects — is often less visible to the public. The National Army Museum addresses this gap, preserving and displaying objects that illuminate how the war was experienced, equipped, and understood by the British military establishment.
The museum's collections include uniforms and equipment from regiments that served in the American theatre, among them the 33rd Regiment of Foot, which was closely associated with Lord Cornwallis and fought in some of the war's most consequential engagements. The 33rd served at the battles of Brandywine, Camden, and Guilford Court House before the army's final march to Yorktown. Regimental colours, officers' swords, enlisted men's accoutrements, and contemporary maps in the museum's holdings provide tangible connections to these campaigns. The collections also include orderly books, letters, and other manuscript materials that record the daily realities of military life during the war.
The museum's significance extends beyond individual objects to the broader narrative it constructs about the British Army's role in the conflict. The American Revolution was a formative experience for the army: it exposed the logistical difficulties of fighting a war across an ocean, challenged established tactical doctrines, and forced adaptations in organisation and equipment that influenced military practice for decades afterward. The museum's galleries and research collections allow visitors and scholars to explore these themes in depth, drawing on a material record that is unmatched in its breadth and specificity.
Following a major refurbishment completed in 2017, the museum reopened with redesigned galleries that present the history of the British Army thematically rather than chronologically. The American Revolution features within these broader narratives of soldiering, leadership, and the experience of conflict, allowing visitors to encounter the war in a context that connects it to wider patterns of military history.
Key Figures
- Lord Cornwallis (1738-1805) — commander of British forces in the southern campaign, whose regiment (the 33rd Foot) is well represented in the museum's collections
- Officers and soldiers of the 33rd Regiment of Foot — whose uniforms, equipment, and documents survive in the museum's holdings
- British Army rank and file — the ordinary soldiers whose kit, weapons, and personal effects form the core of the collection's American Revolution material
- Field Marshal Viscount Wolseley (1833-1913) — instrumental in the campaign to establish a dedicated museum for the British Army, which opened in 1960
What's There Today
The National Army Museum is a modern, well-designed museum that offers free admission and is suitable for visitors of all ages. The 2017 refurbishment created five themed galleries — Soldier, Army, Battle, Society, and Insight — that trace the history of the British Army from the English Civil War to the present. American Revolution material appears primarily in the Soldier and Battle galleries, where objects such as regimental uniforms, the famous "Brown Bess" musket, campaign maps, and personal items from the period are displayed with contextual interpretation. The museum also holds a significant research library and archive accessible to scholars by appointment.
The museum is located on Royal Hospital Road in Chelsea, immediately adjacent to the Royal Hospital Chelsea, making it straightforward to visit both sites in a single trip. Sloane Square Underground station is the nearest Tube stop, approximately a ten-minute walk away. The museum shop stocks a range of publications on British military history, including titles relevant to the American Revolution. For visitors following the heritage trail, the National Army Museum provides the most concentrated collection of British military material from the American war available in a single public institution, and its proximity to the Royal Hospital creates a compelling pair of sites that address both the experience of the war and its aftermath for British soldiers.
Sources
- National Army Museum. Collection records and gallery interpretation, Themes galleries (2017-present). London.
- Chartrand, Rene. The British Soldier in the Americas, 1755-1783. Men-at-Arms Series 317. Oxford: Osprey Publishing, 1998.
- National Army Museum. The National Army Museum Book of the American Revolution. London: Sidgwick & Jackson, 2001.
- Spring, Matthew H. With Zeal and with Bayonets Only: The British Army on Campaign in North America, 1775-1783. Norman: University of Oklahoma Press, 2008.
National Maritime Museum, Greenwich
Museums
Historical Significance
The National Maritime Museum in Greenwich holds the most important collection in the world on the history of Britain at sea, comprising more than two million items including maritime art, cartography, manuscripts, ship models, navigational instruments, and naval uniforms. The American Revolution was, in critical respects, a naval war: the Royal Navy transported and supplied the army across three thousand miles of ocean, conducted blockade operations along the American coast, and fought fleet actions against France, Spain, and the Dutch Republic that determined the outcome of the conflict. The museum's collections illuminate this naval dimension of the war with a depth and breadth unmatched by any other institution.
The naval war during the American Revolution produced engagements that shaped the course of the conflict far more directly than is sometimes appreciated. The Battle of the Chesapeake on 5 September 1781 was the war's most strategically consequential naval action. A British fleet under Rear Admiral Sir Thomas Graves engaged a French fleet under the Comte de Grasse off the mouth of Chesapeake Bay, and the resulting tactical defeat prevented the Royal Navy from reinforcing or evacuating Cornwallis's army at Yorktown. The surrender that followed effectively ended the war. The Battle of the Saintes on 12 April 1782, fought near the Iles des Saintes north of Dominica, saw Admiral Sir George Rodney defeat de Grasse's French fleet, capturing the admiral himself and his flagship the Ville de Paris. This victory -- the last major fleet action of the war -- restored British naval prestige and secured Britain's position in the West Indies, influencing the terms of the peace treaty signed in 1783. The museum holds a painting depicting the clash of flagships at the Saintes, along with charts, navigational instruments, and officers' effects from the period.
The Battle of Dogger Bank on 5 August 1781, fought in the North Sea between British and Dutch squadrons, reflected the global scope of a conflict that had expanded far beyond the American colonies. The Royal Navy's simultaneous commitments -- protecting trade routes, maintaining the blockade of American ports, confronting the French in the Caribbean and the Indian Ocean, and now fighting the Dutch -- stretched its resources to breaking point and exposed the strategic vulnerabilities that contributed to the loss of the American colonies.
The museum's collections from this period include ship models showing the vessels of the era, naval charts and maps used for navigation and tactical planning, officers' uniforms and personal effects, and manuscript records documenting the daily operations of the fleet. These holdings allow visitors and researchers to understand the war from the quarterdeck -- the perspective of the naval officers and seamen who fought it.
Key Figures
- Rear Admiral Sir Thomas Graves (1725-1802) -- commander of the British fleet at the Battle of the Chesapeake in 1781, whose failure to break through the French line sealed Cornwallis's fate at Yorktown
- Admiral Sir George Rodney (1718-1792) -- victor at the Battle of the Saintes in 1782, who captured the French admiral de Grasse and restored British naval dominance in the Caribbean
- Admiral Samuel Hood, 1st Viscount Hood (1724-1816) -- who served under both Graves at the Chesapeake and Rodney at the Saintes, and became one of the most respected naval commanders of the era
- Comte de Grasse (1722-1788) -- the French admiral whose fleet at the Chesapeake made the Yorktown siege possible, and who was defeated and captured at the Saintes the following year
What's There Today
The National Maritime Museum is the centrepiece of Royal Museums Greenwich, a UNESCO World Heritage Site that also includes the Queen's House, the Cutty Sark, and the Royal Observatory. The museum's galleries present the history of Britain's relationship with the sea from the age of exploration to the present, with the American Revolution-era naval war situated within broader narratives of naval power, trade, and empire. The collections include maritime paintings -- both British and 17th-century Dutch -- ship models and plans, scientific and navigational instruments, cartographic materials, and an extensive manuscript archive including official public records. The museum's holdings on the naval campaigns of 1775-1783 are complemented by material on the wider 18th-century navy, allowing visitors to understand the institutional and technological context within which the war at sea was fought.
The museum is located at Romney Road, Greenwich, London SE10 9NF, within easy reach of Greenwich town centre. Cutty Sark DLR station is the nearest rail link, and Greenwich Pier provides river bus connections. Admission is free, though the museum recommends booking tickets online in advance to guarantee entry. The museum is open daily from 10:00 to 17:00, closing 24-26 December. The proximity of the Queen's House and the Royal Observatory makes it possible to spend a full day exploring the Greenwich maritime complex. For visitors following the heritage trail, the National Maritime Museum provides the essential naval perspective on the American Revolution -- a war that could not have been fought, and was ultimately decided, at sea.
Sources
- Royal Museums Greenwich. Collection records and gallery interpretation. National Maritime Museum, Greenwich.
- Royal Museums Greenwich. "The Battle of the Saints, 12 April 1782." rmg.co.uk/collections.
- Tilley, John A. The British Navy and the American Revolution. Columbia: University of South Carolina Press, 1987.
- Syrett, David. The Royal Navy in American Waters, 1775-1783. Aldershot: Scolar Press, 1989.
- Dull, Jonathan R. The French Navy and American Independence: A Study of Arms and Diplomacy, 1774-1787. Princeton: Princeton University Press, 1975.
National Portrait Gallery
Museums
Historical Significance
The National Portrait Gallery, founded in 1856 and located just off Trafalgar Square in central London, holds the most comprehensive collection of portraits of British historical figures anywhere in the world. For visitors exploring the history of the American Revolution, the Gallery offers something no American institution can: the faces of the British side of the conflict. Portraits of George III, Lord North, Edmund Burke, the Elder and Younger Pitt, Charles James Fox, Lord Germain, and the military commanders who fought in America line its walls, providing an essential corrective to the American-centred narrative that dominates most accounts of the Revolution.
The Gallery's holdings from the Revolutionary period are particularly rich because the late eighteenth century was a golden age of British portraiture. Artists including Joshua Reynolds, Thomas Gainsborough, and George Romney were producing works of extraordinary quality, and many of their subjects were directly involved in the political and military struggle over the American colonies. The portrait of George III allows visitors to look at the man who was demonised in the Declaration of Independence as a tyrant but who was in reality a conscientious and often sympathetic ruler grappling with an unprecedented constitutional crisis. Lord North, the Prime Minister most associated with the war, appears in portraits that reveal a man far more nuanced than the caricature of bumbling incompetence that later tradition assigned him.
The Gallery also holds portraits of Americans who spent time in Britain, including Benjamin Franklin, who lived in London for much of the period 1757-1775 and sat for several British artists. The presence of Franklin's image alongside those of the ministers who opposed him captures the interconnected world of eighteenth-century Anglo-American politics, in which personal relationships, shared culture, and overlapping social circles existed alongside deepening political conflict. Similarly, portraits of Edmund Burke and William Pitt the Elder remind visitors that the Revolution was also a British political crisis, with powerful voices in Parliament opposing the war and defending the colonists' rights.
The Gallery's Revolution-era holdings thus serve not as a single site tied to one event or person, but as a visual archive of the entire conflict's British dimension. For heritage trail visitors who have encountered the American perspective at sites like Benjamin Franklin House or the Adams residence in Grosvenor Square, the National Portrait Gallery provides the indispensable other side of the story — the faces and personalities of the people who governed, debated, fought, and ultimately lost the war that created the United States.
Key Figures
- George III — King of Great Britain during the American Revolution; the Gallery holds multiple portraits spanning his long reign (1760-1820)
- Frederick, Lord North — Prime Minister 1770-1782, who led the British government through most of the war and bore much of the political blame for its outcome
- Edmund Burke — Whig politician and political philosopher who argued against coercive policies toward the American colonies
- William Pitt the Elder (Earl of Chatham) — Former Prime Minister who vocally opposed taxing the colonies and collapsed in the House of Lords during a debate on American affairs in 1778
- Benjamin Franklin — American diplomat and scientist who lived in London for years; his portraits in the Gallery date from his time in Britain
What's There Today
The National Portrait Gallery reopened in June 2023 following a major three-year refurbishment, the most significant transformation in the building's history. The redesigned galleries provide improved chronological flow and new display spaces, with the eighteenth-century rooms offering an excellent presentation of Revolution-era portraits. The collection is arranged to allow visitors to follow British history through the faces of its participants, making it straightforward to locate the key figures of the American conflict. Admission to the permanent collection is free, and the Gallery is open daily (check the website for current hours, as these may vary for special exhibitions).
The Gallery is located at St Martin's Place, immediately behind the National Gallery on Trafalgar Square, and is accessible from Charing Cross or Leicester Square Underground stations. It is one of the most centrally located sites on the heritage trail and combines naturally with visits to other nearby Revolution-related locations, including the Houses of Parliament, Whitehall, and St James's Palace. The Gallery's shop carries publications on its collection, and its online database allows visitors to research specific portraits before or after their visit. A thorough exploration of the Revolution-era holdings requires at least an hour, though the full collection rewards a much longer visit.
Sources
- National Portrait Gallery, online collection database (npg.org.uk/collections)
- Pointon, Marcia, Hanging the Head: Portraiture and Social Formation in Eighteenth-Century England (Yale University Press, 1993)
- Perry, Gill, and Michael Rossington, eds., Femininity and Masculinity in Eighteenth-Century Art and Culture (Manchester University Press, 1994)
- National Portrait Gallery, A Guide to the Collection (revised edition, 2023)
Tate Britain
Museums
Historical Significance
Tate Britain, on Millbank beside the Thames, houses several of the most important British paintings depicting the American Revolutionary War, making it an essential site for understanding how the conflict was visualised, interpreted, and commemorated in British art. The gallery's collection includes major works by John Singleton Copley and Benjamin West, two American-born artists who became leading figures in the London art world while painting scenes of the very war that was tearing their homeland from the British Empire.
The most significant Revolution-era painting at Tate Britain is John Singleton Copley's The Death of Major Peirson, 6 January 1781 (1783). This monumental canvas, measuring approximately 2.5 by 3.7 metres, depicts the Battle of Jersey, in which a French force attempted to seize the island of Jersey in a surprise attack. Major Francis Peirson, a young British officer aged just twenty-four, rallied the garrison and drove back the French but was killed at the moment of victory. The painting shows Peirson's death in the central action, with his black servant Pompey avenging him by shooting the French sniper -- a detail that made the painting remarkable for its time in depicting a Black figure as the agent of heroic action.
Copley, a Bostonian who had relocated to London in 1774 partly because the revolutionary upheaval made his position as a portrait painter to the colonial elite untenable, found himself in the paradoxical position of painting British military triumphs during a war against his homeland. His earlier masterpiece, Watson and the Shark (1778), had established him as a London sensation, and The Death of Major Peirson confirmed his status. The painting was exhibited at the Royal Academy in 1784, where it drew enormous crowds and critical acclaim. Its theatrical composition and emotional intensity set a new standard for history painting in Britain.
Benjamin West, another American expatriate who had arrived in London in 1763 and risen to become Historical Painter to George III and later President of the Royal Academy, also produced works related to the war that are held in the Tate collection. West's revolutionary approach to history painting -- depicting contemporary events with figures in modern dress rather than classical costume, as in his famous The Death of General Wolfe (1770) -- established the visual language through which the British public understood military conflict. His influence on how the Revolutionary War was depicted in art was pervasive.
The presence of these works at Tate Britain raises important questions about commemoration. British art of the Revolutionary War period tended to focus on moments of British heroism -- the death of Peirson, naval engagements, individual acts of courage -- rather than the political dimensions of the conflict. The war's ultimate outcome, American independence, was not a subject that lent itself to triumphal British art. The paintings thus represent a selective commemoration that emphasised sacrifice and valour while avoiding the uncomfortable reality of defeat. This pattern of remembering the war through isolated episodes of heroism rather than confronting its political meaning persisted in British culture for generations.
The gallery also holds works by other artists that touch on the revolutionary era, including portraits and prints that document the political and social world of late eighteenth-century London during the war years.
Key Figures
- John Singleton Copley - Boston-born painter who became one of London's foremost artists; his Death of Major Peirson is the most celebrated British painting of a Revolutionary War-era engagement
- Benjamin West - Pennsylvania-born painter who became Historical Painter to George III and President of the Royal Academy; revolutionised history painting and influenced how the British public visualised contemporary military conflict
- Major Francis Peirson - Young British officer killed at the Battle of Jersey in 1781, whose death became the subject of Copley's most ambitious history painting
- George III - Patron of Benjamin West and active supporter of the Royal Academy; his commissions from West demonstrate the monarchy's engagement with the visual culture surrounding the war
What's There Today
Tate Britain occupies the former site of the Millbank Penitentiary on the north bank of the Thames. The gallery, founded in 1897, houses the national collection of British art from 1500 to the present. Copley's The Death of Major Peirson is a highlight of the eighteenth-century galleries and is typically on permanent display, though gallery hang can change. Works by Benjamin West are also in the collection, though not all are on display at any given time. The Tate's online catalogue (tate.org.uk) allows visitors to check which works are currently displayed.
Admission to Tate Britain is free (charges apply for special exhibitions). The gallery is open daily. The nearest Underground station is Pimlico (Victoria line), approximately a ten-minute walk, and the Tate Boat river bus service connects Tate Britain with Tate Modern across the river. The gallery is fully accessible. For visitors following the Revolution trail, Tate Britain provides essential context for understanding how the war was commemorated and processed through British visual culture.
Sources
- Prawn, Jules David, John Singleton Copley, 2 vols. (Cambridge, MA: Harvard University Press, 1966)
- von Erffa, Helmut, and Allen Staley, The Paintings of Benjamin West (New Haven: Yale University Press, 1986)
- Tate Gallery, catalogue entries for Copley, The Death of Major Peirson, accession number N00733
- Kamensky, Jane, A Revolution in Color: The World of John Singleton Copley (New York: W.W. Norton, 2016)
- Hoock, Holger, Empires of the Imagination: Politics, War, and the Arts in the British World, 1750-1850 (London: Profile Books, 2010)
The Fusilier Museum
Museums
Historical Significance
The 7th Regiment of Foot, the Royal Fusiliers, served extensively during the American Revolutionary War, primarily in the Canadian and northern theatres. The regiment was stationed in the Province of Quebec from April 1773, with detachments garrisoning Montreal, Quebec City, Fort Chambly, and Fort St Johns (Saint-Jean-sur-Richelieu). When the American invasion of Canada began in the autumn of 1775, the Royal Fusiliers found themselves directly in the path of the advancing Continental forces.
The regiment's early experience of the war was one of isolation and defeat. At Fort Chambly on October 20, 1775, 83 Fusiliers under Major Stopford were trapped and compelled to surrender to the American force under Major General Richard Montgomery. Fort St Johns fell on November 17, with Lieutenant Colonel Prescott, eleven officers, and 120 men of the 7th taken prisoner. Only a small detachment of roughly 70 men under Captain Humphrey Owens, who had remained in Quebec City, escaped capture. These men participated in the defence of Quebec during the American assault of December 31, 1775, when Montgomery was killed and the invasion was repulsed -- a turning point that preserved Canada for the Crown.
The regiment was rebuilt and continued to serve throughout the war. It participated in operations along the Canadian frontier and, as the war progressed, elements of the 7th were deployed southward. The Royal Fusiliers took part in the capture of Charleston in May 1780 and helped garrison the city. A detachment served with Cornwallis's army in the Carolinas, fighting at the Battle of Guilford Courthouse (March 15, 1781). The regiment's light infantry company was present at the Siege of Yorktown and surrendered with Cornwallis on October 19, 1781. The Royal Fusiliers' war thus spanned the full geographical and chronological range of the conflict, from the Canadian frontier in 1775 to the final surrender in Virginia in 1781.
Key Figures
- Lieutenant Colonel John Prescott -- Commanded the 7th Foot at Fort St Johns; captured when the garrison surrendered to the Americans in November 1775
- Major Joseph Stopford -- Commanded the Fusilier detachment at Fort Chambly; surrendered to Montgomery's invading force in October 1775
- Captain Humphrey Owens -- Led the small detachment that held Quebec City and participated in repulsing the American assault of December 1775
- Major General Richard Montgomery -- American commander who captured Fort Chambly and Fort St Johns before being killed at Quebec; his campaign effectively destroyed the 7th Foot's original establishment in Canada
What's There Today
The Fusilier Museum is located within the Tower of London, housed in the headquarters of the Royal Regiment of Fusiliers. The museum traces the history of the regiment from its raising in 1685 -- originally to guard the Tower's ordnance -- through to the present day. Collections include uniforms, weapons, medals, regimental colours, and personal artefacts spanning over three centuries of service. The Tower of London itself has a direct connection to the Revolution: it served as a major ordnance depot from which arms, ammunition, and supplies were dispatched to British forces in America, and Henry Laurens, President of the Continental Congress, was imprisoned within its walls from 1780 to 1781.
The museum is accessible with a general admission ticket to the Tower of London. Entry to the Fusilier Museum itself is free once inside the Tower. Tower of London tickets are approximately 34.80 pounds for adults when booked online in advance (gate prices are higher). The Tower is open daily: summer hours are 9am to 5:30pm (Tuesday to Saturday) and 10am to 5:30pm (Sunday and Monday); winter hours close at 4:30pm. The nearest stations are Tower Hill (District and Circle lines) and Tower Gateway (DLR). The museum is approximately five minutes' walk from Tower Hill station.
Sources
- Smyth, Sir John, In This Sign Conquer: The Story of the Army Chaplains (Mowbray, 1968)
- Stanley, George F.G., Canada Invaded, 1775-1776 (Hakkert, 1973)
- Spring, Matthew H., With Zeal and With Bayonets Only: The British Army on Campaign in North America, 1775-1783 (University of Oklahoma Press, 2008)
- The Fusilier Museum London, Tower of London, collection guides and interpretive materials
- fusiliermuseumlondon.org
The Guards Museum
Museums
Historical Significance
The three regiments of Foot Guards -- the 1st (later Grenadier Guards), the Coldstream Guards, and the 3rd Foot Guards (later Scots Guards) -- were the elite of the British Army, and their deployment to America in 1776 signalled the seriousness with which the government regarded the colonial rebellion. Rather than sending entire Guard regiments, the army formed a composite Brigade of Guards by drawing fifteen men from each of the sixty-four companies across the three regiments, creating two battalions for American service. This unusual formation, assembled on February 13, 1776, and commanded by Brigadier General Edward Mathew of the Coldstream Guards, embarked for America in May and arrived at Sandy Hook, New York, in August 1776.
The Guards Brigade fought in the New York campaign and then moved south to the Philadelphia theatre, seeing action at the Battle of Brandywine (September 11, 1777), where Cornwallis's flanking column -- of which the Guards formed a key part -- struck the American right and drove it from the field. The Brigade was also engaged at Germantown (October 4, 1777) and the skirmishing around Philadelphia that followed. After wintering in the city, the Guards participated in operations around Monmouth before the strategic focus shifted southward.
In 1780-1781, the Guards Brigade marched with Cornwallis through the Carolinas. At the Battle of Guilford Courthouse (March 15, 1781), the Guards suffered their most devastating losses of the war. Advancing as part of the second line under Brigadier Charles O'Hara of the Coldstream Guards, the Brigade was caught in fierce close-quarters fighting with Continental Army regulars. O'Hara himself was wounded. The casualties were so severe that the Brigade was temporarily reduced to a single under-strength battalion. The Guards subsequently marched to Virginia with Cornwallis and surrendered at Yorktown on October 19, 1781. It was Brigadier O'Hara who carried out the formal act of surrender on behalf of Cornwallis, who claimed illness.
Key Figures
- Brigadier General Edward Mathew -- Coldstream Guards; commanded the Brigade of Guards during its initial American service, 1776-1778
- Brigadier General Charles O'Hara -- Coldstream Guards; commanded the Guards at Guilford Courthouse, where he was wounded, and formally surrendered the British army at Yorktown on Cornwallis's behalf
- Charles, Lord Cornwallis -- Commander of British forces in the south, under whom the Guards Brigade served at Brandywine, Guilford Courthouse, and Yorktown
- Colonel Henry Trelawny -- Commanded the 1st Battalion of Guards in America during the later stages of the war
What's There Today
The Guards Museum is located at Wellington Barracks on Birdcage Walk, directly opposite St James's Park and roughly 300 yards from Buckingham Palace. The museum tells the story of the five regiments of Foot Guards -- Grenadier, Coldstream, Scots, Irish, and Welsh -- from their origins in the 17th century to the present day. The collection includes over 1,000 items: uniforms, weapons, medals, regimental colours, personal letters, and artefacts that document the Guards' service across four centuries. An audio guide offering both a 20-minute overview and a 60-minute detailed tour is included with admission. The displays place the Guards' American Revolutionary War service within the broader context of an institution whose primary role has always been the protection of the sovereign, making their deployment to a distant colonial war all the more significant.
The museum is open daily, 10am to 4pm (last entry 3:30pm), though visitors should be aware that occasional closures occur for ceremonial reasons. Adult admission is approximately 10 pounds; children under 16 enter free. The museum is also included on the London Pass and National Art Pass. The nearest Underground stations are St James's Park (District and Circle lines) and Westminster (Jubilee, District, and Circle lines). The location on Birdcage Walk places the museum within easy walking distance of other Revolution-connected London sites, including the Houses of Parliament, the Banqueting House, and St James's Palace.
Sources
- Mackinnon, Colonel Daniel, Origin and Services of the Coldstream Guards, 2 vols. (Richard Bentley, 1833)
- Whitworth, Rex, Field Marshal Lord Ligonier: A Story of the British Army, 1702-1770 (Clarendon Press, 1958)
- Spring, Matthew H., With Zeal and With Bayonets Only: The British Army on Campaign in North America, 1775-1783 (University of Oklahoma Press, 2008)
- Babits, Lawrence E., A Devil of a Whipping: The Battle of Cowpens (University of North Carolina Press, 1998)
- The Guards Museum, Wellington Barracks, London, collection guides and interpretive materials
- theguardsmuseum.com
Southeast England
20 sites
Penshurst Place (Algernon Sidney)
Political
Historical Significance
Penshurst Place in Kent is the ancestral home of Algernon Sidney (1623-1683), whose Discourses Concerning Government was one of the four most-cited texts by the founders of the American Republic. Sidney argued against the divine right of kings and for government based on the consent of the governed -- ideas that cost him his life. He was executed for treason on 7 December 1683; his unpublished manuscript was used as evidence against him, making him a martyr to the principle of free political thought.
Bernard Bailyn's research documented that American revolutionary writers referred to Sidney "above all" among English constitutional thinkers, and his Discourses became what Bailyn called "a textbook of revolution" in America. Jefferson cited Sidney alongside Locke as the source for "the general principles of liberty and the rights of man in nature and in society." Adams and Franklin both owned copies. Jefferson prescribed the Discourses for the curriculum at the University of Virginia, and Madison listed it among the "books proper for the use of Congress" in 1783.
Sidney's execution for his political writings resonated powerfully with American colonists who faced charges of treason for their own revolutionary words. His fate illustrated both the danger of challenging royal authority and the nobility of doing so -- a lesson the founders took to heart.
Key Figures
- Algernon Sidney (1623-1683) - Political philosopher; executed for treason; author of Discourses Concerning Government; buried at Penshurst
- Thomas Jefferson - Cited Sidney alongside Locke as the source of American constitutional principles
- James Madison - Listed Sidney's Discourses among essential books for Congress
- Sir Philip Sidney (1554-1586) - Algernon's ancestor; the poet-soldier whose fame made Penshurst an icon of English culture
What's There Today
Penshurst Place is one of England's finest medieval manor houses, held by the Sidney family since 1552. The Great Hall (c.1341) is among the best-preserved examples of fourteenth-century domestic architecture in the country. Portraits of Algernon Sidney hang in the house, including one by Justus van Egmont (1663). The house is open seasonally from late March to early November, with gardens and grounds open 10:00 AM to 5:00 PM and the house from 11:30 AM (last entry 3:30 PM). Admission to gardens and grounds is £15 for adults, with a £2 upgrade for the house. The estate includes eleven acres of formal gardens, an adventure playground, woodland trail, and toy museum. Penshurst is approximately thirty-five miles southeast of London, accessible by car or train to Tonbridge (then taxi).
Sources
- Bailyn, Bernard, The Ideological Origins of the American Revolution (Harvard University Press, 1967)
- Journal of the American Revolution, "Algernon Sidney and the American Revolution" (2022)
- National Constitution Center, "Discourses Concerning Government" (historic document library)
- Penshurst Place, official website, penshurstplace.com
- Scott, Jonathan, Algernon Sidney and the English Republic, 1623-1677 (Cambridge University Press, 1988)
Runnymede & ABA Memorial
Political
Historical Significance
Runnymede is the meadow beside the Thames where King John sealed Magna Carta on 15 June 1215, establishing the principle that even a monarch is subject to the law. No single document did more to shape the constitutional ideas that American colonists invoked against George III. The Fifth Amendment's due process clause -- "no person shall be deprived of life, liberty, or property, without due process of law" -- descends directly from Magna Carta's guarantee of proceedings according to the "law of the land." The charter's principles of trial by jury, protection against excessive fines, and the prohibition of taxation without consent became the legal foundations on which colonial lawyers built their case for independence.
The American Bar Association Memorial, dedicated on 28 July 1957, stands on the lower slopes of Cooper's Hill above the meadow. A domed classical rotunda designed by Sir Edward Maufe, it bears the inscription: "To commemorate Magna Carta, symbol of freedom under law." The memorial represents the formal recognition by the American legal profession that its constitutional tradition begins here, in an English water-meadow. The ABA has rededicated the memorial periodically, renewing its pledge to the principles of the Great Charter.
Young colonists Adams, Jefferson, and Madison learned the spirit of Magna Carta through Sir Edward Coke's Institutes -- the same legal tradition taught at Middle Temple, already on this trail. The First Continental Congress explicitly invoked Magna Carta in its 1774 Declaration of Rights and Grievances. Runnymede is where that intellectual chain begins.
Key Figures
- King John (1166-1216) - Sealed Magna Carta at Runnymede in 1215 under pressure from rebel barons
- Sir Edward Coke (1552-1634) - Jurist who revived Magna Carta as a living constitutional document; his Institutes were the legal textbooks of colonial America
- John Adams, Thomas Jefferson, James Madison - All studied Magna Carta through Coke's Institutes and cited it in revolutionary arguments
What's There Today
Runnymede is a National Trust site on the banks of the Thames near Egham, Surrey. The grounds are open daily year-round, approximately 7:00 AM to 5:30 PM, with free entry (pay-and-display parking; free for National Trust members). The ABA Memorial rotunda sits in a grassed enclosure on the slopes of Cooper's Hill. Nearby are the separate Magna Carta Memorial, the JFK Memorial (1965), and the Commonwealth Air Forces Memorial. A Magna Carta Tea Room and second-hand bookshop operate on site. The meadow itself is a peaceful riverside landscape with walking trails and picnic areas. Runnymede is easily accessible from the M25 (Junction 13) and is approximately thirty minutes from central London by car.
Sources
- National Trust, "Runnymede and Ankerwycke," nationaltrust.org.uk
- Library of Congress, "Magna Carta: Muse and Mentor -- Magna Carta and the U.S. Constitution"
- Holt, J.C., Magna Carta (Cambridge University Press, 3rd edition, 2015)
- American Bar Association, Magna Carta Memorial dedication records
- Howard, A.E. Dick, The Road from Runnymede: Magna Carta and Constitutionalism in America (University Press of Virginia, 1968)
Windsor Castle
Political
Historical Significance
Windsor Castle served as the preferred country residence of King George III during the American Revolutionary War, and it was here that the King retreated from the pressures of London to consider the crisis that would cost Britain its thirteen American colonies. George III was deeply personally invested in suppressing the American rebellion, viewing the colonists' defiance as a challenge to the authority of the Crown and the constitutional order of the British Empire. Windsor provided the domestic setting for many of the King's deliberations on American policy, his correspondence with Lord North and other ministers, and his reception of dispatches from the war.
George III and Queen Charlotte made Windsor their principal family home from the early 1770s, preferring its relative privacy to the formality of St James's Palace and Buckingham House in London. The King occupied the Queen's Lodge (since demolished) adjacent to the Castle's south terrace, and later initiated substantial renovations to the Upper Ward. It was at Windsor that the King processed much of the news from America, including the defeats at Saratoga (1777) and Yorktown (1781), the latter of which effectively ended the war. According to tradition, upon learning of the surrender at Yorktown, the King reportedly exclaimed "Oh God! It is all over!" though the exact wording and setting of this remark are not definitively established by primary sources.
The King's determination to continue the war even after major setbacks was a significant factor in prolonging the conflict. His resistance to American independence persisted until Lord North's government fell in March 1782 and the incoming Rockingham ministry opened peace negotiations. Windsor thus witnessed both the King's resolve and his eventual, reluctant acceptance of the loss of the American colonies.
Key Figures
- King George III - Reigned 1760-1820; the sovereign whose policies and personal determination shaped Britain's conduct of the American war
- Queen Charlotte - Consort of George III, managed the royal household at Windsor during the war years
- Lord North (Frederick North, 2nd Earl of Guilford) - Prime Minister (1770-1782), frequently corresponded with the King and visited Windsor
- Fanny Burney - Novelist and later Keeper of the Robes to Queen Charlotte, whose diaries provide insight into court life at Windsor (her appointment came in 1786, after the war)
What's There Today
Windsor Castle remains an official residence of the British sovereign and is the oldest and largest continuously occupied castle in the world. The Castle is open to visitors for much of the year, managed by the Royal Collection Trust. Visitors can tour the State Apartments, St George's Chapel, and the Semi-State Rooms (the latter open only in winter months). The Castle's precincts largely reflect the extensive remodelling carried out by George IV in the 1820s, which transformed the exterior into the dramatic Gothic Revival silhouette visible today, though the underlying medieval and Stuart fabric remains.
The Queen's Lodge, where George III actually lived during the American war, was demolished in the early 19th century, and no above-ground trace survives. However, the North Terrace and the Castle's general layout are recognisable from the King's time. The town of Windsor itself retains Georgian-era buildings, and the surrounding Great Park was a favourite retreat of George III. Windsor is easily accessible by train from London Waterloo and Paddington. Visitors should check the Royal Collection Trust website for opening times, as the Castle closes for state occasions and royal use.
Sources
- Roberts, Jane. Royal Landscape: The Gardens and Parks of Windsor. Yale University Press, 1997.
- Brooke, John. King George III. Constable, 1972.
- The Royal Archives, Windsor Castle: Correspondence of George III (partially published in Sir John Fortescue, ed., The Correspondence of King George the Third, 6 vols., 1927-1928).
- Hibbert, Christopher. George III: A Personal History. Viking, 1998.
- Royal Collection Trust, Windsor Castle guidebook, various editions.
Buckler's Hard, Beaulieu
Military
Historical Significance
Buckler's Hard, a small shipbuilding village on the Beaulieu River in Hampshire, was one of the private yards that supplemented the Royal Dockyards in producing warships for the Royal Navy during the American Revolutionary War. The village had been established in the early eighteenth century by the Duke of Montagu, and by the time of the American conflict, it was under the supervision of master shipbuilder Henry Adams, whose family would build ships at Buckler's Hard for three generations. The yard's location on the sheltered Beaulieu River, with access to the New Forest's oak timber, made it an ideal site for constructing the wooden warships that were Britain's primary instrument of maritime power.
During the American war, the demand for warships intensified dramatically as Britain found itself fighting not only the American colonies but also France, Spain, and the Dutch Republic. Adams expanded the yard's launchways in 1771 to accommodate larger vessels, and the yard produced several warships for the conflict, most notably HMS Agamemnon, a 64-gun third-rate ship of the line launched in 1781. The Agamemnon saw action at the Battle of the Saintes in April 1782, the decisive naval engagement in which Admiral Rodney's fleet defeated the French in the Caribbean, helping to restore British naval prestige after the disaster at Yorktown. The Agamemnon would later become famous as Horatio Nelson's favourite ship during the French Revolutionary Wars.
The shipbuilding activity at Buckler's Hard during the American war illustrates the enormous industrial effort required to sustain Britain's naval campaigns. Each ship of the line consumed thousands of carefully selected oak trees and required years of skilled labour. The village's two rows of Georgian cottages, originally built to house the shipwrights and their families, are a physical reminder of the human scale of this enterprise. Buckler's Hard was not merely a shipyard; it was a self-contained community dedicated to the construction of the weapons that would determine the outcome of the war at sea.
Key Figures
- Henry Adams - Master shipbuilder at Buckler's Hard who supervised the construction of warships including HMS Agamemnon during the American war. His family built ships at the yard for three generations.
- Admiral Sir George Rodney - Commander of the British fleet at the Battle of the Saintes (1782), where ships built at yards like Buckler's Hard helped secure a crucial victory.
- Lord Sandwich (John Montagu, 4th Earl of Sandwich) - First Lord of the Admiralty who oversaw the expansion of naval shipbuilding during the American war.
- Duke of Montagu - Original developer of Buckler's Hard as a shipbuilding village in the early eighteenth century.
- Horatio Nelson - Though his famous association with HMS Agamemnon came during the later French Revolutionary Wars, the ship's construction at Buckler's Hard during the American conflict established the vessel's place in naval history.
What's There Today
Buckler's Hard is one of the best-preserved eighteenth-century shipbuilding villages in England. The two parallel rows of Georgian cottages, facing each other across a wide grassy street that slopes down to the river, survive virtually intact and convey an immediate sense of the village's original character. Several cottages have been restored to their eighteenth-century appearance and are open to visitors, showing how shipwrights, labourers, and their families lived during the age of sail.
The Buckler's Hard Maritime Museum, housed in the village, contains detailed exhibits on the shipbuilding process, the Adams family, and the warships constructed at the yard, including HMS Agamemnon. Models, tools, documents, and interactive displays explain the craft of wooden shipbuilding and the village's contribution to the Royal Navy during the American and Napoleonic wars. The slipways where ships were launched are still visible along the riverbank. River cruises on the Beaulieu River are available, and the village is set within the Beaulieu Estate, which also includes the National Motor Museum and Beaulieu Abbey. Buckler's Hard is accessible by road from Southampton and the M27.
Sources
- Jonathan Coad, The Royal Dockyards, 1690-1850 (Scolar Press, 1989)
- N. A. M. Rodger, The Command of the Ocean: A Naval History of Britain, 1649-1815 (Allen Lane, 2004)
- Buckler's Hard Maritime Museum, "History of Buckler's Hard" (bucklershard.co.uk)
- Robert Gardiner, ed., Navies and the American Revolution, 1775-1783 (Chatham Publishing, 1996)
Chatham Historic Dockyard
Military
Historical Significance
Chatham Dockyard on the River Medway in Kent was one of the Royal Navy's principal shipbuilding and fitting-out yards during the American Revolution. Along with Portsmouth, Deptford, and Woolwich, Chatham was responsible for constructing, repairing, and equipping the warships that fought in the American war and the wider global conflict that erupted when France (1778), Spain (1779), and the Dutch Republic (1780) entered the war against Britain. The dockyard's shipwrights, ropemakers, sailmakers, and other craftsmen worked at an accelerated pace to meet the demands of a war fought across the Atlantic.
The dockyard's ropery, built in 1792 but replacing an earlier facility that served during the Revolution, illustrates the scale of naval supply. A single ship of the line required miles of rope, and Chatham's ropewalk was one-quarter of a mile long. The dockyard also housed dry docks for ship repair, mast houses, sail lofts, and storehouses. During the Revolution, the yard built and fitted out ships of the line and frigates, though precise records of which specific vessels were constructed at Chatham during 1775-1783 require consultation of Admiralty records at the National Archives.
Chatham's strategic position also made it vulnerable. The dockyard had been humiliatingly raided by the Dutch in 1667, and during the Revolutionary war there were concerns about its defence, particularly after France entered the conflict. John Paul Jones's raids on British coastal shipping in 1778 heightened anxiety about the security of naval installations. The dockyard's role illustrates the enormous logistical and industrial effort required to project naval power across the Atlantic, an effort that ultimately proved insufficient to prevent American independence.
Key Figures
- Lord Sandwich (John Montagu, 4th Earl) - First Lord of the Admiralty 1771-1782; responsible for the dockyards and fleet readiness
- Dockyard workforce - Thousands of shipwrights, ropemakers, caulkers, and labourers who built and maintained the fleet
- Commissioner of the Dockyard - The senior naval official managing Chatham's operations
- John Paul Jones - American naval commander whose raids heightened concern for dockyard security
What's There Today
The Historic Dockyard Chatham is now a major heritage attraction and museum in Medway, Kent. The dockyard closed as an active naval facility in 1984 and was subsequently opened to the public. It preserves an exceptional collection of Georgian and Victorian dockyard buildings, many of which date from or near the Revolutionary period. The ropery (the present building dates to 1792) still produces rope using traditional methods and is a highlight of any visit. Historic warships are displayed in the docks, and exhibitions cover the history of the Royal Navy and the dockyard.
The site charges an admission fee (annual passes are available and represent good value for repeat visitors). It is located in Chatham, Kent, approximately 35 miles southeast of London. Access is by car or by train to Chatham station, with a short bus or taxi ride to the dockyard. The dockyard hosts regular events including re-enactments and themed weekends. For visitors following the heritage trail, Chatham provides a vivid sense of the industrial scale of 18th-century naval warfare. The dockyard is not to be confused with the modern Chatham Maritime development on adjacent land.
Sources
- MacDougall, Philip, Royal Dockyards (David & Charles, 1982)
- Coad, Jonathan, The Royal Dockyards 1690-1850 (Scolar Press, 1989)
- The Historic Dockyard Chatham, www.thedockyard.co.uk
- Baugh, Daniel A., British Naval Administration in the Age of Walpole (Princeton University Press, 1965) - for dockyard operations context
- National Archives, Admiralty records (ADM 106 series, Navy Board correspondence)
Coxheath Camp Site
Military
Historical Significance
In the summer of 1778, following France's entry into the war in February of that year, Britain faced the prospect of invasion for the first time since the Seven Years' War. The bulk of the regular army was committed to North America, and domestic defences were dangerously thin. The government established a series of large military encampments for home defence, the largest at Coxheath, on open heathland approximately two and a half miles south of Maidstone in Kent, positioned to defend the approaches to London from the southeast coast. The threat intensified sharply in the summer of 1779 when Spain entered the conflict and a combined Franco-Spanish fleet of sixty-six warships entered the Channel. Coxheath was not a temporary measure: the camp operated from 1778 through 1782, sustained by years of genuine invasion danger rather than a single summer's panic.
At its peak, Coxheath Camp held between 15,000 and 17,000 troops, making it the largest military encampment in England. The camp became a national spectacle, drawing visitors from across the country, including fashionable society from London. The militia units encamped at Coxheath underwent intensive training to bring them to a standard capable of resisting a professional French army. King George III and Queen Charlotte reviewed the troops at Coxheath in November 1778, lending royal prestige to the home defence effort and bolstering public morale at a time of considerable anxiety.
The camp at Coxheath illustrates the American Revolution's direct impact on life in Britain. The war forced the country to confront its own vulnerability, strained the regular army to breaking point, and required the mobilisation of militia on a scale not seen in a generation. Coxheath was the most visible symbol of this domestic military crisis, and its existence was a direct consequence of the Franco-American alliance and the broader European war it provoked.
Key Figures
- King George III - Reviewed troops at Coxheath in November 1778, demonstrating royal commitment to home defence during the American war.
- Queen Charlotte - Accompanied the king to the Coxheath review, and the spectacle became a notable event in the social calendar.
- Lord Amherst (Jeffery Amherst) - Commander-in-chief of the forces in Britain, responsible for organising home defence and overseeing the encampments.
- Duchess of Devonshire (Georgiana Cavendish) - Famously visited Coxheath Camp and wore military-inspired dress, helping to make the camp a fashionable destination.
- Lord George Germain - Secretary of State for the Colonies whose management of the American war had left Britain vulnerable to invasion.
What's There Today
There are no visible remains of the Coxheath Camp today. The heathland where thousands of soldiers once drilled and encamped has long since been enclosed and converted to agricultural use and residential development. The area approximately two and a half miles south of Maidstone, around the village of Coxheath, is now a mixture of farmland, orchards, and housing. No monuments, markers, or interpretation panels identify the site of the camp.
Despite the absence of physical remains, the site is of considerable historical interest to those tracing the domestic impact of the American Revolution in Britain. Maidstone itself is an attractive county town with a medieval archbishop's palace, a museum, and good transport links to London and the Kent coast. Visitors interested in the military history of the period may wish to combine a visit to the Coxheath area with nearby Fort Amherst at Chatham, where the defensive works constructed during the American war survive in impressive form.
Sources
- Stephen Conway, The British Isles and the War of American Independence (Oxford University Press, 2000)
- Matthew H. Spring, With Zeal and with Bayonets Only: The British Army on Campaign in North America, 1775-1783 (University of Oklahoma Press, 2008)
- Piers Mackesy, The War for America, 1775-1783 (Harvard University Press, 1964)
- Amanda Foreman, Georgiana, Duchess of Devonshire (HarperCollins, 1998)
- Jonathan R. Dull, The French Navy and American Independence (Princeton University Press, 1975)
Deal Castle
Military
Historical Significance
Deal Castle, one of Henry VIII's chain of coastal fortresses built in the 1530s, occupies a commanding position overlooking The Downs, the sheltered anchorage between the Kent coast and the Goodwin Sands. For centuries, The Downs served as one of the most important maritime assembly points in England, where fleets gathered, convoys formed, and warships awaited favourable winds before proceeding to sea. During the American Revolutionary War, The Downs became a critical staging area for the naval and military operations that sustained Britain's war effort across the Atlantic.
Throughout the conflict, warships and transport vessels assembled in The Downs before sailing for North America, the Caribbean, and other theatres of the war. The anchorage was a scene of constant activity as convoys were organised, troops embarked, and supply ships gathered under naval escort. In 1779, when France and Spain combined their fleets in a planned invasion of England, the threat to the Kent coast became acute. Militia units were reinforced along the coast, and Deal Castle, though centuries old, served as a garrison point and a visible symbol of coastal defence. The invasion fleet entered the English Channel but was defeated by disease and disorganisation rather than battle, though the alarm it caused was genuine and widespread.
Deal Castle's role during the American war was primarily as a garrison and observation point rather than a scene of combat, but its position overlooking The Downs places it at the heart of the naval logistics that sustained the British war effort. The castle was part of a broader defensive infrastructure along the Kent coast that included Walmer Castle and Sandown Castle, all of which played roles in the mobilisation of 1779. The American war gave these Tudor fortresses a new relevance, and their garrisons were augmented as part of the nationwide effort to defend the home islands while fighting a war across the ocean.
Key Figures
- Lord Sandwich (John Montagu, 4th Earl of Sandwich) - First Lord of the Admiralty who managed the naval war from London and depended on anchorages like The Downs for fleet assembly and convoy operations.
- Admiral Sir Charles Hardy - Commander of the Channel Fleet in 1779, tasked with defending the English Channel against the combined Franco-Spanish invasion fleet.
- Lord Amherst (Jeffery Amherst) - Commander-in-chief of the forces in Britain, responsible for the militia reinforcements sent to defend the Kent coast during the 1779 invasion scare.
- Lord North - Prime Minister during the American war whose government faced the dual challenge of prosecuting the war in America and defending Britain from invasion.
- Comte d'Orvilliers - French admiral who commanded the combined Franco-Spanish fleet during the 1779 invasion attempt that threatened the Kent coast.
What's There Today
Deal Castle is managed by English Heritage and is open to visitors throughout most of the year. The castle is one of the finest and most complete examples of Henry VIII's coastal defences, with its distinctive rose-shaped plan of concentric bastions designed to provide overlapping fields of fire. Visitors can explore the castle's bastions, underground passages, and central keep, which houses an exhibition on the castle's history from the Tudor period through to the twentieth century.
The castle's position on the seafront at Deal offers views across The Downs anchorage, and interpretation materials explain the significance of this stretch of water to England's maritime and military history. Deal itself is an attractive seaside town with a Georgian high street, independent shops, and good restaurants. Walmer Castle, another English Heritage property and the official residence of the Lord Warden of the Cinque Ports, is a short walk south along the coast and offers complementary exhibits. Together, the Deal and Walmer castles provide a rich introduction to the strategic importance of the Kent coast during the American Revolutionary era and beyond.
Sources
- N. A. M. Rodger, The Command of the Ocean: A Naval History of Britain, 1649-1815 (Allen Lane, 2004)
- Piers Mackesy, The War for America, 1775-1783 (Harvard University Press, 1964)
- Stephen Conway, The British Isles and the War of American Independence (Oxford University Press, 2000)
- English Heritage, "Deal Castle" (english-heritage.org.uk)
Fort Amherst, Chatham
Military
Historical Significance
Fort Amherst is the principal surviving fortification of the Chatham Lines, a system of defensive works constructed to protect the Royal Dockyard at Chatham, one of Britain's most important naval facilities. The dockyard built, maintained, and fitted out the warships of the Royal Navy, and its security was a matter of national survival. During the American Revolutionary War, the threat posed by France's entry into the conflict in 1778 made the defence of Chatham an urgent priority. The existing fortifications were substantially enhanced between 1778 and 1783, and extensive underground tunnels were carved into the chalk hillside between 1776 and 1805 to provide ammunition storage, barracks, and protected positions.
The fort is named after Field Marshal Jeffery Amherst, 1st Baron Amherst, who served as commander-in-chief of the forces in Britain during the American war. Amherst had won fame during the Seven Years' War as the conqueror of French Canada, and his appointment to lead home defence during the American conflict reflected the seriousness with which the government viewed the invasion threat. Under his authority, the Chatham Lines were strengthened with new batteries, redoubts, and the underground works that remain the fort's most remarkable feature today.
The fortification of Chatham during the American war is a powerful reminder that the conflict's impact extended far beyond the battlefields of North America. Britain's decision to fight a war three thousand miles away while simultaneously defending its home territory against European rivals placed enormous strain on military resources and strategic planning. Fort Amherst, with its American War-era tunnels and defences, is the most substantial physical evidence in southeast England of this defensive crisis. Though English Heritage has described it as "the most complete Napoleonic fortification" in the region, its origins lie firmly in the American Revolutionary period.
Key Figures
- Jeffery Amherst, 1st Baron Amherst - Commander-in-chief of the forces in Britain during the American war and namesake of the fort. Previously the conqueror of French Canada during the Seven Years' War.
- Lord Sandwich (John Montagu, 4th Earl of Sandwich) - First Lord of the Admiralty who oversaw the Royal Navy during the American war and was responsible for the security of Chatham Dockyard.
- King George III - Took a close personal interest in the defence of the realm and the fortification of key installations including Chatham.
- Charles Lennox, 3rd Duke of Richmond - Master-General of the Ordnance from 1782, who continued and expanded the fortification programme at Chatham.
What's There Today
Fort Amherst is a heritage trust visitor attraction occupying over twenty acres of the original Chatham Lines. The fort's most compelling feature is its network of underground tunnels, carved into the chalk during and after the American war. Guided tours take visitors through these tunnels, which retain their original dimensions and atmosphere, offering a vivid sense of the scale of the defensive works and the labour required to create them. Above ground, the fort's ramparts, bastions, and gun emplacements are well preserved and provide commanding views over the Medway valley and the site of the dockyard.
The Fort Amherst Heritage Trust runs regular events, including military re-enactments, ghost tours, and educational programmes. Interpretation panels throughout the site explain the fort's history from the American War period through the Napoleonic era and both World Wars. Chatham Historic Dockyard, a major heritage attraction in its own right, is a short distance away and offers complementary insights into the naval side of the American war. The fort is accessible from the A2 and by rail to Chatham, making it an easy day trip from London.
Sources
- Stephen Conway, The British Isles and the War of American Independence (Oxford University Press, 2000)
- Piers Mackesy, The War for America, 1775-1783 (Harvard University Press, 1964)
- Jonathan Coad, The Royal Dockyards, 1690-1850 (Scolar Press, 1989)
- Fort Amherst Heritage Trust, "History of Fort Amherst" (fortamherst.com)
Forton Prison Site
Military
Historical Significance
Forton Prison in Gosport, Hampshire, was one of two principal facilities holding American prisoners of war during the Revolutionary War, the other being Mill Prison in Plymouth. Located across the harbour from Portsmouth's great naval base, Forton was originally a hospital complex converted for prisoner use from 1777 onwards. Hundreds of captured American sailors, privateers, and soldiers were confined here in overcrowded and unsanitary conditions.
The prisoners occupied a deeply uncertain legal position. Britain refused to classify captured Americans as prisoners of war, treating them instead as rebels subject to criminal prosecution. This meant the customary exchange cartels between European states did not apply. Benjamin Franklin, American Commissioner in Paris, organised financial relief through intermediaries such as the Nantes merchant Jonathan Williams and the British MP David Hartley, who personally advanced funds. Franklin's accounts show regular disbursements for clothing, blankets, and supplementary food — aid that kept men alive through harsh winters. He also pressed relentlessly for prisoner exchanges, with limited success until later in the war.
Charles Herbert, a Massachusetts sailor held at Forton from 1777 to 1779, kept a diary — later published as A Relic of the Revolution — that provides the most vivid firsthand account of daily life. Herbert recorded a monotonous routine: prisoners were mustered and counted each morning, received a ration of poor beef or "stinking" fish with a pound of bread, and were locked into their quarters at nightfall. He described men pooling pennies from Franklin's relief funds to buy vegetables from local market women permitted to trade at the prison gate. Boredom and cold were constant; Herbert wrote of prisoners staging theatrical performances, holding mock courts, and debating politics to fill the long days.
Escape was a persistent preoccupation. Prisoners dug tunnels, bribed guards, and exploited lax perimeter security with remarkable regularity. Herbert catalogued multiple breakouts, noting that escapees typically headed for the south coast, where sympathetic smuggling networks ferried them across the Channel to France. Captain Gustavus Conyngham, the Continental Navy raider whom the British had branded a pirate, escaped Forton in November 1779 — reportedly concealed in a load of laundry — and reached the Netherlands. The frequency of escapes eventually prompted the Admiralty to tighten security and increase guard patrols, though breakouts continued until the war's end.
Key Figures
- Charles Herbert - American prisoner at Forton whose diary is a key primary source on conditions
- Benjamin Franklin - Organised financial relief and prisoner exchange efforts from Paris
- David Hartley - British MP sympathetic to the American cause who advocated for prisoner welfare and exchanges
- Captain Thomas Thompson - Continental Navy officer captured and held at Forton
- Gustavus Conyngham - Continental Navy captain held at Forton before his escape in 1779
What's There Today
The Forton Prison site in Gosport has been substantially redeveloped. The original prison buildings were largely demolished or repurposed over the 19th and 20th centuries. Parts of the site were later used as military barracks (Forton Barracks / St Vincent), and some structures from the broader complex may survive in altered form within the subsequent development. The area is now a mix of residential and commercial use, and there is limited visible evidence of the 18th-century prison.
Gosport is accessible by ferry from Portsmouth Harbour (a short crossing) or by road. While the prison site itself offers little for visitors to see, the wider Portsmouth area is rich in naval heritage relevant to the American Revolution, including the Historic Dockyard (where period warships are displayed), the Royal Naval Museum, and the harbour from which many of the ships involved in the war sailed. The Hampshire Record Office in Winchester holds some administrative records related to the prison.
Sources
- Herbert, Charles, A Relic of the Revolution (Charles H. Peirce, 1847) — Herbert's diary of captivity at Forton, 1777-1779
- Cohen, Sheldon S., Yankee Sailors in British Gaols: Prisoners of War at Forton and Mill, 1777-1783 (University of Delaware Press, 1995)
- Crawford, Michael J., ed., Naval Documents of the American Revolution (Naval History and Heritage Command, ongoing)
- Vail, R.W.G., "Forton Prison During the American Revolution," in Proceedings of the American Antiquarian Society (1937)
- Franklin, Benjamin, correspondence and accounts relating to prisoner relief, in The Papers of Benjamin Franklin (Yale University Press, ongoing)
- The National Archives (UK), Admiralty records (ADM 98, ADM 105) relating to prisoner administration
Portsmouth Historic Dockyard
Military
Historical Significance
Portsmouth was the Royal Navy's foremost dockyard during the American Revolution and the primary base from which fleets were dispatched to fight in the American war. Situated on the Solent in Hampshire, Portsmouth's deep natural harbour and strategic position on the English Channel made it the navy's principal operational base. It was from Portsmouth that many of the fleets and convoys sailed for North America, the Caribbean, and later for operations against France and Spain when the war expanded into a global conflict after 1778.
The dockyard was the largest industrial complex in the world during the 18th century, employing thousands of workers in shipbuilding, repair, and supply. During the Revolution, Portsmouth built and fitted out ships of the line and frigates, manufactured rigging and sails, and stored the vast quantities of supplies needed for transatlantic operations. The dockyard's block mills, designed by Marc Isambard Brunel and Samuel Bentham and installed from 1803, were pioneering examples of mass production, though they post-date the Revolution. The Georgian storehouses, ropewalks, and dry docks that survive today were in active use during the war.
Lord Sandwich, as First Lord of the Admiralty, faced persistent criticism over the readiness of the fleet, and the condition of the dockyards was a political issue throughout the war. The entry of France into the conflict in 1778 stretched resources to breaking point, as the navy now had to defend home waters and the Channel as well as maintain forces across the Atlantic. The Franco-Spanish Armada of 1779, which threatened an invasion of England, brought the war directly to Portsmouth's doorstep. The dockyard's capacity to build and repair ships was a critical factor in Britain's ability to sustain the war.
Key Figures
- Lord Sandwich (John Montagu, 4th Earl) - First Lord of the Admiralty; oversaw the dockyards during the war
- Admiral Augustus Keppel - Commander of the Channel Fleet based at Portsmouth; his court-martial in 1779 was a political sensation
- Admiral Sir George Rodney - Sailed from Portsmouth for Caribbean operations
- Admiral Richard Howe - Naval commander in North America; his ships were fitted at Portsmouth
- Dockyard workforce - Skilled shipwrights, ropemakers, and labourers who sustained the fleet
What's There Today
Portsmouth Historic Dockyard is one of Britain's premier maritime heritage sites. The dockyard remains partially active as a naval base (HMNB Portsmouth), with the historic section open to the public as a museum complex. Key attractions include HMS Victory (Nelson's flagship at Trafalgar, but built in the 1760s and therefore a ship of the Revolutionary era), the National Museum of the Royal Navy, the Mary Rose Museum, and HMS Warrior. HMS Victory, launched in 1765, was in active service during the American Revolution and fought at the First Battle of Ushant in 1778, making it a directly relevant artefact of the period.
The dockyard charges an admission fee (multi-attraction tickets are available). It is located in Old Portsmouth, accessible by train to Portsmouth Harbour station, which is immediately adjacent. The Georgian dockyard buildings, dry docks, and ropehouses provide an authentic sense of the scale of 18th-century naval operations. The National Museum of the Royal Navy includes exhibitions on the Georgian navy. Portsmouth is approximately 70 miles southwest of London and is also accessible by car via the M3/A3. The nearby Round Tower and old fortifications offer views of the harbour entrance.
Sources
- Coad, Jonathan, The Royal Dockyards 1690-1850 (Scolar Press, 1989)
- Rodger, N.A.M., The Insatiable Earl: A Life of John Montagu, 4th Earl of Sandwich (W.W. Norton, 1994)
- National Museum of the Royal Navy, www.nmrn.org.uk
- Portsmouth Historic Dockyard, www.historicdockyard.co.uk
- Mackesy, Piers, The War for America, 1775-1783 (Harvard University Press, 1964)
- Lavery, Brian, The Ship of the Line, vol. 1 (Conway Maritime Press, 1983)
Warley Camp Site
Military
Historical Significance
In 1778, as France's alliance with the American colonies transformed the Revolutionary War into a global conflict, Britain scrambled to defend its home territory against the threat of invasion. Warley Common, near Brentwood in Essex, was selected as the site of a major military encampment to protect the eastern approaches to London. From May to November 1778, approximately 10,000 soldiers were encamped on the common, drilling, training, and preparing to resist a French landing on the Essex or Kent coast. Alongside Coxheath in Kent, Warley was one of the two largest military camps established in England during the American war.
King George III personally reviewed the troops at Warley on 20 October 1778, an event of considerable public significance. The royal review was intended to demonstrate the nation's readiness and resolve, and it attracted enormous attention. The camp's most famous visual record is the painting by Philippe-Jacques de Loutherbourg, who depicted a dramatic mock battle staged at Warley for the entertainment of spectators. De Loutherbourg's painting, now in the Royal Collection, captures the scale and spectacle of the encampment and has become one of the iconic images of British military life during the American Revolutionary era.
The Warley encampment reveals the extent to which the American war disrupted life in Britain itself. The mobilisation of militia, the requisitioning of common land, and the presence of thousands of soldiers in the Essex countryside were direct consequences of a conflict being fought three thousand miles away. The camp also exposed the limitations of Britain's military infrastructure: the militia units assembled at Warley varied widely in quality, and the logistical challenge of feeding and equipping such a large force on home soil strained local resources. Warley Camp was a visible and unavoidable reminder to the British public that the war in America had consequences at home.
Key Figures
- King George III - Reviewed troops at Warley Common on 20 October 1778, lending royal authority to the home defence effort.
- Lord Amherst (Jeffery Amherst) - Commander-in-chief of the forces in Britain, who organised the system of defensive encampments including Warley.
- Philippe-Jacques de Loutherbourg - Alsatian-born painter whose depiction of the Warley mock battle is held in the Royal Collection and remains the most vivid visual record of the camp.
- Lord George Germain - Secretary of State for the Colonies whose prosecution of the American war had necessitated the home defence mobilisation.
- Sir William Howe - Former commander-in-chief in America who had returned to England by 1778 and was among those involved in discussions about home defence strategy.
What's There Today
Warley Common itself no longer exists in its eighteenth-century form. Much of the land was acquired by the War Office in the nineteenth century for the construction of Warley Barracks, which served as the depot of the Essex Regiment and later the headquarters of the Ford Motor Company's British operations. The Essex Regiment Chapel, built in 1857, is a Grade II listed building that survives on the former barracks site and provides a tangible link to the area's military heritage, though it post-dates the American War by several decades.
The surrounding area of Brentwood has been extensively developed, and there are no visible remains of the 1778 encampment. However, the Essex Regiment Museum (now part of the Combined Military Services Museum in Maldon) holds artefacts and records relating to the Essex militia's role during the American war period. Visitors interested in de Loutherbourg's famous painting of the Warley mock battle can view it in the Royal Collection. Brentwood is easily accessible from London by rail, and a visit can be combined with other sites in the southeast connected to the American Revolution.
Sources
- Stephen Conway, The British Isles and the War of American Independence (Oxford University Press, 2000)
- Piers Mackesy, The War for America, 1775-1783 (Harvard University Press, 1964)
- Royal Collection Trust, catalogue entry for Philippe-Jacques de Loutherbourg, The Mock Attack at Warley Camp (rct.uk)
- J. W. Burrows, The Essex Regiment: 1st Battalion (44th) (John H. Burrows & Sons, 1923)
Edmund Burke's Estate Beaconsfield
People
Historical Significance
Edmund Burke (1729-1797) was one of the most eloquent and influential voices in Parliament opposing the British government's policy toward the American colonies. An Irish-born Whig MP, Burke served as private secretary to the Marquess of Rockingham and represented several constituencies, including Bristol (1774-1780), a city with deep commercial ties to America. His speeches on American taxation (1774) and on conciliation with the colonies (1775) are among the finest examples of parliamentary oratory and remain widely studied as foundational texts on the conflict.
Burke's arguments against coercion were rooted in pragmatism as much as principle. He contended that the colonists were heirs to English traditions of liberty and that attempting to govern them by force was both unjust and impractical. His famous observation that "an Englishman is the unfittest person on earth to argue another Englishman into slavery" captured his conviction that British and American political cultures were fundamentally aligned. He did not initially advocate for independence -- rather, he urged conciliation and a restoration of the pre-crisis relationship. It is important to note that Burke's opposition to the war did not extend to a wholesale embrace of revolutionary principles; his later hostility to the French Revolution in Reflections on the Revolution in France (1790) demonstrated the conservative dimensions of his thought.
Burke purchased Butler's Court (also known as Gregories) in Beaconsfield in 1768, and it remained his country home until his death in 1797. The estate was a financial burden -- Burke was never wealthy and relied on political patrons -- but it provided a base away from Westminster where he could write and entertain political allies. He is buried in the parish church of St Mary and All Saints in Beaconsfield.
Key Figures
- Edmund Burke - Whig MP, orator, and political philosopher who opposed the war with America
- Marquess of Rockingham (Charles Watson-Wentworth) - Burke's political patron, who as Prime Minister repealed the Stamp Act and later negotiated peace
- Charles James Fox - Fellow Whig who shared Burke's opposition to the American war (though they later split over the French Revolution)
- Lord North - The Prime Minister whose American policy Burke relentlessly criticised in Parliament
What's There Today
The estate at Butler's Court is private property and is not open to the public. The house has been substantially altered since Burke's time, and the grounds are not accessible to visitors. However, Burke's grave at St Mary and All Saints Church in Beaconsfield Old Town is accessible and can be visited. The church is a short walk from the town centre and is generally open during daytime hours. Burke's grave is inside the church, and there are memorial inscriptions.
Beaconsfield is a prosperous market town in Buckinghamshire, easily reached from London by rail (Chiltern Railways) or by car via the M40 motorway. The Old Town retains its Georgian character and has several historic inns. There is no dedicated Burke museum or heritage centre, so Heritage Trail visitors should plan to visit the church as the primary point of interest. A brief stop can be combined with visits to other sites in the Southeast England cluster of the trail.
Sources
- Lock, F.P., Edmund Burke, Vols. 1-2 (Oxford University Press, 1998-2006)
- Bourke, Richard, Empire and Revolution: The Political Life of Edmund Burke (Princeton University Press, 2015)
- Burke, Edmund, Speech on Conciliation with America (1775)
- Burke, Edmund, Speech on American Taxation (1774)
- O'Brien, Conor Cruise, The Great Melody: A Thematic Biography of Edmund Burke (Sinclair-Stevenson, 1992)
Firle Place (Gage Family Estate)
People
Historical Significance
Firle Place, a Tudor manor house nestled beneath the South Downs in East Sussex, has been the seat of the Gage family since the fifteenth century. Its most consequential resident in the context of the American Revolution was General Thomas Gage (1718/19-1787), who served as Commander-in-Chief of British forces in North America from 1763 and then as Military Governor of Massachusetts from 1774. It was Gage who, from his headquarters in Boston, dispatched the column of regulars toward Lexington and Concord on the night of April 18, 1775 — the expedition that triggered the first armed engagements of the Revolutionary War on the morning of April 19.
Gage's mission was to seize provincial military stores at Concord and, if possible, to arrest the patriot leaders Samuel Adams and John Hancock. The operation was compromised almost from the start. Intelligence about the march reached the colonial militia through multiple channels, most famously the midnight rides of Paul Revere and William Dawes. The resulting clashes at Lexington Green and the North Bridge at Concord, followed by a punishing American pursuit of the retreating British column back to Boston, transformed a political crisis into an armed rebellion.
Two months later, the Battle of Bunker Hill (June 17, 1775) inflicted devastating casualties on the British forces under Gage's overall command. Although the British technically won the field, the cost was staggering — over a thousand killed and wounded — and Gage was recalled to England in October 1775, replaced by General William Howe. He returned to Firle Place and lived there in relative obscurity until his death on April 2, 1787. He is buried in the churchyard of St Peter's Church in Firle village, a short walk from the estate.
A fascinating subplot surrounds Gage's wife, Margaret Kemble Gage (1734-1824), born into a prominent Anglo-Dutch family in New Brunswick, New Jersey. Historians have long debated whether she leaked her husband's plans for the Concord expedition to the patriot network. The circumstantial evidence is suggestive: Gage had confided operational details to very few people, and Dr. Joseph Warren in Boston appeared to have remarkably precise intelligence about the march. While the question remains unresolved, the possibility that divided loyalties within the Gage household helped spark the Revolution adds a compelling personal dimension to the Firle Place story.
Key Figures
- General Thomas Gage — Commander-in-Chief of British forces in North America (1763-1775) and Military Governor of Massachusetts; ordered the march on Concord that ignited the Revolutionary War
- Margaret Kemble Gage — American-born wife of General Gage; suspected of passing intelligence about the Concord expedition to patriot leaders
- General William Howe — Gage's successor as Commander-in-Chief in North America; led British forces through the early campaigns of the war
- Dr. Joseph Warren — Boston patriot leader who dispatched Paul Revere and William Dawes on their midnight rides, likely acting on intelligence from a source close to Gage; killed at Bunker Hill
What's There Today
Firle Place remains a privately owned country house, home to the Gage family to this day. The house is open to visitors on select days during the summer months and contains an impressive collection of Old Master paintings, Georgian furniture, and Sevres porcelain accumulated by the family over centuries. While no dedicated exhibition addresses General Gage's American career, the house itself — its portraits, family archives, and period interiors — offers a tangible connection to the world of the eighteenth-century British military aristocracy that governed colonial affairs.
St Peter's Church in Firle village, where General Gage is buried, is a short walk from the estate and is open to visitors. The church contains Gage family memorials spanning several centuries. The surrounding village of Firle and the South Downs landscape remain remarkably unspoiled, offering a sense of the rural England to which Gage retired after his American command. The nearby town of Lewes provides additional context: it was here, during the Bonfire Night celebrations of the 1770s, that effigies of unpopular political figures were burned — a reminder that political passions surrounding the American conflict reached deep into the English countryside.
Sources
- Alden, John R. General Gage in America: Being Principally a History of His Role in the American Revolution. Baton Rouge: Louisiana State University Press, 1948.
- Fischer, David Hackett. Paul Revere's Ride. New York: Oxford University Press, 1994.
- Thomas, Peter D. G. Tea Party to Independence: The Third Phase of the American Revolution, 1773-1776. Oxford: Clarendon Press, 1991.
- Ketchum, Richard M. Decisive Day: The Battle for Bunker Hill. New York: Doubleday, 1974.
Hayes Place (Pitt the Elder)
People
Historical Significance
William Pitt the Elder (1708-1778), created Earl of Chatham in 1766, was the most prominent British statesman to champion the cause of the American colonists in the years leading to the Revolution. As the architect of British victory in the Seven Years' War (1756-1763), Pitt had overseen the expansion of the empire that the American crisis would fracture. His prestige was immense, and his interventions in the American debate carried enormous weight on both sides of the Atlantic. The colonists revered him: Pittsburgh, Pennsylvania, is named in his honour.
Pitt's position on America was nuanced in ways that are sometimes overlooked. He opposed Parliament's right to tax the colonies -- famously declaring during the Stamp Act crisis that "this kingdom has no right to lay a tax upon the colonies" -- but he did not support American independence. In his final speech in the House of Lords on 7 April 1778, he rose to oppose the Duke of Richmond's motion to recognise American independence, arguing that while the Americans' grievances were just, dismembering the empire was unacceptable. The effort of speaking proved too much: Pitt collapsed during the debate and was carried from the chamber. He died on 11 May 1778 at Hayes Place, his country home in Kent.
Hayes Place was Pitt's retreat from the pressures of public life and the site of his death. He had purchased the estate in the 1750s, sold it, and later repurchased it. His financial affairs were chronically strained despite his political eminence. The house provided the setting for his final years, during which he followed the American crisis with intense concern even as his health declined. It was from Hayes that he made his last journeys to Westminster to speak against both the government's coercive policies and the prospect of American separation.
Key Figures
- William Pitt the Elder (Earl of Chatham) - Former Prime Minister, champion of colonial rights, opponent of American independence
- William Pitt the Younger - Pitt's son, who became Prime Minister in 1783 at the age of 24
- Hester Grenville, Countess of Chatham - Pitt's wife, who managed the household during his long periods of illness
- Duke of Richmond - Proposed the motion for recognising American independence that Pitt opposed in his final speech
What's There Today
Hayes Place no longer survives. The original house was demolished, and the area has been substantially developed as part of the suburban growth of Hayes in the London Borough of Bromley. There are limited heritage markers in the area to indicate the site's significance. Visitors should be aware that there is little physical fabric remaining to connect to Pitt's residence.
The area is accessible via public transport from central London (Hayes station, served by Southeastern railway). For Heritage Trail visitors, this site is primarily of historical interest rather than a visual destination. The story it tells -- of the greatest British statesman of his age dying in defence of a position that satisfied neither the American patriots nor the British government -- is one of the most dramatic and poignant episodes of the Revolution. Visitors may wish to combine this stop with a visit to Westminster Abbey, where Pitt is buried and where a substantial monument commemorates him, or to the Houses of Parliament where his final speech took place.
Sources
- Peters, Marie, Pitt and Popularity: The Patriot Minister and London Opinion During the Seven Years' War (Oxford University Press, 1980)
- Brown, Peter D., William Pitt, Earl of Chatham: The Great Commoner (Allen & Unwin, 1978)
- Williams, Basil, The Life of William Pitt, Earl of Chatham (Longmans, 1913)
- Parliamentary History of England, Vol. 19 (Hansard) -- record of Pitt's final speech, April 1778
- Black, Jeremy, Pitt the Elder (Cambridge University Press, 1992)
Stoneland Lodge Site (Lord George Germain)
People
Historical Significance
Stoneland Lodge near Withyham in East Sussex was the country estate of Lord George Germain (1716-1785), known for most of his life as Lord George Sackville and later created Viscount Sackville. As Secretary of State for the American Colonies from 1775 to 1782, Germain was the single most important figure in directing British military strategy during the American Revolution. From his offices in Whitehall, he oversaw the deployment of armies across the Atlantic, coordinated with military commanders, and attempted to manage a war fought thousands of miles away in an era when communications took weeks to cross the ocean.
Germain's record as Secretary of State has been the subject of intense historical debate. His critics -- and there were many, both in his own time and since -- blamed him for strategic failures including the lack of coordination that led to Burgoyne's disaster at Saratoga in 1777, the confused chain of command between generals in America, and the overall inability to translate tactical victories into strategic success. His defenders argue that he was an energetic administrator who faced impossible logistical challenges and was often undermined by commanders in the field who disregarded or reinterpreted his instructions. The truth likely lies somewhere between these positions: Germain was industrious and determined but also rigid, personally difficult, and burdened by a controversial past.
That past was the shadow of the Battle of Minden in 1759, where Germain (then Lord George Sackville) had been found guilty by a court-martial of disobeying orders and declared unfit to serve in any military capacity. This disgrace haunted his political career and provided his opponents with a ready weapon. George III's willingness to rehabilitate Germain and entrust him with the American war was itself controversial. Stoneland Lodge, in the quiet Sussex countryside, was Germain's retreat from the political storms that surrounded him throughout the conflict.
Key Figures
- Lord George Germain (Viscount Sackville) - Secretary of State for the American Colonies, 1775-1782; principal architect of British military strategy
- George III - The King who appointed Germain despite his controversial past
- Lord North - Prime Minister under whom Germain served
- General John Burgoyne - Commander whose defeat at Saratoga (1777) was partly attributed to failures of coordination with Germain's office
- General Sir Henry Clinton - Commander-in-Chief in America who had a deeply acrimonious relationship with Germain
What's There Today
Stoneland Lodge is in private ownership and is not accessible to the public. The site has been altered over time, and the degree to which the original 18th-century structure survives is uncertain. The surrounding area near Withyham in the High Weald of East Sussex is attractive countryside but offers no heritage interpretation related to Germain or the American Revolution.
For Heritage Trail visitors, this site is primarily of biographical interest -- the private retreat of the man who, more than any other individual, directed the British military effort against the American colonies. There is little to see at the site itself, and visitors cannot access the property. The nearby village of Withyham has a notable parish church, St Michael and All Angels, which contains the Sackville family chapel with impressive monuments (though these predate Germain's period). Visitors interested in Germain's story may find the site most meaningful as a waypoint on a broader tour of Southeast England trail sites, combining it with visits to Paine's house in Lewes or other accessible locations in the region.
Sources
- Valentine, Alan, Lord George Germain (Oxford University Press, 1962)
- Mackesy, Piers, The War for America 1775-1783 (Harvard University Press, 1964)
- Brown, Gerald Saxon, The American Secretary: The Colonial Policy of Lord George Germain, 1775-1778 (University of Michigan Press, 1963)
- O'Shaughnessy, Andrew Jackson, The Men Who Lost America: British Leadership, the American Revolution, and the Fate of the Empire (Yale University Press, 2013)
- Willcox, William B., Portrait of a General: Sir Henry Clinton in the War of Independence (Knopf, 1964)
Tom Paine's House Lewes
People
Historical Significance
Thomas Paine lived in the Sussex town of Lewes from approximately 1768 to 1774, a formative period that shaped the political thinking he would unleash upon the world with Common Sense (1776) and Rights of Man (1791). Paine came to Lewes to take up a position as an excise officer, collecting taxes on goods such as tobacco and alcohol. He lodged and later lived above the premises of Samuel Ollive, a tobacconist, on Bull House in the High Street. After Ollive's death, Paine married his daughter Elizabeth in 1771, though the marriage was unhappy and the couple formally separated in 1774.
Lewes in the 1760s and 1770s was a lively market town with a tradition of political radicalism and dissenting thought. Paine joined a debating society that met at the White Hart Inn, where local tradesmen, professionals, and intellectuals discussed the political questions of the day. It was in these Lewes debates that Paine honed the argumentative skills and rhetorical directness that would later characterize his revolutionary writings. He also wrote his first known political work in Lewes — The Case of the Officers of Excise (1772), a pamphlet arguing for better pay for excisemen, which he took to London to lobby Parliament (unsuccessfully).
Paine's Lewes years ended in personal and professional failure. He was dismissed from the excise service in 1774 for neglecting his duties (he had been absent lobbying in London), his marriage collapsed, and his tobacco shop went bankrupt. He left England for America in October 1774, armed with a letter of introduction from Benjamin Franklin, whom he had met in London. Within two years, Common Sense would make him the most widely read political writer in the American colonies and one of the intellectual architects of the Revolution. The Lewes period is thus the crucible from which one of the Revolution's most important voices emerged.
Key Figures
- Thomas Paine - Excise officer in Lewes 1768-1774, later author of Common Sense and Rights of Man
- Elizabeth Ollive Paine - Paine's second wife, daughter of his Lewes landlord; they married in 1771 and separated in 1774
- Samuel Ollive - Lewes tobacconist in whose house Paine lodged
- Benjamin Franklin - Met Paine in London and provided the letter of introduction that brought him to America in 1774
- Members of the Headstrong Club - Lewes debating society (the informal name is traditional but not certainly documented) where Paine sharpened his rhetorical skills
What's There Today
Bull House, the building where Paine lived and worked in Lewes, survives on the High Street and bears a commemorative plaque. The building is now partly occupied by the Sussex Archaeological Society (now Sussex Past) and is not regularly open to the public as a Paine museum, though it is accessible during some heritage events. The plaque and the building's exterior can be viewed at any time from the street.
Lewes is a characterful town with a strong sense of its radical heritage. The White Hart Hotel on the High Street still operates and claims a connection to Paine's debating society, though the present building has been significantly altered. The town also celebrates its history with an annual Bonfire Night procession on November 5th, one of the largest in England, rooted in a long tradition of popular dissent. Lewes is accessible by rail (Lewes station, with frequent services from London Victoria and Brighton) and by road. The town offers an excellent day visit combining Paine's story with Lewes Castle, the medieval Priory ruins, and the South Downs National Park.
Sources
- Keane, John, Tom Paine: A Political Life (Bloomsbury, 1995)
- Nelson, Craig, Thomas Paine: Enlightenment, Revolution, and the Birth of Modern Nations (Viking, 2006)
- Paine, Thomas, The Case of the Officers of Excise (1772)
- Rickman, Thomas Clio, The Life of Thomas Paine (1819) — an early biography by Paine's friend, though hagiographic in tone
- Sussex Archaeological Society, Bull House historical information
Fort Nelson, Royal Armouries
Museums
Historical Significance
Fort Nelson on Portsdown Hill in Hampshire houses the Royal Armouries' national collection of artillery -- over 700 pieces spanning six hundred years of gunpowder warfare. While the fort itself dates from the 1860s, the collection it contains reaches back to the earliest days of cannon, and the 18th-century guns within it are directly relevant to understanding the role of artillery during the American Revolution. Artillery was not merely a supporting arm during the war; it was decisive at several of the conflict's most consequential engagements.
At Bunker Hill in June 1775, British artillery -- including 6-pounder and 12-pounder field guns -- supported the infantry assaults on the American redoubt, though the steep terrain and improvised fortifications limited its effectiveness during the initial attacks. The experience underscored the difficulty of deploying guns in the broken, wooded terrain that characterised much of the American theatre. Naval artillery proved equally critical: the Royal Navy's guns supported amphibious operations, conducted bombardments of coastal positions, and fought fleet engagements against French, Spanish, and eventually Dutch naval forces. At Yorktown in October 1781, it was the overwhelming weight of Franco-American siege artillery -- including French Gribeauval guns, with Rochambeau's siege train deploying twelve 24-pounders, eight 16-pounders, and sixteen mortars -- that battered the British defences into submission. The siege demonstrated the devastating effect of concentrated artillery fire against fixed fortifications, a lesson that would influence military engineering and gunnery for decades.
Fort Nelson's collection includes 18th-century guns of the types deployed during these engagements: smoothbore muzzle-loading cannon, howitzers, and mortars that represent the state of artillery technology during the Revolutionary War period. The Artillery Hall houses some of the finest early bronze guns through to the heavy guns of the 18th and 19th centuries, providing visitors with a material record of how artillery evolved and was employed in the wars of this era.
Key Figures
- Henry Knox (1750-1806) -- the Continental Army's chief of artillery, who famously transported captured British guns from Fort Ticonderoga to break the Siege of Boston in early 1776
- Comte de Rochambeau (1725-1807) -- commander of the French expeditionary force whose siege train proved decisive at Yorktown in 1781
- Royal Artillery officers and gunners -- who served the guns at Bunker Hill, throughout the New York and Philadelphia campaigns, and at Yorktown
- Admiral Sir George Rodney (1718-1792) -- whose naval gunnery at the Battle of the Saintes in 1782 restored British naval superiority in the Caribbean
What's There Today
Fort Nelson is itself a remarkable historical site. Built in the 1860s as one of five forts on Portsdown Hill overlooking the naval base at Portsmouth, it was part of the chain of fortifications commissioned under Lord Palmerston following the 1860 Royal Commission on the Defence of the United Kingdom. Known popularly as "Palmerston's Follies" because some faced inland rather than seaward, the forts were designed to protect Portsmouth from land-based attack. Fort Nelson is a Grade I Listed Building featuring a polygonal layout with thick brick walls, a deep dry moat, caponiers for enfilade fire, and an extensive network of underground tunnels and ramparts. The fort was restored at a cost of several million pounds and opened to the public in 1994, becoming part of the Royal Armouries in 1995.
The Artillery Hall is the centrepiece of the collection, displaying guns from the medieval period through to the modern era. Visitors can also explore the fort's ramparts, tunnels, and defensive features, gaining an understanding of how fortifications were designed and defended -- principles that were applied, on a smaller scale, at the earthwork fortifications of the American Revolution. The collection includes notable pieces such as the Boxted Bombard (an English wrought-iron cannon from around 1450), the Dardanelles Gun (a Turkish bronze cannon from 1464), and French field guns captured at Waterloo.
Fort Nelson is located at Portsdown Hill Road, Fareham, Hampshire PO17 6AN. Admission is free, though car parking costs £3. Opening hours vary seasonally: April to October, the fort is open daily 10:00 to 17:00 during school holidays and Tuesday to Sunday during term time; November to March, hours are 10:00 to 16:00 on the same pattern. Last admission is one hour before closing. The site is closed 24-26 December. Free visits can be booked through Eventbrite.
Sources
- Royal Armouries. Artillery Hall and fort displays. Fort Nelson, Fareham.
- Royal Armouries. "Fort Nelson." royalarmouries.org.
- "Fort Nelson, Hampshire." Wikipedia. Accessed 2025.
- American Battlefield Trust. "Boom! Artillery in the American Revolution." battlefields.org.
- Chartrand, Rene. The French Army in the American War of Independence. Men-at-Arms Series 244. Oxford: Osprey Publishing, 1991.
Royal Engineers Museum, Chatham
Museums
Historical Significance
The Royal Engineers played a critical but often overlooked role in the American Revolution. Military engineers designed and built the fortifications, conducted siege operations, surveyed terrain, and produced the maps that shaped British strategy throughout the war. At the outbreak of hostilities in 1775, only one engineer was on duty in all of North America: Captain John Montresor, who was appointed Chief Engineer of America in December of that year. He was joined by three additional engineers during 1775 and a further twenty-one in 1776, reflecting the urgent demand for their skills as the war expanded. The Royal Engineers Museum in Gillingham, Kent -- the largest military museum in the county -- preserves the history of this corps and its contributions to British military engineering across more than three centuries.
Engineers were present at nearly every major engagement of the American war. At Bunker Hill in June 1775, the hastily constructed American redoubt on Breed's Hill demonstrated the decisive importance of fieldworks, a lesson that shaped British engineering priorities for the remainder of the conflict. Engineers designed the defensive works around New York following its capture in 1776, fortified Philadelphia during the British occupation, and constructed the network of redoubts and earthworks at Yorktown in 1781 that Cornwallis hoped would hold against the Franco-American siege. The siege of Yorktown itself was a textbook exercise in the engineering principles laid down by Vauban: the attackers advanced through parallel trenches dug progressively closer to the British lines, bringing their artillery to bear with devastating effect. The failure of the Yorktown fortifications to withstand this methodical approach contributed directly to the British surrender that effectively ended the war.
Captain Montresor was also a prolific surveyor and cartographer, producing as many as two thousand maps during his career in America. His map of New York is considered one of the finest depictions of the city and its surroundings produced during the period, and it was used by both sides during the war. The mapping work of the Royal Engineers -- recording terrain, fortifications, and lines of communication -- produced a body of cartographic material that remains an important primary source for understanding the geography of the conflict.
The museum's collections encompass over 500,000 objects relating to the history of military engineering. While the American Revolution represents one chapter within the broader story the museum tells, the corps' experience in America was formative: it demonstrated the challenges of engineering operations in unfamiliar terrain, across vast distances, and against an adversary who proved adept at using fieldworks to offset British advantages in training and discipline.
Key Figures
- Captain John Montresor (1736-1799) -- Chief Engineer of America from December 1775, who served through the Siege of Boston, the battles around New York, and the campaigns in New Jersey and Pennsylvania; a prolific cartographer who produced approximately two thousand maps during his career in America
- Royal Engineers officers and sappers -- the small corps of engineers who designed fortifications at Boston, New York, Philadelphia, and Yorktown, and conducted siege and survey operations throughout the war
- General Charles Cornwallis (1738-1805) -- whose defensive works at Yorktown, constructed under the direction of Royal Engineers, proved insufficient against the Franco-American siege in October 1781
What's There Today
The Royal Engineers Museum is housed in the former Ravelin Building at Brompton Barracks, a site with deep connections to the history of the corps. The museum's galleries cover the full span of Royal Engineers history from the 1700s to the present, with exhibits organised by the diverse specialisms of military engineering: fortification, bridging, bomb disposal, camouflage, signals, photography, transportation, and maps. The maps and plans collection is of particular relevance to the American Revolution, documenting the places where the corps served and built. Visitors can explore the technical aspects of military engineering through exhibits featuring equipment used for bridging, fortification, and demolition. The museum also holds twenty-five Victoria Crosses, a Wellington map from Waterloo, and a V2 rocket among its nationally significant objects.
The museum is located on Prince Arthur Road in Gillingham, Kent, a short distance from Chatham town centre. It is open Tuesday to Sunday, 10:00 to 17:00, with last entry at 16:00, and also opens on Bank Holiday Mondays. Admission is charged: adults pay £17.50, children aged 5-15 pay £8, and seniors and students pay £15. Family tickets are available. All tickets are valid for twelve months and include entry to all events. The museum also maintains a research library and archive that can be accessed by appointment.
For visitors following the heritage trail, the Royal Engineers Museum provides insight into a dimension of the American Revolution that is rarely explored in other institutions: the engineering war of fortifications, sieges, and maps that underpinned every major campaign.
Sources
- Royal Engineers Museum. Galleries and collection records. Gillingham, Kent.
- "The Royal Engineers Museum." Wikipedia. Accessed 2025.
- American Battlefield Trust. "Fortifications in the American Revolution." battlefields.org.
- Montresor, John. Maps and surveys, 1754-1778. American Revolutionary Geographies Online, argomaps.org.
- Spring, Matthew H. With Zeal and with Bayonets Only: The British Army on Campaign in North America, 1775-1783. Norman: University of Oklahoma Press, 2008.
Royal Green Jackets (Rifles) Museum
Museums
Historical Significance
The 60th (Royal American) Regiment of Foot occupies a unique position in the history of the American Revolution: it was the only British line regiment raised in the American colonies themselves. Formed in 1755-56 at the onset of the French and Indian War, the regiment was created specifically to meet the demands of warfare in the forests and frontier of North America. Its battalions were raised on Governors Island, New York, and recruited heavily from colonial settlers, including many men of Swiss and German descent. The regiment's founding officers included European professionals such as Henry Bouquet, a Swiss soldier whose innovative ideas about light infantry tactics, practical field clothing, and the use of rifles rather than smoothbore muskets would profoundly influence the future development of the British Army.
When the Revolution broke out in 1775, the 60th's colonial origins created an uncomfortable irony: a regiment born in America now fought against Americans. During the war, the regiment's battalions were dispersed across multiple theatres. The 1st and 2nd Battalions served in the Caribbean, while newly raised 3rd and 4th Battalions -- recruited this time from Britain rather than the colonies -- were deployed to the southern theatre and the Floridas. Companies of the 60th fought at the Battle of Briar Creek, Georgia, on March 3, 1779, and manned gun batteries during the Siege of Savannah in October 1779, helping to repel the combined Franco-American assault. Eight companies were part of the garrison at Pensacola, West Florida, and surrendered when the Spanish captured the post on May 9, 1781. Other elements served at St. Vincent and Antigua, and participated in the ill-fated Nicaragua expedition of 1780.
The 60th's broader significance lies in its pioneering role in the development of light infantry and rifle tactics within the British Army. The frontier warfare of the 1750s and 1760s had demonstrated that conventional European line tactics were inadequate for the wooded terrain of North America. The 60th's experience informed the creation of specialist rifle and light infantry units in later decades, including the famous 5th Battalion raised in 1797, which became the first rifle battalion in the regular British Army. This lineage runs directly through to the King's Royal Rifle Corps and ultimately to The Rifles, the regiment whose history the Winchester museum now preserves.
Key Figures
- Henry Bouquet -- Swiss-born officer of the 60th who pioneered light infantry tactics and the use of rifles in the British Army during the French and Indian War
- Frederick Haldimand -- Swiss-born officer who served with the 60th and later became Governor of Quebec during the Revolution, overseeing British operations in Canada
- Jacques Prevost -- Swiss soldier and adventurer who originally proposed the formation of the Royal American Regiment to the Duke of Cumberland
- Major General Augustin Prevost -- Commanded British forces in the southern theatre, where elements of the 60th served during the Revolution
What's There Today
The Royal Green Jackets (Rifles) Museum -- now also known as the Rifleman's Museum -- is located at Peninsula Barracks on Romsey Road in Winchester, Hampshire. The museum traces the history of the 60th (Royal American) Regiment, the Rifle Brigade, the King's Royal Rifle Corps, the Royal Green Jackets, and their successor regiment, The Rifles. Collections include weapons, uniforms, medals, and personal effects spanning from the mid-18th century to the present. The museum's displays on the regiment's colonial and frontier origins are particularly relevant to understanding the American Revolution, placing the conflict within the broader history of how the British Army adapted to warfare in North America. The emphasis on rifle tactics and light infantry innovation connects the 18th-century American experience to the regiment's later distinguished service in the Napoleonic Wars and beyond.
Peninsula Barracks also houses several other military museums, making Winchester a rewarding destination for anyone interested in British military history. The Rifles Museum is open Monday to Saturday, 10:00am to 4:00pm (last admission 3:30pm), and is closed on Sundays. Admission is GBP 5.00 for adults, GBP 4.50 for seniors, GBP 4.00 for students, and free for children under 16. Serving personnel and Friends of the Museum are admitted free. The barracks are a short walk south of Winchester city centre and cathedral.
Sources
- Houlding, J.A., Fit for Service: The Training of the British Army, 1715-1795 (Clarendon Press, 1981)
- Spring, Matthew H., With Zeal and With Bayonets Only: The British Army on Campaign in North America, 1775-1783 (University of Oklahoma Press, 2008)
- Griffith, Robert, Riflemen: The History of the 5th Battalion, 60th (Royal American) Regiment, 1797-1818 (Helion & Company, 2021)
- Royal Green Jackets (Rifles) Museum, Winchester, official website and interpretive materials (rgjmuseum.co.uk)
- Military Heritage, "60th (Royal American) Regiment of Foot: History and Uniform" (online guide)
Royal Hampshire Regiment Museum, Winchester
Museums
Historical Significance
The Royal Hampshire Regiment Museum in Winchester preserves the history of the 37th (North Hampshire) Regiment of Foot, one of the British regiments that served in North America during the American Revolution. The 37th Foot was ordered to America in November 1775 as part of a substantial reinforcement of British forces, and the regiment would remain in the theatre for the duration of the war, participating in several of the conflict's major engagements before enduring the humiliation of partial surrender at Yorktown.
The 37th Foot landed at Cape Fear and took part in General Howe's campaign for New York in the summer of 1776. The regiment participated in the landing on Long Island and the attack on Brooklyn on 22 August 1776, though its role in that action was relatively minor, with only one man wounded. The regiment was more heavily engaged during the capture of New York on 15-16 September, with its Light Company experiencing sharp fighting. In December 1776, the 37th was detached from Howe's main force to join the attack on Rhode Island, a base for American privateers that was a considerable thorn in the British side.
The following year brought more consequential action. The 37th fought at the Battle of Brandywine on 11 September 1777, one of the largest engagements of the war, and at Germantown on 4 October 1777, where the regiment suffered three killed and twenty wounded -- the heaviest casualties in its brigade. The Battle of Monmouth Court House on 28 June 1778, the last major encounter between the principal armies in the north, cost the British sixty dead, including two from the 37th.
After Monmouth, the 37th spent the years 1778 to 1781 in the defence of New York, a garrison role that offered few opportunities beyond raids and outpost skirmishes. Only the regiment's flanking companies -- the Light Company and the Grenadier Company -- saw significant action during this period. In 1781, the 37th's Light Company was attached to two battalions sent south to reinforce Cornwallis, and these men were among those trapped when the Franco-American siege closed around Yorktown in October. The Light Company was present at the British surrender on 19 October 1781. Prisoners from the regiment released under the Treaty of Paris in 1783 numbered nearly thirty. In June 1783, the 37th was among six regiments sent to garrison Nova Scotia, where it would spend the next six years.
Key Figures
- Officers and soldiers of the 37th (North Hampshire) Regiment of Foot -- who served in America from 1776 to 1783, fighting at Long Island, New York, Brandywine, Germantown, and Monmouth
- Light Company of the 37th Foot -- whose men were present at the surrender of Yorktown in October 1781 as part of Cornwallis's reinforced army
- General Sir William Howe (1729-1814) -- commander-in-chief of British forces during the New York and Philadelphia campaigns in which the 37th served
- General Charles Cornwallis (1738-1805) -- whose army, including the 37th's Light Company, surrendered at Yorktown
What's There Today
The Royal Hampshire Regiment Museum occupies the ground floor of Serle's House on Southgate Street in Winchester, approximately 150 metres from the High Street. The museum tells the story of the regiment from its raising in 1702 through its service across three centuries, including the American Revolution, the Napoleonic Wars, both World Wars, and subsequent conflicts. The collections include regimental colours, uniforms, weapons, medals, photographs, and personal effects that trace the experiences of the officers and men who served. Material relating to the American Revolution places the 37th Foot's service in context within the broader regimental history.
The museum is part of Winchester's cluster of military museums located in and around the Peninsula Barracks area. The nearby HorsePower Museum (the Museum of the King's Royal Hussars) occupies the same barracks complex. The Royal Hampshire Regiment Museum is open Tuesday to Friday 10:00 to 16:00 and Saturday to Sunday 12:00 to 16:00, from April to October. Admission is free. The museum can be contacted at 01962 852933.
Winchester itself has deep military connections, and the concentration of regimental museums in the city makes it a rewarding stop for visitors interested in British military history. For those following the heritage trail, the Royal Hampshire Regiment Museum offers the opportunity to trace the specific experience of one regiment through the American war -- from the landing at Cape Fear in 1776 to the surrender at Yorktown and the long garrison duty that followed.
Sources
- The Royal Hampshire Regiment Museum. "The 37th Foot in America, 1775-1783." royalhampshireregiment.org.
- National Army Museum. "37th (North Hampshire) Regiment of Foot." nam.ac.uk.
- "37th (North Hampshire) Regiment of Foot." Wikipedia. Accessed 2025.
- Spring, Matthew H. With Zeal and with Bayonets Only: The British Army on Campaign in North America, 1775-1783. Norman: University of Oklahoma Press, 2008.
- Winchester's Military Museums. winchestersmilitarymuseums.co.uk.
Southwest England
20 sites
Brixham Harbour (William of Orange Landing)
Political
Historical Significance
On 5 November 1688, William of Orange landed at Brixham with approximately 40,000 soldiers, sailors, and volunteers, triggering the Glorious Revolution that deposed James II and established parliamentary supremacy in England. The resulting English Bill of Rights (1689) became the template for colonial rights arguments and, ultimately, for the American Bill of Rights itself.
The 1689 Bill established principles that American colonists believed applied to them: parliamentary supremacy, free elections, freedom of speech in Parliament, the right to petition, restrictions on taxation without parliamentary consent, the right to bear arms for self-defence, and protections against cruel and unusual punishment. George III's perceived violations of these rights were central to the colonial case for independence. At least six clauses of the American Bill of Rights parallel the 1689 document directly: the First Amendment (right to petition), the Second Amendment (right to bear arms), and the Eighth Amendment (protection against cruel and unusual punishment) have near-identical antecedents in the English Bill of Rights.
The Virginia Declaration of Rights (1776), drafted by George Mason and a direct precursor to the Declaration of Independence, drew explicitly on the 1689 Bill. When the founders demanded their "rights as Englishmen," they meant the rights established by the Glorious Revolution -- rights they believed George III was violating.
Key Figures
- William III of Orange (1650-1702) - Landed at Brixham in 1688; became King of England after the Glorious Revolution
- George Mason (1725-1792) - Drafted the Virginia Declaration of Rights (1776), drawing on the 1689 Bill of Rights
- James Madison (1751-1836) - Principal author of the American Bill of Rights, modelled in part on the 1689 English Bill
What's There Today
A Grade II listed white marble statue of William III stands on The Strand at Brixham Harbour, created in 1888-89 by W. & T. Wills of London. The inscription reads: "William Prince of Orange, afterwards William III, King of Great Britain & Ireland, landed near this spot 5th November 1688 and issued his famous declaration 'The liberties of England and the Protestant religion I will maintain.'" The statue is a public outdoor monument, freely accessible at all times, in the atmospheric setting of a working fishing harbour. Brixham Battery and Berry Head (already on this trail for their 1779 wartime role) are approximately 1.2 km away, making this an easy addition to an existing Brixham visit.
Sources
- Historic England, "Prince of Orange Statue, Brixham," Grade II Listing 1291780
- UK Parliament, "Bill of Rights 1689," parliament.uk
- Pincus, Steve, 1688: The First Modern Revolution (Yale University Press, 2009)
- Schwartz, Bernard, The Great Rights of Mankind: A History of the American Bill of Rights (Oxford University Press, 1977)
- Schwoerer, Lois G., The Declaration of Rights, 1689 (Johns Hopkins University Press, 1981)
Salisbury Cathedral (Magna Carta)
Political
Historical Significance
Salisbury Cathedral holds one of the four surviving original copies of Magna Carta, sealed in 1215. It is the best preserved of the four, and visitors can view the actual document in the thirteenth-century Chapter House where it has been displayed for centuries. For American visitors, standing before this parchment is standing before the origin of the constitutional tradition that produced the Declaration of Independence and the Bill of Rights.
The charter established principles that American colonists cited with precision: Clause 39 guaranteed that "no free man shall be seized or imprisoned, or stripped of his rights or possessions, or outlawed or exiled, or deprived of his standing in any way, nor will we proceed with force against him, or send others to do so, except by the lawful judgement of his equals or by the law of the land." This became the Fifth Amendment's due process clause. Clause 12 restricted the king's ability to levy taxes without common consent -- the principle behind "no taxation without representation." The First Continental Congress explicitly invoked Magna Carta in its 1774 Declaration of Rights and Grievances.
Sir Edward Coke's seventeenth-century reinterpretation of Magna Carta as a charter of individual liberty -- rather than a feudal bargain between king and barons -- became the version American colonists absorbed through their legal education. Coke's Institutes, studied at Middle Temple (already on this trail), taught generations of colonial lawyers that Magna Carta guaranteed rights that no government could abridge.
Key Figures
- King John (1166-1216) - Sealed Magna Carta at Runnymede in 1215
- Sir Edward Coke (1552-1634) - Reinterpreted Magna Carta as a charter of individual rights; his Institutes were the legal textbooks of colonial America
- Elias of Dereham (d. 1245) - Cleric who distributed copies of Magna Carta; Salisbury's copy came through him
What's There Today
Salisbury Cathedral, consecrated in 1258, is one of the finest examples of Early English Gothic architecture, with Britain's tallest spire at 123 metres. The Magna Carta is displayed in a climate-controlled case in the thirteenth-century octagonal Chapter House, which features outstanding medieval carved friezes depicting Old Testament scenes. The cathedral is open Monday to Saturday 9:30 AM to 4:45 PM and Sunday 10:00 AM to 3:45 PM. The Chapter House opens at 1:00 PM. Admission is £8 for adults (children under 13 free) and includes both the cathedral and Chapter House. The cathedral close -- the largest in England -- offers a serene setting. Salisbury is conveniently located between London and the Southwest trail sites, making it an ideal stop on a driving tour.
Sources
- Salisbury Cathedral, "Magna Carta," salisburycathedral.org.uk
- Library of Congress, "Magna Carta: Muse and Mentor"
- Holt, J.C., Magna Carta (Cambridge University Press, 3rd edition, 2015)
- Howard, A.E. Dick, The Road from Runnymede (University Press of Virginia, 1968)
- UK Parliament, "Magna Carta," parliament.uk
Berry Head Fortifications
Military
Historical Significance
Berry Head, the prominent limestone headland at the southern end of Torbay in Devon, became a site of military importance during the American War of Independence when Britain faced the combined naval threat of France and Spain. Torbay had long served as a sheltered anchorage for the Royal Navy's Channel Fleet, and when these European powers entered the conflict in 1778 and 1779 respectively, protecting this vital staging area became an urgent priority. The Board of Ordnance authorised the construction of coast defence batteries on Berry Head in 1779, and work continued through 1780 to create fortified positions commanding the approaches to the bay.
Two principal batteries date from this period. The Half Moon Battery, with its distinctive curved parapet, was positioned to cover the eastern approaches, while Hardy's Head Battery defended the southern flank of the headland. Hardy's Head Battery is now a Scheduled Monument, recognised for its significance as an American War-era fortification. Together, these positions formed part of a defensive network designed to prevent an enemy fleet from using Torbay as a landing ground or from disrupting the Channel Fleet at anchor. The fortifications were built with the labour of troops and local workers under the supervision of Royal Engineers.
The strategic context was acute. France had entered the war in February 1778; Spain followed in June 1779. That August, a combined Franco-Spanish fleet of sixty-six ships of the line entered the English Channel -- the largest hostile force in those waters since the Spanish Armada of 1588. The Channel Fleet under Admiral Sir Charles Hardy, heavily outnumbered, relied on Torbay as its primary anchorage during this crisis and the wider 1779-1782 period. Berry Head's batteries ensured that the anchorage had at least some shore-based firepower to deter enemy incursions. The defences were maintained through the end of hostilities in 1783 and later expanded significantly during the French Revolutionary and Napoleonic Wars, but their origins lie firmly in the American conflict.
Key Figures
- Admiral Sir Charles Hardy - Commander of the Channel Fleet in 1779, who used Torbay as his primary anchorage during the Franco-Spanish invasion crisis; Hardy's Head Battery likely takes its name from him.
- Lord Amherst - Commander-in-Chief of British forces responsible for home defence, who oversaw the emergency fortification programme of 1779-1780.
- Admiral Augustus Keppel - Commander of the Channel Fleet in 1778, whose operations from Torbay highlighted the anchorage's strategic value and vulnerability.
- Don Luis de Cordova - Spanish admiral who co-commanded the 1779 combined fleet; his presence in the Channel drove the urgency of Berry Head's defences.
What's There Today
Berry Head is now a National Nature Reserve managed by Torbay Coast and Countryside Trust, and the fortifications are freely accessible to visitors. The remains of the Half Moon Battery and Hardy's Head Battery are well preserved, with substantial stone walls, gun platforms, and magazines still visible. Hardy's Head Battery retains its guardhouse, magazine, and parapet, and interpretive panels explain the site's military history from the American War period onward. A later Napoleonic-era redoubt crowns the summit of the headland, adding further layers of military heritage.
The nature reserve setting makes Berry Head an exceptional visit. The headland offers commanding views across Torbay and out to sea -- the same vistas that made it strategically valuable in the eighteenth century. A visitor centre near the car park covers both natural and military history. Walking trails connect the battery sites, and the combination of dramatic coastal scenery, wildlife, and well-preserved fortifications makes Berry Head one of the most rewarding American War heritage sites in Southwest England.
Sources
- N.A.M. Rodger, The Command of the Ocean: A Naval History of Britain 1649-1815 (Allen Lane, 2004)
- Jonathan Coad, Support for the Fleet: Architecture and Engineering of the Royal Navy's Bases 1700-1914 (English Heritage, 2013)
- Historic England, "Hardy's Head Battery, Berry Head," Scheduled Monument entry, National Heritage List for England
- Torbay Coast and Countryside Trust, "Berry Head National Nature Reserve: History," https://www.countryside-trust.org.uk
Brixham Battery
Military
Historical Significance
When France entered the American War in 1778 and Spain followed in 1779, the south coast of England suddenly faced the threat of invasion for the first time in generations. The Board of Ordnance responded with a programme of emergency coastal fortification, and the fishing port of Brixham in Torbay was identified as a site requiring protection. Brixham was not merely a fishing village -- it served as a key revictualling station for the Royal Navy's Channel Fleet, which used the sheltered waters of Torbay as a forward anchorage. An enemy landing at Brixham could disrupt the fleet's supply chain at a critical moment in the war.
In 1779, the Board of Ordnance ordered gun emplacements to be constructed at Brixham to defend the harbour and its approaches. The work proceeded through the winter and into 1780, with twenty-four-pounder guns arriving in May 1780 and being mounted in prepared positions overlooking the bay. Land was commandeered from local owners to build the battery and associated works. This was no abstract precaution: in August 1779, a combined Franco-Spanish fleet of sixty-six ships of the line -- the largest hostile armada to enter the Channel since 1588 -- appeared off the English coast, causing widespread panic before disease and command disputes forced its withdrawal. The battery at Brixham was part of the direct response to that terrifying episode.
The battery remained garrisoned through the final years of the American War. When hostilities ended with the Treaty of Paris in 1783, the government paid compensation to the landowners whose property had been requisitioned. The Brixham defences illustrate how the American Revolution was not simply a distant colonial conflict but one that brought the threat of war directly to English shores, reshaping coastal communities and landscapes from Devon to Kent.
Key Figures
- Lord Amherst - Commander-in-Chief of British forces 1778-1782, responsible for home defence including coastal fortifications during the invasion scare.
- Charles Lennox, 3rd Duke of Richmond - Master-General of the Ordnance from 1782, oversaw the national programme of coastal defence that included Brixham.
- Admiral Sir Charles Hardy - Commander of the Channel Fleet in 1779, whose fleet sheltered at Torbay during the Franco-Spanish invasion crisis.
- Count d'Orvilliers - French admiral commanding the Franco-Spanish combined fleet in 1779, whose Channel incursion prompted the emergency fortifications.
What's There Today
The site of the battery is now Battery Gardens, a public open space on the headland above Brixham harbour. The gardens offer panoramic views across Torbay, and visitors can still trace the outline of the gun emplacements and defensive earthworks. Interpretive panels explain the site's military history. The Brixham Battery Heritage Centre, housed in a later Victorian-era fortification on the same site, provides additional context on the defence of Torbay from the eighteenth century onward.
Brixham itself is a picturesque harbour town well worth exploring. The working fishing harbour below the battery site gives visitors a sense of why this location mattered strategically. A replica of the Golden Hind sits in the harbour, and the town has a strong heritage tourism infrastructure. Combined with the nearby Berry Head fortifications, which date from the same period, Brixham offers a compact circuit of American War-era coastal defences within easy walking distance.
Sources
- Roger Knight, Britain Against Napoleon: The Organization of Victory 1793-1815 (Allen Lane, 2013)
- Jonathan Coad, Support for the Fleet: Architecture and Engineering of the Royal Navy's Bases 1700-1914 (English Heritage, 2013)
- N.A.M. Rodger, The Command of the Ocean: A Naval History of Britain 1649-1815 (Allen Lane, 2004)
- Historic England, "Brixham Battery," National Heritage List for England
Devonport Dockyard
Military
Historical Significance
Devonport Dockyard, known during the American Revolutionary War era as Plymouth Dock, was the Royal Navy's principal western dockyard and a critical base for naval operations during the conflict. Its location at the mouth of the English Channel gave it strategic importance for Atlantic operations, making it the primary departure and arrival point for squadrons and convoys heading to and from North America and the Caribbean. The dockyard built and refitted warships throughout the war and served as a major assembly point for naval expeditions.
When France declared war on Britain in 1778, Plymouth Dock's importance increased enormously. The Channel Fleet, tasked with defending British home waters against Franco-Spanish invasion threats, operated extensively from Plymouth. The combined Franco-Spanish Armada of 1779, numbering some sixty-six ships of the line, entered the English Channel and caused alarm along the south coast, with Plymouth a potential target. The dockyard worked feverishly to prepare ships, and the town's defences were hastily reinforced. Though the invasion fleet ultimately withdrew without engaging, the episode underscored Plymouth's vulnerability and strategic significance.
The dockyard also served as a base for commerce protection and privateering operations in the western approaches. Captured American and French prizes were brought into Plymouth for adjudication. The town itself was home to a significant naval and military community, and soldiers from the Plymouth garrison were among those deployed to North America during the war.
Key Figures
- Admiral Augustus Keppel - Commander of the Channel Fleet (1778-1779), operated from Plymouth
- Admiral Sir Charles Hardy - Commanded the Channel Fleet during the 1779 invasion crisis
- Lord Sandwich - First Lord of the Admiralty, responsible for dockyard preparedness
- Admiral Richard Howe - Departed from Plymouth area for North American commands
- Sir Thomas Slade - His ship designs, including the Victory-class, were built and maintained at the yard (Slade died in 1771, but his designs served throughout the war)
What's There Today
Devonport Dockyard remains an active Royal Navy base and is the largest naval base in western Europe. HMNB Devonport continues to build and maintain warships, including the Royal Navy's submarine fleet. Because it is an operational military facility, general public access is restricted. However, guided heritage tours are available at certain times through the Devonport Naval Heritage Centre, which covers the dockyard's history from its founding in 1691.
Several Georgian-era structures survive within the dockyard, including the impressive Ropery, officers' residences, and dock infrastructure dating from the American Revolutionary War period. The South Yard, the oldest part of the dockyard, retains significant 18th-century fabric. Outside the dockyard walls, the area known as Devonport (formerly Plymouth Dock) has several period buildings, and the Royal William Victualling Yard nearby has been converted into a public leisure and residential complex. Plymouth itself offers the Mayflower Steps and other sites connecting to the broader Anglo-American story.
Sources
- Coad, Jonathan. Support for the Fleet: Architecture and Engineering of the Royal Navy's Bases 1700-1914. English Heritage, 2013.
- The National Archives, Kew: Admiralty records relating to Plymouth Dockyard (ADM 174 series).
- Lavery, Brian. The Ship of the Line. 2 vols. Conway Maritime Press, 1983-1984.
- Willis, Sam. The Struggle for Sea Power: A Naval History of the American Revolution. W.W. Norton, 2015.
- Historic England listing entries for Devonport Dockyard structures.
Mill Prison Site
Military
Historical Significance
Mill Prison in Plymouth, Devon, was the largest facility for holding American prisoners of war in Britain during the Revolutionary War. Situated near the Royal Naval Dockyard at Devonport, it received captured American sailors, privateers, and marines from 1777 until the war's end. The total number who passed through its walls ran into the thousands.
Conditions were harsh. Prisoners endured overcrowding, inadequate food, cold, and epidemic disease — smallpox swept through the cramped quarters repeatedly. The legal position of the inmates compounded their suffering. Because Britain classified captured Americans as rebels rather than lawful combatants, they were denied the protections and exchange rights normally afforded prisoners of war. This legal limbo left men languishing for years without prospect of release. British authorities intermittently offered prisoners their freedom if they would enlist in the Royal Navy; the overwhelming majority refused, a collective act of resistance that the prisoners enforced through their own internal governance. As Caleb Foot recorded, those who accepted the King's offer were ostracised as traitors before they left the yard.
The prisoners organised themselves with striking discipline. They elected committees, established rules of conduct, and pooled the small sums that reached them through Franklin's relief network and from sympathetic British citizens, including Quakers in Plymouth. Timothy Connor's journal describes the daily ration — a pound of bread, a portion of beef "more bone than meat," and a quart of beer — and the efforts men made to supplement it by selling handmade crafts to townspeople through the prison railing. Connor also recorded the defiant celebration of the Fourth of July 1778 inside the prison walls, with toasts to Congress and thirteen cheers, an event that outraged the guards but went unpunished.
Escape attempts were frequent. Prisoners tunnelled under walls, slipped past sentries during shift changes, and occasionally walked out in disguise. Some reached France; many were recaptured and confined in the "Black Hole," a punishment cell. The experiences chronicled at Mill Prison became foundational to the young nation's narrative of sacrifice and perseverance, cited in early histories and pension claims for decades after independence.
Key Figures
- Benjamin Franklin - Coordinated prisoner relief and exchange negotiations from Paris
- Captain Henry Johnson - Commander of the privateer Yankee Hero, one of the notable prisoners held at Mill
- Timothy Connor - Prisoner who kept a journal of his time at Mill Prison
- David Hartley - British MP and friend of Franklin who advocated for humane treatment and prisoner exchanges
- Caleb Foot - American prisoner whose account describes conditions and escape attempts
What's There Today
The Mill Prison site is located in the Millbay area of Plymouth, near the modern ferry terminal. Very little of the original 18th-century prison complex survives above ground. The area was heavily redeveloped in the 19th and 20th centuries, and the Millbay docks were built over part of the former prison grounds. A memorial plaque was placed on a wall near the site in the 20th century to commemorate the American prisoners held there, though its exact location and condition should be verified before visiting.
Plymouth itself has extensive connections to American and naval history. The Mayflower Steps on the Barbican mark the traditional departure point of the Pilgrim Fathers in 1620, and the city's Royal Naval heritage is pervasive. The Plymouth and West Devon Record Office holds relevant archival material. The city is accessible by rail (Plymouth station on the Great Western Main Line) and by road via the M5/A38. Visitors interested in the prisoner-of-war story should also consider visiting the nearby Dartmoor Prison (built during the Napoleonic Wars but later used to hold American prisoners during the War of 1812), which provides a tangible sense of what the Mill Prison experience may have been like.
Sources
- Cohen, Sheldon S., Yankee Sailors in British Gaols: Prisoners of War at Forton and Mill, 1777-1783 (University of Delaware Press, 1995)
- Foot, Caleb, "Reminiscences of the Revolution: Prison Letters and Sea Journal of Caleb Foot," Historical Collections of the Essex Institute, vol. 26 (1889)
- Connor, Timothy, journal excerpts in Danske Dandridge, American Prisoners of the Revolution (Michie Company, 1911)
- Dandridge, Danske, American Prisoners of the Revolution (Michie Company, 1911)
- Sheldon S. Cohen, "American Prisoners of War in Britain, 1777-1783," The Mariner's Mirror, vol. 81, no. 2 (1995)
- The National Archives (UK), Admiralty records relating to prisoner administration at Mill Prison
Pendennis Castle
Military
Historical Significance
Pendennis Castle, commanding the entrance to Carrick Roads and Falmouth harbour from its headland position, took on renewed military importance during the American Revolution. Built by Henry VIII in the 1540s to defend against French and Spanish invasion, the castle had seen action during the English Civil War but had been relatively quiet for over a century. The outbreak of the American war in 1775 changed that. Falmouth harbour was home to the Post Office Packet Service, the vital mail link between Britain and its forces in North America, making the defence of the harbour entrance a matter of strategic urgency.
From 1775, the castle was garrisoned by the locally raised Miners' Militia, men recruited from Cornwall's tin and copper mining communities. This was a pragmatic arrangement: Cornwall's miners were tough, accustomed to discipline, and available in numbers without drawing regular troops away from overseas service. New barracks were constructed within the castle grounds in 1779 to accommodate the expanded garrison, and these barracks survive today as one of the most tangible American War-era structures at the site. The castle's existing Tudor and Elizabethan defences -- the central keep, the curtain walls, and the outer ring of bastions -- were maintained and adapted for the new threat.
The defensive role of Pendennis became critical after France entered the war in February 1778 and Spain joined in June 1779. Cornwall, jutting into the Western Approaches, was acutely vulnerable: French privateers and warships raided coastal shipping, and the packet ships sailing from Falmouth were prime targets. When the combined Franco-Spanish fleet of sixty-six warships entered the Channel in August 1779, Falmouth lay directly in its path, and an enemy landing could have severed Britain's transatlantic communications at a stroke. The castle, together with St Mawes Castle across the water, formed a crossfire commanding the narrow entrance to Carrick Roads. The garrison remained on alert through the end of hostilities in 1783, and Pendennis continued to serve as a military installation well into the twentieth century.
Key Figures
- Henry VIII - Built Pendennis Castle in the 1540s as part of his coastal defence programme; the Tudor keep remains the centrepiece of the site.
- Lord Amherst - Commander-in-Chief of British forces 1778-1782, responsible for the home defence arrangements that included reinforcing Pendennis.
- Benjamin Franklin - His 1755 work organising the Falmouth packet route helped establish the strategic importance of the harbour that Pendennis defended.
- Augustus Keppel, 1st Viscount Keppel - Channel Fleet commander in 1778, whose operations underscored the need for secure southwest harbours.
What's There Today
Pendennis Castle is one of English Heritage's major sites in Cornwall, open to visitors year-round with paid admission. The castle is remarkably well preserved, with the original Tudor keep, the Elizabethan outer defences, and the 1779 barracks all accessible. English Heritage has developed extensive interpretation throughout the site, including exhibitions on its military history from Henry VIII through the Second World War. The American War period is represented in displays about the castle's Georgian-era garrison and the defence of Falmouth harbour.
Visitors can walk the full circuit of walls and bastions, enjoying panoramic views over Falmouth harbour, Carrick Roads, and across to St Mawes Castle. The headland setting is dramatic, and the walk from Falmouth town centre to the castle passes through attractive gardens and along the waterfront. For trail visitors, Pendennis pairs naturally with the National Maritime Museum Cornwall and Custom House Quay in Falmouth to create a half-day exploration of the town's American Revolution connections. The castle also hosts regular events, re-enactments, and family activities.
Sources
- English Heritage, "Pendennis Castle," https://www.english-heritage.org.uk/visit/places/pendennis-castle/
- Jonathan Coad, Support for the Fleet: Architecture and Engineering of the Royal Navy's Bases 1700-1914 (English Heritage, 2013)
- A.H. Norway, History of the Post Office Packet Service 1793-1815 (Macmillan, 1895)
- John R. Kenyon, Castles, Town Defences, and Artillery Fortifications in Britain: A Bibliography (Council for British Archaeology, 2003)
- Jonathan R. Dull, The French Navy and American Independence (Princeton University Press, 1975)
Royal Citadel, Plymouth
Military
Historical Significance
The Royal Citadel on Plymouth Hoe was the nerve centre of Britain's defence during the most dramatic moment of the wider Revolutionary War: the 1779 Franco-Spanish invasion scare. In August 1779, a combined fleet of sixty-six French and Spanish warships appeared off Plymouth -- the largest hostile fleet to enter the English Channel since the Spanish Armada of 1588. The fleet anchored in Cawsand Bay with the intent of landing thirty thousand soldiers on English soil.
Plymouth panicked. The naval commissioner "slipped into panic-stricken mode," the army commander asked to be relieved on health grounds, and the dockyard workers were armed. A boom was placed across Plymouth Sound, block ships were prepared, and militias flooded into the area. The garrison of the Royal Citadel was placed on full action stations. The fleet ultimately withdrew without landing -- disease had killed an estimated eight thousand men aboard, and adverse winds prevented coordinated action -- but the scare transformed British military planning. Decades of fortification building followed, producing many of the coastal defences already on this trail: Berry Head, Brixham Battery, Maker Heights, and reinforced positions from Cornwall to Kent.
The invasion attempt was a direct consequence of France and Spain entering the American Revolutionary War. Their strategy was to compel Britain to concentrate naval forces in home waters, relieving pressure on the American theatre. It worked: the threat to Plymouth and the wider Channel coast diverted ships and troops that might otherwise have been deployed against the Continental Army.
Key Figures
- Admiral Sir Charles Hardy - Commander of the British Channel Fleet; assembled approximately 35 ships to shadow the Franco-Spanish armada
- Comte d'Orvilliers - French admiral commanding the combined fleet
- Lord Amherst - Commander-in-Chief of British forces; responsible for the coastal defence response
What's There Today
The Royal Citadel is a seventeenth-century star fortress on Plymouth Hoe, still an active military installation. English Heritage offers guided tours on Saturdays from April to October, led by specialist guides. The tours cover the Citadel's history from its construction by Charles II in the 1660s through its wartime roles. The fortress walls, bastions, and gateway are impressive examples of military architecture. Plymouth Hoe itself -- the famous promenade where Drake allegedly played bowls before the 1588 Armada -- is freely accessible and offers panoramic views across Plymouth Sound. The Citadel is approximately 1.5 miles from the existing Plymouth Dockyard trail entry and 0.5 miles from Mill Prison.
Sources
- English Heritage, "Royal Citadel, Plymouth," english-heritage.org.uk
- Wikipedia, "Armada of 1779"
- Maker Heights Heritage, "The 1779 Franco-Spanish Armada"
- More Than Nelson, "The Channel Fleet Retreat, August 1779"
- RevWarTalk, "French and Spanish Armada of 1779"
Stapleton Prison Site, Bristol
Military
Historical Significance
Stapleton Prison was constructed in 1779 on the outskirts of Bristol to hold prisoners of war captured during the widening global conflict triggered by the American Revolution. While Mill Prison in Plymouth and Forton Prison in Gosport held primarily American captives, Stapleton served a distinct purpose: it accommodated Dutch and Spanish combatants, allies of the American cause whose captured sailors and soldiers were landed at Bristol, one of England's principal western ports.
Unlike the American prisoners at Forton and Mill, the Dutch and Spanish inmates at Stapleton were recognised as lawful combatants under established European conventions. They were entitled to prisoner exchanges, received rations set by treaty, and had the protection of their governments' diplomatic representatives. Yet this formal status did not spare them from the realities of wartime confinement. The prison reformer John Howard, visiting in 1782 during his systematic inspection of British detention facilities, documented 774 Spanish prisoners and 13 Dutchmen at the site. Howard recorded that while the buildings were in tolerable repair, overcrowding was evident, the sick were not adequately separated from the healthy, and the yard space was insufficient for the number of inmates. His observations, published in The State of the Prisons, remain the most detailed contemporary account of conditions at Stapleton.
Spain had entered the war in 1779 as a French ally, and Dutch involvement followed in 1780 after Britain declared war over Dutch trade with the American rebels. Stapleton thus received a steady flow of prisoners from naval engagements in the Atlantic and the Channel, many taken by Admiral Rodney's squadrons. The mortality among these prisoners was substantial. Archaeological excavations conducted between 2018 and 2023 uncovered over a thousand burials associated with the prison, with skeletal analysis revealing evidence of malnutrition, scurvy, and infectious disease — conditions consistent with Howard's written account. These finds have drawn renewed scholarly attention to a largely forgotten site.
Stapleton also holds significance in the broader history of prisoner-of-war treatment. It was among the earliest purpose-built POW camps in Britain, representing a shift from confining prisoners in hulks, castles, or civilian gaols toward dedicated facilities — a model that would be expanded during the Napoleonic Wars. The prisoners were released following the Treaty of Paris in 1783.
Key Figures
- John Howard - Prison reformer who inspected Stapleton in 1782 and documented conditions and prisoner numbers; his advocacy transformed British penal policy.
- Don Luis de Cordova - Spanish admiral whose fleet operations in the Atlantic and Channel led to the capture of many of the Spanish prisoners held at Stapleton.
- Lord George Germain - Secretary of State for the Colonies 1775-1782, whose office oversaw wartime prisoner-of-war policy and facility construction.
- Admiral George Rodney - British naval commander whose victories in the Caribbean and Atlantic produced Spanish and Dutch prisoners subsequently held in Britain.
What's There Today
The Stapleton Prison site lies in the Stapleton area of north Bristol, now largely absorbed into the suburban landscape. No standing structures from the original 1779 prison survive above ground, but the site has gained renewed visibility through the major archaeological excavations of 2018-2023. These digs, led by Bristol and regional archaeological teams, uncovered extensive burial grounds and structural remains, generating significant media coverage and academic interest. Finds from the excavations are being studied and will contribute to future public interpretation.
The area around the prison site is accessible, and local heritage organisations have worked to raise awareness of Stapleton's history through walking guides, interpretation panels, and public talks. For visitors to Bristol interested in the American Revolution, Stapleton complements the city's broader eighteenth-century heritage, including the historic harbour from which privateers sailed and through which prisoners were landed. Bristol's M Shed museum and the city archives hold relevant materials on the port's wartime role. The site is best appreciated as part of a wider Bristol itinerary rather than as a standalone destination.
Sources
- John Howard, The State of the Prisons in England and Wales (3rd edition, 1784)
- Francis Abell, Prisoners of War in Britain 1756 to 1815 (Oxford University Press, 1914)
- Kenneth Morgan, Bristol and the Atlantic Trade in the Eighteenth Century (Cambridge University Press, 1993)
- Bristol City Council and Cotswold Archaeology, "Stapleton Prison Excavation Reports," 2018-2023
- Gavin Kinsley, "The Archaeology of Prisoner-of-War Sites in Britain," Post-Medieval Archaeology, vol. 49 (2015)
Bath Assembly Rooms
People
Historical Significance
The Assembly Rooms in Bath, designed by John Wood the Younger and opened in 1771, were at the heart of fashionable Georgian society during the American Revolutionary War. Bath was the premier resort town in 18th-century Britain, attracting politicians, military officers, aristocrats, and intellectuals who gathered in the Assembly Rooms for dances, card games, concerts, and, crucially, political conversation. During the American crisis, these social gatherings served as informal forums where opinion on the war was shaped and debated among Britain's governing class.
William Pitt the Elder, 1st Earl of Chatham, spent considerable time in Bath during the 1760s and 1770s, seeking treatment for the gout and depression that periodically incapacitated him. Pitt was the most prominent British statesman to oppose the government's coercive policies toward the American colonies, and his presence in Bath made the city a focal point for anti-war political sentiment. His dramatic final speech in the House of Lords in April 1778, in which he collapsed while opposing American independence (he died the following month), was preceded by a period of convalescence in Bath. It should be noted, however, that while Pitt opposed the government's American policy, he also opposed American independence itself, favouring a negotiated settlement within the empire.
Bath's social season brought together figures from across the political spectrum. Military officers recovering from wounds or on leave mixed with politicians and colonial agents. The Assembly Rooms, the Pump Room, and the numerous coffee houses and taverns of Bath provided the social infrastructure for these encounters. The extent to which specific American Revolutionary War policy decisions were directly influenced by conversations at the Bath Assembly Rooms is difficult to document precisely, but the Rooms' role as a gathering place for the political elite during this period is well established.
Key Figures
- William Pitt the Elder, 1st Earl of Chatham - Former Prime Minister, spent extended periods in Bath, opposed coercive American policy
- Ralph Allen - Bath philanthropist and political figure (d. 1764); his legacy shaped the city's political culture in the Revolutionary era
- William Herschel - Musician and astronomer resident in Bath during the war years; performed at the Assembly Rooms (his astronomical work, while unrelated to the war, brought international attention to the city)
- Beau Nash's successors - Masters of Ceremonies who managed the Rooms' social calendar during the war period
What's There Today
The Bath Assembly Rooms survive in excellent condition and are owned by the National Trust. Located on Bennett Street in central Bath, the Rooms comprise four principal spaces: the Ball Room, the Tea Room, the Card Room, and the Octagon. The interiors have been restored to their 18th-century appearance following bomb damage sustained during the Second World War (the Baedeker Blitz of 1942). The National Trust operates the Rooms as an event venue and visitor attraction.
The Fashion Museum was housed in the basement of the Assembly Rooms until its relocation in 2023 to the Old Post Office on Milsom Street. Visitors to the Assembly Rooms can view the principal rooms when events are not taking place; admission and opening hours should be checked in advance via the National Trust website. Bath itself is a UNESCO World Heritage Site, and the surrounding Georgian streetscape provides an exceptionally well-preserved context for understanding 18th-century social and political life. The nearby Pump Room and Roman Baths are also worth visiting.
Sources
- Davis, Graham, and Penny Bonsall. A History of Bath: Image and Reality. Carnegie Publishing, 2006.
- Peters, Marie. The Elder Pitt. Longman, 1998.
- Mowl, Tim. John Wood: Architect of Obsession. Millstream Books, 1988.
- National Trust guidebook: Bath Assembly Rooms. Various editions.
- Neale, R.S. Bath 1680-1850: A Social History. Routledge, 1981.
Bowood House
People
Historical Significance
Bowood House in Wiltshire was the country seat of William Petty, 2nd Earl of Shelburne (later 1st Marquess of Lansdowne, 1737-1805), the Prime Minister who negotiated the peace treaty that formally ended the American Revolution and recognised the independence of the United States. Shelburne served as Prime Minister from July 1782 to February 1783, succeeding the Marquess of Rockingham who had died in office. It fell to Shelburne to bring the complex peace negotiations to a conclusion, balancing the interests of Britain, America, France, Spain, and the Netherlands.
The Treaty of Paris, signed on 3 September 1783, was largely shaped by Shelburne's vision. He pursued surprisingly generous terms toward the new United States, granting extensive territorial boundaries reaching to the Mississippi River and securing fishing rights for Americans off Newfoundland. His strategy was rooted in a belief that liberal trade relations with an independent America would be more beneficial to Britain than continued conflict. This approach was controversial: many in Parliament felt he had conceded too much, and his government fell in February 1783, partly as a result. Historians have generally treated Shelburne more kindly than his contemporaries did, recognising that the generous peace helped lay the groundwork for the eventual Anglo-American commercial relationship.
Bowood House served as a centre of intellectual and political life. Shelburne was a patron of the Enlightenment, and his circle at Bowood included the scientist Joseph Priestley (who discovered oxygen while working in the Bowood laboratory in 1774), the philosopher Jeremy Bentham, and the economist Abbe Morellet. Discussions at Bowood about free trade, rational governance, and individual liberty reflected the same intellectual currents that animated the American Revolution. Benjamin Franklin visited Bowood during his years in England, and the connections forged here contributed to the climate in which the peace was negotiated.
Key Figures
- Earl of Shelburne (William Petty, later 1st Marquess of Lansdowne) - Prime Minister 1782-1783 who negotiated the peace treaty
- Benjamin Franklin - American commissioner in the peace negotiations; visited Bowood during his London years
- Richard Oswald - Shelburne's lead negotiator with the Americans in Paris
- Joseph Priestley - Scientist and radical thinker who worked at Bowood, discovering oxygen in its laboratory
- Marquess of Rockingham - Shelburne's predecessor as Prime Minister, who initiated peace negotiations before his death
What's There Today
Bowood House and Gardens are open to the public seasonally, typically from April to November. The house contains fine Georgian interiors, including the laboratory where Priestley conducted his experiments and the Robert Adam-designed Diocletian Wing. The art collection includes works relevant to the 18th-century political world. The surrounding parkland was landscaped by Capability Brown and includes extensive gardens, a lake, and woodland walks.
The estate is located near Calne in Wiltshire, accessible by car from the M4 motorway. The nearest railway station is Chippenham. Admission is charged, and visitors should check the Bowood website (bowood.org) for current opening times and prices. For Heritage Trail visitors, Bowood is one of the finest country house experiences on the trail and one of the few sites where the interior spaces directly connected to the Revolutionary era can be visited. The combination of political history, scientific heritage, and landscape makes it an especially rewarding stop.
Sources
- Norris, John, Shelburne and Reform (Macmillan, 1963)
- Morris, Richard B., The Peacemakers: The Great Powers and American Independence (Harper & Row, 1965)
- Hoffman, Ronald and Albert, Peter J., eds., Peace and the Peacemakers: The Treaty of 1783 (University of Virginia Press, 1986)
- Bowood House, bowood.org
- Fitzmaurice, Lord Edmond, Life of William, Earl of Shelburne (Macmillan, 1875-1876)
Button Gwinnett Birthplace, Down Hatherley
People
Historical Significance
Button Gwinnett was born in 1735 at Down Hatherley, Gloucestershire, the third of seven children of the Reverend Samuel Gwinnett, vicar of the parish. He was baptised on 10 April 1735 in St Catherine's parish, Gloucester. After an apprenticeship with his uncle in Bristol and then in the ironmongery trade in Wolverhampton -- where he married Ann Bourne at St Peter's Church in 1757 -- Gwinnett emigrated to America in 1762, eventually settling in Georgia.
In Georgia, Gwinnett transformed himself from a struggling planter into a political leader. He was elected to the Continental Congress and signed the Declaration of Independence in August 1776, representing the newest and smallest of the thirteen colonies. He went on to serve briefly as president (governor) of Georgia in early 1777. His career was cut short on 19 May 1777, when he was killed in a duel with General Lachlan McIntosh following a political dispute -- making him one of the youngest signers to die and one of the few to die by violence outside of war.
Gwinnett's signature has become one of the most valuable autographs in the world. Only about fifty-one authenticated examples survive, making it the rarest of any Declaration signer. A single Gwinnett signature has sold for over $700,000 at auction. His obscurity in life -- he held high office for only a few months -- contrasts strikingly with the fame his signature commands among collectors.
Key Figures
- Button Gwinnett (1735-1777) - Declaration signer for Georgia; born at Down Hatherley; killed in a duel aged 42
- Rev. Samuel Gwinnett - Button's father; vicar of Down Hatherley from 1727; buried with his wife Anne in the churchyard
- Ann Bourne Gwinnett - Button's wife; married at St Peter's Church, Wolverhampton, 1757
What's There Today
The Church of St Mary and Corpus Christi at Down Hatherley is a listed building with a fifteenth-century tower, though the body of the church was rebuilt in 1860. In the churchyard lies the tombstone of the Reverend Samuel Gwinnett and his wife Anne -- Button's parents -- which is the subject of an active restoration effort after decades of ivy overgrowth and weathering. The church is an active parish church accessible to visitors. The village of Down Hatherley is a quiet rural settlement approximately five miles northwest of Gloucester.
A separate memorial exists in Wolverhampton, where a blue plaque on St Peter's House in Exchange Street commemorates Gwinnett's marriage at the adjacent St Peter's Church. The marriage connection to Wolverhampton is well-documented in the parish register. Down Hatherley is accessible by car from the M5 motorway (Junction 11), and visitors exploring the Cotswolds or Gloucester Cathedral can easily incorporate a stop.
Sources
- Gwinnett Family History website, "Down Hatherley" and "Button Gwinnett 1735-1777," gwinnett.me.uk
- Jenkins, Charles F., Button Gwinnett: Signer of the Declaration of Independence (Doubleday, 1926)
- Dictionary of Welsh Biography, "Gwinnett, Button," National Library of Wales
- British Listed Buildings, "Church of St Mary and Corpus Christi, Down Hatherley"
- National Park Service, "Signers of the Declaration: Button Gwinnett"
Catharine Macaulay's Alfred House, Bath
People
Historical Significance
Catharine Macaulay was the most prominent female historian in eighteenth-century Britain, and her eight-volume History of England from the Accession of James I to That of the Brunswick Line (1763-1783) made her one of the most influential intellectual supporters of the American revolutionary cause on either side of the Atlantic. Her residence at Alfred House in Bath, where she lived during the early 1770s, became a salon for radical political discussion at a critical moment in the imperial crisis.
Macaulay's History was a republican interpretation of the English Civil War and the Glorious Revolution that championed parliamentary sovereignty, individual liberty, and resistance to tyranny. American colonists recognised immediately that her arguments applied to their own situation. Her work was widely read in the colonies, and she corresponded with leading American figures including George Washington, Benjamin Franklin, John Adams, Mercy Otis Warren, and James Otis. Washington wrote to her in 1790 expressing his "great esteem" and invited her views on the new Constitution. Adams considered her one of the most important political writers of the age. The historian Kate Davies has documented how Macaulay served as a transatlantic bridge between British radical thought and American revolutionary ideology.
Alfred House, on Alfred Street in Bath, was provided to Macaulay by her admirer and patron the Reverend Thomas Wilson, rector of St Stephen Walbrook in London. Wilson's devotion to Macaulay was extravagant and, to many contemporaries, embarrassing: he installed a life-sized statue of her as the Muse of History in the chancel of his London church and hosted elaborate birthday celebrations in her honour. The Bath residence placed Macaulay in one of Georgian Britain's most important social and intellectual centres. Bath in the 1770s was not merely a resort; it was a place where politicians, intellectuals, military officers, and colonial administrators mingled during the social season. Macaulay used this environment to advance her political views, entertaining visitors who shared her sympathies for the American cause and her broader commitment to republican principles.
Macaulay's American connections deepened after the Revolution. She visited the United States in 1784-1785, staying with Washington at Mount Vernon for ten days -- an extraordinary mark of respect for a foreign intellectual. Washington showed her around his estate and the two discussed the challenges facing the new republic. She also visited the Adams family and other revolutionary leaders. Her American tour cemented her reputation as a figure who had provided vital intellectual ammunition for the patriot cause during the years when it mattered most.
Her personal life generated considerable controversy. Her 1778 marriage to William Graham, a man twenty-six years her junior, scandalised polite society and cost her the patronage of Wilson and others. The satirist Thomas Rowlandson lampooned the match, and many former admirers distanced themselves. Yet she continued her scholarly work, publishing Letters on Education in 1790, a treatise that influenced Mary Wollstonecraft's Vindication of the Rights of Woman. She died in 1791, having lived long enough to see the American republic she championed take its first steps and the French Revolution she cautiously welcomed begin to unfold.
Key Figures
- Catharine Macaulay - Britain's foremost female historian of the eighteenth century; her republican History of England provided intellectual foundations for American revolutionary arguments; corresponded with Washington, Adams, and Franklin
- George Washington - Commander-in-Chief and first President; hosted Macaulay at Mount Vernon in 1784 and maintained a respectful correspondence with her on political philosophy
- Rev. Thomas Wilson - Rector of St Stephen Walbrook and Macaulay's devoted patron who provided Alfred House as her Bath residence; his extravagant admiration for her became a subject of public ridicule
- Mercy Otis Warren - American historian and political writer who corresponded with Macaulay; the two women formed a transatlantic intellectual partnership grounded in shared republican convictions
- Mary Wollstonecraft - Feminist writer whose Vindication of the Rights of Woman (1792) was directly influenced by Macaulay's Letters on Education
What's There Today
Alfred Street in Bath survives as a handsome Georgian terrace in the heart of the city, a short walk from the Royal Crescent and the Circus. The street was built in the 1770s and retains its original character. The specific house Macaulay occupied is not marked with a plaque, and identifying the exact property requires further research into historical rate books. The surrounding area is quintessential Georgian Bath: honey-coloured stone terraces, elegant proportions, and a streetscape that would be largely recognisable to an eighteenth-century visitor.
Bath is easily accessible by train from London Paddington (approximately ninety minutes). Alfred Street is a five-minute walk from the Bath Assembly Rooms, another site on this trail. The city's compact centre makes it ideal for combining multiple Revolution-era sites in a single visit. The Bath Central Library and the Bath Record Office hold local history resources that may yield further information on Macaulay's time in the city.
Sources
- Davies, Kate, Catharine Macaulay and Mercy Otis Warren: The Revolutionary Atlantic and the Politics of Gender (Oxford University Press, 2005)
- Hill, Bridget, The Republican Virago: The Life and Times of Catharine Macaulay, Historian (Oxford: Clarendon Press, 1992)
- Hicks, Philip, "Catharine Macaulay's Civil War: Gender, History, and Republicanism in Georgian Britain," Journal of British Studies 41, no. 2 (2002)
- Macaulay, Catharine, The History of England from the Accession of James I to That of the Brunswick Line, 8 vols. (London, 1763-1783)
- Washington, George, letter to Catharine Macaulay Graham, 9 January 1790, Founders Online, National Archives
Church of St David, Barton St David (Adams Ancestry)
People
Historical Significance
The village of Barton St David in Somerset is the ancestral home of the Adams family that produced two American presidents. Henry Adams (c.1583-1646) was born here to John Adams and Agnes Stone. He married Edith Squire in 1609 in the neighbouring parish of Charlton Mackrell, and the couple lived in Barton St David before emigrating to Massachusetts in 1638 on the ship Mary and John with their eight children. Henry Adams settled in Braintree, Massachusetts, founding the American branch of the family. His great-great-grandson was President John Adams (1735-1826), the second president and a principal architect of independence; his great-great-great-grandson was President John Quincy Adams (1767-1848), the sixth president.
The Adams connection to Barton St David illustrates a pattern central to this trail: the deep English roots of the men who broke from England. John Adams was acutely conscious of his ancestry. In his writings he traced his family back to the English West Country and reflected on the irony that descendants of loyal English subjects had become the leaders of a revolution against the Crown. The emigration of Henry Adams in 1638 was part of the Great Migration of Puritans to New England, driven by religious and economic pressures under Charles I -- the same tensions that would erupt into the English Civil War four years later. The constitutional ideas forged in that crisis, passed through generations of Adams family memory and New England political culture, emerged two centuries later in the Declaration of Independence, which John Adams did more than almost anyone to bring about.
Through the wider Adams and Squire families, genealogists have traced connections from Barton St David to Presidents Millard Fillmore, William Howard Taft, and Calvin Coolidge, making this small Somerset village one of the most presidential parishes in England.
Key Figures
- Henry Adams (c.1583-1646) - Born in Barton St David; emigrated to Massachusetts 1638; founder of the American Adams line
- Edith Squire Adams - Henry's wife; married 1609 at Charlton Mackrell
- President John Adams (1735-1826) - Henry's great-great-grandson; 2nd President of the United States; principal advocate for independence
- President John Quincy Adams (1767-1848) - Henry's great-great-great-grandson; 6th President
What's There Today
The Church of St David is a Grade II* listed building with twelfth-century origins and a distinctive fifteenth-century octagonal tower. Inside the church, a commemorative plaque installed in the chancel wall in 1927 (erected by Edward Dean Adams in 1926) reads: "To the glory of God, in honour of St David and to the memory of Henry Adams born in this parish about 1583 and a founder of New England 1638; ancestor of two Presidents of the United States of America, John Adams and John Quincy Adams, whose exalted services to their country evoke a testimony of respect for their ancestral home." The plaque is flanked by two American flags and is regularly visited by American tourists. The village of Barton St David has a population of approximately six hundred and lies five miles southeast of Glastonbury, which serves as the nearest tourist hub. The church is freely accessible to visitors.
Sources
- Bartlett, Josiah Gardner, Henry Adams of Somersetshire, England and Braintree, Mass.: His English Ancestry and Some of His Descendants (1927)
- Historic England, Church of St David, Grade II* Listing 1176035
- Victoria County History of Somerset, vol. 10, "Barton St David," via British History Online
- BBC News, "Barton St David: The village with links to five US presidents"
- McCullough, David, John Adams (Simon & Schuster, 2001)
John Locke's Birthplace, Wrington
People
Historical Significance
John Locke was born on 29 August 1632 in a small thatched cottage immediately adjacent to the north side of All Saints Church, Wrington, Somerset, and was baptised the same day. The son of a Puritan country lawyer who served as a captain in the Parliamentary cavalry during the English Civil War, Locke grew up in a household shaped by the constitutional conflicts that would culminate in the execution of Charles I and the Glorious Revolution. These experiences, absorbed in childhood, informed the political philosophy that became the intellectual foundation of the American Revolution.
Locke's Second Treatise of Government argued that governments derive their just powers from the consent of the governed, that natural rights to life, liberty, and property precede government, and that the people retain the right to alter or abolish governments that violate those rights. Every one of these principles appears in the Declaration of Independence. Jefferson acknowledged the debt directly, and when asked to name the sources of the Declaration's ideas, he cited Locke alongside Algernon Sidney. The village of Wrington is thus the starting point for a chain of ideas that runs from a Somerset cottage through the coffeehouses and studies of Restoration England to the Continental Congress in Philadelphia.
Key Figures
- John Locke (1632-1704) - Born here; philosopher whose Two Treatises of Government provided the philosophical foundation of the Declaration of Independence
- John Locke Sr. - Father; Puritan lawyer and Parliamentary cavalry captain during the English Civil War
- Thomas Jefferson - Directly adapted Locke's ideas into the Declaration
What's There Today
All Saints Church, Wrington, is a Grade I listed medieval church with a notable fifteenth-century tower. In the south porch stand early nineteenth-century stone busts of John Locke and Hannah More (the local writer and reformer). The cottage where Locke was born, which stood immediately adjacent to the north side of the church, survived into the Victorian era but no longer stands. The church itself is a fine example of Somerset Perpendicular Gothic architecture and is an active parish church open to visitors. The village of Wrington lies approximately twelve miles south of Bristol. Bristol Airport is nearby.
Sources
- Woolhouse, Roger, Locke: A Biography (Cambridge University Press, 2007)
- Cranston, Maurice, John Locke: A Biography (Longmans, 1957)
- Wrington Somerset, "John Locke Tercentenary," wringtonsomerset.org.uk
- Church of All Saints, Wrington, parish records
- Locke, John, Two Treatises of Government, ed. Peter Laslett (Cambridge University Press, 1988)
Bristol Harbour
Commercial
Historical Significance
Bristol was one of Britain's most important Atlantic trading ports during the 18th century, and the American Revolutionary War disrupted its commercial life profoundly. The city's merchants had extensive trading connections with the American colonies, particularly in tobacco, sugar, and the slave trade. When hostilities began, these transatlantic commercial links were severed, causing significant economic hardship. American privateers operating in the approaches to the Bristol Channel further threatened the city's maritime trade, and Bristol merchants were among the most vocal in petitioning Parliament for a peaceful resolution to the conflict.
Bristol's political significance during the Revolution is inseparable from the career of Edmund Burke, who served as one of the city's two Members of Parliament from 1774 to 1780. Burke used his Bristol platform to deliver some of his most famous speeches on the American crisis, including his arguments for conciliation with the colonies and his defence of representative (as opposed to delegated) government. His 1774 "Speech to the Electors of Bristol" articulated the principle that a member of Parliament owes constituents his independent judgement, not mere obedience to their instructions. Burke's pro-American stance, combined with his support for Irish trade liberalisation and Catholic relief, ultimately cost him his Bristol seat in 1780.
The city's mercantile community was divided on the American question: some merchants supported conciliation to restore trade, while others backed coercive policies. Bristol also contributed to the war effort through shipbuilding and provisioning. The port's role in the Atlantic slave trade, while declining by the 1770s relative to Liverpool, remained significant. Bristol merchants who petitioned Parliament for the "liberty" of commerce were in many cases the same men who had built their fortunes transporting enslaved Africans to the colonies whose own liberty they now debated. This entanglement of freedom rhetoric and slave-trade profit was not lost on contemporary observers, and it underscores how deeply the economics of slavery shaped British responses to the American crisis.
Key Figures
- Edmund Burke - MP for Bristol (1774-1780), leading parliamentary voice for conciliation with America
- Henry Cruger - Burke's fellow Bristol MP, an American-born merchant who also supported colonial rights
- Richard Champion - Bristol porcelain manufacturer and Burke's political ally, active in pro-American lobbying
- Samuel Peach and other Bristol merchants - Petitioned for peace to restore transatlantic trade
- John Wesley - Published from Bristol his A Calm Address to Our American Colonies (1775), opposing the rebellion
What's There Today
Bristol's historic harbour area has been extensively redeveloped as a cultural and leisure destination. The Floating Harbour, created in 1809, altered the medieval port layout, but the general area around Queen Square, King Street, and the waterfront retains significant Georgian architecture from the Revolutionary War period. The Merchants' Hall on Clifton Down, the Exchange on Corn Street (now a market), and numerous warehouses speak to Bristol's 18th-century commercial prosperity.
The M Shed museum on the harbourside covers Bristol's maritime and trading history, including its Atlantic connections. Burke's Bristol associations are commemorated with a statue on Colston Avenue (erected 1894). Visitors can explore the Georgian House Museum on Great George Street, a merchant's townhouse from the 1790s that illustrates the lifestyle of Bristol's trading elite. The harbour area is freely accessible and well served by public transport. The city also hosts the SS Great Britain and other maritime attractions, though these date from later periods.
Sources
- Morgan, Kenneth. Bristol and the Atlantic Trade in the Eighteenth Century. Cambridge University Press, 1993.
- Lock, F.P. Edmund Burke. 2 vols. Oxford University Press, 1998-2006.
- Dresser, Madge, and Peter Fleming. Bristol: Ethnic Minorities and the City 1000-2001. Phillimore, 2007.
- Richardson, David. Bristol, Africa and the Eighteenth-Century Slave Trade to America. 4 vols. Bristol Record Society, 1986-1996.
- The National Archives, Kew: Customs records for Bristol (CUST series).
- Burke, Edmund. Speeches and Letters on American Affairs. Various editions; the 1774 Bristol speech is widely reprinted.
George III Statue Weymouth
Commemoration
Historical Significance
George III (1738-1820) was the reigning British monarch throughout the American Revolution, and his name became synonymous with the conflict in the popular imagination on both sides of the Atlantic. The Declaration of Independence directed its grievances squarely at the King, casting him as a tyrant. In reality, George III's role was more complex: while he firmly supported Parliament's right to tax the colonies and was unwavering in his opposition to American independence, the war was prosecuted by his ministers, particularly Lord North, Lord George Germain, and the Earl of Sandwich. The King's determination to continue the war even as military setbacks mounted made him a central figure in the conflict's prolongation.
George III first visited Weymouth in 1789, on the recommendation of his physicians following his first serious bout of illness (now widely attributed to porphyria, though this diagnosis remains debated among medical historians). He returned regularly, making Weymouth a fashionable seaside resort. The town became closely associated with the King, and local loyalty ran deep. In 1810, to mark the Golden Jubilee of his accession to the throne, the townspeople erected a painted statue of the King on the Esplanade. By this time, the King was elderly and increasingly afflicted by illness; he would spend the last decade of his life largely incapacitated at Windsor Castle.
The statue is notable as one of the few surviving public monuments to George III in England. Brightly painted rather than rendered in bronze or stone, it presents a distinctive and somewhat folk-art appearance. For American visitors, the statue offers a striking encounter with the man whom the Declaration of Independence accused of "a history of repeated injuries and usurpations" -- commemorated here not as a wartime adversary but as a beloved local figure and patron of the town.
Key Figures
- George III - King of Great Britain and Ireland 1760-1820; the monarch against whom the American colonists rebelled
- Lord North (Frederick North) - Prime Minister 1770-1782 who directed the war on the King's behalf
- James Hamilton, local architect - Attributed with designing the statue's setting (though documentation on the statue's precise creator is limited)
What's There Today
The painted statue of George III stands prominently on the Esplanade in Weymouth, facing the sea. It is a full-length figure in bright colours, a distinctive and photogenic landmark. The statue is freely accessible at all times and is a popular meeting point along the seafront. It has been restored several times over the centuries, most recently in the early 2000s, and the painted finish is periodically refreshed to maintain its eye-catching appearance.
Weymouth itself is a pleasant seaside town on the Dorset coast with good transport links. The seafront area around the statue offers views of Weymouth Bay and the harbour. Visitors can combine a visit with nearby attractions including the Jurassic Coast (a UNESCO World Heritage Site) and Portland Castle. There is no dedicated interpretation panel at the statue specifically addressing the American Revolution connection, so visitors following the Heritage Trail should come prepared with context about George III's role in the conflict.
Sources
- Black, Jeremy, George III: America's Last King (Yale University Press, 2006)
- Brooke, John, King George III (Constable, 1972)
- Weymouth Civic Society records
- Historic England listing for George III Statue, Weymouth (Grade II listed)
- Macalpine, Ida and Hunter, Richard, George III and the Mad-Business (Allen Lane, 1969)
Bodmin Keep: Cornwall's Regimental Museum
Museums
Historical Significance
The 46th (South Devonshire) Regiment of Foot served extensively in the American Revolutionary War, fighting in several of the major engagements of the conflict. The regiment was part of the British forces in North America from the early stages of the war and saw action at the Battle of Long Island (August 1776), the storming of Fort Washington (November 1776), the Battle of Brandywine (September 1777), the occupation of Philadelphia (1777-1778), the Battle of Germantown (October 1777), and the Battle of Monmouth (June 1778). This was a regiment that experienced the full arc of the war in the northern and middle colonies, from the initial British successes around New York through the grinding campaigns of Pennsylvania and New Jersey.
One of the most intriguing artefacts associated with the 46th Foot is a Masonic Bible long known as "Washington's Bible." According to regimental tradition, during an amphibious raid on New Bedford, Massachusetts, in September 1778, soldiers of the 46th rescued a Bible from the burning house of a man named Benjamin West. The Bible subsequently accompanied the regiment on its travels, was lost when the baggage train was captured, and was returned to the regiment by the Americans under a flag of truce. It was captured again by the French in Dominica in 1805 and once more returned. The possible connection to George Washington -- the Bible's popular name notwithstanding -- remains debated, and the provenance is uncertain. What is clear is that the object's remarkable journey across battlefields and continents reflects the global reach of the 18th-century British military experience.
The 46th Foot's American service illustrates the demands placed on British infantry regiments during the war: sustained campaigning far from home, heavy casualties, and the difficulty of achieving decisive results against an elusive enemy fighting on its own ground. The regiment's story is representative of the wider British experience in America, where tactical victories often failed to translate into strategic success.
Key Figures
- General Sir William Howe -- Commander-in-chief of British forces 1776-1778, under whom the 46th Foot fought at Long Island, Fort Washington, Brandywine, and Germantown
- General Sir Henry Clinton -- Succeeded Howe as commander-in-chief in 1778; oversaw the withdrawal from Philadelphia and the engagement at Monmouth
- Major General Charles Grey -- Led the British force that conducted the raid on New Bedford in September 1778, during which the "Washington's Bible" was reportedly recovered
- General George Washington -- Commander of the Continental Army; the 46th Foot faced his forces at multiple engagements throughout the war
What's There Today
Bodmin Keep is a Grade II listed former military barracks building dating from the 1850s, located on Lostwithiel Road (B3268) in Bodmin, Cornwall. Since 1925, it has housed Cornwall's Regimental Museum, which tells the story of the Duke of Cornwall's Light Infantry (formed from the 32nd and 46th Regiments of Foot in 1881), the Cornwall Regiment, and related Cornish military units. The museum's collections include uniforms, weapons, medals, maps, paintings, and -- most notably for the American Revolution -- the "Washington's Bible" captured during the 1778 New Bedford raid. The displays place the regiment's American service within the broader sweep of Cornish and British military history.
The museum is currently closed (see note above). Prior to closure, the museum's address was The Keep, Bodmin PL31 1EG. When open, it was typically open daily during the summer season (April to September) and on reduced hours during the winter. Admission was charged. Bodmin is accessible by road via the A30 and A38, and the town has a railway station on the branch line from Bodmin Parkway (on the main London Paddington to Penzance line). Visitors are strongly advised to contact the museum before travelling to confirm current status.
Sources
- National Army Museum, "46th (South Devonshire) Regiment of Foot" (online collection guide)
- Spring, Matthew H., With Zeal and With Bayonets Only: The British Army on Campaign in North America, 1775-1783 (University of Oklahoma Press, 2008)
- Bodmin Keep, "Object of the Month: May 2017" (bodminkeep.org.uk) -- on the provenance of "Washington's Bible"
- Cannon, Richard, Historical Record of the Forty-sixth, or the South Devonshire, Regiment of Foot (London, 1851)
- Bodmin Keep: Cornwall's Army Museum, official website and interpretive materials (bodminkeep.org.uk)
Falmouth Packet Service (National Maritime Museum Cornwall)
Museums
Historical Significance
Falmouth served as the home port of the Post Office Packet Service from 1689 to 1851, making it the nerve centre of British overseas communication for over 160 years. The packet ships were fast, armed mail vessels that carried official dispatches, commercial correspondence, and bullion across the Atlantic and to the Mediterranean. During the American Revolution, these ships formed the only reliable line of communication between the British government in London and its military commanders and colonial officials in North America. The monthly packet sailing to New York was the thread by which ministers coordinated a war fought three thousand miles away.
The New York packet route had deep connections to the revolutionary period even before hostilities began. In 1755, Benjamin Franklin -- then still a loyal colonial postmaster -- helped organise the Falmouth-to-New York mail service during a visit to England, improving transatlantic postal reliability. Two decades later, that same route became a casualty of the conflict Franklin had helped ignite. The New York sailing was suspended in September 1775 after the outbreak of fighting and not restored until January 1777, when packets were redirected to Halifax, Nova Scotia, then under firm British control. Throughout the war, alternative routings had to be improvised as the strategic situation shifted.
Falmouth's packets faced constant danger from American and French privateers prowling the Western Approaches. Packet captains were expected to fight to protect their dispatches and, if capture seemed inevitable, to throw the weighted mail bags overboard. Several Falmouth packets were taken as prizes during the war, and crews endured combat, imprisonment, and ransom. The threat was severe enough that the Admiralty periodically assigned naval escorts, though the packets' speed remained their best defence. Falmouth itself became a target, prompting the reinforcement of Pendennis Castle and harbour defences after France entered the war in 1778.
Key Figures
- Benjamin Franklin - As colonial postmaster, helped organise the Falmouth-to-New York packet route in 1755; later became the foremost American diplomat in Europe during the Revolution.
- Lord Le Despencer (Francis Dashwood) - Joint Postmaster General 1766-1781, oversaw the packet service during the war years and managed the disruption to Atlantic mail routes.
- Captain John Bazely - Falmouth packet commander who fought notable engagements against American privateers; later promoted to the Royal Navy.
- Edmund Dummer - Original architect of the Falmouth packet system in 1689, whose infrastructure remained the basis of wartime communications nearly a century later.
What's There Today
The National Maritime Museum Cornwall in Falmouth is the principal site for visitors. Its Robertson Packet Ship Gallery tells the story of the packet service through original artefacts, ship models, and interactive displays, covering the vessels, their crews, and the global mail routes they maintained. The museum sits in a striking waterfront building on Discovery Quay, overlooking the harbour the packets once called home.
Beyond the museum, the historic Custom House Quay survives as a working waterfront and is where packet ships were cleared and dispatches landed. The quay's Georgian buildings evoke the era when Falmouth was Britain's gateway to the Atlantic. Pendennis Castle, visible across the harbour, provides the military context. The town itself retains much of its eighteenth-century character, and walking from the quay to the castle headland gives visitors a sense of the compact harbour that handled communications vital to an empire at war.
Sources
- A.H. Norway, History of the Post Office Packet Service 1793-1815 (Macmillan, 1895)
- Susan Gay, Old Falmouth (Headley Brothers, 1903)
- National Maritime Museum Cornwall, "Packet Ship Gallery" exhibition materials, https://nmmc.co.uk
- David Cordingly, Cochrane the Dauntless: The Life and Adventures of Thomas Cochrane (Bloomsbury, 2007)
- Kenneth Ellis, The Post Office in the Eighteenth Century: A Study in Administrative History (Oxford University Press, 1958)
Soldiers of Gloucestershire Museum
Museums
Historical Significance
The 28th (North Gloucestershire) Regiment of Foot served in one of the critical early campaigns of the American Revolutionary War: the British effort to capture New York and destroy George Washington's Continental Army in the autumn of 1776. The regiment arrived in North America in May 1776 and was assigned to the forces under General Sir William Howe that landed on Long Island and drove the Americans from New York City. At the Battle of White Plains on October 28, 1776, the 28th Foot was part of the Second Brigade under Brigadier General Alexander Leslie, fighting alongside the 5th, 35th, and 49th Regiments of Foot. The battle was an indecisive engagement -- Howe forced Washington from his positions but failed to destroy the Continental Army -- yet it secured British control of the New York area, which would remain the main British base in North America for the rest of the war.
Following White Plains, the 28th continued to serve as part of the garrison and operational forces in the New York and New Jersey theatre, participating in the grinding cycle of raids, patrols, and minor engagements that characterised the war in the middle colonies. The regiment's American service illustrates the reality that much of the British Army's experience in the Revolution was not defined by set-piece battles but by the exhausting demands of holding and policing occupied territory, far from home and among a largely hostile population.
In 1778, the 28th was redeployed to the Caribbean, where the war against France had opened a new front. The regiment participated in the capture of Saint Lucia in December 1778, but later suffered the misfortune of being part of the garrison on Saint Kitts when it fell to the French in 1782. The regiment's men were captured and interned before eventually returning to Britain after the peace.
Key Figures
- General Sir William Howe -- Commander-in-chief of British forces in North America 1776-1778, under whom the 28th Foot fought in the New York campaign
- Brigadier General Alexander Leslie -- Commanded the Second Brigade, including the 28th Foot, at White Plains
- General George Washington -- Commander of the Continental Army at White Plains; the British failure to destroy his force at this engagement allowed the war to continue
- Admiral the Comte d'Estaing -- French commander whose Caribbean operations in 1778-1779 drew British regiments like the 28th away from the American mainland
What's There Today
The Soldiers of Gloucestershire Museum is housed in the Custom House at Gloucester's historic docks, a restored Victorian warehouse building overlooking the waterfront. The museum tells the story of Gloucestershire's soldiers from 1694 to the present, covering the 28th (North Gloucestershire) and 61st (South Gloucestershire) Regiments of Foot, the Gloucestershire Regiment formed from their amalgamation in 1881, and successor formations. Collections include uniforms, weapons, medals, personal items, and interactive displays that trace the regiment's service across multiple centuries and theatres, including the American Revolution and the wider 18th-century conflicts that shaped the British Army. The museum's location in the atmospheric Gloucester Docks -- once a busy inland port -- adds historical texture to any visit.
The museum is located at Custom House, 31 Commercial Road, Gloucester Docks, Gloucester GL1 2HE. It is open Wednesday to Sunday, 10:00am to 4:00pm, with last entry at 3:00pm. It is closed Monday and Tuesday. Admission is approximately GBP 5.00 for adults, with concession and family rates available. Pre-booking online is required. Gloucester Docks is a short walk from the city centre and Gloucester railway station.
Sources
- National Army Museum, "28th (North Gloucestershire) Regiment of Foot" (online collection guide)
- Spring, Matthew H., With Zeal and With Bayonets Only: The British Army on Campaign in North America, 1775-1783 (University of Oklahoma Press, 2008)
- Schecter, Barnet, The Battle for New York: The City at the Heart of the American Revolution (Walker & Company, 2002)
- Soldiers of Gloucestershire Museum, Gloucester, official website and interpretive materials (soldiersofglos.com)
- Age of Revolution, "Soldiers of Gloucestershire Museum" (venue guide)
Raynham Hall (Townshend Estate)
Political
Historical Significance
Raynham Hall in Norfolk is the ancestral seat of the Townshend family and the birthplace of Charles Townshend (1725-1767), the politician whose fiscal policies helped precipitate the American Revolution. As Chancellor of the Exchequer from 1766, Townshend introduced the Revenue Act of 1767 -- universally known as the Townshend Acts -- which imposed duties on glass, lead, paint, paper, and tea imported into the American colonies. These taxes, levied without colonial representation, provoked fierce resistance and became one of the direct causes of the revolutionary crisis.
Townshend intended the duties to raise revenue to pay the salaries of colonial governors and judges, thereby making them independent of colonial assemblies -- a move the colonists perceived as a fundamental threat to self-governance. The Acts also established a new Board of Customs Commissioners in Boston and authorised writs of assistance allowing officials to search for smuggled goods. The colonial response was immediate and intense: non-importation agreements, the Massachusetts Circular Letter, and escalating confrontation that led directly to the Boston Massacre of 1770. Although most of the Townshend duties were repealed in 1770, the tax on tea was deliberately retained as a symbol of Parliamentary authority -- and it was this surviving tea duty that provoked the Boston Tea Party of 1773.
Charles Townshend did not live to see the consequences of his legislation. He died suddenly in September 1767, just months after the Acts received royal assent. Born at Raynham Hall and educated at Leyden and Cambridge, he represented Great Yarmouth in Norfolk before holding a succession of government offices. He was renowned for his oratorical brilliance and political unpredictability -- Edmund Burke famously described one of his parliamentary performances as surpassing anything he had witnessed. The town of Townshend, Vermont, was named after him during the brief period when the Acts were seen as a reasonable exercise of authority. Today his name is remembered primarily as a byword for the miscalculated taxation that helped lose an empire.
Key Figures
- Charles Townshend - Chancellor of the Exchequer who introduced the Townshend Acts of 1767; born at Raynham Hall; died 1767 before witnessing their consequences.
- 1st Marquess Townshend (George Townshend) - Charles's elder brother, military commander at Quebec in 1759; inherited Raynham Hall and the family title.
- Augustus Henry FitzRoy, 3rd Duke of Grafton - Prime Minister under whom Townshend served; bore responsibility for colonial policy after Townshend's death.
- Samuel Adams - Boston political leader who organised colonial resistance to the Townshend Acts through non-importation agreements and the Circular Letter.
- Edmund Burke - Parliamentarian and political philosopher who opposed the Townshend Acts and championed conciliation with the colonies.
What's There Today
Raynham Hall remains the private home of the Townshend family, as it has been since its construction in the 1620s by Sir Roger Townshend with design influences attributed to Inigo Jones. The house is a magnificent example of Palladian architecture, with its characteristic symmetry, classical proportions, and elegant interiors containing important collections of paintings and furniture. The estate grounds include parkland and agricultural land typical of Norfolk's great estates.
The hall is not regularly open to the public but hosts periodic open days, typically in connection with charity events or heritage open days programmes. Visitors should check in advance for opening dates. When accessible, the house offers a direct encounter with the family home of one of the Revolution's most consequential -- if inadvertent -- catalysts. The surrounding Norfolk countryside is attractive, and nearby Great Yarmouth, the parliamentary constituency Charles Townshend represented, is easily reached. For trail visitors in East Anglia, Raynham Hall connects thematically to Norwich's sites of anti-war sentiment and commercial opposition to the conflict that Townshend's policies helped provoke.
Sources
- Peter D.G. Thomas, The Townshend Duties Crisis: The Second Phase of the American Revolution 1767-1773 (Oxford University Press, 1987)
- Sir Lewis Namier and John Brooke, The History of Parliament: The House of Commons 1754-1790 (HMSO, 1964)
- Robert Middlekauff, The Glorious Cause: The American Revolution, 1763-1789 (Oxford University Press, 2005)
- Pevsner, Nikolaus, and Bill Wilson, The Buildings of England: Norfolk 2: North-West and South (Yale University Press, 1999)
Culford Park (Cornwallis Estate)
People
Historical Significance
Culford Park in Suffolk was the country estate of Charles Cornwallis, 1st Marquess Cornwallis (1738-1805), the British general whose surrender at Yorktown on 19 October 1781 effectively ended major military operations in the American Revolution. Cornwallis's capitulation to the combined American and French forces under George Washington and the Comte de Rochambeau was the decisive military event of the war, shattering remaining British hopes of retaining the colonies and precipitating the fall of Lord North's government.
Cornwallis's American career was marked by both competence and controversy. He arrived in America in 1776 and served with distinction at the battles of Brandywine and Camden. His aggressive southern strategy in 1780-1781, however, led him deep into the interior of the Carolinas and Virginia without securing his supply lines or maintaining effective control of the territory behind him. His decision to move his army to the Chesapeake coast and establish a base at Yorktown proved fatal when a French fleet under Admiral de Grasse sealed off the bay, cutting off any possibility of naval rescue. After a siege of approximately three weeks, Cornwallis surrendered his force of roughly 8,000 men. He reportedly pleaded illness on the day of surrender and sent his deputy, Brigadier General Charles O'Hara, to hand over his sword.
Despite the Yorktown debacle, Cornwallis's career was far from over. He was not widely blamed for the defeat -- much criticism fell on Lord Germain and the overall strategic direction from London. Cornwallis went on to serve as Governor-General of India (1786-1793, 1805), where he implemented significant administrative reforms, and as Lord Lieutenant of Ireland (1798-1801). He died in India in 1805 during his second term as Governor-General. Culford Park remained the family seat throughout these years.
Key Figures
- Charles Cornwallis, 1st Marquess Cornwallis - British general who surrendered at Yorktown; later Governor-General of India
- George Washington - Commander-in-Chief of the Continental Army who, with French allies, forced Cornwallis's surrender
- Comte de Rochambeau - Commander of French forces at Yorktown
- Admiral de Grasse - French admiral whose fleet sealed the Chesapeake, trapping Cornwallis
- Brigadier General Charles O'Hara - Cornwallis's deputy who physically surrendered the sword at Yorktown
What's There Today
Culford Park is now home to Culford School, an independent school occupying the historic estate. Public access is limited as the buildings and grounds are in active educational use. The park was landscaped by Humphry Repton in the late 18th century, and elements of his design survive. The estate includes a notable Grade I listed church, the Church of St Mary, which contains Cornwallis family memorials and is generally accessible to visitors.
The estate is located near Bury St Edmunds in Suffolk, accessible by car. Visitors should contact Culford School in advance to enquire about access to the grounds or church. For Heritage Trail visitors, the primary interest is the connection to Cornwallis and the Yorktown surrender -- the military event that ended the Revolutionary War. The peaceful Suffolk countryside surrounding the estate contrasts powerfully with the drama of its most famous resident's American campaign. Bury St Edmunds itself, a few miles away, offers accommodation and additional historic attractions.
Sources
- Wickwire, Franklin and Mary, Cornwallis: The American Adventure (Houghton Mifflin, 1970)
- Wickwire, Franklin and Mary, Cornwallis: The Imperial Years (University of North Carolina Press, 1980)
- Ketchum, Richard M., Victory at Yorktown: The Campaign That Won the Revolution (Henry Holt, 2004)
- Culford School records and estate history
- Mackesy, Piers, The War for America 1775-1783 (Harvard University Press, 1964)
Hinchingbrooke House
People
Historical Significance
Hinchingbrooke House near Huntingdon, Cambridgeshire, was the ancestral seat of John Montagu, 4th Earl of Sandwich, who served as First Lord of the Admiralty from 1771 to 1782 — the entire period of the American Revolutionary War. As the political head of the Royal Navy, Sandwich bore ultimate responsibility for Britain's naval preparedness and strategy during the conflict. His tenure remains one of the most debated in British naval history, with historians divided on whether the Navy's difficulties during the war were primarily his fault or the result of deeper structural problems and inadequate funding from Parliament.
Sandwich faced an enormous challenge. When the war began in 1775, the Royal Navy had been reduced by peacetime economies and was not prepared for a major conflict. The initial task of blockading the American coast and supporting the army in North America strained resources. When France entered the war in 1778, followed by Spain in 1779 and the Netherlands in 1780, Britain found itself fighting a global naval war with a fleet that many critics argued was too small and too poorly maintained. Sandwich was accused of corruption, mismanagement, and neglecting the fleet in favour of political patronage. His opponents in Parliament, led by the Earl of Shelburne and others, attacked him relentlessly.
Modern historians, notably N.A.M. Rodger, have offered a more sympathetic assessment, arguing that Sandwich worked energetically to expand and refit the fleet under severe financial constraints and that many of the Navy's problems predated his appointment. The truth likely lies between the extremes: Sandwich was an able administrator who was nonetheless overwhelmed by the unprecedented demands of a multi-front naval war. Hinchingbrooke House, where he entertained, planned, and corresponded, was the private setting for a public figure at the center of one of Britain's greatest strategic crises.
Key Figures
- John Montagu, 4th Earl of Sandwich - First Lord of the Admiralty 1771-1782, managed (and was blamed for) the Royal Navy's wartime performance
- Augustus Keppel, 1st Viscount Keppel - Admiral whose court-martial after the Battle of Ushant (1778) became a cause celebre and a political weapon against Sandwich
- Sir Hugh Palliser - Admiralty Board member and ally of Sandwich, whose actions at Ushant triggered the political crisis
- Lord North - Prime Minister who relied on Sandwich to maintain naval supremacy
- Martha Ray - Sandwich's mistress, murdered in 1779 at Covent Garden in a sensational case that added personal tragedy to his political difficulties
What's There Today
Hinchingbrooke House is now part of Hinchingbrooke School, a secondary school in Huntingdon. The house itself is a Grade I listed building with origins dating to the medieval period — it was originally a Benedictine nunnery before passing to the Cromwell family and then to the Montagus. The house retains significant architectural features from multiple periods, including the Sandwich era. Public access is limited due to the building's use as a school, but open days and heritage events are occasionally held, particularly during Heritage Open Days in September.
Huntingdon is accessible by rail (Huntingdon station on the East Coast Main Line) and by road from the A1/A14. The Cromwell Museum in Huntingdon, housed in the former grammar school attended by Oliver Cromwell and Samuel Pepys, provides broader local history context. Visitors interested in Sandwich's career should also consider the National Maritime Museum in Greenwich, which holds portraits and documents related to his Admiralty tenure, and the Admiralty buildings on Whitehall in London.
Sources
- Rodger, N.A.M., The Insatiable Earl: A Life of John Montagu, 4th Earl of Sandwich (HarperCollins, 1993)
- Syrett, David, The Royal Navy in American Waters 1775-1783 (Scolar Press, 1989)
- Barnes, G.R. and Owen, J.H., eds., The Private Papers of John, Earl of Sandwich, First Lord of the Admiralty, 1771-1782 (Navy Records Society, 1932-1938)
- Historic England, "Hinchingbrooke House" listing
- Knight, Roger, "The Royal Navy's Recovery after the Early Phase of the American Revolutionary War," in The British Navy and the Use of Naval Power in the Eighteenth Century (Leicester University Press, 1988)
John Locke's Grave, High Laver
People
Historical Significance
John Locke, the philosopher whose ideas became the intellectual architecture of the American Revolution, is buried in the churchyard of All Saints Church, High Laver, Essex. Locke lived at nearby Otes Manor as a guest of Sir Francis Masham from 1691 until his death on 28 October 1704. His memorial inscription, composed by Locke himself, is characteristically modest: it describes him as a man "contented with his modest lot" who "devoted himself wholly to the pursuit of truth."
Locke's Two Treatises of Government (1689) provided the philosophical foundation for the Declaration of Independence. His arguments that governments derive their authority from the consent of the governed, that individuals possess natural rights to life, liberty, and property, and that the people retain the right to alter or abolish governments that violate those rights appear directly in Jefferson's text. Jefferson himself adapted Locke's "life, liberty, and property" into "life, liberty, and the pursuit of happiness." When asked about the Declaration's intellectual sources, Jefferson listed Locke alongside Algernon Sidney as the wellspring of American constitutional thought. James Madison prescribed Locke's Two Treatises as essential reading for Congress.
The quiet Essex churchyard where Locke lies is a striking contrast to the global impact of his ideas. The man who gave the Revolution its philosophical justification spent his final years in rural England, writing letters, tending his health, and reading scripture.
Key Figures
- John Locke (1632-1704) - Philosopher; author of Two Treatises of Government and Essay Concerning Human Understanding; buried here
- Thomas Jefferson - Called Locke one of "the three greatest men that have ever lived"; adapted Locke's ideas into the Declaration
- Sir Francis Masham - Locke's host at Otes Manor, 1691-1704
What's There Today
All Saints Church is a small medieval parish church in the rural Essex village of High Laver, approximately twenty miles northeast of central London. Locke's brick altar tomb stands outside the south wall of the nave. His memorial inscription, originally on the exterior wall, was moved inside the south side of the nave in 1932 to protect it from weathering. The church is open daily with free entry. The setting is quiet and contemplative -- a country churchyard with limited parking (a small lay-by outside the church). Travel by car is advised; public transport is limited. The village is approximately ten miles from Chelmsford.
Sources
- Locke, John, Two Treatises of Government, ed. Peter Laslett (Cambridge University Press, 1988)
- John Locke Foundation, "How Locke Influenced the Declaration of Independence"
- American Battlefield Trust, "John Locke" biography
- A Church Near You, "High Laver All Saints," Church of England
- Woolhouse, Roger, Locke: A Biography (Cambridge University Press, 2007)
Thomas Paine Statue Thetford
People
Historical Significance
Thetford, a market town in Norfolk, is the birthplace of Thomas Paine, born here on January 29, 1737 (Old Style; 1736 by the calendar then in use). Paine's father, Joseph Pain (Thomas later added the "e"), was a Quaker stay-maker (corset maker), and his mother, Frances Cocke, was the daughter of a local attorney. Paine attended Thetford Grammar School until the age of 13 before being apprenticed to his father's trade. He left Thetford as a young man and spent years in various occupations — stay-maker, privateer, excise officer, teacher — before emigrating to America in 1774 and transforming himself into one of the most consequential political writers of the 18th century.
Paine's Common Sense, published in January 1776, was a sensation. Written in plain, forceful language accessible to ordinary readers, it argued that the American colonies had no reason to remain subject to the British Crown and that independence was both morally right and practically necessary. The pamphlet sold an estimated 150,000 copies in its first year — an extraordinary figure for a colonial population of roughly 2.5 million. George Washington ordered it read to his troops. More than any other single publication, Common Sense shifted American public opinion from seeking redress within the British system to demanding outright independence. Paine followed it with The American Crisis papers ("These are the times that try men's souls"), which sustained revolutionary morale through the darkest periods of the war.
Thetford itself saw little direct impact from the Revolution, but its claim as Paine's birthplace has made it a site of pilgrimage for admirers of his work. The town's relationship with Paine has been complicated over the centuries — his later works, particularly The Age of Reason (1794), which attacked organised religion, made him a deeply controversial figure in England, and local sentiment was not always favourable. The erection of a statue in his honour in 1964 was itself a subject of debate. Paine remains a figure who elicits strong reactions, and visitors should expect to encounter multiple perspectives on his legacy.
Key Figures
- Thomas Paine - Born in Thetford 1737, author of Common Sense (1776), The American Crisis (1776-1783), Rights of Man (1791), and The Age of Reason (1794)
- Joseph Pain - Paine's father, a Quaker stay-maker in Thetford
- Frances Cocke Pain - Paine's mother, an Anglican, reflecting the mixed religious background that may have influenced his later thinking on religion
- Benjamin Franklin - Encountered Paine in London and encouraged his emigration to America with a letter of introduction
- George Washington - Ordered Common Sense read to Continental Army troops; Paine served under Washington during the New York and New Jersey campaigns
What's There Today
A gilded bronze statue of Thomas Paine by Sir Charles Wheeler stands in front of King's House on King Street in Thetford. The statue depicts Paine holding a copy of Rights of Man and was unveiled in 1964, funded by the Thomas Paine Foundation of the United States. It is freely accessible and is the town's most prominent tribute to its famous son. The former site of Paine's birthplace on White Hart Street is marked but the original building does not survive.
The Ancient House Museum, operated by Norfolk Museums Service, is located in a striking 15th-century timber-framed building and includes displays on Paine's early life and Thetford's history. The Thomas Paine Hotel on White Hart Street also commemorates the connection. Thetford Grammar School, which Paine attended, still exists as a functioning school (now in newer buildings) and claims to be one of the oldest schools in England. Thetford is accessible by rail (Thetford station on the Norwich-Cambridge line) and by road from the A11. The town is a good base for exploring the Norfolk-Suffolk border area and is approximately 30 miles from Norwich.
Sources
- Keane, John, Tom Paine: A Political Life (Bloomsbury, 1995)
- Nelson, Craig, Thomas Paine: Enlightenment, Revolution, and the Birth of Modern Nations (Viking, 2006)
- Paine, Thomas, Common Sense (R. Bell, Philadelphia, 1776)
- Paine, Thomas, The American Crisis (1776-1783)
- Ancient House Museum, Thetford, exhibition materials
- Fruchtman, Jack Jr., Thomas Paine: Apostle of Freedom (Four Walls Eight Windows, 1994)
Norwich Guildhall
Commercial
Historical Significance
In January 1775, as the crisis between Britain and its American colonies approached the point of no return, merchants in Norwich joined their counterparts in London, Bristol, Glasgow, and Birmingham in petitioning Parliament to seek conciliation rather than confrontation. The Norwich merchants' petition was part of a coordinated wave of commercial protest that demonstrated significant domestic opposition to the government's coercive policies toward the colonies. These petitions argued that the disruption of Anglo-American trade was inflicting serious economic harm on British manufacturing and commercial towns, and that peaceful resolution was both morally right and financially essential.
Norwich was one of England's most important textile centres in the eighteenth century, and its worsted cloth manufacturers had substantial trading interests with the American colonies. The non-importation agreements adopted by the Continental Congress in 1774 directly threatened Norwich's American markets. The city's merchants understood that war would not merely be an inconvenience but a potential catastrophe for their livelihoods. The petition, likely debated and endorsed at the Guildhall -- the seat of Norwich's civic government -- reflected a pragmatic calculation as much as a political principle, though many Norwich merchants also held genuine sympathy for the colonists' constitutional arguments.
Norwich's opposition to the war was rooted in more than commerce. The city had a long tradition of political radicalism and religious dissent, with a large Nonconformist population whose theological independence often translated into sympathy for civil liberties and self-governance. This Dissenting culture, centred on chapels like the Octagon Chapel, gave Norwich's anti-war sentiment an ideological depth that went beyond economic self-interest. The city was identified by contemporaries as one of the foremost centres of pro-American opinion outside London, and the 1775 petition was one expression of a broader current of sympathy that persisted throughout the conflict.
Key Figures
- Edmund Burke - MP and political philosopher who presented commercial petitions including those from Norwich's merchants and argued passionately for conciliation with America.
- Lord North - Prime Minister 1770-1782, whose government received and largely disregarded the merchants' petitions, pursuing instead a military solution to the colonial crisis.
- William Windham - Norfolk MP and later statesman, connected to Norwich's political circles during the revolutionary period.
- Benjamin Franklin - As colonial agent in London before 1775, Franklin encouraged British commercial interests to pressure Parliament against punitive colonial policies.
What's There Today
Norwich Guildhall is a Grade I listed building and one of the largest surviving medieval civic buildings outside London. Dating from the early fifteenth century, it served as the centre of Norwich's governance for centuries, including during the American revolutionary period when the merchants' petition would have been organised. The building features a distinctive flint and stone facade, a vaulted undercroft, and the council chamber where civic business was conducted. It is located prominently on Gaol Hill in the heart of Norwich's historic centre, overlooking the Market Place.
The Guildhall is accessible to visitors, though opening times may vary and parts of the building are used for civic functions. The undercroft has served various purposes over the centuries and is periodically open for heritage events. Norwich itself is an exceptionally well-preserved medieval and Georgian city, and the Guildhall sits within easy walking distance of other trail-relevant sites including the Octagon Chapel. The Castle Museum and the Norfolk Record Office hold documents relating to Norwich's eighteenth-century commerce and politics. For trail visitors, the Guildhall represents the commercial and civic dimension of British opposition to the American war -- a reminder that the Revolution was debated not only in Parliament but in the counting houses and council chambers of provincial England.
Sources
- James E. Bradley, Popular Politics and the American Revolution in England: Petitions, the Crown, and Public Opinion (Mercer University Press, 1986)
- John K. Edwards, "Norwich and the American Revolution," Norfolk Archaeology, Vol. 38 (1981)
- Penelope Corfield, "The Social and Economic History of Norwich 1650-1850: A Study in Urban Growth" (PhD thesis, University of London, 1976)
- Historic England, "Norwich Guildhall," National Heritage List for England
Octagon Chapel, Norwich
Protest & Dissent
Historical Significance
The Octagon Chapel, built in 1756 on Colegate in Norwich, was a centre of religious dissent and political radicalism in one of England's most independently minded cities during the American revolutionary period. Originally constructed as a Presbyterian meeting house, the congregation moved toward Unitarianism over the course of the eighteenth century, reflecting a broader theological liberalism among English Dissenters. This religious independence was inseparable from the political sympathies of its congregation, many of whom supported the American colonists' cause as an extension of their own struggle for civil and religious liberty.
Norwich's Dissenting community was among the most substantial in England, and it gave the city a distinctive political character. Nonconformists were excluded from public office by the Test and Corporation Acts and denied access to the English universities, creating a population with deep grievances against the established order. Many Norwich Dissenters saw in the Americans' resistance to Parliamentary overreach a parallel to their own situation -- a fight against arbitrary authority and for the rights of conscience. The Octagon Chapel's congregation included merchants, manufacturers, and professional men who combined theological heterodoxy with progressive politics, and the chapel served as an informal gathering point for this dissenting culture.
The chapel's significance extended beyond Norwich. John Wesley, visiting the city, famously described the Octagon as "the most elegant meeting house in Europe," a tribute to its architectural ambition. The building's octagonal plan, with its clear glass windows flooding the interior with light, was itself a statement of Enlightenment rationality -- a deliberate contrast to the dim mystery of Anglican churches. The Norwich Dissenting tradition that the Octagon embodied fed into the wider current of British pro-American sympathy that included Richard Price, Joseph Priestley, and the network of Rational Dissenters across England and Wales who saw the American Revolution as a vindication of their principles.
Key Figures
- John Wesley - Founder of Methodism, who praised the Octagon Chapel as "the most elegant meeting house in Europe" during his visit to Norwich.
- Richard Price - Welsh Dissenting minister and philosopher whose 1776 pamphlet Observations on the Nature of Civil Liberty was one of the most influential British defences of the American cause; connected to the national Dissenting network that included Norwich.
- Joseph Priestley - Chemist and Unitarian minister whose defence of American independence was rooted in the same Dissenting principles that animated the Octagon's congregation.
- Thomas Belsham - Prominent Unitarian minister and intellectual who helped codify the liberal theology that characterised chapels like the Octagon in the late eighteenth century.
What's There Today
The Octagon Chapel stands on Colegate in Norwich's historic northern quarter and is a Grade I listed building. It remains in active use as a Unitarian chapel, making it one of the longest continuously used Dissenting places of worship in England. The octagonal interior is remarkably well preserved, with its original layout of box pews (partially modified), a central pulpit, and the large clear-glazed windows that give the space its characteristic luminosity. The architectural quality that impressed John Wesley in the eighteenth century is still immediately apparent.
The chapel is open for Sunday services and welcomes visitors at other times, though it is advisable to check opening hours in advance. The Colegate area of Norwich retains much of its eighteenth-century character, with historic houses, former meeting houses, and narrow lanes that evoke the Dissenting community's world. The chapel is a short walk from Norwich Guildhall and the Market Place, making it easy to combine both sites in a single visit. For trail visitors, the Octagon Chapel represents the ideological and spiritual dimension of British support for the American Revolution -- a tradition of principled dissent that connected Norwich to Philadelphia, Boston, and the wider cause of liberty.
Sources
- C.B. Jewson, The Jacobin City: A Portrait of Norwich in Its Reaction to the French Revolution 1788-1802 (Blackie and Son, 1975)
- James E. Bradley, Religion, Revolution, and English Radicalism: Nonconformity in Eighteenth-Century Politics and Society (Cambridge University Press, 1990)
- Historic England, "The Octagon Chapel, Colegate, Norwich," National Heritage List for England
- David L. Wykes, "The Contribution of the Dissenting Academy to the Development of Rational Dissent," in Knud Haakonssen, ed., Enlightenment and Religion (Cambridge University Press, 1996)
Royal Norfolk Regimental Museum
Museums
Historical Significance
The 9th Regiment of Foot, which became the East Norfolk Regiment in 1782, was one of the British units caught up in the most consequential campaign of the American Revolutionary War: the Saratoga expedition of 1777. The regiment's experience -- hard fighting, eventual surrender, and years of captivity -- encapsulates the strategic disaster that transformed the American rebellion into a global war.
The 9th Foot embarked for Canada in April 1776 as part of the force assembling under Major General John Burgoyne for an ambitious invasion southward from Canada through the Hudson Valley, intended to split the rebellious colonies in two. In July 1777, the regiment participated in the siege and capture of Fort Ticonderoga and the subsequent engagement at Fort Anne as Burgoyne's army pushed south. These early successes masked the growing difficulties of supply, terrain, and American resistance that would undo the campaign.
At the First Battle of Freeman's Farm on September 19, 1777, the 9th Foot was initially held in reserve but was committed to the fighting as the engagement intensified. The battle was a savage, confused affair fought in wooded terrain that negated many of the British advantages in conventional warfare. The 9th suffered heavily; Major Forbes, commanding a screening force of the regiment, lost all but one of his officers in the opening minutes of fire. The regiment was drawn into prolonged close-range combat alongside the 62nd, 21st, and 20th Foot as Major General Phillips committed more of his division to support the faltering British line. At the Second Battle of Freeman's Farm (Bemis Heights) on October 7, 1777, Burgoyne's attempt to break through the American positions failed decisively, and the British army began its retreat northward.
On October 17, 1777, Burgoyne surrendered his entire army at Saratoga. The 9th Foot, along with the rest of the force, became prisoners of war under the Convention of Saratoga. The regiment's men spent three years in captivity as part of the "Convention Army," held in increasingly difficult conditions as the Continental Congress disputed the terms of the agreement. The surrender at Saratoga persuaded France to enter the war openly as an American ally, transforming the conflict's scale and ultimately sealing its outcome.
On its return from captivity, the regiment was posted to Norwich to recover and recruit back to strength. It spent the next seven years based in the city, and on August 31, 1782, formally became the 9th (East Norfolk) Regiment of Foot -- a county association that endured until the regiment's amalgamation in the 20th century.
Key Figures
- Major General John Burgoyne — Commanded the northern invasion from Canada; his surrender at Saratoga was the war's strategic turning point; later became a playwright and member of Parliament
- Major General William Phillips — Commanded the right wing and artillery at Saratoga; his efforts to support the 9th Foot and other regiments at Freeman's Farm were critical to preventing a complete British collapse on the field
- Major Forbes — Commanded the 9th Foot's screening force at Freeman's Farm; lost nearly all his officers in the battle's opening phase
- Major General Horatio Gates — Commanded the American forces at Saratoga; received Burgoyne's surrender and the Convention terms
- Brigadier General Benedict Arnold — His aggressive leadership at both battles of Freeman's Farm was instrumental in the American victory, though he acted without Gates's authorisation at Bemis Heights
What's There Today
The Royal Norfolk Regimental Museum occupies galleries within Norwich Castle, the city's dominant landmark -- a Norman keep set on a mound above the city centre. The museum sits in the Rotunda, a 1970s addition to the castle complex, and tells the 300-year history of the county regiment through object-rich displays concentrating on uniforms, kit, medals, weapons, personal letters, and diaries. The displays are strongest on 19th- and 20th-century campaigns, but the museum's collections include material from the regiment's earlier history. The broader Norwich Castle Museum and Art Gallery, which surrounds the regimental museum, offers fine art, archaeology, and natural history collections in a recently refurbished setting.
Norwich Castle is located on Castle Meadow in the city centre, easily reached on foot from Norwich railway station. The museum is open Monday to Saturday, 10am to 4:30pm, and Sunday afternoons from 1pm to 4:30pm, with last admission at 3:30pm. Admission is charged for the castle museum complex, which includes access to the regimental displays. Norwich itself, as the historic county town of Norfolk, provides a fitting setting for understanding the recruiting grounds of the 9th Foot -- the regiment drew its soldiers from across the county, and its formal association with Norfolk dates directly from the aftermath of its American service.
Sources
- Ketchum, Richard M., Saratoga: Turning Point of America's Revolutionary War (Henry Holt, 1997)
- Nickerson, Hoffman, The Turning Point of the Revolution (Houghton Mifflin, 1928; repr. 1967)
- Spring, Matthew H., With Zeal and With Bayonets Only: The British Army on Campaign in North America, 1775-1783 (University of Oklahoma Press, 2008)
- Royal Norfolk Regimental Museum, Norwich Castle, collection guides and interpretive materials
- Lunt, James, John Burgoyne of Saratoga (Macdonald and Jane's, 1975)
Lincoln Castle (Magna Carta)
Political
Historical Significance
Lincoln Castle holds one of four surviving original copies of Magna Carta (1215) alongside the only surviving copy of the Charter of the Forest (1217), displayed together in a purpose-built underground vault opened in 2015. For American visitors, these documents represent the origin of the constitutional principles that the colonists invoked when they declared independence from George III.
Lincoln's Magna Carta arrived here shortly after the charter was sealed at Runnymede in 1215, distributed to the counties by Elias of Dereham. The castle has held it ever since -- over eight hundred years in the same location. The Charter of the Forest, often overlooked, extended Magna Carta's protections to ordinary people by restoring common rights to royal forests. Together the two documents established the principle that government must operate under law and that the rights of the people -- from barons to commoners -- cannot be arbitrarily overridden by the Crown.
The trail also includes Salisbury Cathedral, which holds another of the four surviving originals in its medieval Chapter House. Lincoln offers a different but complementary experience: a modern, purpose-built vault with advanced interpretive displays, set within one of the finest Norman castles in England.
Key Figures
- King John (1166-1216) - Sealed Magna Carta at Runnymede in 1215
- Sir Edward Coke (1552-1634) - Revived Magna Carta as a charter of individual liberty; his Institutes were studied by colonial lawyers
- Elias of Dereham (d. 1245) - Distributed Magna Carta copies to the counties, including Lincoln
What's There Today
Lincoln Castle is a major heritage attraction built by William the Conqueror in 1068. The David PJ Ross Magna Carta Vault (opened 2015) is a purpose-built underground facility with climate-controlled display cases, modern interpretive exhibits, and theatrical lighting. Both the Magna Carta and the Charter of the Forest are on permanent display, though each is periodically removed for three-month conservation closures. The castle also offers a complete medieval wall walk (the only one in England where you can walk the full circuit), a Victorian prison with separate cells and chapel, and extensive grounds. Open daily, 10:00 AM to 4:00 PM in winter and 10:00 AM to 5:00 PM in summer. Admission is approximately £17 for adults. Lincoln Cathedral, one of England's finest Gothic buildings, stands adjacent.
Sources
- Lincoln Castle, official website, lincolncastle.com
- Library of Congress, "Magna Carta: Muse and Mentor"
- Holt, J.C., Magna Carta (Cambridge University Press, 3rd edition, 2015)
- Historic England, Lincoln Castle listing
Birmingham Gun Quarter
Military
Historical Significance
Birmingham's Gun Quarter was the principal centre of small-arms manufacturing in eighteenth-century Britain and played a critical role in arming the forces that fought the American Revolution. When war broke out in 1775, the Board of Ordnance turned to Birmingham's network of gunsmiths, barrel-makers, lock-filers, and stockers to meet a sudden and enormous demand for muskets. The standard infantry weapon, the Long Land Pattern and later the Short Land Pattern musket — collectively known as the "Brown Bess" — was produced in Birmingham workshops in quantities that dwarfed the output of the government's own manufactory at the Tower of London.
The gun trade in Birmingham was organised along lines of specialisation rather than centralised factory production. Individual craftsmen and small workshops each contributed a component — barrels, locks, stocks, furniture — and the finished weapons were assembled and proved before delivery to government stores. This decentralised system allowed the trade to scale up rapidly in wartime, though it also raised persistent concerns about quality control. The Board of Ordnance appointed inspectors to Birmingham, and disputes over rejected weapons and late deliveries were common throughout the war years. Nevertheless, Birmingham's output was indispensable: without it, Britain could not have equipped the tens of thousands of soldiers, sailors, and loyalist militia deployed across the Atlantic.
Among the most prominent figures in Birmingham's wartime arms trade was Samuel Galton Jr., a Quaker manufacturer who inherited a substantial gun-making business from his father. Galton supplied large quantities of muskets and other weapons to the government, a commercial activity that sat uneasily with the Society of Friends' peace testimony. In 1795 the Birmingham Quaker meeting formally disowned Galton for his refusal to abandon the arms trade, a celebrated episode that illuminated the moral tensions created by war profits in a community committed to pacifism.
The physical landscape of the Gun Quarter, centred on the streets north of St Chad's Cathedral, has been substantially altered since the eighteenth century, but traces of the trade survive. The Birmingham Gun Barrel Proof House, established by Act of Parliament in 1813 to replace earlier proving arrangements, still operates on Banbury Street and remains the statutory authority for the proof-testing of firearms in Birmingham. It is one of only two such institutions in the United Kingdom and provides a tangible link to the city's long history of arms manufacturing.
Key Figures
- Samuel Galton Jr. (1753-1832) — Quaker arms manufacturer who supplied muskets to the Board of Ordnance and was disowned by his meeting for refusing to leave the trade
- Birmingham gunsmiths — the collective network of barrel-makers, lock-filers, stockers, and assemblers who produced the bulk of Britain's military small arms
- Board of Ordnance — the government body responsible for procuring weapons, which placed large-scale contracts with Birmingham manufacturers
- Sir John Goodricke — Ordnance inspector stationed in Birmingham during the war years to oversee quality and delivery
What's There Today
The Gun Quarter occupies the area north and west of St Chad's Cathedral in central Birmingham. While much of the eighteenth-century built environment has been replaced by later industrial and commercial development, the neighbourhood retains its historic name and a number of buildings associated with the gun trade survive in altered form. The Birmingham Gun Barrel Proof House on Banbury Street is the most significant surviving institution. Still in active use for the statutory proof-testing of firearms, it maintains a small collection of historic weapons and proof marks and can be visited by appointment. The Proof House is a Grade II* listed building and a rare working link to the manufacturing processes that armed the British Empire.
For broader context on Birmingham's industrial and military history, visitors can explore the collections at the Birmingham Museum and Art Gallery, which holds examples of Birmingham-made firearms, and Thinktank, the city's science museum, which addresses the region's manufacturing heritage. The Jewellery Quarter, adjacent to the Gun Quarter, preserves a more intact landscape of small-workshop manufacturing and gives a sense of the kind of dense, specialised craft production that characterised the gun trade in the eighteenth century. Together these sites convey how Birmingham's industrial economy was mobilised for the American war.
Sources
- Bailey, De Witt. British Military Flintlock Rifles, 1740-1840. Lincoln, RI: Andrew Mowbray Publishers, 2002.
- Williams, David. The Birmingham Gun Trade. Stroud: Tempus Publishing, 2004.
- Pearson, Robin, and David Richardson. "Business Networking in the Industrial Revolution." Economic History Review 54, no. 4 (2001): 657-679.
- Cule, J. E. "Samuel Galton and the Birmingham Gun Trade." Midland History 4, no. 2 (1977): 112-130.
Coalbrookdale and the Iron Bridge
Military
Historical Significance
Coalbrookdale, in the Severn Gorge of Shropshire, was one of the most important ironworking centres in eighteenth-century Britain and a significant contributor to the military effort during the American Revolution. The Coalbrookdale Company, founded by Abraham Darby I in 1709, had pioneered the smelting of iron with coke rather than charcoal, a technological breakthrough that enabled iron production on a scale previously impossible. By the 1770s the company and its neighbours in the Severn Gorge were producing a wide range of iron goods, including cannon and shot for the Board of Ordnance.
During the American war the demand for ordnance surged. The Coalbrookdale Company cast cannon for both the army and the Royal Navy, contributing to the arsenal that Britain deployed across the Atlantic and in the wider global conflict with France and Spain. The Severn Gorge ironworks were well positioned to meet this demand: they had access to local coal and ironstone, water power from the river and its tributaries, and the Severn itself provided a navigable route for transporting heavy goods to the ports of Bristol and beyond. The war years were a period of intense activity for the ironworks, and military contracts formed a substantial part of their output.
It was in the midst of this wartime industrial expansion that the Iron Bridge was constructed. Designed and promoted by the Shrewsbury architect Thomas Farnolls Pritchard and cast at the Coalbrookdale works under the direction of Abraham Darby III, the bridge was erected across the Severn in 1779. It was the first major bridge in the world to be built of cast iron, and it immediately became a symbol of the Industrial Revolution and of the capabilities of the British iron industry. That it was built during the American war is not coincidental: the same industrial capacity that produced cannon and shot also produced the structural members of the bridge, and the confidence of the ironmasters who funded it reflected the prosperity that military contracts helped sustain.
The Iron Bridge and the surrounding landscape of the Severn Gorge were inscribed as a UNESCO World Heritage Site in 1986, recognised as the birthplace of the Industrial Revolution. The site's connection to the American Revolution is one strand in a broader story of how industrial innovation, military demand, and imperial ambition were intertwined in late eighteenth-century Britain.
Key Figures
- Abraham Darby III (1750-1789) — ironmaster who oversaw the casting and construction of the Iron Bridge and managed the Coalbrookdale works during the war years
- Coalbrookdale Company — the ironworking firm that cast cannon and shot for the Board of Ordnance during the American Revolution
- Thomas Farnolls Pritchard (1723-1777) — Shrewsbury architect who designed the Iron Bridge, though he died before its completion
- Board of Ordnance — the government body that contracted with Coalbrookdale and other ironworks for military supplies
What's There Today
The Ironbridge Gorge is one of Britain's most rewarding heritage destinations. The Iron Bridge itself, now open only to pedestrians, spans the Severn in the village of Ironbridge and remains a powerful visual statement of eighteenth-century engineering ambition. The Ironbridge Gorge Museums, a group of ten museums spread across the World Heritage Site, offer extensive coverage of the area's industrial history. The Museum of Iron, located at the original Coalbrookdale furnace site, traces the history of iron-making from Abraham Darby I's breakthrough to the present and includes material on military production during the eighteenth century. The nearby Darby Houses preserve the domestic settings of the ironmaking dynasty.
The wider gorge landscape retains many features of its industrial past, including furnace sites, warehouses, workers' housing, and the river wharves from which iron products were shipped. The Coalbrookdale area is accessible by road from the M54, and Telford is the nearest rail station. The museums are managed by the Ironbridge Gorge Museum Trust and are open year-round, with a passport ticket offering access to all ten sites. For visitors following the American Revolution heritage trail, Coalbrookdale provides a compelling illustration of how British industrial power underpinned the war effort and how military demand accelerated the technological changes that transformed the modern world.
Sources
- Trinder, Barrie. The Industrial Revolution in Shropshire. 3rd ed. Chichester: Phillimore, 2000.
- Raistrick, Arthur. Dynasty of Iron Founders: The Darbys and Coalbrookdale. 2nd ed. York: Sessions Book Trust, 1989.
- Cossons, Neil, and Barrie Trinder. The Iron Bridge: Symbol of the Industrial Revolution. Bradford-on-Avon: Moonraker Press, 1979.
- Ironbridge Gorge Museum Trust. Interpretive materials and collection records, Museum of Iron, Coalbrookdale.
Brington Church (St Mary the Virgin)
People
Historical Significance
The Church of St Mary the Virgin at Great Brington, Northamptonshire, holds the earliest surviving memorials to George Washington's direct ancestors in England. Two Washington grave slabs in the church mark members of the family who lived at nearby Sulgrave Manor before their fortunes declined and a younger branch emigrated to Virginia.
The most significant memorial is the ledger stone of Lawrence Washington (d. 13 December 1616), George Washington's great-great-great-grandfather, located in the chancel. The worn stone bears a carved heraldic shield displaying the Washington coat of arms -- three red stars above two red horizontal bars on a white field -- alongside the arms of the Butler family (his wife Margaret's people). The inscription identifies him as "sone and heire of Robert Washington of Soulgrave" and records that he and Margaret had eight sons and nine daughters. One of those sons, the Reverend Lawrence Washington, became rector of Purleigh in Essex; his son Colonel John Washington emigrated to Virginia around 1656, beginning the American branch that produced the first president two generations later.
A second memorial in the nave commemorates Robert Washington (d. 10 March 1622) and his wife Elizabeth (née Chishull, d. 19 March 1622), who died within days of each other. Their poignant joint inscription records that "they lived lovingly together many yeares in this parish." Robert was Lawrence's brother, making him George Washington's great-uncle several times removed. The presence of Washington burials at Brington rather than Sulgrave reflects the family's connection to the Spencer family of nearby Althorp. The Spencers were the dominant landowners in the parish, and the Washingtons -- by then lesser gentry whose fortunes were declining -- were their neighbours and contemporaries. The church's celebrated Spencer Chapel, with nineteen generations of Spencer tombs sculpted by artists including Nicholas Stone, Nollekens, Flaxman, and Chantrey, stands alongside these more modest Washington memorials as a striking contrast in fortune.
Key Figures
- Lawrence Washington (c.1565-1616) - George Washington's 4x great-grandfather; eldest son and heir of Robert Washington of Sulgrave; buried in the chancel
- Robert Washington (c.1544-1622) - Lawrence's brother; buried in the nave with his wife Elizabeth
- Elizabeth Washington (née Chishull, d. 1622) - Robert's wife; joint memorial in the nave
- Rev. Lawrence Washington (1602-1652) - Son of Lawrence (d. 1616); rector of Purleigh, Essex; father of the Virginia emigrant
- Col. John Washington (c.1634-1677) - Grandson of the Lawrence buried here; emigrated to Virginia c.1656
What's There Today
The Church of St Mary the Virgin with St John is a Grade I listed building in Great Brington, open daily from 10:00 AM to 5:00 PM (or dusk in winter). It is an active parish church within the Spencer Benefice, freely accessible to visitors without appointment. The Washington grave slabs are visible in the chancel and nave, though the inscriptions are worn and require careful reading. The Washington coat of arms on Lawrence's slab -- with its stars and bars that visually echo the American flag -- is a highlight for American visitors, though the claimed link between the arms and the flag's design remains disputed by historians.
The church itself is a fine medieval building, but its chief fame lies in the Spencer Chapel, separately designated as a Scheduled Monument. The Spencer tombs are considered among the finest church monuments in England. The church is located in the village of Great Brington, adjacent to the Althorp estate (seat of the Spencer family and childhood home of Diana, Princess of Wales). Sulgrave Manor lies approximately twelve miles to the northeast, making the two sites an ideal pairing for a half-day visit exploring Washington's English ancestry.
Sources
- Historic England, Church of St Mary, Brington, Grade I Listing 1067622
- Mount Vernon Digital Encyclopedia, "Washington Family Ancestry," mountvernon.org
- National Churches Trust, "Great Brington St Mary the Virgin with St John"
- Britain Express, "Great Brington, St Mary's Church"
- A Church Near You, Church of England, "St Mary the Virgin w St John, Great Brington"
Button Gwinnett Blue Plaque, Wolverhampton
People
Historical Significance
A blue plaque on St Peter's House in Exchange Street, Wolverhampton, commemorates the marriage of Button Gwinnett to Ann Bourne at the adjacent St Peter's Church on 19 April 1757. Gwinnett, who had been apprenticed in the ironmongery trade in Wolverhampton, married into a local family before emigrating to America in 1762. He settled in Georgia, became president (governor) of the colony, and signed the Declaration of Independence in August 1776 -- one of only eight signers born in the British Isles.
Gwinnett's Wolverhampton years bridge his Gloucestershire origins (his father was vicar of Down Hatherley, already on the trail) and his American career. The ironmongery trade he learned here gave him the commercial skills he took to the colonies. His life was cut short at forty-two when he was killed in a duel with General Lachlan McIntosh in 1777, making him one of the youngest signers to die. His signature, with only about fifty-one authenticated examples surviving, is the rarest and most valuable of any Declaration signer.
Key Figures
- Button Gwinnett (1735-1777) - Declaration signer for Georgia; married here 1757; killed in a duel aged 42
- Ann Bourne Gwinnett - Button's wife; married at St Peter's Church, Wolverhampton
What's There Today
A blue plaque is mounted on St Peter's House in Exchange Street, approximately one hundred metres from St Peter's Church where the marriage took place. St Peter's Church, a Grade I listed medieval church in Wolverhampton city centre, is one of the finest parish churches in the West Midlands and is open to visitors. The marriage is recorded in the parish register. Wolverhampton is accessible by train from Birmingham (20 minutes) and London (2 hours).
Sources
- Gwinnett Family History, "Button Gwinnett 1735-1777," gwinnett.me.uk
- Jenkins, Charles F., Button Gwinnett: Signer of the Declaration of Independence (Doubleday, 1926)
- St Peter's Church, Wolverhampton, parish records
Church of St James the Less, Sulgrave
People
Historical Significance
The Church of St James the Less stands adjacent to Sulgrave Manor and served as the parish church of the Washington family during their century at Sulgrave. Beneath an ironstone slab in the church lie Lawrence Washington (c.1500-1584), who built Sulgrave Manor, and his wife Amee (Amy) Pargiter Washington (d. 1564) -- George Washington's five-times great-grandparents. Their monumental brasses, which originally decorated the slab, were stolen in 1889 but recovered in 1923 and returned to the church.
The church also contains the "Washington Pew," a seventeenth-century box pew used by the Washington family during their residence at the manor. The combination of the family tomb, the Washington Pew, and the adjacent manor house makes Sulgrave one of the most complete Washington heritage sites in England -- visitors can see where the family lived, worshipped, and were buried within a few hundred metres.
Key Figures
- Lawrence Washington (c.1500-1584) - Builder of Sulgrave Manor; George Washington's 5x great-grandfather; buried here
- Amee (Amy) Pargiter Washington (d. 1564) - Lawrence's wife; buried here alongside him
What's There Today
The Church of St James the Less is a Grade II* listed building dating from the thirteenth and fourteenth centuries, with later additions. The Washington tomb slab and recovered monumental brasses are in the church. The Washington Pew is a distinctive seventeenth-century box pew. The church is an active parish church, freely accessible to visitors, and stands immediately adjacent to Sulgrave Manor. Together they form the natural starting point for the "Washington's English Ancestors" driving tour.
Sources
- Church of St James the Less, Sulgrave, Wikipedia
- Sulgrave Manor Trust, official website, sulgravemanor.org.uk
- Friends of Sulgrave Manor (US), "The Washingtons," sulgravemanor.us
- Mount Vernon Digital Encyclopedia, "Washington Family Ancestry"
Erasmus Darwin House, Lichfield
People
Historical Significance
Erasmus Darwin (1731-1802), physician, natural philosopher, poet, and inventor, lived and practised medicine at this house on Beacon Street in Lichfield from 1758 to 1781. During the American Revolution, Darwin was among the most prominent intellectuals in the English Midlands to express open sympathy with the American cause. His support was not casual opinion but rooted in a deep commitment to Enlightenment principles of liberty, scientific progress, and rational governance that he shared with many of the rebellious colonists and their supporters.
Darwin was a founding member of the Lunar Society of Birmingham, the celebrated informal gathering of industrialists, scientists, and thinkers who met monthly near the full moon. The Lunar Society's membership -- including Matthew Boulton, James Watt, and Josiah Wedgwood -- was broadly sympathetic to American independence, seeing in the colonial cause an extension of the progressive, rational values they championed. Darwin's Lichfield home was a hub of this intellectual network. His lifelong friendship with Benjamin Franklin, who visited Lichfield and corresponded extensively with Darwin, placed him in direct personal contact with the revolutionary movement. Franklin and Darwin shared interests in science, electricity, and social improvement.
Darwin's American sympathies extended beyond private opinion. He was elected to the American Philosophical Society, Franklin's learned society in Philadelphia, a mark of the esteem in which American intellectuals held him. His connections to the revolutionary cause were part of a wider pattern among English Dissenting and progressive circles, where support for American liberty was understood as consistent with domestic campaigns for religious toleration, parliamentary reform, and scientific advancement. Darwin's Lichfield years, spanning the entire period of the Revolution, were among his most intellectually productive, and the house witnessed the interplay of science, politics, and transatlantic friendship that characterised the Midlands Enlightenment.
Key Figures
- Erasmus Darwin - Physician, polymath, and Lunar Society founder who supported the American Revolution and maintained a lifelong friendship with Benjamin Franklin.
- Benjamin Franklin - American statesman and scientist who visited Lichfield and corresponded with Darwin; their friendship embodied the transatlantic Enlightenment.
- Matthew Boulton - Industrialist and Lunar Society member, business partner of James Watt, whose pro-American sympathies aligned with Darwin's.
- Josiah Wedgwood - Potter, Lunar Society member, and abolitionist whose medallions and political engagement connected Midlands industry to progressive causes including American liberty.
- Joseph Priestley - Chemist, theologian, and Lunar Society member who was among the most outspoken British defenders of the American Revolution.
What's There Today
Erasmus Darwin House is a restored Georgian townhouse museum on Beacon Street in the centre of Lichfield, directly opposite the west front of Lichfield Cathedral. The house has been carefully restored to its eighteenth-century appearance and opened as a museum dedicated to Darwin's life, work, and intellectual circle. Exhibits cover his medical practice, his inventions (including a speaking machine and a horizontal windmill), his poetry, and his connections to the Lunar Society. Displays explore his friendships with Franklin and other figures of the transatlantic Enlightenment.
The museum is managed by a charitable trust and open to visitors on a regular schedule, with a small admission charge. The herb garden has been replanted with species Darwin would have used in his medical practice. Lichfield itself is a compact, attractive cathedral city with strong literary and intellectual heritage -- Samuel Johnson's birthplace museum is nearby -- making it easy to visit both sites in a single trip. For trail visitors exploring Midlands connections to the American Revolution, Darwin House pairs well with Soho House in Birmingham (Boulton's home and Lunar Society meeting place) and the Wedgwood Museum in Barlaston.
Sources
- Desmond King-Hele, Erasmus Darwin: A Life of Unequalled Achievement (Giles de la Mare, 1999)
- Jenny Uglow, The Lunar Men: The Friends Who Made the Future (Faber and Faber, 2002)
- Erasmus Darwin House, "About the House," https://www.erasmusdarwin.org
- Robert Schofield, The Enlightened Joseph Priestley (Pennsylvania State University Press, 2004)
Langar Hall (Howe Family)
People
Historical Significance
Langar Hall in Nottinghamshire was the estate associated with the Howe family, which produced two of the most important British commanders of the American Revolution. General Sir William Howe (1729-1814) served as Commander-in-Chief of British forces in North America from 1775 to 1778, while his elder brother Admiral Richard Howe, 1st Earl Howe (1726-1799), commanded the naval forces in American waters during the same period. Together, the Howe brothers held responsibility for both the land and sea campaigns during the critical early years of the war.
William Howe commanded British forces at the Battle of Bunker Hill (1775), captured New York (1776), and took Philadelphia (1777). Yet his generalship remains deeply controversial among historians. Critics have long questioned why he failed to pursue and destroy Washington's army after several battlefield victories, and why he chose to campaign against Philadelphia rather than support Burgoyne's advance from Canada -- a decision that contributed to the disastrous British defeat at Saratoga (1777), which brought France into the war. His defenders argue that he was constrained by limited resources and a genuine, if naive, hope that conciliation might end the conflict without total war.
Both Howe brothers were known to hold sympathies for the American colonists. Their elder brother, George Augustus Howe, 3rd Viscount Howe, had been killed fighting alongside American colonial troops at Ticonderoga in 1758 during the Seven Years' War, and the Massachusetts assembly had voted funds for a memorial to him in Westminster Abbey. This family connection gave William and Richard Howe a personal link to the American cause and may have contributed to their restrained approach to the war. William Howe was also appointed as a peace commissioner alongside his military command, a dual role that some historians argue created an inherent conflict between his military and diplomatic objectives.
Key Figures
- General Sir William Howe - Commander-in-Chief of British forces in America, 1775-1778
- Admiral Richard Howe, 1st Earl Howe - Commander of British naval forces in America; later First Lord of the Admiralty
- George Augustus Howe, 3rd Viscount Howe - Elder brother killed at Ticonderoga (1758); his death created a personal link between the Howes and America
- George Washington - Howe's principal adversary as commander of the Continental Army
- General Sir Henry Clinton - Succeeded William Howe as Commander-in-Chief in 1778
What's There Today
Langar Hall survives as a privately operated country house hotel and restaurant in the village of Langar, Nottinghamshire. The building dates from various periods and retains a historic country house atmosphere. As a commercial hotel, it is accessible to the public for dining and accommodation -- an unusual situation among Heritage Trail sites that makes it possible to visit without special arrangements. Guests can experience the setting associated with the Howe family, though the hotel's focus is on hospitality rather than heritage interpretation.
The village of Langar is in the Vale of Belvoir, an attractive rural area of Nottinghamshire. It is accessible by car, located about 12 miles southeast of Nottingham. The nearest railway station is at Bingham. The parish church in Langar contains Howe family memorials and is worth a visit. For Heritage Trail visitors, this site tells the story of the brothers who held the fate of the British war effort in their hands during its most critical phase -- and whose controversial generalship remains one of the great "what if" debates of the American Revolution.
Sources
- Anderson, Troyer Steele, The Command of the Howe Brothers During the American Revolution (Oxford University Press, 1936)
- Gruber, Ira D., The Howe Brothers and the American Revolution (Atheneum, 1972)
- Mackesy, Piers, The War for America 1775-1783 (Harvard University Press, 1964)
- Partridge, Bellamy, Sir Billy Howe (Longmans, 1932)
- Langar Hall, langarhall.com
Lord North's Wroxton Abbey
People
Historical Significance
Wroxton Abbey was the country seat of Frederick North, 2nd Earl of Guilford -- better known as Lord North -- who served as Prime Minister from 1770 to 1782, spanning nearly the entire period of the American Revolution. North was the political leader most directly responsible for prosecuting the war against the American colonies on the British side. It was his government that passed the Tea Act (1773), the Coercive Acts (1774, known in America as the "Intolerable Acts"), and the Prohibitory Act (1775). He managed the war effort through Parliament, securing funding, defending government policy, and facing increasingly fierce opposition from Whig critics like Charles James Fox, Edmund Burke, and the Marquess of Rockingham.
North's relationship with the war was deeply conflicted. He repeatedly expressed private doubts about the wisdom of continuing the conflict and on several occasions offered to resign, only to be persuaded to remain by George III, who relied heavily on his parliamentary skill. After the British surrender at Yorktown in October 1781, North's position became untenable. He is reported to have received the news exclaiming "Oh God, it is all over!" -- though the precise wording of this famous quotation varies across sources. His government fell in March 1782, and he was succeeded by the Marquess of Rockingham, who negotiated peace with America.
Wroxton Abbey itself is a Jacobean house built on the site of an Augustinian priory. The North family acquired the estate in the 17th century, and it served as their country retreat for generations. Lord North would have retreated here between parliamentary sessions, away from the pressures of London. The estate's peaceful Oxfordshire setting stands in sharp contrast to the turbulent political career of its most famous resident.
Key Figures
- Lord North (Frederick North, 2nd Earl of Guilford) - Prime Minister 1770-1782; led the British government through most of the American war
- George III - The King who relied on North to maintain parliamentary support for the war
- Lord George Germain - Secretary of State for the Colonies under North, who directed military strategy
- Charles James Fox - Leading parliamentary opponent of North's war policy
What's There Today
Wroxton Abbey is now the overseas campus of Fairleigh Dickinson University (an American institution, which adds an interesting layer of transatlantic irony to the site). The Jacobean building has been adapted for academic use but retains much of its historic character, including period features and grounds. Public access is limited as it is an active university campus, though the grounds may be accessible at certain times. Visitors should check with Fairleigh Dickinson University in advance regarding access.
The village of Wroxton itself is a picturesque Oxfordshire village near Banbury, with thatched cottages and a village green. The parish church of All Saints contains North family memorials and is generally accessible. The surrounding countryside offers pleasant walking. For Heritage Trail visitors, the site is best understood as the private retreat of the man who bore the political burden of the American war -- a place where the weight of transatlantic conflict met the quiet rhythms of English country life.
Sources
- Thomas, Peter D.G., Lord North (Allen Lane, 1976)
- Whiteley, Peter, Lord North: The Prime Minister Who Lost America (Hambledon Press, 1996)
- Mackesy, Piers, The War for America 1775-1783 (Harvard University Press, 1964)
- Fairleigh Dickinson University, Wroxton College information
- Victoria County History, Oxfordshire
Sulgrave Manor
People
Historical Significance
In 1539, following Henry VIII's Dissolution of the Monasteries, Lawrence Washington -- a prosperous wool merchant and twice Mayor of Northampton -- purchased the Sulgrave estate from the Crown for £324 14s 10d. The land had belonged to the Priory of St Andrew, Northampton. Lawrence built the manor house between 1540 and 1560, establishing the family seat that would anchor the Washingtons in Northamptonshire for the next century. Above the entrance porch, he carved the Washington family coat of arms -- three stars (mullets) above two horizontal bars -- alongside the Royal Arms of Elizabeth I. This heraldic device, passed down through the generations, would eventually become the basis for the flag of the District of Columbia and appears on the Purple Heart medal. Its visual resemblance to the Stars and Stripes has long been noted, though Mount Vernon's own scholars describe a direct link to the American flag as an "enduring myth" without documentary evidence.
The Washingtons' path from Sulgrave to Virginia traced an arc of declining fortune. Lawrence's son Robert inherited the manor, and Robert's son Lawrence (d. 1616) was the last to hold it before the family's financial position weakened. The property passed out of Washington hands by the mid-seventeenth century. Within two generations, the Reverend Lawrence Washington -- born at Sulgrave, later rector of Purleigh in Essex -- saw his son Colonel John Washington emigrate to Virginia around 1656. John's great-grandson, born in 1732, was George Washington, first President of the United States. The chain from Sulgrave to Mount Vernon spans just eight generations: Lawrence the wool merchant stands as George Washington's five-times great-grandfather.
The manor's preservation is itself a transatlantic story. In 1911, inspired by a suggestion from Theodore Roosevelt to mark a century of peace between Britain and America, a campaign led to the joint Anglo-American purchase of Sulgrave Manor in 1914. The manor was restored in the 1920s, with formal gardens designed by Sir Reginald Blomfield, and has operated as a museum dedicated to the Washington-British connection ever since.
Key Figures
- Lawrence Washington (c.1500-1584) - Wool merchant, Mayor of Northampton; purchased and built Sulgrave Manor; George Washington's 5x great-grandfather
- Robert Washington (1544-1619) - Lawrence's eldest son and heir; inherited Sulgrave
- Lawrence Washington (c.1565-1616) - Robert's son; last Washington to hold Sulgrave; buried at Great Brington Church
- Rev. Lawrence Washington (1602-1652) - Born at Sulgrave; rector of Purleigh, Essex; father of the emigrant John Washington
- Col. John Washington (c.1634-1677) - Emigrated to Virginia c.1656; George Washington's great-grandfather
What's There Today
Sulgrave Manor is a Tudor hall house open to the public from late March to September, typically Sunday through Tuesday, 10:30 AM to 4:00 PM. Two rooms of the original house survive -- the Great Hall on the ground floor and the Great Bedchamber upstairs -- alongside later additions. Visitors can engage with hands-on Tudor history, including period games, costume dressing, and kitchen demonstrations. A dedicated George Washington exhibition displays personal belongings of the first president, including his velvet frock coat, and explores his path from Virginia planter to the presidency.
The gardens, laid out in the 1920s by Sir Reginald Blomfield, include formal lawns, herbaceous borders, a wildflower orchard with historic fruit trees, a Tudor herb and vegetable garden, topiary, and a rock garden with an Alpine house. The entrance porch with its carved Washington arms is the site's iconic feature. Admission is charged (approximately £10-11 for adults). The manor is managed by the Sulgrave Manor Trust and is a member of Historic Houses. The adjacent Church of St James the Less contains Washington family tombs and the "Washington Pew," a seventeenth-century box pew used by the family.
Sources
- Sulgrave Manor Trust, official website, sulgravemanor.org.uk
- Mount Vernon Digital Encyclopedia, "Washington Family Ancestry," mountvernon.org
- Historic Houses Association, "Founding Forefathers: The Story of Sulgrave Manor"
- Friends of Sulgrave Manor (US), "The Washingtons," sulgravemanor.us
- Baker, George, The History and Antiquities of the County of Northampton (1822-1841)
Protest & Dissent
3 sites
Joseph Priestley Blue Plaque (New Meeting House Site)
Protest & Dissent
Historical Significance
Joseph Priestley (1733-1804), the chemist, theologian, and political radical, served as minister of the New Meeting House in Birmingham from 1780 to 1791. Although the American Revolution had formally ended with the Treaty of Paris in 1783, Priestley's tenure at New Meeting was shaped by the revolutionary sympathies he had expressed throughout the conflict and continued to champion afterward. His 1774 pamphlet An Address to Protestant Dissenters of All Denominations had defended the American colonists' right to resist Parliamentary taxation, arguing that the principles of civil and religious liberty were inseparable.
Priestley's support for the American cause was more than rhetorical. He maintained an extensive correspondence with Benjamin Franklin throughout the Revolution, and the two had been close friends since the 1760s when Priestley lived in London. Franklin encouraged Priestley's scientific work on gases and electricity, and Priestley reciprocated with political solidarity. Their friendship exemplified the transatlantic network of Dissenters, scientists, and reformers who saw the American Revolution as part of a broader struggle for rational governance and individual rights. Priestley's position at New Meeting placed him at the centre of Birmingham's vibrant Dissenting community, which included many Lunar Society members sympathetic to the American cause.
The consequences of Priestley's radicalism caught up with him dramatically in July 1791, when the Priestley Riots erupted in Birmingham. A mob, angered by Priestley's support for the French Revolution and his long history of political dissent, attacked and burned the New Meeting House, along with Priestley's home and laboratory. While the riots occurred after the American War, they were rooted in the same tensions between establishment loyalism and Dissenting radicalism that the Revolution had inflamed. Priestley fled Birmingham and ultimately emigrated to Pennsylvania in 1794, completing a personal arc from British defender of American liberty to American citizen.
Key Figures
- Joseph Priestley - Chemist, Unitarian minister, and political radical; minister at New Meeting 1780-1791; outspoken supporter of American independence who ultimately emigrated to Pennsylvania.
- Benjamin Franklin - Priestley's close friend and correspondent; their relationship bridged science and revolutionary politics across the Atlantic.
- Matthew Boulton - Birmingham industrialist and Lunar Society colleague of Priestley; though more cautious politically, Boulton was part of the progressive Midlands circle.
- Theophilus Lindsey - Unitarian minister and reformer who shared Priestley's theological and political radicalism; founded Essex Street Chapel in London.
- Richard Price - Welsh Dissenting minister and Priestley's close ally; his 1776 pamphlet Observations on the Nature of Civil Liberty was a celebrated defence of the American cause.
What's There Today
The original New Meeting House was destroyed in the 1791 Priestley Riots and not rebuilt on the same site. The location on Moor Street (now within Birmingham's city centre) is today occupied by St Michael's Catholic Church, constructed in 1967-1968. A blue plaque installed in 1980 on the church marks the site of the New Meeting House and commemorates Priestley's ministry there. The plaque is the primary physical marker connecting this location to the revolutionary period.
Visitors should note that this is a plaque site rather than a museum, best appreciated as part of a broader Birmingham itinerary exploring the city's Enlightenment and industrial heritage. The Soho House museum in Handsworth, where the Lunar Society met at Matthew Boulton's home, provides the richest context for Priestley's Birmingham circle. The Birmingham Museum and Art Gallery and the Library of Birmingham hold relevant collections. A statue of Priestley by Peter Hollins stands nearby in Chamberlain Square (relocated during recent redevelopment). For those following the full trail, the site connects to Priestley's wider network at Newington Green in London and to Richard Price's heritage in South Wales.
Sources
- Robert Schofield, The Enlightened Joseph Priestley (Pennsylvania State University Press, 2004)
- Jenny Uglow, The Lunar Men: The Friends Who Made the Future (Faber and Faber, 2002)
- Rose, R.B., "The Priestley Riots of 1791," Past and Present, No. 18 (1960)
- Birmingham Civic Society, "Blue Plaques: Joseph Priestley," https://www.birminghamcivicsociety.org.uk
Samuel Johnson Birthplace Museum
Protest & Dissent
Historical Significance
Samuel Johnson, born in this house on Breadmarket Street in Lichfield in 1709, was the most celebrated English writer of his age — lexicographer, essayist, poet, and moralist. His connection to the American Revolution lies primarily in his 1775 pamphlet Taxation No Tyranny, a vigorous defence of Parliament's right to tax the American colonies. Written at the request of the government of Lord North, the pamphlet argued that the colonists, having voluntarily settled under British sovereignty, were bound by the authority of Parliament and had no grounds to resist taxation. Johnson memorably asked: "How is it that we hear the loudest yelps for liberty among the drivers of negroes?" — a pointed criticism of the hypocrisy of slaveholding colonists invoking natural rights.
Taxation No Tyranny was widely read and provoked fierce responses on both sides of the Atlantic. It represented the intellectual case for parliamentary supremacy over the colonies and articulated views held by a significant portion of British public opinion. Johnson's argument was not merely political but philosophical: he rejected the social contract theory underlying colonial resistance and held that liberty was best secured through established institutions rather than revolutionary upheaval. The pamphlet was itself somewhat softened before publication — the government asked Johnson to tone down some of its more provocative passages, suggesting that even his allies found his rhetoric uncomfortably blunt.
Johnson's views on America were not reducible to simple reaction. He was genuinely troubled by the institution of slavery and used the colonial crisis to highlight what he saw as American moral inconsistency. His friend and biographer James Boswell, by contrast, was more sympathetic to the colonial cause, and their disagreements on the subject are recorded in Boswell's Life of Johnson. Johnson died in 1784, having lived to see American independence become an accomplished fact — an outcome he had predicted would lead to disorder and decline.
Key Figures
- Samuel Johnson - Author of Taxation No Tyranny (1775), lexicographer, and leading British intellectual
- James Boswell - Johnson's biographer, who sympathised with aspects of the American cause and recorded their debates on the subject
- Lord North (Frederick North) - Prime Minister who commissioned Taxation No Tyranny
- Benjamin Franklin - While in London, Franklin moved in overlapping intellectual circles; Johnson was aware of Franklin's arguments for colonial rights
- Edmund Burke - Fellow member of the Literary Club with Johnson but a vocal parliamentary advocate for conciliation with the colonies
What's There Today
The Samuel Johnson Birthplace Museum occupies the house where Johnson was born and spent his early years. It is a well-preserved example of an early 18th-century townhouse and has been a museum since 1901. The museum contains exhibits on Johnson's life and works, period room displays, and a collection of Johnson-related artefacts. The connection to the American Revolution through Taxation No Tyranny is part of the broader interpretation of Johnson's public life, though the museum's coverage spans his entire career.
Lichfield is a small cathedral city in Staffordshire, accessible by rail (Lichfield City and Lichfield Trent Valley stations) and by road from the A38/A5. The city offers a pleasant day visit, with Lichfield Cathedral, Erasmus Darwin's house (another museum), and the market square all within walking distance. Johnson's statue stands in the Market Square, and a Johnson heritage trail links key sites in the city. The museum charges a modest admission fee and is open throughout the year, though hours may be reduced in winter.
Sources
- Johnson, Samuel, Taxation No Tyranny: An Answer to the Resolutions and Address of the American Congress (T. Cadell, 1775)
- Boswell, James, The Life of Samuel Johnson (1791), ed. G.B. Hill, revised L.F. Powell (Oxford University Press, 1934-1964)
- Clark, J.C.D., Samuel Johnson: Literature, Religion, and English Cultural Politics from the Restoration to Romanticism (Cambridge University Press, 1994)
- Samuel Johnson Birthplace Museum, visitor information, www.samueljohnsonbirthplace.org.uk
- Greene, Donald, The Politics of Samuel Johnson (Yale University Press, 1960)
Soho House (Lunar Society)
Protest & Dissent
Historical Significance
Soho House in Handsworth, Birmingham, was the home of Matthew Boulton (1728-1809), one of the foremost industrialists of the eighteenth century and the driving force behind the Lunar Society of Birmingham. This informal gathering of scientists, engineers, manufacturers, and thinkers met monthly on the Monday nearest the full moon — the lunar light making travel on unpaved roads safer — and became one of the most remarkable intellectual circles of the Enlightenment. From the 1760s through the 1790s, the Lunar Society's discussions ranged across science, technology, medicine, education, and politics, and its members' sympathies with the American revolutionary cause made Soho House a site of genuine political significance.
The Lunar Society's core membership reads like a roster of the late eighteenth century's most consequential minds. Besides Boulton, regular attendees included James Watt, the engineer whose improvements to the steam engine transformed industry; Josiah Wedgwood, the potter and manufacturer; Erasmus Darwin, physician, poet, and grandfather of Charles Darwin; and Joseph Priestley, the chemist, theologian, and political radical. These men were bound together not only by scientific curiosity but by a shared commitment to rational inquiry and progressive reform. Many of them viewed the American colonists' resistance to arbitrary authority as consistent with their own principles, and their correspondence reveals a keen and sympathetic engagement with events across the Atlantic.
Joseph Priestley's story illustrates how dangerous such sympathies could be. A Unitarian minister and discoverer of oxygen, Priestley was an outspoken supporter of both the American and French revolutions. His public celebration of the fall of the Bastille provoked a loyalist backlash in Birmingham: on July 14, 1791, a mob attacked and burned his house, laboratory, and chapel in what became known as the Priestley Riots. Priestley and his family fled, eventually emigrating to Pennsylvania in 1794. The destruction of Priestley's home and the broader climate of repression that followed the French Revolution effectively ended the Lunar Society as an active body, though its members' contributions to science and industry endured.
Boulton himself, while more cautious in his public political statements than Priestley, maintained extensive transatlantic connections through his manufacturing business. The Boulton and Watt steam engine firm supplied technology that would shape the economies of both Britain and the new American republic. Soho House, where these conversations and collaborations took place, thus stands as a monument to the intersection of Enlightenment science, industrial innovation, and the political upheavals of the revolutionary era.
Key Figures
- Matthew Boulton — Industrialist, manufacturer, and host of the Lunar Society at Soho House; partner with James Watt in the revolutionary steam engine business
- Joseph Priestley — Chemist, Unitarian minister, and political radical; supporter of the American and French revolutions whose Birmingham home was destroyed by a loyalist mob in 1791
- Josiah Wedgwood — Master potter and Lunar Society member who supported American independence and maintained transatlantic commercial ties
- Erasmus Darwin — Physician, natural philosopher, and poet; founding Lunar Society member whose ideas anticipated evolutionary theory
- James Watt — Engineer and inventor whose improvements to the steam engine, developed in partnership with Boulton, transformed industry on both sides of the Atlantic
What's There Today
Soho House is now a museum managed by Birmingham Museums Trust, open to the public on scheduled days. The house has been carefully restored to reflect its late eighteenth-century appearance, and visitors can see the dining room where Lunar Society meetings took place, along with period furnishings, scientific instruments, and displays interpreting the lives and work of the Society's members. The museum presents the Lunar Society story as one of friendship, intellectual ambition, and the interplay between scientific discovery and social change — including the political dimensions of the members' engagement with the American and French revolutions.
The surrounding Handsworth area has changed dramatically since Boulton's day, but Soho House retains its Georgian character and its grounds offer a tranquil setting. For visitors on the American Revolution heritage trail, the museum provides an essential window into the British intellectual milieu that engaged most deeply and sympathetically with the American cause. Combined with a visit to the Wedgwood Museum in Barlaston and the site of Priestley's former home in Birmingham, Soho House anchors a Midlands itinerary that reveals how the Revolution resonated far beyond Westminster and the ports.
Sources
- Uglow, Jenny. The Lunar Men: Five Friends Whose Curiosity Changed the World. New York: Farrar, Straus and Giroux, 2002.
- Schofield, Robert E. The Lunar Society of Birmingham: A Social History of Provincial Science and Industry in Eighteenth-Century England. Oxford: Clarendon Press, 1963.
- Jones, Peter M. Industrial Enlightenment: Science, Technology, and Culture in Birmingham and the West Midlands, 1760-1820. Manchester: Manchester University Press, 2008.
- Rose, R. B. "The Priestley Riots of 1791." Past & Present 18 (1960): 68-88.
Derby Museum (Joseph Wright Gallery)
Museums
Historical Significance
Joseph Wright of Derby (1734-1797) was one of the most distinctive painters of the eighteenth century, celebrated for his dramatic use of candlelight and moonlight in scenes of scientific experimentation, industrial innovation, and Enlightenment philosophy. The Derby Museum and Art Gallery holds the world's largest collection of his work, and Wright's paintings provide a remarkable visual record of the intellectual and social milieu in the English Midlands that was broadly sympathetic to the American revolutionary cause. His art documents the culture of inquiry, progress, and rational thought that linked provincial English intellectuals to their American counterparts.
Wright was closely connected to the Lunar Society of Birmingham through his friendships with Erasmus Darwin and John Whitehurst, both of whom were friends and correspondents of Benjamin Franklin. Darwin, the physician and polymath, and Whitehurst, the clockmaker and geologist, shared Franklin's passion for scientific investigation, and all three were sympathetic to the American colonies' struggle for self-governance. Wright painted portraits of both men and moved in the same circles of Midlands industrialists, scientists, and Dissenters who saw the American Revolution as an extension of the Enlightenment values they championed -- reason, liberty, and the practical application of knowledge.
Wright's most famous paintings -- An Experiment on a Bird in the Air Pump (1768), A Philosopher Lecturing on the Orrery (c. 1766), and his many forge and furnace scenes -- capture the world of provincial scientific culture that nurtured pro-American sentiment. These were not works of political propaganda, but they depicted the same people, the same values, and the same intellectual ambitions that drove British support for American independence. Wright's Derby was a town of manufacturers, innovators, and freethinkers, and his canvases preserve that world with extraordinary vividness.
Key Figures
- Joseph Wright of Derby - Painter whose works document the Midlands Enlightenment culture that supported the American cause; closely linked to Lunar Society figures.
- Erasmus Darwin - Physician, Lunar Society founder, and Wright's friend; openly supported the American Revolution and maintained a friendship with Franklin.
- John Whitehurst - Derby clockmaker, geologist, and Fellow of the Royal Society; friend of both Wright and Franklin; part of the Midlands scientific network.
- Benjamin Franklin - His friendships with Darwin and Whitehurst connected the American revolutionary cause to the provincial English scientific community Wright depicted.
- Josiah Wedgwood - Potter, Lunar Society member, and patron of the arts whose progressive politics aligned with the pro-American sympathies of Wright's circle.
What's There Today
The Joseph Wright Gallery occupies a dedicated suite of rooms within the Derby Museum and Art Gallery on the Strand in Derby city centre. The gallery displays the museum's unrivalled collection of Wright's paintings, including portraits, landscapes, industrial scenes, and his celebrated candlelit scientific subjects. The works are displayed chronologically, allowing visitors to trace Wright's development and the changing preoccupations of his Midlands circle. A study room accessible by appointment holds over 300 drawings and preparatory sketches, offering deeper engagement with Wright's working methods.
The museum itself is free to enter and is housed in a handsome Victorian building. Alongside the Wright Gallery, it covers Derby's wider history, natural sciences, and the city's industrial heritage, including its connections to the textile industry and the Derwent Valley Mills World Heritage Site. For trail visitors, the gallery is best understood in the context of the Midlands Enlightenment network: a visit to Derby pairs naturally with Erasmus Darwin House in nearby Lichfield and Soho House in Birmingham. Together, these sites illuminate the intellectual world that connected provincial English science and industry to the cause of American independence.
Sources
- Judy Egerton, Wright of Derby (Tate Gallery, 1990)
- Jenny Uglow, The Lunar Men: The Friends Who Made the Future (Faber and Faber, 2002)
- Benedict Nicolson, Joseph Wright of Derby: Painter of Light (Routledge, 1968)
- Derby Museums, "Joseph Wright Gallery," https://www.derbymuseums.org/joseph-wright-gallery
Staffordshire Regiment Museum
Museums
Historical Significance
The Staffordshire Regiment Museum covers the history of regiments drawn from one of England's most industrialised counties, including several that served during the American Revolutionary War. The 38th Regiment of Foot and the 64th Regiment of Foot -- later designated the 1st and 2nd Staffordshire regiments respectively -- were both in North America during the conflict, and their service spans the war from its earliest shots to the bitter fighting in the southern theatre.
The 38th Foot was stationed in Boston when the war began and was among the regiments that marched into the Massachusetts countryside on April 19, 1775. Companies of the 38th were part of the column sent to search Colonel Barrett's farm beyond Concord's North Bridge, and the regiment endured the punishing retreat back to Boston under constant fire from colonial militia. Two months later, the 38th fought at Bunker Hill on June 17, 1775, joining the assault on the American redoubt alongside the 5th and 52nd Foot and the Royal Marines. The regiment suffered heavy casualties in one of the war's costliest British victories. The 38th subsequently fought at Brandywine (September 1777) before continuing service through the later stages of the war.
The 64th Foot was also part of the Boston garrison during the opening phase of the war. After the British retreat from Lexington and Concord, companies of the 64th were among the reinforcements sent to occupy the high ground at Charlestown and construct fortifications. The regiment served through the siege of Boston and subsequent campaigns.
The museum also interprets the broader Staffordshire military tradition, including the later 80th Regiment of Foot (Staffordshire Volunteers), raised in 1793, which inherited the county connection. The earlier 80th Foot (Royal Edinburgh Volunteers), raised by public subscription in Edinburgh in 1778 specifically for American service, sailed to New York in 1779 and surrendered with Cornwallis at Yorktown in October 1781, though this regiment's link to Staffordshire came through the later numbering system rather than direct recruitment.
Key Figures
- General Thomas Gage — Commander-in-chief of British forces in North America 1763-1775; ordered the march to Concord that brought the 38th into the war's opening engagement
- Major General William Howe — Commanded the assault at Bunker Hill in which the 38th fought; subsequently commander-in-chief 1775-1778
- Lieutenant Colonel James Abercrombie — Commanded the 38th Foot during the early Boston period; the regiment's officers included several who would go on to further service in the war
- Lieutenant Colonel Thomas Dundas — Commanded the 80th Foot (Royal Edinburgh Volunteers) during its American service, including the Yorktown campaign
What's There Today
The Staffordshire Regiment Museum is located at Whittington Barracks on the A51 between Lichfield and Tamworth. The museum traces the story of the Staffordshire regiments from their origins through to the modern Mercian Regiment. Collections include uniforms, weapons, medals, personal effects, and campaign records spanning centuries of service. Notable features include a full-size replica World War I trench, outdoor military vehicle displays, and an extensive medal collection. While the museum's displays are strongest on the 19th- and 20th-century conflicts, the 18th-century collections provide context for the regiment's formative period, including the American war years when the Staffordshire county association was first formalised.
The museum is open year-round, 10am to 4pm, closed at Christmas. Admission is charged. The site includes free parking and outdoor exhibits. Lichfield, three miles to the west, offers further context: Samuel Johnson's birthplace museum there commemorates the lexicographer who wrote Taxation No Tyranny (1775), one of the most prominent defences of Parliament's right to tax the American colonies.
Sources
- Spring, Matthew H., With Zeal and With Bayonets Only: The British Army on Campaign in North America, 1775-1783 (University of Oklahoma Press, 2008)
- Fischer, David Hackett, Paul Revere's Ride (Oxford University Press, 1994)
- Philbrick, Nathaniel, Bunker Hill: A City, a Siege, a Revolution (Viking, 2013)
- Staffordshire Regiment Museum, Whittington, collection guides and interpretive materials
- National Army Museum, regimental histories of the 38th and 64th Foot
Wedgwood Museum
Museums
Historical Significance
The Wedgwood Museum at Barlaston, near Stoke-on-Trent in Staffordshire, preserves the legacy of Josiah Wedgwood (1730-1795), one of the most innovative manufacturers of the eighteenth century and a figure whose transatlantic commercial and intellectual connections place him squarely within the story of the American Revolution. Wedgwood built a ceramics empire that depended heavily on colonial markets, and his political sympathies aligned firmly with the American cause. He was among the prominent English dissenters, manufacturers, and intellectuals who viewed the colonists' struggle as an extension of their own campaigns for political and religious liberty at home.
Wedgwood's friendship with Benjamin Franklin was both personal and commercial. Franklin, during his long years as a colonial agent in London (1757-1775), moved in the same circles of progressive thinkers, scientists, and industrialists. He visited Wedgwood's works in Staffordshire, and the two exchanged ideas on subjects ranging from ceramic chemistry to political philosophy. Wedgwood supplied pottery to American customers and understood that the colonial trade was vital to British manufacturing prosperity — a practical argument against coercive policies that he pressed alongside his principled objections.
As a leading member of the Lunar Society of Birmingham, Wedgwood belonged to an informal but remarkably influential network of scientists, engineers, and manufacturers who met monthly on the night nearest the full moon. Fellow members included Matthew Boulton, James Watt, Erasmus Darwin, and Joseph Priestley. The Lunar Society was not merely a scientific club; its members discussed politics openly, and many harboured sympathies for the American and, later, French revolutions. Wedgwood's participation in this circle connected his commercial interests to a broader Enlightenment programme of reform.
Perhaps Wedgwood's most enduring contribution to the era's political causes was his production in 1787 of the anti-slavery medallion bearing the image of a kneeling enslaved man in chains and the legend "Am I Not a Man and a Brother?" Produced for the Society for Effecting the Abolition of the Slave Trade, the medallion became one of the most widely reproduced images of the abolitionist movement on both sides of the Atlantic. It stands as a reminder that the revolutionary-era debates about liberty, rights, and self-governance extended beyond the question of colonial independence to encompass the fundamental contradiction of slavery within societies that proclaimed freedom.
Key Figures
- Josiah Wedgwood — Master potter, industrialist, and Lunar Society member who supported American independence and produced the iconic anti-slavery medallion
- Benjamin Franklin — American polymath, diplomat, and colonial agent in London; friend and customer of Wedgwood who facilitated transatlantic intellectual and commercial exchange
- Matthew Boulton — Birmingham industrialist and Lunar Society founder; close associate of Wedgwood in both business and progressive politics
- Thomas Bentley — Wedgwood's business partner and a Liverpool merchant with strong American trading connections; shared Wedgwood's political sympathies
What's There Today
The Wedgwood Museum, located at the Wedgwood factory site in Barlaston, houses the world's largest collection of Wedgwood ceramics, manuscripts, and archival material. The collection spans the full history of the firm from its eighteenth-century origins and includes examples of the jasperware, basalt, and creamware that made Wedgwood's reputation. The museum tells the story of Josiah Wedgwood's life and innovations, situating his work within the broader context of the Industrial Revolution, Enlightenment thought, and transatlantic trade. Visitors can see original examples of the anti-slavery medallion alongside other pieces that reflect the political and social commitments of the Wedgwood circle.
The museum offers a thoughtful visitor experience that goes well beyond the display of fine ceramics. Interpretive exhibits explore Wedgwood's scientific experimentation, his marketing genius, and his connections to figures like Franklin and the Lunar Society. The surrounding Staffordshire Potteries landscape provides additional context for understanding the industrial world that shaped Wedgwood's career. For visitors following the American Revolution heritage trail, the museum offers a compelling illustration of how deeply the American crisis was entangled with British commercial life, intellectual culture, and the politics of reform.
Sources
- Uglow, Jenny. The Lunar Men: Five Friends Whose Curiosity Changed the World. New York: Farrar, Straus and Giroux, 2002.
- Reilly, Robin. Josiah Wedgwood, 1730-1795. London: Macmillan, 1992.
- Dolan, Brian. Wedgwood: The First Tycoon. New York: Viking, 2004.
- Oldfield, J. R. Popular Politics and British Anti-Slavery: The Mobilisation of Public Opinion against the Slave Trade, 1787-1807. Manchester: Manchester University Press, 1995.
Northern England
30 sites
Cross Street Chapel
Political
Historical Significance
Cross Street Chapel was the intellectual and spiritual centre of Manchester's Dissenting community during the American Revolutionary era. Founded in 1694 by Henry Newcome, who had been ejected from the established church in 1662, the chapel became over the course of the eighteenth century the largest, wealthiest, and most influential congregation of Dissenters in Manchester and its district. By the 1770s and 1780s, the congregation had moved doctrinally toward Unitarianism, and its members and ministers formed the nucleus of a liberal intellectual circle whose sympathies lay broadly with the American colonial cause.
Dissenters -- Protestants who refused to conform to the Church of England -- had a natural affinity with the American colonists' arguments about liberty, representation, and resistance to arbitrary authority. The chapel's congregants, excluded from holding civic office under the Test and Corporation Acts, understood from personal experience the grievances of those denied full political rights. Manchester's Dissenters, centred on Cross Street, tended to support the Whig and reform interest against the High Tory sympathies that dominated the town's Collegiate Church (now Manchester Cathedral). During the American crisis, this political alignment placed many chapel members on the side of those who opposed coercive measures against the colonies.
The chapel's most significant connection to the Revolutionary era came through its role as the incubator of the Manchester Literary and Philosophical Society, founded in February 1781. The society grew out of a private dining club organised by Dr Thomas Percival, a physician and moral philosopher who was a Trustee of Cross Street Chapel. Together with the Reverend Thomas Barnes, who became minister of the chapel in 1780, Percival established the society to promote scientific and intellectual exchange. Its early meetings were held in a back room of Cross Street Chapel until 1799, when the society moved to purpose-built premises on George Street.
Percival maintained correspondence with men of science and letters in both Europe and America. He was elected to the American Philosophical Society in 1786, the learned body founded by Benjamin Franklin in Philadelphia, and he corresponded directly with Franklin. This transatlantic intellectual network connected Manchester's Dissenting community to the American Enlightenment and its political ideals. Percival's later work on medical ethics, published in 1803, became a foundational source for the American Medical Association's first code of ethics in 1847, demonstrating the enduring intellectual links between Cross Street Chapel's circle and American institutions.
The chapel also gave rise to the Manchester Academy, founded in 1786 as one of the last dissenting academies. Its first tutors, Reverend Barnes and Reverend Ralph Harrison, were both ministers at Cross Street. The Academy later migrated to York and then to London, eventually becoming Harris Manchester College, Oxford -- a direct institutional descendant of the chapel's educational mission.
Key Figures
- Dr Thomas Percival (1740-1804) -- Physician, moral philosopher, Trustee of Cross Street Chapel, founder and first president of the Manchester Literary and Philosophical Society; elected to the American Philosophical Society in 1786; correspondent of Benjamin Franklin
- Rev. Thomas Barnes (1747-1810) -- Minister of Cross Street Chapel from 1780; co-founder of the Manchester Literary and Philosophical Society and the Manchester Academy; leading Dissenting intellectual
- Rev. Ralph Harrison (1748-1810) -- Assistant minister at Cross Street Chapel; tutor at the Manchester Academy; advocate for civil and religious liberty
- Benjamin Franklin (1706-1790) -- American statesman and philosopher who corresponded with Percival, linking Manchester's Dissenting intellectual circle to the American revolutionary cause
What's There Today
Cross Street Chapel still stands at its original location at 29 Cross Street, Manchester M2 1NL, though the current building dates from 1997, replacing an earlier structure destroyed in the 1996 IRA bombing of Manchester. It remains an active Unitarian congregation and welcomes visitors. The chapel maintains displays about its history, including its connections to the Literary and Philosophical Society and the Manchester Academy. The surrounding area of central Manchester retains the street pattern of the Georgian town, though the buildings are largely modern. The chapel is a short walk from St Ann's Square and the Royal Exchange Theatre, making it easy to combine with other sites from the same period.
Sources
- Cross Street Chapel. "A Brief History of Cross Street Chapel." cross-street-chapel.org.uk.
- Harris Manchester College, Oxford. "Cross Street Chapel." hmc.ox.ac.uk.
- Percival, Thomas. Correspondence, in Founders Online, National Archives (founders.archives.gov): "To Benjamin Franklin from Thomas Percival, 11 May 1784."
- Wykes, David L. "The Manchester Academy, 1786-1803." In Dissenting Academies Online, Dr Williams's Library.
- Thornber, Craig. "Cross Street Chapel, Manchester." thornber.net.
Peterloo Memorial, Manchester
Political
Historical Significance
On 16 August 1819, cavalry charged a crowd of approximately sixty thousand people who had gathered at St Peter's Field in Manchester to demand parliamentary reform. Eighteen people were killed and between four and seven hundred injured. The demands of the crowd -- universal male suffrage, annual parliaments, and secret ballots -- descended directly from the radical tradition ignited by the American Revolution and transmitted through Thomas Paine's Rights of Man, the London Corresponding Society, and the Spencean movement. The name "Peterloo," a satirical echo of the Battle of Waterloo, became a rallying cry for reform that echoed through the nineteenth century.
The massacre galvanised the movement that eventually produced the Great Reform Act of 1832, the Chartist movement, the trade union movement, and the founding of the Manchester Guardian newspaper (now The Guardian). The intellectual lineage from the American Revolution to Peterloo runs through specific texts and organisations: Paine's defence of American principles in Rights of Man inspired the London Corresponding Society (1792), whose members faced the 1794 Treason Trials (Old Bailey, already on this trail). The Spencean followers of Thomas Spence (Newcastle, already on this trail) organised the Spa Fields meetings of 1816. The Peterloo demonstrators inherited this tradition and paid for it with their lives.
Key Figures
- Henry "Orator" Hunt (1773-1835) - Principal speaker at St Peter's Field; imprisoned for two years after Peterloo
- Thomas Paine (1737-1809) - His Rights of Man (1791) inspired the reform movement that led to Peterloo
- Arthur Thistlewood (1774-1820) - Radical organiser influenced by Paine; spent time in America and France
What's There Today
The Peterloo Memorial, unveiled on 14 August 2019, stands on Windmill Street on the forecourt of Manchester Central Convention Complex. Designed by Turner Prize-winning artist Jeremy Deller with architects Caruso St John, it takes the form of a landscaped hill of eleven concentric steps, 1.8 metres high and 11.6 metres wide. The vertical faces are engraved with the names of the eighteen people killed and the towns from which marchers came, positioned at their accurate compass bearings. The memorial is freely accessible at all times. The nearby People's History Museum on Left Bank, Spinningfields, has extensive Peterloo exhibits. St Peter's Square Metrolink stop is a three-minute walk.
Sources
- People's History Museum, "Protest and Peterloo: The Story of 16 August 1819"
- Poole, Robert, Peterloo: The English Uprising (Oxford University Press, 2019)
- Caruso St John Architects, "Peterloo Memorial" project page
- Reid, Robert, The Peterloo Massacre (Heinemann, 1989)
Berwick-upon-Tweed Barracks
Military
Historical Significance
Berwick Barracks, completed between 1717 and 1721 to designs attributed to Nicholas Hawksmoor, holds the distinction of being the first purpose-built barracks in the British Isles. Located in England's northernmost town on the Scottish border, the barracks served as a key garrison and staging post throughout the eighteenth century. During the American Revolutionary War, Berwick played a significant logistical role as regular regiments cycled through the garrison on their way to embarkation ports for service in North America.
The demands of the American war placed enormous strain on Britain's military infrastructure. Regiments stationed at Berwick and similar garrison towns across the country were systematically redeployed to the American theatre, leaving domestic defences dangerously weakened. As regular troops were shipped to Boston, New York, and the southern colonies, the Berwick garrison was progressively reduced and backfilled with Invalid Companies, units composed of soldiers no longer fit for active field service due to age, wounds, or infirmity. These invalids maintained a skeleton garrison and performed essential duties such as guarding the town, manning the fortifications, and processing recruits.
Berwick's experience reflected a nationwide pattern during the American war. The wholesale transfer of regular troops overseas left Britain vulnerable, a fact dramatically exposed when John Paul Jones raided the British coast in 1778-1779 and France and Spain entered the war as American allies. The resulting defence crisis forced the government to rely on militia, volunteer associations, and invalid veterans to protect the home islands. Berwick Barracks, with its continuous military use from 1721 through to the twentieth century, embodies this story of imperial overstretch, where fighting a war three thousand miles away hollowed out the garrisons that defended Britain itself.
Key Figures
- Nicholas Hawksmoor (c.1662-1736) - Architect to whom the design of Berwick Barracks is attributed; a leading figure of English Baroque architecture and collaborator of Christopher Wren and John Vanbrugh.
- Lord Barrington, 2nd Viscount Barrington (1717-1793) - Secretary at War from 1765 to 1778; responsible for the logistical nightmare of deploying and supplying troops to America from garrisons like Berwick.
- Sir Jeffrey Amherst, 1st Baron Amherst (1717-1797) - Commander-in-Chief of British forces; oversaw the redeployment of garrison troops to American service and the replacement of regulars with invalid companies.
- Lord George Germain (1716-1785) - Secretary of State for the Colonies who directed the military strategy requiring the massive troop transfers that depleted domestic garrisons.
- Lord North (1732-1792) - Prime Minister whose government struggled to balance the demands of the American war with the defence of the British Isles.
What's There Today
Berwick Barracks is managed by English Heritage and is open to visitors as a heritage site and museum complex. The barracks compound includes the original three-storey accommodation blocks arranged around a parade ground, the officers' quarters, and the main gateway, all substantially preserved. The site houses multiple museum displays: the King's Own Scottish Borderers Regimental Museum traces the history of the regiment from 1689, the Berwick Borough Museum covers the town's rich history as a contested border settlement, and a contemporary art gallery occupies the upper floors of the Clock Block.
The barracks are located in the centre of Berwick-upon-Tweed, within the circuit of the town's remarkable Elizabethan walls, among the finest surviving examples of artillery fortifications in Europe. A walk around the ramparts provides context for Berwick's strategic importance as a garrison town. The barracks are open seasonally, and an admission fee applies for English Heritage non-members. Berwick is on the East Coast Main Line, making it accessible by train from Edinburgh (forty-five minutes) and Newcastle (fifty minutes), and serves as a natural stopping point for visitors travelling between the Scottish and English sections of the trail.
Sources
- Stephen Conway, The British Isles and the War of American Independence (Oxford University Press, 2000)
- Piers Mackesy, The War for America, 1775-1783 (Harvard University Press, 1964)
- English Heritage, "Berwick Barracks: History and Visiting," english-heritage.org.uk
- John Cannon, "Berwick Barracks," in The Oxford Companion to British History (Oxford University Press, 2009)
Carlisle Castle
Military
Historical Significance
Carlisle Castle, the ancient border fortress in northwest England, served as a military depot and staging point for troops destined for service in North America during the American Revolutionary War. As one of the principal garrison towns in the north of England, Carlisle played a logistical role in the movement of soldiers from northern England and Scotland to embarkation ports. The Castle housed regimental depots and served as a mustering point where newly recruited soldiers were assembled, equipped, and trained before being marched south to ports such as Liverpool, Cork, or Portsmouth for transport across the Atlantic.
The Castle's role during the American war was part of a longer history as a military installation on England's northern frontier. By the 1770s, its strategic importance had shifted from border defence to serving as an administrative and logistical hub for the British Army's operations. Regiments associated with the northern counties, including units of foot raised in Cumberland, Westmorland, and Lancashire, used Carlisle as a recruiting and depot centre. The castle also held prisoners of war at various points in its history, though its use for American war prisoners specifically is not well documented in the available sources.
The broader region around Carlisle contributed recruits to the British Army throughout the conflict. Economic conditions in the rural north of England, including limited agricultural employment, made military service an attractive option for many young men. The Castle's garrison would have expanded and contracted as regiments formed, deployed, and returned throughout the eight years of the war.
Key Figures
- Lord George Germain (Viscount Sackville) - Secretary of State for the Colonies (1775-1782), responsible for the overall strategic direction of troop deployments, including from northern depots
- Local recruiting officers - Officers of various regiments tasked with raising men in Cumberland and the surrounding counties (specific names are not well recorded for this period at Carlisle)
- Sir John Dalrymple - Scottish military figure involved in northern recruiting efforts
What's There Today
Carlisle Castle is managed by English Heritage and is open to visitors year-round. The Castle retains substantial medieval and later fabric, including the impressive 12th-century keep, the inner and outer baileys, and the gatehouse. The interior houses a regimental museum for the Border Regiment (now the Duke of Lancaster's Regiment), which covers the military history of the region including the 18th century, though specific American Revolutionary War content is limited.
The Castle's setting in central Carlisle, adjacent to the Cathedral and the medieval city walls, makes it easily accessible on foot from Carlisle railway station. The keep and ramparts offer views over the surrounding countryside toward the Scottish border. English Heritage provides interpretive displays focused primarily on the Castle's medieval history and its role in the English Civil War and the Jacobite risings. Visitors interested in the American war connection should look for the 18th-century barracks and storage buildings within the Castle precincts, which date from the period of the conflict.
Sources
- McCarthy, M.R., H.R.T. Summerson, and R.G. Annis. Carlisle Castle: A Survey and Documentary History. English Heritage, 1990.
- Conway, Stephen. The British Isles and the War of American Independence. Oxford University Press, 2000.
- Houlding, J.A. Fit for Service: The Training of the British Army, 1715-1795. Oxford University Press, 1981.
- English Heritage guidebook: Carlisle Castle. Various editions.
Flamborough Head (Battle Site)
Military
Historical Significance
The Battle of Flamborough Head on 23 September 1779 was the most famous naval engagement of the American Revolution fought in British waters and one of the iconic moments of the entire war. Captain John Paul Jones, commanding the aging French-donated frigate Bonhomme Richard, intercepted a large Baltic merchant convoy escorted by the new British frigate HMS Serapis (44 guns) and the armed ship Countess of Scarborough off the chalk cliffs of Flamborough Head in Yorkshire. What followed was one of the most ferocious ship-to-ship actions in the age of sail.
The battle began at approximately 7 p.m. in fading autumn light and raged for over three hours. Jones's Bonhomme Richard was outgunned and took devastating damage; several of her eighteen-pounder guns burst at the start of the action, and the ship was holed repeatedly below the waterline. At one point, with his ship sinking and on fire, Jones was reportedly called upon to surrender. His defiant response, traditionally rendered as "I have not yet begun to fight!", became one of the most celebrated phrases in American naval history. Jones lashed his ship to the Serapis and turned the battle into a close-quarters brawl. A grenade thrown into the Serapis's lower gun deck detonated stored ammunition, and Captain Richard Pearson finally struck his colours at approximately 10:30 p.m.
The battle was witnessed by thousands of spectators gathered on the Flamborough cliffs and the headland above Bridlington Bay. The sight of the battle's gun flashes and the sound of cannon fire carried to the shore created a spectacle without parallel in the war's British dimension. Jones transferred his crew to the captured Serapis as the Bonhomme Richard sank the following day. Though Jones won the battle, Captain Pearson's resistance had allowed the merchant convoy to escape, and he was knighted for his service. The engagement made Jones the most famous, and most feared, American naval commander of the Revolution.
Key Figures
- John Paul Jones (1747-1792) - Continental Navy captain from Kirkbean, Scotland; commanded the Bonhomme Richard and won the battle despite catastrophic damage to his ship, becoming an American naval legend.
- Captain Richard Pearson (1731-1806) - Royal Navy commander of HMS Serapis; fought tenaciously before surrendering, and was knighted for saving the merchant convoy.
- Pierre Landais (1731-1820) - French-born captain of the Alliance, part of Jones's squadron; his erratic firing during the battle may have hit the Bonhomme Richard as much as the enemy, and Jones later accused him of treachery.
- Benjamin Franklin (1706-1790) - American Commissioner in Paris who arranged the Bonhomme Richard and French support for Jones's expedition; the ship was named in honour of Franklin's Poor Richard's Almanack.
- Captain Thomas Piercy - Commander of the Countess of Scarborough, which fought a separate action against the Alliance during the battle and was also captured.
What's There Today
Flamborough Head is a dramatic chalk headland jutting into the North Sea on the Yorkshire coast, approximately four miles northeast of the town of Bridlington. The battle site is commemorated by a toposcope memorial, originally erected in 1959 and refurbished in 2025, which identifies key positions and provides an interpretive diagram of the engagement. The memorial stands near the cliff edge, offering spectacular views over the waters where the battle took place.
Flamborough Head Lighthouse, built in 1806 by John Matson, stands prominently on the headland and is visible for miles. An earlier chalk tower lighthouse, dating to 1674, also survives nearby and is one of the oldest surviving lighthouse structures in England. The headland is part of the Flamborough Head Heritage Coast and is designated a Special Area of Conservation for its seabird colonies. The cliffs offer excellent walking along the England Coast Path, and the RSPB Bempton Cliffs reserve is nearby. The headland is freely accessible at all times. Visitors should combine this site with Scarborough Castle, fifteen miles to the north, for the full story of the battle and its impact on the Yorkshire coast.
Sources
- Samuel Eliot Morison, John Paul Jones: A Sailor's Biography (Little, Brown, 1959)
- Evan Thomas, John Paul Jones: Sailor, Hero, Father of the American Navy (Simon & Schuster, 2003)
- James C. Bradford, ed., Command Under Sail: Makers of the American Naval Tradition, 1775-1850 (Naval Institute Press, 1985)
- Flamborough Head Heritage Coast, "Battle of Flamborough Head," eastridingofyorkshire.co.uk
Scarborough Castle
Military
Historical Significance
On 23 September 1779, one of the most dramatic episodes of the American Revolution on British soil unfolded within sight of Scarborough Castle's ancient walls. John Paul Jones's Franco-American squadron, cruising the British coast to disrupt commerce and spread alarm, encountered a large Baltic merchant convoy of over forty vessels off Flamborough Head, escorted by HMS Serapis and the armed vessel Countess of Scarborough. As the merchant ships scattered toward safety, many fled northward to shelter under the guns of Scarborough Castle, whose headland position commanded the approaches to the harbour.
The castle garrison played a direct supporting role during the crisis. Signal guns were fired from the castle to alert the town and surrounding countryside, and the garrison maintained a watch as the battle between Jones's Bonhomme Richard and HMS Serapis raged offshore in the fading light. Thousands of spectators gathered on the castle headland and along the cliffs to witness the engagement, one of the most famous naval battles of the eighteenth century. The convoy's decision to run for Scarborough demonstrated the continuing military relevance of a fortress that had dominated this stretch of the Yorkshire coast since the twelfth century.
The Battle of Flamborough Head, visible from Scarborough's ramparts, brought the American war home to the English civilian population in an unusually vivid way. The sight and sound of a naval battle just offshore, with the real possibility that American and French warships might turn their guns on the town itself, generated a wave of anxiety along the entire east coast of England. Scarborough's role as a place of refuge for the merchant fleet and a vantage point for civilian witnesses makes it an essential companion site to Flamborough Head itself.
Key Figures
- John Paul Jones (1747-1792) - Scottish-born Continental Navy captain commanding the Franco-American squadron; his attack on the convoy escort triggered the flight of merchant ships to Scarborough's shelter.
- Captain Richard Pearson (1731-1806) - Commander of HMS Serapis; though he lost his ship to Jones, his dogged resistance allowed most of the merchant convoy to escape to safety, and he was knighted for his conduct.
- Captain Thomas Piercy - Commander of the armed ship Countess of Scarborough, which fought the Alliance in a separate engagement during the battle; forced to surrender after a sharp action.
- Benjamin Franklin (1706-1790) - American Commissioner in Paris who secured the French ships and supplies that made Jones's expedition possible.
- King Henry II (1133-1189) - Builder of the great keep at Scarborough Castle, which had dominated the headland for over six centuries by the time of the American war.
What's There Today
Scarborough Castle is managed by English Heritage and is one of the most dramatically situated fortresses in England, perched on a rocky headland three hundred feet above the North Sea. The ruins span nearly three thousand years of history, from a Bronze Age settlement through the medieval keep to Civil War-era damage. The English Heritage visitor centre provides interpretation of the castle's full history, including its role during the American Revolutionary War period.
From the castle ramparts, visitors enjoy panoramic views of the coastline stretching south toward Flamborough Head, where the battle took place approximately fifteen miles away. On a clear day, the headland is visible, allowing visitors to appreciate the perspective of the thousands who watched the battle from this vantage point. The castle grounds include the remains of the twelfth-century keep, a medieval barbican, and later fortifications. Scarborough itself is a classic English seaside resort with extensive amenities. The castle is open year-round, with seasonal variations in hours. An admission fee applies for English Heritage non-members.
Sources
- Evan Thomas, John Paul Jones: Sailor, Hero, Father of the American Navy (Simon & Schuster, 2003)
- Samuel Eliot Morison, John Paul Jones: A Sailor's Biography (Little, Brown, 1959)
- English Heritage, "Scarborough Castle: History and Visiting," english-heritage.org.uk
- Jack Binns, The History of Scarborough (Blackthorn Press, 2001)
Whitehaven Harbour
Military
Historical Significance
Whitehaven Harbour in Cumbria was the target of one of the most audacious naval raids of the American Revolution. On the night of April 22-23, 1778, Captain John Paul Jones of the Continental Navy led a landing party of approximately 30 men in two boats into the harbour with the aim of setting fire to the shipping — some 200 to 300 vessels lay at anchor in what was then one of England's busiest ports. Jones knew the harbour well: he had been apprenticed to a Whitehaven merchant as a boy and had sailed from the port repeatedly in his youth. This local knowledge made the raid possible but also gave it a deeply personal dimension.
The raid did not achieve its full military objective. One of the boats, under the command of a lieutenant, failed to carry out its mission effectively, and the fires set on the coal ship Thompson were quickly extinguished by townspeople alerted to the attack. Jones and his men also spiked the cannons of the harbour's two small batteries before withdrawing. While the material damage was minimal, the psychological impact was enormous. This was the first hostile military landing on English soil since the Jacobite rising of 1745 (and before that, arguably since the Dutch raid on the Medway in 1667). The raid sent shockwaves through Britain, exposed the vulnerability of coastal towns, forced the Admiralty to divert warships to home defence, and made Jones a figure of terror along the British coastline — and a hero in France and America.
Jones's Whitehaven raid was part of a broader cruise in the Irish Sea aboard the sloop Ranger, which also included the attempted kidnapping at St Mary's Isle and the engagement with HMS Drake off Carrickfergus. Together, these actions demonstrated that the Continental Navy could carry the war to British home waters, challenging the Royal Navy's command of the seas in a way that no one had anticipated.
Key Figures
- John Paul Jones - Continental Navy captain who led the raid; born John Paul in Kirkbean, Scotland, he had sailed from Whitehaven as a young man
- Lieutenant Samuel Wallingford - Marine officer wounded during the raid
- David Freeman - One of Jones's crew who reportedly deserted during the raid and alerted townspeople (accounts vary on this point)
- Lord Sandwich (John Montagu, 4th Earl) - First Lord of the Admiralty, criticized for leaving the coast exposed
- Benjamin Franklin - American Commissioner in Paris who had authorized Jones's cruise
What's There Today
Whitehaven Harbour retains much of its Georgian character and is one of the best-preserved 18th-century harbours in England. The harbour walls, piers, and several quayside buildings date from the period of the raid. A cannon and commemorative plaque mark the battery where Jones's men spiked the guns. The Beacon Museum on the harbourside includes displays on the town's maritime history and the Jones raid. A statue of John Paul Jones was considered but has not been erected — a reflection, perhaps, of the ambivalent local feelings about commemorating what was, from the town's perspective, an enemy attack.
The harbour is the centerpiece of Whitehaven's regeneration as a heritage and leisure destination. Visitors can walk the harbour walls, view the Old Fort battery site, and explore the town's Georgian streets. Whitehaven is accessible by rail on the Cumbrian Coast Line and by road via the A595. The Rum Story museum, housed in an original 18th-century warehouse, provides additional context on the town's colonial trading connections.
Sources
- Morison, Samuel Eliot, John Paul Jones: A Sailor's Biography (Little, Brown, 1959)
- Thomas, Evan, John Paul Jones: Sailor, Hero, Father of the American Navy (Simon & Schuster, 2003)
- Jones, John Paul, Memoirs of Rear-Admiral Paul Jones (Edinburgh, 1830) — compiled from Jones's own papers, though editorial framing should be read critically
- The Beacon Museum, Whitehaven, exhibition materials
- Syrett, David, The Royal Navy in European Waters During the American Revolutionary War (University of South Carolina Press, 1998)
Holy Trinity Church, Washington Village
People
Historical Significance
Holy Trinity Church stands immediately adjacent to Washington Old Hall and would have been the parish church of the Washington family during their centuries at the Wessyngton manor. The family who gave their name to this place -- and ultimately to America's first president -- worshipped here before branches dispersed southward in the fourteenth and fifteenth centuries.
The church's most notable feature for trail visitors is a collection of twenty-eight coats of arms displayed on the altar rails and parclose screen, commissioned by the Reverend Cyril Lomax in 1937 and 1940. These include the Washington family arms alongside those of connected local gentry families, creating a visual genealogy of the families who shaped this corner of northeast England. The Washington arms -- three red stars above two red bars -- are the same design found at Sulgrave Manor and Brington Church, linking all three Washington heritage sites through heraldry.
Key Figures
- William de Hertburn (c.1160-1194) - First to acquire the Wessyngton manor; would have worshipped at an earlier church on this site
- Rev. Cyril Lomax - Commissioned the heraldic displays in 1937 and 1940, preserving the Washington and associated family connections
What's There Today
Holy Trinity Church is a medieval parish church in Washington Village, immediately adjacent to Washington Old Hall (National Trust). The church contains twenty-eight coats of arms on the altar rails and parclose screen, including the Washington family arms. It is an active parish church, freely accessible to visitors, and pairs naturally with a visit to the Old Hall next door. The two sites together tell the complete story of the Washington family's origins in this village: their manor, their church, and the name that became synonymous with American independence.
Sources
- Co-Curate / Newcastle University, "Washington Old Hall" and related materials
- Washington History Society, "Washington Coats of Arms"
- National Trust, "Washington Old Hall," nationaltrust.org.uk
Robert Morris Birthplace, Liverpool
People
Historical Significance
Robert Morris was born on 20 January 1734 in Liverpool, where his father, also named Robert Morris, had been baptised at the Parish Church of St Peter on Church Street in 1711. The elder Morris worked as a factor for Foster, Cunliffe and Sons, one of Liverpool's major tobacco trading firms, and emigrated to Maryland around 1738 to manage their operations in the Chesapeake. Young Robert joined his father in Oxford, Maryland, in 1747, at the age of thirteen.
In Philadelphia, Morris was apprenticed to the shipping firm of Charles Willing and rose rapidly through the merchant class. By the outbreak of the Revolution, he was one of the wealthiest men in America. Though he initially opposed independence -- voting against the resolution on 1 July 1776 -- he ultimately abstained to allow Pennsylvania's delegation to vote in favour and then signed the Declaration on 2 August. Morris became one of only two men (with Roger Sherman) to sign all three of the new nation's founding documents: the Declaration of Independence, the Articles of Confederation, and the Constitution.
His most consequential role came as Superintendent of Finance from 1781 to 1784, when he personally financed much of the war effort during its most desperate phase. He pledged his personal credit, established the Bank of North America (the country's first modern bank), and kept the Continental Army supplied when Congress could not. For this, he earned the title "Financier of the Revolution." George Washington offered him the position of first Secretary of the Treasury, but Morris declined, recommending Alexander Hamilton instead. His later years were tragic: ruinous land speculation led to bankruptcy, and from 1798 to 1801 he was imprisoned in Philadelphia's debtor's prison. He died in poverty on 8 May 1806.
Key Figures
- Robert Morris (1734-1806) - "Financier of the Revolution"; Declaration signer for Pennsylvania; born in Liverpool
- Robert Morris Sr. (1711-1750) - Father; Liverpool-born tobacco factor; baptised at St Peter's Church, Liverpool
- George Washington - Offered Morris the Treasury position; Morris recommended Hamilton instead
- Alexander Hamilton - Succeeded to the role Morris declined; Hamilton's own father was from Ayrshire, Scotland
What's There Today
The Parish Church of St Peter, where Morris's father was baptised in 1711, was demolished in 1922. Its location on Church Street -- now one of Liverpool's main shopping thoroughfares -- is marked by a bronze Maltese cross set into the pavement outside the entrance to Keys Court, near the Liverpool ONE shopping complex. The cross was cast from metal melted down from the church's altar rails. No specific plaque commemorating Robert Morris has been identified in Liverpool. The city already features on the trail with entries for the Walker Art Gallery (Colonel Tarleton portrait) and Liverpool Town Hall, both of which are within walking distance of the St Peter's Church site on Church Street.
Sources
- Rappleye, Charles, Robert Morris: Financier of the American Revolution (Simon & Schuster, 2010)
- National Park Service, "Signers of the Declaration: Robert Morris"
- American Battlefield Trust, "Robert Morris" biography
- University of Pennsylvania Archives, "Robert Morris"
- Encyclopaedia Britannica, "Robert Morris, American Statesman"
St Oswald's Church, Warton
People
Historical Significance
St Oswald's Church in Warton, Lancashire, marks the intermediate home of the Washington family between their origins in Tyne and Wear and their later seat at Sulgrave Manor, Northamptonshire. Robert Washington settled in the Warton area in the late fifteenth century and contributed to building the church's sixty-two-foot tower, placing the Washington coat of arms -- three stars (mullets) above two horizontal bars -- on the exterior. This heraldic device, passed down through the generations, connects all the Washington heritage sites on this trail: Washington Old Hall, Warton, Sulgrave Manor, and Brington Church.
The Washington coat of arms stone was moved from the exterior west wall of the tower to inside the church in 1955 to protect it from weather erosion. It is now displayed under a glass cover, though heavily worn after centuries of exposure. On the wall of the north aisle hangs an elaborate Washington family tree tracing the ancestry from this Lancashire branch to George Washington. Each 4 July, the Stars and Stripes flies from the church tower -- a tradition that draws American visitors. A Washington D.C. flag, donated in 1977, is also displayed inside.
Key Figures
- Robert Washington - Settled in Warton in the late 15th century; contributed to building the church tower; placed Washington arms on the exterior
- George Washington (1732-1799) - Descendant of the Warton branch through the family's subsequent move to Northamptonshire and emigration to Virginia
What's There Today
St Oswald's Church is a Grade II listed building on Main Street in the village of Warton, near Lancaster. The Washington coat of arms stone is displayed inside the church under a glass cover, alongside a Washington family tree on the north aisle wall. The church is an active parish church within the United Benefice of Warton, with services on Sundays and weekdays. Visitors are welcome outside service times (check ubwby.org for current hours). Nearby, the medieval Old Rectory is a Scheduled Ancient Monument maintained by English Heritage. Warton is a short drive from Lancaster and the M6 motorway, and could be combined with the Lake District or Yorkshire Dales.
Sources
- Britain Express, "Warton, St Oswald's Church and the George Washington Connection"
- Journal of Antiquities, "The Washington Family Coat-of-Arms Stone at St Oswald's Church, Warton"
- Historic England, Church of St Oswald, Warton, Grade II Listing 1308887
- Friends of Sulgrave Manor, Washington family genealogy
Washington Old Hall
People
Historical Significance
Washington Old Hall is where the Washington family name was born. Around 1183, William de Hertburn exchanged his tenancy of Hartburn in County Durham for the manor of Wessyngton, held from the Bishop of Durham. Following Anglo-Norman convention, the family adopted the name of their new estate, becoming "de Wessyngton" -- later anglicised to Washington. Without this place, there is no Washington name, and the history of the American Revolution reads very differently.
The Washingtons held the Wessyngton manor for approximately seven generations, from the late twelfth century to around 1399. During the fourteenth century, branches of the family began dispersing southward. Robert de Washington settled in Warton, Lancashire, in the early 1300s, and by 1529 Lawrence Washington had moved to Northamptonshire, where he acquired Sulgrave Manor during the Dissolution of the Monasteries. The manor at Washington itself was sold to the James family in 1613, and over the following centuries the medieval hall was incorporated into a new building, eventually declining into a tenement housing up to thirty-five people in cramped conditions. In 1936 it was declared unfit for human habitation and threatened with demolition.
The Hall's rescue was led by Fred Hill, a local schoolteacher who founded the Friends of the Old Hall and contacted the Daughters of the American Revolution for support. Restoration began in 1937, was interrupted by the war, and completed in 1955, when the Hall was opened by US Ambassador Winthrop W. Aldrich. It was transferred to the National Trust in 1957. In May 1977, President Jimmy Carter visited with Prime Minister James Callaghan -- a powerful symbol of the transatlantic bond that this modest medieval manor represents.
Key Figures
- William de Hertburn (c.1160-1194) - First to acquire Wessyngton manor; progenitor of the Washington family name
- Col. John Washington (c.1634-1677) - Descendant of the Wessyngton line who emigrated to Virginia c.1656; George Washington's great-grandfather
- George Washington (1732-1799) - First President of the United States; direct descendant of the de Wessyngton family
- Fred Hill - Local teacher who saved the Hall from demolition in 1936
- President Jimmy Carter - Visited the Hall in May 1977
What's There Today
Washington Old Hall is a Grade I listed National Trust property in Washington Village, Tyne and Wear. The house is open seasonally from late March to October, typically Sunday through Wednesday, with the hall open 11:00 AM to 5:00 PM and gardens from 10:00 AM. Admission is charged for non-members (approximately £6.50 for adults); National Trust and Royal Oak Foundation members enter free.
The centrepiece is the Great Hall, furnished as a seventeenth-century room with flagged floors and raftered ceilings. Medieval twin arches between the Hall and the kitchen survive from the original twelfth-century manor -- the oldest fabric in the building. Ground-floor rooms are presented as they would have appeared under the James family in the 1600s, with period furniture, oil paintings, and porcelain. The upper floor recreates the cramped tenement conditions of the eighteenth and nineteenth centuries, illustrating how close the building came to destruction. The gardens include a wildflower meadow (the Mead), a recreated seventeenth-century parterre, a nut orchard, and sensory herb gardens. A small tearoom is run by the Friends of Washington Old Hall.
Sources
- National Trust, "Washington Old Hall," nationaltrust.org.uk/visit/north-east/washington-old-hall
- National Trust, "History of Washington Old Hall," nationaltrust.org.uk
- Mount Vernon Digital Encyclopedia, "Washington Family Ancestry," mountvernon.org
- Historic England, Grade I Listing 1354971
- Daughters of the American Revolution, "Washington Old Hall," dar.org
Wentworth Woodhouse
People
Historical Significance
Wentworth Woodhouse, one of the largest houses in England with a facade stretching over 600 feet, was the seat of Charles Watson-Wentworth, 2nd Marquess of Rockingham, who served as Prime Minister during two critical moments in the American crisis. During his first ministry (1765-1766), Rockingham's government repealed the Stamp Act, the deeply unpopular tax that had provoked the first major colonial resistance. This repeal was accompanied by the Declaratory Act, which asserted Parliament's theoretical right to legislate for the colonies "in all cases whatsoever" -- a compromise that papered over the fundamental constitutional disagreement without resolving it.
Rockingham returned to power in March 1782, after the fall of Lord North's government following the British defeat at Yorktown. His second ministry initiated the peace negotiations that would lead to the Treaty of Paris (1783) and formal recognition of American independence. Rockingham personally favoured generous peace terms, but his ministry was cut short by his sudden death in July 1782, just months after taking office. The Earl of Shelburne succeeded him and completed the negotiations. Rockingham's political circle -- the "Rockingham Whigs" -- included Edmund Burke, Charles James Fox, and other prominent opponents of the war, and the group effectively functioned as an early form of organised political opposition.
Wentworth Woodhouse served as a centre of Whig political activity throughout this period. Rockingham entertained allies and plotted parliamentary strategy from the estate, which reflected the enormous wealth and influence of the Yorkshire aristocracy. The house stands as a monument to the political world that shaped the British side of the American Revolution -- a world of country-house politics, aristocratic patronage, and parliamentary manoeuvre.
Key Figures
- Marquess of Rockingham (Charles Watson-Wentworth) - Prime Minister who repealed the Stamp Act (1766) and initiated peace negotiations (1782)
- Edmund Burke - Rockingham's private secretary and political ally; the intellectual voice of the Rockingham Whigs
- Charles James Fox - Prominent Whig politician allied with Rockingham in opposing the war
- Earl of Shelburne - Succeeded Rockingham and completed the peace treaty
- Lord North - The Prime Minister whose fall from power brought Rockingham back to office
What's There Today
Wentworth Woodhouse is open to the public for guided tours, managed by the Wentworth Woodhouse Preservation Trust, which acquired the property in 2017. The house has an extraordinary Palladian east front -- the longest country house facade in Europe -- and a Baroque west front. Restoration work is ongoing, and the tours offer a chance to see both the magnificent state rooms and the conservation process in action. The surrounding parkland and gardens are also accessible.
The estate is located in the village of Wentworth near Rotherham in South Yorkshire. It is accessible by car, with parking on site. The nearest railway station is Elsecar. Visitors should book tours in advance through the Wentworth Woodhouse Preservation Trust website (wentworthwoodhouse.org.uk). The house hosts events and exhibitions throughout the year. For Heritage Trail visitors, this is one of the most impressive and accessible country house sites on the trail, offering a vivid sense of the political world from which the Rockingham Whigs challenged the government's American policy.
Sources
- O'Gorman, Frank, The Rise of Party in England: The Rockingham Whigs, 1760-82 (Allen & Unwin, 1975)
- Langford, Paul, The First Rockingham Administration, 1765-1766 (Oxford University Press, 1973)
- Thomas, Peter D.G., British Politics and the Stamp Act Crisis (Oxford University Press, 1975)
- Wentworth Woodhouse Preservation Trust, wentworthwoodhouse.org.uk
- O'Brien, Conor Cruise, The Great Melody (Sinclair-Stevenson, 1992)
Wilberforce House Museum, Hull
People
Historical Significance
William Wilberforce, born on 24 August 1759 in this merchant's house on the High Street of Hull, grew up in a major port city whose commercial life was directly disrupted by the American Revolutionary War. Hull, as one of England's principal east coast trading ports, suffered significantly when American privateers and the broader conflict threatened merchant shipping in the North Sea and Atlantic. Hull merchants and shipowners petitioned Parliament for naval convoys to protect their vessels from American raiders, a tangible reminder that the Revolution's economic impact extended far beyond the colonies.
The American war shaped the political and intellectual environment in which the young Wilberforce came of age. He was elected Member of Parliament for Hull in 1780, at the age of twenty-one, during the final years of the conflict. The war's disruption of trade, the debates over government accountability that it provoked, and the broader questioning of imperial ethics all formed the backdrop to Wilberforce's early political career. The connections between the American Revolution and the abolition movement that would define his life's work were significant: the Revolution's rhetoric of liberty and natural rights exposed the hypocrisy of a slaveholding republic while simultaneously energising antislavery sentiment on both sides of the Atlantic.
Hull's experience during the American war also illustrates the conflict's impact on ordinary British communities far from Westminster. The threat of American privateers disrupted the livelihoods of Hull's fishing fleets and merchant houses, while the impressment of sailors for the Royal Navy drained the port of experienced seamen. The war's costs fuelled local support for the Yorkshire Association reform movement, centred in nearby York. Wilberforce House thus stands at the intersection of multiple threads connecting the American Revolution to the broader story of British political and moral reform in the late eighteenth century.
Key Figures
- William Wilberforce (1759-1833) - Born in this house; MP for Hull and later Yorkshire; led the parliamentary campaign to abolish the slave trade (achieved 1807) and slavery itself in the British Empire (achieved 1833).
- Robert Wilberforce (d. 1768) - William's father; a prosperous Hull merchant whose family fortune derived from the Baltic and colonial trade disrupted by the American war.
- William Pitt the Younger (1759-1806) - Wilberforce's close friend from Cambridge; became Prime Minister in 1783 and supported Wilberforce's early reform efforts.
- Rev. Christopher Wyvill (1740-1822) - Leader of the Yorkshire Association, which drew support from Hull and the East Riding; his reform agitation during the American war shaped the political environment Wilberforce entered.
- Olaudah Equiano (c.1745-1797) - Formerly enslaved author whose autobiography, published in 1789, became a key text in the abolition campaign Wilberforce championed; his work connected American revolutionary ideals of liberty to the antislavery cause.
What's There Today
Wilberforce House Museum is located at 25 High Street in Hull's Old Town, in the original seventeenth-century merchant's house where William Wilberforce was born. The house is a Grade I listed building, and it has operated as a museum since 1906, making it one of the oldest dedicated museum houses in England. The museum's primary focus is the transatlantic slave trade and the abolition campaign, with extensive displays covering the Middle Passage, plantation life, and the political struggle to end the trade. Period rooms recreate the domestic environment of the Wilberforce family.
Admission to the museum is free. The museum is part of Hull's Museums Quarter in the Old Town, alongside the Streetlife Museum of Transport and the Hull and East Riding Museum of Archaeology. The High Street area preserves much of its historic character, with several other merchant houses from the same period. Hull's maritime heritage is further explored at the Hull Maritime Museum and The Deep aquarium on the waterfront. The museum is open Tuesday through Saturday, with Sunday afternoon hours. Visitors should allow at least an hour, and the museum's shop stocks specialist books on the abolition movement and Hull's maritime history.
Sources
- William Hague, William Wilberforce: The Life of the Great Anti-Slave Trade Campaigner (Harcourt, 2007)
- Adam Hochschild, Bury the Chains: Prophets and Rebels in the Fight to Free an Empire's Slaves (Houghton Mifflin, 2005)
- Hull City Council, "Wilberforce House Museum," hullcc.gov.uk/museums
- Stephen Conway, The British Isles and the War of American Independence (Oxford University Press, 2000)
Guildhall and Sandhill Newcastle
Commercial
Historical Significance
The Guildhall on Sandhill stands at the historic heart of Newcastle's commercial and civic life, and during the American Revolutionary period it was the focal point of a coal trade that connected Tyneside to the wider Atlantic conflict. From this building and the surrounding quayside, the Hostmen of Newcastle — a chartered company holding a monopoly over Tyne coal exports since 1600 — controlled the most important fuel supply in the British Isles. The politics of coal, trade, and imperial taxation all converged here in the 1760s and 1770s.
Newcastle's merchants had attempted to establish direct trade with the American colonies in the mid-18th century. Ralph Carr, one of Newcastle's most prominent merchant adventurers, began trading with New York and Boston around 1750, shipping grindstones and coal as ballast for the transatlantic voyage. But the American trade proved frustrating: colonial buyers preferred credit over the cash terms Carr insisted upon, and demand for Newcastle's goods was modest. The trade came to a near-total halt in 1765, when the British government demanded bonds of 2,000 pounds from all merchants trading with America. Newcastle's merchants refused to comply, and the transatlantic commerce that Carr and others had painstakingly built collapsed — a full decade before the outbreak of armed conflict.
This disruption was part of the same wave of imperial taxation policy that provoked the Stamp Act crisis in the colonies. While Newcastle's merchants were not among the most vocal petitioners to Parliament for repeal — that role fell to London, Bristol, and the major Atlantic ports — they felt the economic consequences acutely. The Guildhall, where the Corporation met and where commercial disputes were adjudicated, was the natural venue for these grievances.
Meanwhile, the coal trade itself was undergoing a transformation with direct implications for the war. In 1771, the coal owners of the Tyne and Wear formalised the "Limitation of the Vend," a price-fixing cartel that allocated production quotas among collieries to maintain high export prices. This cartel operated throughout the American war years, controlling the supply of coal that heated London and fuelled the industries supporting the British war effort. The collier brigs that carried Tyneside coal down the east coast to London were themselves a strategic resource: stoutly built, flat-bottomed vessels ideal for carrying bulk cargo, they were the same class of ship that the Royal Navy converted for exploration and transport. Captain Cook's HMS Endeavour and HMS Resolution were both converted Whitby-built colliers of the type that regularly loaded coal on the Tyne.
Sandhill itself, the open area before the Guildhall, was Newcastle's principal marketplace and the commercial hub where merchants, keelmen, and shipowners conducted their business. The keelmen — who transported coal in flat-bottomed barges from upriver staiths to the collier ships moored on the Tyne — were a restive workforce whose periodic strikes disrupted the coal supply. Five strikes occurred between 1738 and 1771, reflecting tensions between the labouring poor and the merchant oligarchy that the American revolutionary rhetoric of liberty and rights would soon intensify.
Key Figures
- Ralph Carr (1711-1806) — Newcastle merchant adventurer who attempted trade with New York and Boston in the 1750s; co-founder of Bell, Cookson, Carr and Airey bank on Pilgrim Street
- The Hostmen of Newcastle — Chartered guild holding the monopoly over Tyne coal exports, whose control shaped the economics of the coal trade throughout the war period
- Richard Ridley — Prominent coal owner and Hostman whose staiths on the Tyne were among those documented in 18th-century accounts of the Quayside
What's There Today
The Guildhall survives as a Grade I listed building on Sandhill, overlooking the Tyne. The original 17th-century structure by Robert Trollope (completed 1655) was substantially altered in 1794 when William Newton and David Stephenson added a Palladian north frontage with four Ionic columns. The building is occasionally open for events and heritage days. Sandhill retains several 17th- and 18th-century merchant houses, including Bessie Surtees House (English Heritage), which offers a glimpse of the prosperous trading community that dominated Newcastle's civic life during the Revolutionary period. The Quayside below is freely accessible and well-interpreted, though the working coal staiths and keelmen's quarters are long gone.
Sources
- Northumberland Archives. "Trading with America — Business (Mis)fortunes in 18th-Century Newcastle." Blog post, 31 March 2021.
- Hausman, William J. "Cheap Coals or Limitation of the Vend? The London Coal Trade, 1770-1845." Journal of Economic History 44, no. 2 (1984): 321-328.
- Falkus, M.E. "The British Whale-oil Industry and the North East Coal Trade." Northern History 10 (1975).
- Flinn, Michael W. The History of the British Coal Industry, Vol. 2: 1700-1830. Oxford University Press, 1984.
- Historic England listing: The Guildhall and Merchants' Court (List Entry 1120877).
- Brand, John. The History and Antiquities of the Town and County of the Town of Newcastle upon Tyne. 1789.
Liverpool Town Hall
Commercial
Historical Significance
Liverpool's involvement in the American Revolution was shaped by its position as Britain's foremost Atlantic trading port. By the 1770s the town had grown wealthy on the triangular trade linking West Africa, the Caribbean, and the American colonies. The disruption of transatlantic commerce caused by colonial rebellion therefore struck at the economic foundations of the Liverpool merchant elite. When news of escalating tensions reached the town, the Liverpool Corporation moved swiftly to petition Parliament against American independence, framing the conflict in terms of trade, imperial authority, and the livelihoods of thousands of Liverpool families.
The Town Hall, completed in 1754 to a design by John Wood the Elder, served as the seat of the Corporation and the symbolic centre of Liverpool's mercantile power. It was here that the merchant oligarchy debated war policy, organised subscriptions for the Crown's military effort, and coordinated the fitting-out of privateers to prey on American and French shipping. Liverpool privateers proved highly effective during the war, capturing hundreds of enemy vessels and enriching their owners while simultaneously weakening the supply lines on which the rebel colonies depended.
Liverpool also functioned as a major embarkation point for troops and supplies bound for North America. The town's shipbuilders and chandlers profited from government contracts, and the war economy temporarily offset losses in the slave trade caused by the disruption of colonial markets. By the 1770s Liverpool dominated the British slave trade, outstripping Bristol and London; the same Corporation members who protested American threats to their commercial "liberty" presided over a port that shipped tens of thousands of enslaved Africans annually. The contradiction between Liverpool's grievances about disrupted trade and its central role in the slave economy mirrored the wider moral tension of the conflict. Liverpool's enthusiasm for the war was not universal, however; a minority of merchants and Dissenters sympathised with the American cause.
The Town Hall itself was badly damaged by fire in 1795 and subsequently rebuilt and enlarged by James Wyatt, but the building's Georgian core preserves its eighteenth-century character. Its council chamber and grand ballroom remain physical reminders of the space in which Liverpool's wartime decisions were taken, making it an important site for understanding how the Revolution reverberated through Britain's commercial centres.
Key Figures
- Liverpool Corporation — the governing body of the town, which petitioned Parliament against American independence and coordinated the local war effort
- Liverpool slave-trade merchants — the commercial elite whose Atlantic trading networks were disrupted by the war and who funded privateering ventures
- John Wood the Elder — architect of the original Town Hall (completed 1754), which became the setting for wartime deliberations
- James Wyatt — architect who rebuilt and enlarged the Town Hall after the 1795 fire, giving it its present appearance
What's There Today
Liverpool Town Hall remains a working civic building and is the ceremonial home of the Lord Mayor of Liverpool. The interior, with its elaborate plasterwork, chandeliers, and portraits of former mayors, retains much of its Georgian and Regency grandeur. Guided tours are available on selected dates throughout the year, offering access to the council chamber, the grand ballroom, and other state rooms not normally open to the public. The building sits at the head of Castle Street in Liverpool's commercial district, surrounded by other Georgian and Victorian architecture.
The Town Hall is a Grade I listed building and forms part of Liverpool's wider heritage landscape, which includes the UNESCO-designated waterfront (inscribed 2004, delisted 2021). Visitors interested in Liverpool's Atlantic trading history can combine a Town Hall visit with the International Slavery Museum and the Merseyside Maritime Museum at the nearby Albert Dock, both of which address the city's connections to the slave trade and transatlantic commerce during the Revolutionary era.
Sources
- Longmore, Jane. "Civic Liverpool: 1680-1800." In Liverpool 800: Culture, Character and History, edited by John Belchem, 113-169. Liverpool: Liverpool University Press, 2006.
- Pope, David. "The Wealth and Social Aspirations of Liverpool's Slave Merchants of the Second Half of the Eighteenth Century." In Liverpool, the African Slave Trade, and Abolition, edited by Roger Anstey and P. E. H. Hair, 77-105. Historic Society of Lancashire and Cheshire, 1976.
- Williams, Gomer. History of the Liverpool Privateers and Letters of Marque, with an Account of the Liverpool Slave Trade. London: William Heinemann, 1897. Reprint, Liverpool: Liverpool University Press, 2004.
- Rawley, James A., with Stephen D. Behrendt. The Transatlantic Slave Trade: A History. Rev. ed. Lincoln: University of Nebraska Press, 2005.
Manchester Old Exchange
Commercial
Historical Significance
The Old Exchange on Market Street was the commercial nerve centre of Manchester during the American Revolutionary era. Built in 1729 by Sir Oswald Mosley, the Lord of the Manor, the building stood at the corner of Market Street and Exchange Street in what was then the Market Place. It provided a dedicated space where merchants, manufacturers, and factors could meet, negotiate, and strike deals in the town's expanding textile trade. By the 1770s, Manchester's economy was built on the production and export of fustians, checks, and smallwares -- cotton-linen mixed cloths used for men's waistcoats, breeches, and frock coats. Checks, a cheaper linen-cotton composite, were produced principally for Atlantic markets, including the American colonies.
The outbreak of the American crisis struck directly at this trade. The non-importation agreements adopted by American colonists in 1768-69 and again under the Continental Association of 1774 disrupted demand for Manchester goods in their most important overseas market. The economic pain was felt acutely in the Exchange and its surrounding streets, where a slowly growing community of exporters -- just sixteen Manchester firms were identified as exporters in the 1760s and 1770s -- depended on transatlantic commerce.
In response to the crisis, Manchester's merchant elite formed the Manchester Committee of Trade in 1774, one of the earliest attempts in England to establish a general-interest business body. The Committee submitted a memorial in July 1774, signed by twelve of its twenty-eight members, and a further petition was sent to Parliament on 12 December 1774, as colonial tensions escalated toward open conflict. These petitions joined those from Liverpool, Lancaster, Bristol, Birmingham, and other manufacturing towns in urging Parliament to find a resolution before trade was destroyed entirely. Between 23 and 27 January 1775, petitions from merchants and manufacturers in towns involved in the American trade, including Manchester, were formally presented to the House of Commons.
The Committee of Trade operated from within the Exchange's orbit, and its membership reflected the town's commercial oligarchy. The committee's internal tensions -- between established corporation families and newer mercantile interests -- mirrored the wider national divisions over how to handle the American crisis. Some members favoured conciliation to preserve trade; others supported the government's coercive policies. The committee survived the war years and continued until about 1786, later evolving into the Manchester Chamber of Commerce.
The American war accelerated changes already underway in Manchester's economy. The disruption of Atlantic trade routes, combined with the loss of American raw materials, pushed manufacturers toward new sources and new technologies. By the time peace returned in 1783, Manchester was on the cusp of a dramatic industrial transformation, with Richard Arkwright's Shudehill Mill opening that same year as the town's first mechanised cotton-spinning factory.
Key Figures
- Sir Oswald Mosley (1st Baronet, c.1696-1757) -- Lord of the Manor of Manchester who built the Exchange in 1729, providing the town's first dedicated commercial meeting space
- Manchester Committee of Trade members (1774-1786) -- The collective body of merchants and manufacturers who organised petitions to Parliament over the disruption of American trade
- Manchester check and fustian manufacturers -- The network of producers whose Atlantic market goods were directly affected by colonial non-importation agreements
- Edmund Burke -- MP who championed conciliation with the American colonies in his celebrated 1775 speech, reflecting the concerns raised by manufacturing town petitions including Manchester's
What's There Today
The 1729 Exchange building was demolished in 1792 after falling into disrepair. Its site, at the junction of Market Street and Exchange Street, is now occupied by commercial retail premises -- approximately where the Marks and Spencer store stands on Market Street today. No physical trace of the original building survives. However, the successor Royal Exchange building, located nearby on St Ann's Square, is now the Royal Exchange Theatre and contains information about the history of Manchester's commercial life. The Science and Industry Museum on Liverpool Road also covers the broader story of Manchester's textile trade and its transatlantic connections. Market Street itself remains one of Manchester's principal commercial thoroughfares, preserving the area's centuries-old function as the heart of the city's trade.
Sources
- Maw, Peter. "Provincial Merchants in Eighteenth-Century England: The 'Great Oaks' of Manchester." English Historical Review 136, no. 580 (2021): 568-604.
- Shercliff, W. H. "Alignments, Interests and Tensions over 'Reform' in Eighteenth-Century Britain: The Manchester Committee of Trade, 1774-1786." Northern History 51, no. 1 (2014).
- City of Capital and Labour, Chapter 1: "The Georgian Boom Town, c.1720-c.1780." Open Book Publishers.
- UK Parliament records: Petitions from merchants and manufacturers, January 1775.
Protest & Dissent
3 sites
Thomas Spence's Broad Garth
Protest & Dissent
Historical Significance
In the autumn of 1775, as fighting raged between British troops and American colonists an ocean away, a self-taught schoolmaster named Thomas Spence stood before the Newcastle Philosophical Society and delivered a lecture that would mark one of the most radical responses to the American crisis anywhere in Britain. Entitled "Property in Land Every One's Right" — later known as "The Real Rights of Man" — the lecture argued that all land should be held in common by the parishes, with rents distributed equally among inhabitants. It was a vision of social transformation that went far beyond anything the American patriots themselves were demanding, yet it was the American Revolution that catalysed Spence's thinking and gave him a platform.
Spence was born on Newcastle's Quayside on 21 June 1750, the son of a Scottish net-maker. He grew up in poverty and was largely self-educated, eventually becoming a schoolmaster who ran a small school and debating society at Broad Garth, a narrow lane running down to the Quayside in the heart of Newcastle's riverside trading quarter. It was from this modest base that Spence engaged with the explosive political debates of the 1770s.
The immediate trigger for Spence's radicalism was local, not American: the threatened enclosure of Newcastle's Town Moor in 1771, when the Corporation attempted to let common land to builders and the freemen of the city fought back through the courts, winning their case and securing the Town Moor Act of 1774. But the American crisis provided the intellectual framework. The Newcastle Philosophical Society, like many provincial debating clubs of the period, had been established precisely to debate the ideological issues raised by the dispute with the colonies. Periodicals circulating in Newcastle in 1776 advertised Thomas Paine's "Common Sense," and the language of natural rights, popular sovereignty, and resistance to tyranny was in the air.
Spence's lecture to the Philosophical Society was not well received. He was expelled from the society for selling copies of his talk on the streets of Newcastle. But the ideas he developed at Broad Garth would prove remarkably durable. When Spence moved to London in 1788, he became a radical bookseller and a leading member of the London Corresponding Society. He published penny pamphlets and his periodical "Pig's Meat," which drew directly on the political culture of 1770s Newcastle and the revolutionary language of the American and French crises. His followers, the "Spenceans," would go on to play a role in the Cato Street Conspiracy of 1820, and historians have traced a line from Spence's Broad Garth debating society through to the Chartists and later radical movements.
Broad Garth thus represents something distinctive in Britain's relationship to the American Revolution: not the perspective of merchants worried about trade or politicians debating in Parliament, but the voice of working-class radicalism, inspired by the American example to imagine far more sweeping changes than the colonists themselves envisioned. Newcastle's vibrant culture of popular debate, pamphleteering, and political agitation in the 1770s made it fertile ground for these ideas, and Spence was its most original product.
Key Figures
- Thomas Spence (1750-1814) — Schoolmaster, radical bookseller, and land reformer who delivered "The Real Rights of Man" lecture in Newcastle in 1775, inspired by the American crisis and the Town Moor enclosure dispute
- Thomas Paine (1737-1809) — Whose "Common Sense" circulated in Newcastle periodicals in 1776, shaping the radical discourse from which Spence drew
- Rev. James Murray — Minister and member of the Newcastle Philosophical Society, which hosted debates on the American question in the 1770s
What's There Today
Broad Garth survives as a narrow lane running between the Quayside and the lower part of the old town in Newcastle. A black commemorative plaque marks the site of Spence's schoolroom and debating society, noting his birth on the Quayside in 1750 and describing him as "an utopian writer and land reformer" and "a courageous pioneering campaigner for the rights of men and women." The plaque carries the motto "Dare to be Free." The surrounding Quayside area retains some 18th-century character amid extensive modern redevelopment and is freely accessible. The "Mapping Radical Tyneside" project includes Spence's birthplace among its documented sites. The Lit & Phil library on nearby Westgate Road, successor to the intellectual culture of the 1770s debating societies, holds relevant collections.
Sources
- Ashraf, Mary. The Life and Times of Thomas Spence. Frank Graham, 1983.
- Dickinson, H.T., ed. The Political Works of Thomas Spence. Avero Publications, 1982.
- Knox, Malcolm. "Radical Politics and Print Culture in Newcastle, c. 1770-1832." Northern History, 2025.
- Northumberland Archives. "Trading with America — Business (Mis)fortunes in 18th-Century Newcastle." Blog post, 31 March 2021.
- Mapping Radical Tyneside project, Newcastle University: radicaltyneside.org.
- Thomas Spence Society: thomas-spence-society.co.uk.
Town Moor Newcastle
Protest & Dissent
Historical Significance
Newcastle's Town Moor — roughly 1,000 acres of common land stretching north from the city centre — was the site of an enclosure dispute in the early 1770s that directly inspired one of the most radical British responses to the American Revolution. The struggle over who owned the Moor and who had the right to use it became entangled with the broader transatlantic debate about natural rights, property, and liberty that the American crisis had thrust to the centre of British political life.
The dispute began in 1771, when Newcastle's Corporation attempted to lease parts of the Town Moor to builders for development. The freemen of Newcastle — tradesmen and craftsmen who held traditional grazing and gathering rights on the Moor — mounted a legal challenge, arguing that the common land belonged to them by ancient custom. The case went through the courts, and in 1774 Parliament passed the Town Moor Act, which established a compromise: the Corporation owned the land, but the freemen retained control of grazing rights, and rents from any let portions would be paid into charitable funds for the benefit of freemen and their families.
This outcome had a profound effect on a young Newcastle schoolmaster named Thomas Spence. Watching the freemen successfully defend their common rights against the enclosing Corporation, Spence began to formulate a far more radical proposition: that all land, everywhere, should be held in common by parish communities, with rents divided equally among all inhabitants regardless of status. He presented this plan to the Newcastle Philosophical Society on 8 November 1775 in a lecture entitled "Property in Land Every One's Right." The timing was not coincidental. The Philosophical Society had been established to debate the issues raised by the American crisis, and Spence framed his land plan in the language of natural rights that the colonists were invoking against British authority. Where the Americans claimed the right to be free from taxation without representation, Spence claimed the right of every person to a share of the earth itself.
The connection between the Town Moor dispute and the American Revolution runs deeper than timing alone. The freemen's successful defence of their common rights suggested to Spence a practical mechanism for land reform: just as the Town Moor rents were distributed to benefit the freemen's community, so rents from all parish land could support the poor and dispossessed. The American rhetoric of liberty and natural rights provided the ideological language; the Town Moor provided the working model. Spence spent the rest of his life developing and promoting this synthesis, first from his school at Broad Garth in Newcastle and later as a radical bookseller in London.
The Town Moor enclosure dispute also illustrates the broader social tensions that the American crisis exposed in British cities. Newcastle in the 1770s was dominated by a narrow merchant oligarchy centred on the coal trade, and the Corporation's attempt to enclose common land was part of a pattern of elite encroachment on traditional popular rights that working people across England were resisting. The American colonists' arguments about the rights of freeborn Englishmen resonated powerfully in communities like Newcastle, where those same rights were felt to be under threat not from a distant Parliament but from the local ruling class.
Key Figures
- Thomas Spence (1750-1814) — Newcastle schoolmaster whose radical land plan was directly inspired by the Town Moor dispute and the American revolutionary debate about natural rights
- The Freemen of Newcastle — Tradesmen and craftsmen who successfully defended their common rights to the Town Moor through the courts in the 1770s
- Newcastle Corporation — The governing body that attempted to enclose the Town Moor, provoking the legal dispute that inspired Spence's radicalism
What's There Today
The Town Moor remains one of the largest areas of common land in any English city, stretching from the edge of Newcastle city centre northward past the racecourse. Freemen of Newcastle still exercise grazing rights, and cattle can be seen on the Moor during summer months. The area is freely accessible on foot and crossed by several paths. There is no specific marker connecting the Moor to the 1770s enclosure dispute or to Spence, though the history is documented in the Town Moor Act of 1774 and in displays at local heritage sites. The annual Hoppings fair, held on the Moor each June, is a continuation of traditional uses of the common land. The Moor offers expansive views across the city and is easily reached from Newcastle city centre on foot or by Metro to Exhibition Park.
Sources
- Rodgers, Christopher, et al. "Town Moor, Newcastle upon Tyne." In English Urban Commons. Routledge, 2023.
- Ashraf, Mary. The Life and Times of Thomas Spence. Frank Graham, 1983.
- Dickinson, H.T., ed. The Political Works of Thomas Spence. Avero Publications, 1982.
- North East Heritage Library. "The Town Moor Radicals: Thomas Spence and his Clandestines."
- Newcastle University. "Hidden Histories: Town Moor." Wastes and Strays project.
- Town Moor Act 1774 (14 Geo. III, c. 81).
York Assembly Rooms
Protest & Dissent
Historical Significance
On 30 December 1779, approximately 600 Yorkshire freeholders gathered in the Assembly Rooms in York to form the Yorkshire Association, a political movement that represented one of the most significant domestic consequences of the American Revolutionary War. The meeting was convened by the Reverend Christopher Wyvill, a wealthy Anglican clergyman and landowner, in response to growing public outrage over the escalating costs of the American war, government corruption, and what the reformers saw as the Crown's excessive influence over Parliament.
The Yorkshire Association petitioned Parliament for "economical reform," demanding reductions in government spending, the elimination of sinecure offices and Crown patronage, and more equitable parliamentary representation. The petition, bearing the signatures of leading Yorkshire gentry, carried enormous political weight because Yorkshire was England's largest and most prestigious county constituency. Within months, twenty-five other counties and numerous boroughs followed Yorkshire's example, creating a nationwide association movement that posed a serious challenge to Lord North's government and the prosecution of the American war.
The significance of the Yorkshire Association extended well beyond the immediate wartime context. Wyvill and his supporters were making arguments about representation, taxation, and government accountability that consciously echoed the grievances of the American colonists. The association movement demonstrated that the principles fuelling revolution across the Atlantic had powerful resonance in Britain itself. While the movement did not achieve its immediate legislative goals, it planted the seeds of the parliamentary reform campaigns that would ultimately produce the Great Reform Act of 1832. The York Assembly Rooms thus witnessed a pivotal moment when the American war catalysed domestic political reform in Britain.
Key Figures
- Rev. Christopher Wyvill (1740-1822) - Anglican clergyman and Yorkshire landowner who organised and led the Yorkshire Association; dedicated forty years to the cause of parliamentary reform inspired by the American crisis.
- Lord Rockingham, 2nd Marquess of Rockingham (1730-1782) - Yorkshire's leading Whig grandee, based at Wentworth Woodhouse; supported economical reform and later became Prime Minister, overseeing peace negotiations with America.
- Edmund Burke (1729-1797) - Whig MP and Rockingham's political ally; introduced Economical Reform legislation in Parliament partly in response to the association movement's pressure.
- William Pitt the Younger (1759-1806) - Supported parliamentary reform early in his career, influenced by the association movement; later became Britain's youngest Prime Minister.
- Lord North (1732-1792) - Prime Minister whose government was the target of the Yorkshire Association's criticism; the mounting costs of the American war and political pressure from the associations contributed to his resignation in March 1782.
What's There Today
The York Assembly Rooms, located on Blake Street in the centre of York, are one of the finest examples of Palladian architecture in northern England. Designed by Richard Boyle, 3rd Earl of Burlington, and completed in 1732, the building features a grand hypostyle hall modelled on an Egyptian temple described by the Roman architect Vitruvius, with fifty-two Corinthian columns supporting the roof. The building is Grade I listed and is considered one of Burlington's masterpieces.
The Assembly Rooms currently operate as an ASK Italian restaurant, which means the interior is publicly accessible during restaurant hours without needing special arrangements. While the change of use may seem incongruous, it has ensured the building's maintenance and allows visitors to dine beneath the same columns and ceilings that witnessed the formation of the Yorkshire Association. The architectural details, including the original colonnade and the decorated ceiling, are well preserved. York itself is one of England's premier heritage destinations, and the Assembly Rooms are within easy walking distance of York Minster, the Shambles, and the city walls. No admission fee is required to enter.
Sources
- Ian R. Christie, Wilkes, Wyvill and Reform: The Parliamentary Reform Movement in British Politics, 1760-1785 (Macmillan, 1962)
- N.C. Phillips, Yorkshire and English National Politics, 1783-1784 (University of Canterbury Press, 1961)
- Eugene Charlton Black, The Association: British Extraparliamentary Political Organization, 1769-1793 (Harvard University Press, 1963)
- York Civic Trust, "Assembly Rooms," yorkcivictrust.co.uk
Abbeydale Industrial Hamlet
Industrial
Historical Significance
Abbeydale Industrial Hamlet is a remarkably complete eighteenth-century water-powered industrial works on the River Sheaf in south-west Sheffield. Though the site's history stretches back to at least the late seventeenth century, with workshops recorded from 1685 and the "Abbey Dale Works" formally documented from 1714, it is the eighteenth-century development of the site that connects it to the world of the American Revolution. Abbeydale was one of a network of water-powered forges, grinding hulls, and steel-making facilities along Sheffield's five rivers that together formed the manufacturing base for the cutlery, edge-tools, and bladed implements exported to the American colonies and beyond.
The site's primary products were scythes and agricultural edge tools -- crown scythes forged under water-powered tilt hammers, along with grass hooks, hay knives, and similar implements. These were precisely the kinds of goods that flowed from Sheffield's workshops to colonial American farms and households throughout the eighteenth century. The Iron Act of 1750 had prohibited the colonies from establishing their own steel furnaces and manufacturing capability, ensuring that American farmers remained dependent on British-made tools. Sheffield's edge-tool makers, working at sites like Abbeydale, were direct beneficiaries of this mercantilist framework.
The manufacturing process at Abbeydale encompassed the full chain of production: raw materials were converted to steel on site using the cementation process, in which iron bars were packed with charcoal in stone chests and heated for days to produce blister steel. This was then refined in the crucible furnace -- a technique pioneered by Benjamin Huntsman in Sheffield in the 1740s -- before being forged into finished tools under the tilt hammers powered by the River Sheaf. The site thus represents the complete technological system that gave Sheffield its global dominance in edged-tool manufacturing during the Revolutionary period.
When the American colonies imposed non-importation agreements in the late 1760s and the comprehensive Continental Association boycott in 1774, the demand for Sheffield-made tools and cutlery fell sharply. Works like Abbeydale, geared toward producing goods for export, would have felt the effects of lost colonial orders. The outbreak of war in 1775 further disrupted transatlantic trade, though some Sheffield manufacturers may have benefited from military contracts for edged weapons and camp equipment. After American independence, the trade recovered -- by the early nineteenth century, the American market had become Sheffield's single largest export destination, with roughly a third of the city's workforce producing goods for American consumption.
Key Figures
- Benjamin Huntsman (1704-1776) -- Developer of crucible cast steel, the process used at Abbeydale and throughout Sheffield to produce superior steel for edge tools
- Abraham Hill -- Sheffield saw maker who in 1791 patented a method of riveting steel scythe blades to iron backs, an innovation adopted at Abbeydale
- The Tyzack family -- Later operators of the Abbeydale works, who continued scythe production into the twentieth century
- Edward Shepherd -- Leaseholder of the nearby Shepherd Wheel grinding hull from 1749, representative of the small-scale operators who populated Sheffield's river valleys
What's There Today
Abbeydale Industrial Hamlet is a Scheduled Ancient Monument and museum managed by Sheffield Industrial Museums Trust. It is one of the most complete water-powered industrial sites surviving in Britain, with its crucible steel furnace, cementation furnace, tilt forge with working water wheel, hand forge, grinding hull, warehouse, workers' cottages, and manager's house all preserved on site. The tilt hammers and water wheel are demonstrated on open days, giving visitors a vivid sense of the noise and power of eighteenth-century manufacturing. The site is located at Abbeydale Road South, Beauchief, Sheffield S7 2QW, approximately four miles south-west of the city centre. It is open to the public on selected days (check Sheffield Museums website for current hours). Admission is charged. For Heritage Trail visitors, this is the best place in Sheffield to experience the physical reality of the manufacturing economy that supplied colonial America.
Sources
- Hey, David, A History of Sheffield (Carnegie Publishing, 2010)
- Crossley, David, and Ashurst, Denis, Excavations at Rockley Smithies, a Water-Powered Bloomery of the 16th and 17th Centuries (Post-Medieval Archaeology, 1968)
- Sheffield Industrial Museums Trust, Abbeydale Industrial Hamlet: Site History (sheffieldmuseums.org.uk)
- Barraclough, Kenneth C., Sheffield Steel (Moorland Publishing, 1976)
- Tweedale, Geoffrey, Steel City: Entrepreneurship, Strategy, and Technology in Sheffield, 1743-1993 (Oxford University Press, 1995)
- Unwin, Joan, The Cutlery Trades: An Historical Essay in the Economics of Small-Scale Production (Frank Cass, 1968, reprint of 1929 ed.)
Arkwright's Shudehill Mill
Industrial
Historical Significance
Arkwright's Shudehill Mill was Manchester's first purpose-built mechanised cotton-spinning factory, and its construction in the final years of the American War of Independence marks a pivotal moment in the industrial transformation that the conflict helped to accelerate. Richard Arkwright and his partners -- William Brocklebank, John Whittenbury, John Simpson, and Samuel Simpson -- purchased a former brickworks site between Miller Street and Angel Street, north of Rochdale Road, in 1781. The mill was built between 1780 and 1782, and went into production in 1783, the same year the Treaty of Paris ended the American war.
Before the mill's construction, Manchester had no cotton mills at all. The town's textile economy was based on a decentralised system of domestic production, with weavers and spinners working in their homes and small workshops to produce fustians, checks, and other cotton-linen mixed cloths. These goods were traded through the Exchange on Market Street and exported via Liverpool to Atlantic markets, including the American colonies. The American Revolution disrupted this trade profoundly. Colonial non-importation agreements from 1774 and the subsequent war cut off a major market for Manchester goods and disrupted the supply of raw materials.
Arkwright chose the Shudehill site specifically because it was remote from a river, reflecting his intention to power the mill by steam rather than water. This was a revolutionary decision. After initial experimentation with a direct-acting atmospheric (Newcomen-type) engine, the mill went into production using a steam-powered pumping engine in conjunction with a waterwheel. This technical arrangement signalled the birth of the steam-powered textile mill and the beginning of Manchester's rise as a factory metropolis. The machinery inside used Arkwright's water-frame spinning technology, protected by patents that he had developed and defended (with mixed success) since the 1760s.
The mill's opening in 1783 coincided with a decisive shift in Manchester's economy. The end of the American war reopened Atlantic trade routes, and American merchants quickly resumed trading with England. But the war had also catalysed structural changes: new sources of raw cotton were being developed, mechanical spinning was replacing hand-spinning, and the factory system was beginning to supplant domestic production. By 1800, Manchester had forty-two cotton mills, and by the early nineteenth century it had eclipsed all rival textile centres to become "Cottonopolis," the cotton capital of the world. The first bale of American cotton arrived in Liverpool in 1785, and imports from the American South grew rapidly thereafter, creating a new economic interdependence between Manchester and the former colonies.
Shudehill Mill thus stands at the hinge point between two eras: the pre-industrial textile economy that traded with colonial America, and the industrial factory system that would bind Manchester to the post-independence United States through cotton.
Key Figures
- Richard Arkwright (1732-1792) -- Inventor and industrialist whose water-frame spinning technology and factory system transformed the cotton industry; built the Shudehill Mill as Manchester's first mechanised cotton-spinning factory
- William Brocklebank -- Partner in the Shudehill Mill venture and Manchester textile merchant
- John Whittenbury, John Simpson, and Samuel Simpson -- Partners in the mill's construction and operation
- James Watt (1736-1819) -- Engineer whose improvements to the steam engine were being adopted across industry during this period, though the Shudehill Mill initially used an older Newcomen-type engine
What's There Today
The Shudehill Mill was destroyed by bombing in 1940 during the Manchester Blitz, and the site subsequently became a car park. In 2005, the site featured on the television programme Time Team, whose three-day excavation confirmed it as the location of Arkwright's mill. A more extensive archaeological survey was conducted by Salford Archaeology around 2014-2015 when the area was earmarked for redevelopment. The site lies between Miller Street and Angel Street, near Shudehill and close to Manchester Victoria station. There is no visible monument or interpretive signage at the site. For context on Manchester's cotton industry and its transatlantic connections, visitors should go to the Science and Industry Museum on Liverpool Road, which has extensive displays on the city's textile heritage, including the story of cotton, slavery, and trade with America.
Sources
- Miller, Ian, and Salford Archaeology. "Richard Arkwright's Shudehill Mill: The Archaeology of Manchester's First Steampowered Cotton Mill." Industrial Archaeology Review 38, no. 2 (2016).
- Shudehill Mill entry, Wikipedia, citing primary archaeological reports.
- Wessex Archaeology. "Arkwright's Mill, NCP Car Park, Miller Street, Manchester." Archaeological report.
- Science and Industry Museum. "Manchester, Cotton and Slavery." scienceandindustrymuseum.org.uk.
- Science and Industry Museum. "The World's First Industrial City." scienceandindustrymuseum.org.uk.
Cutlers' Hall Sheffield
Industrial
Historical Significance
Cutlers' Hall is the headquarters of the Company of Cutlers in Hallamshire, the trade guild that governed Sheffield's cutlery and edged-tool industry from its incorporation by Act of Parliament in 1624. By the mid-eighteenth century, Sheffield had become the dominant centre of cutlery production in Britain, and the American colonies were among its most important markets. The Company of Cutlers oversaw apprenticeships, regulated quality, and represented the trade's collective interests -- interests that were profoundly affected by the political and commercial crises of the American Revolution.
Sheffield's cutlery trade depended on a framework of mercantile legislation that protected its monopoly over colonial markets. The Iron Act of 1750 prohibited the erection of steel furnaces, slitting mills, and plating forges in the American colonies, effectively preventing colonists from manufacturing their own edged tools and keeping them dependent on imports from Sheffield and other British manufacturing centres. Sheffield products -- knives, forks, scissors, razors, and edge tools -- were found in households throughout the thirteen colonies. By the early 1770s, the American market absorbed a substantial share of Sheffield's output, with some estimates suggesting that northern industrial towns including Sheffield, Birmingham, Leeds, and Manchester sent nearly half their manufactured goods to the colonies.
The colonial boycotts that preceded and accompanied the Revolution struck directly at this trade. The non-importation agreements of 1768-1769, adopted in response to the Townshend Acts, and the Continental Association of October 1774, which imposed a comprehensive ban on importing British goods, caused serious economic disruption in Sheffield. The cutlery trade, with its heavy reliance on American demand, was particularly vulnerable. When the war itself broke out in 1775, the loss of the American market combined with general wartime uncertainty created hardship among Sheffield's workforce of grinders, forgers, and cutlers.
The Company of Cutlers served as the institutional voice of this distress. While the specific records of the Company's wartime petitioning activity remain in the Cutlers' archives at Sheffield (held at Sheffield Archives), the pattern is well established for British manufacturing towns: merchants and manufacturers in London, Bristol, Birmingham, Manchester, and other centres petitioned Parliament repeatedly between 1765 and 1775, warning that colonial trade restrictions and boycotts were damaging British industry and employment. Sheffield, with its acute dependence on the American market, had every reason to join these representations. The Company also petitioned on related trade matters, including a documented 1812 petition against the East India Company's monopoly, reflecting its long tradition of advocating for open markets.
After the war, Sheffield's trade with the newly independent United States recovered and eventually surpassed pre-war levels. By 1812, one in three Sheffield workers was making goods for export to America. The Revolution had temporarily disrupted but not broken the commercial relationship -- and the Cutlers' Hall remained the institution through which the trade organised itself.
Key Figures
- The Master Cutler -- The annually elected head of the Company of Cutlers, who represented the trade in dealings with Parliament and government
- Benjamin Huntsman (1704-1776) -- Inventor of crucible cast steel in the 1740s, whose innovation transformed Sheffield's steel quality and gave its products a competitive edge in global markets
- Thomas Boulsover (1705-1788) -- Sheffield cutler who invented Sheffield Plate (fused silver on copper) in 1743, expanding the city's reputation for metalwork
- Samuel Walker -- Steelmaker who discovered Huntsman's crucible process around 1750, helping to spread the technique through Sheffield
What's There Today
The present Cutlers' Hall is the third building on this site, constructed in 1832-1833 to designs by Samuel Worth and Benjamin Broomhead Taylor, replacing the earlier Georgian hall of 1725 that stood during the Revolutionary period. It is a Grade II* listed building located on Church Street, opposite Sheffield Cathedral, in the heart of the city centre. The building houses the Company of Cutlers' collection of historic silverware and cutlery, and serves as a venue for the annual Cutlers' Feast, a tradition dating back centuries. The hall is primarily used for corporate and civic events but can be visited by arrangement. Visitors to the exterior can appreciate its prominent position in Sheffield's historic core. The nearby Kelham Island Museum provides broader context for Sheffield's steel and cutlery heritage.
Sources
- Leader, Robert Eadon, History of the Company of Cutlers in Hallamshire in the County of York, 2 vols. (Sheffield, 1905-1906)
- Hey, David, A History of Sheffield (Carnegie Publishing, 2010)
- Binfield, Clyde, and Hey, David, eds., Mesters to Masters: A History of the Company of Cutlers in Hallamshire (Oxford University Press, 1997)
- Company of Cutlers in Hallamshire records, Sheffield Archives (Ref: LD)
- National Archives, Discovery catalogue: Archive of the Company of Cutlers in Hallamshire
- Unwin, Joan, The Cutlery Trades: An Historical Essay in the Economics of Small-Scale Production (Frank Cass, 1968, reprint of 1929 ed.)
Duke of Wellington's Regiment Museum
Museums
Historical Significance
The 33rd Regiment of Foot was arguably the most battle-hardened British regiment of the American Revolutionary War. Arriving in North America in 1776 under the personal command of its colonel, Charles, Lord Cornwallis, the 33rd fought in virtually every major engagement of the conflict -- a record matched by few other units on either side. The regiment's American service began at the Battle of Brooklyn (Long Island) on August 27, 1776, where it participated in the flanking manoeuvre that shattered the Continental Army's positions. The 33rd subsequently fought at Kip's Bay, Harlem Heights, Fort Washington, and the New Jersey campaign that followed.
In 1777, the regiment was heavily engaged at the Battle of Brandywine (September 11), where Cornwallis led the main flanking column, and at Germantown (October 4). At Monmouth Court House (June 28, 1778), the 33rd was again in the thick of the fighting. When British strategy shifted southward, the regiment followed Cornwallis to the Carolinas, fighting at the Siege of Charleston (1780) and the Battle of Camden (August 16, 1780), where the American southern army was effectively destroyed. At the Battle of Guilford Courthouse (March 15, 1781), the 33rd was caught in a desperate hand-to-hand struggle with Continental regulars -- accounts suggest Cornwallis ordered his artillery to fire grapeshot into the melee, hitting his own men along with the Americans, in order to break the deadlock. The regiment marched into Virginia with Cornwallis and surrendered with the rest of the British army at Yorktown on October 19, 1781.
The 33rd's experience encapsulates the trajectory of the entire war: early confidence, hard-fought tactical victories, mounting casualties that could not be replaced, and ultimate strategic defeat. Cornwallis's personal identification with the regiment -- he led it from the front throughout the conflict -- makes the 33rd's story inseparable from the story of the British high command in America. The regiment later gained fame under another colonel, Arthur Wellesley, the future Duke of Wellington, from whom it eventually took its name.
Key Figures
- Charles, Lord Cornwallis -- Colonel of the 33rd and later commander of British forces in the southern theatre; his career in America defined the regiment's war and ended with the surrender at Yorktown
- Lieutenant Colonel James Webster -- Effective field commander of the 33rd during several engagements; killed at the Battle of Guilford Courthouse in 1781, one of the most capable British officers lost in the war
- Major Charles Stuart -- Son of the former Prime Minister Lord Bute; served with distinction in the American campaigns
- General Sir William Howe -- Commander-in-chief of British forces 1776-1778, under whom the 33rd fought at Brooklyn, Brandywine, and Germantown
What's There Today
The Duke of Wellington's Regiment Museum occupies the ground floor of Bankfield Museum, a Grade II listed Victorian mansion set in Akroyd Park on Boothtown Road, Halifax. The museum traces the regiment's history from its formation in 1702 as the 33rd Foot through to its amalgamation into the Yorkshire Regiment in 2006. Collections include uniforms, weapons, regimental colours, medals, officers' personal effects, and campaign records spanning three centuries. The displays place the regiment's extensive American Revolutionary War service within the broader arc of British military history, allowing visitors to understand both the tactical character of the war and the institutional culture of the regiment that fought it.
Bankfield Museum is located about a mile north of Halifax town centre, with free on-site parking. Admission is free. The museum is open Tuesday to Saturday, 10am to 4pm, and on Bank Holiday Mondays. The ground floor galleries, including the regimental museum, are fully wheelchair accessible. Halifax is well connected by rail from Leeds, Manchester, and other northern cities, making the museum readily accessible as part of a wider tour of Revolutionary War-connected sites in Yorkshire and Lancashire.
Sources
- MacNiven, Robbie, The Pattern: The 33rd Regiment in the American Revolution 1770-1783 (Helion, 2023)
- Spring, Matthew H., With Zeal and With Bayonets Only: The British Army on Campaign in North America, 1775-1783 (University of Oklahoma Press, 2008)
- Wickwire, Franklin and Mary, Cornwallis: The American Adventure (Houghton Mifflin, 1970)
- Duke of Wellington's Regiment Museum, Bankfield Museum, Halifax, collection guides and interpretive materials
- Calderdale Museums, museums.calderdale.gov.uk
Fusilier Museum
Museums
Historical Significance
The 20th Regiment of Foot -- later the Lancashire Fusiliers -- was one of the British regiments whose American service ended in the catastrophe at Saratoga, the single most consequential British defeat of the Revolutionary War. The regiment arrived in North America in 1776, sailing to Quebec in April to reinforce the British garrison during the American invasion of Canada. After helping to relieve Quebec in May 1776, the 20th joined General John Burgoyne's army for the campaign to sever New England from the rest of the colonies by advancing south from Canada along the Hudson Valley corridor.
The Saratoga campaign of 1777 brought the regiment to disaster. The 20th Foot formed part of Burgoyne's central column during the battles around Bemis Heights and Freeman's Farm, where the British repeatedly attempted to break through the American positions commanded by Major General Horatio Gates and reinforced by the aggressive leadership of Benedict Arnold. At the Second Battle of Saratoga on October 7, 1777, the British assault collapsed, and Burgoyne's army, outnumbered and cut off from retreat, surrendered on October 17. The entire 20th Regiment was among the roughly 5,700 British and German troops who laid down their arms -- the first surrender of a major British field army in the war.
The consequences of Saratoga extended far beyond the Hudson Valley. The surrender convinced France that the American cause could succeed, leading directly to the Franco-American alliance of 1778, which transformed the war from a colonial rebellion into a global conflict. For the men of the 20th, the aftermath was grim: the "Convention Army," as the surrendered troops became known, was marched to internment camps in Massachusetts and later Pennsylvania, where the soldiers remained prisoners until the war's end in 1783. The regiment did not return to England until April 1783, having spent seven years in North America, most of them in captivity.
Key Figures
- General John Burgoyne -- Commander of the northern army whose ambitious campaign ended at Saratoga; his surrender was one of the defining moments of the war
- Major General Horatio Gates -- American commander at Saratoga whose defensive strategy trapped Burgoyne's army
- Major General Simon Fraser -- Senior British officer killed during the Second Battle of Saratoga, whose death contributed to the collapse of the British position
- Major General Friedrich von Riedesel -- Commander of the German contingent in Burgoyne's army, whose troops served alongside the 20th Foot
What's There Today
The Fusilier Museum is located on Moss Street in Bury town centre, opposite the Bury Art Museum and a one-minute walk from the Bury Interchange bus and Metrolink tram station. The museum occupies the former Bury Arts and Crafts Centre, into which it moved in 2009, and tells the story of the XX Lancashire Fusiliers and the Royal Regiment of Fusiliers from the regiment's raising in 1688 to the present day. Collections include uniforms, weapons, medals, personal effects, and campaign records spanning more than three centuries of service. The regiment's American Revolutionary War experience -- including the Saratoga campaign and the long years of captivity -- forms part of the broader 18th-century narrative presented in the galleries.
The museum is open Monday to Friday, 10:00am to 5:00pm, and Saturday, 10:00am to 4:00pm, with last admission one hour before closing. It is closed on Sundays. Admission is charged: adults GBP 4.95, concessions GBP 3.95, children GBP 2.95, family ticket GBP 12.95. Tickets include an annual pass allowing unlimited return visits for twelve months. The museum is easily accessible by public transport; Bury is served by the Manchester Metrolink tram network as well as regional bus services.
Sources
- Spring, Matthew H., With Zeal and With Bayonets Only: The British Army on Campaign in North America, 1775-1783 (University of Oklahoma Press, 2008)
- Ketchum, Richard M., Saratoga: Turning Point of America's Revolutionary War (Henry Holt, 1997)
- National Army Museum, "The Lancashire Fusiliers" (online collection guide)
- The Fusilier Museum, Bury, official website and interpretive materials (fusiliermuseum.com)
- RevWarTalk, "20th Regiment of Foot (Lancashire Fusiliers)" (online regimental history)
King's Own Royal Regiment Museum
Museums
Historical Significance
The 4th Regiment of Foot, known as the King's Own, holds a distinctive place in the history of the American Revolution: its soldiers were among the very first British casualties of the war. The regiment was already stationed in Boston when hostilities began, and its flanking companies -- the grenadier and light infantry companies detached for elite service -- were part of the expedition that marched to Lexington and Concord on April 19, 1775. At the North Bridge in Concord, three soldiers of the 4th Foot's light company were killed in the exchange of fire that marked the opening combat of the Revolution. These men are arguably the first British soldiers to die in the conflict.
Two months later, the King's Own was heavily engaged at the Battle of Bunker Hill (June 17, 1775), one of the bloodiest engagements of the entire war. The regiment's grenadier and light infantry companies, attacking the American fortifications on Breed's Hill, were devastated. In the space of roughly ten minutes, the grenadiers of the 4th Foot lost all but four of their men to the concentrated musket fire of the entrenched defenders. The regiment subsequently served in the New York campaign, fighting at Long Island and participating in operations through 1777, including the Battle of White Marsh in December of that year.
The King's Own's experience at Lexington, Concord, and Bunker Hill illustrates the shock that the opening months of the war delivered to the British Army. The regulars who marched out of Boston in April 1775 expected to disperse a colonial rabble; instead they encountered determined resistance that inflicted casualties at rates the army had rarely experienced. The regiment's losses at Bunker Hill -- across the entire British force, over 1,000 casualties from an attacking force of roughly 2,200 -- demonstrated that the suppression of the rebellion would be a far costlier undertaking than most in London had anticipated.
Key Figures
- Major John Pitcairn -- Royal Marines officer who commanded the advance guard at Lexington; mortally wounded at Bunker Hill, where the King's Own also suffered heavily
- General Thomas Gage -- Commander-in-chief of British forces in Boston and the officer who ordered the Lexington and Concord expedition in which the 4th Foot's flanking companies participated
- General Sir William Howe -- Led the British assault at Bunker Hill and subsequently commanded the forces in which the King's Own served during the New York campaign
- Lieutenant Colonel George Maddison -- Commanded the 4th Foot during its early American service
What's There Today
The King's Own Royal Regiment Museum is housed within Lancaster City Museum, a handsome building occupying the former Town Hall on Market Square in the centre of Lancaster. The museum tells the story of the King's Own from its formation in 1680 through to the modern era. Collections include uniforms, weapons, medals, regimental colours, personal effects, and documentary records that trace the regiment's service across more than three centuries of British military history. The displays set the regiment's American Revolutionary War service -- including its presence at the very outbreak of hostilities -- within the broader narrative of an institution that fought in campaigns from Marlborough's wars to the 20th century.
Lancaster City Museum is centrally located on Market Square, a short walk from Lancaster railway station. Admission is free. The museum is open Friday through Tuesday, 10:30am to 4pm, and closed on Wednesdays and Thursdays. Lancaster itself, as the county town of Lancashire, is a natural hub for visiting the cluster of regimental museums in the region that document British military service during the American Revolution.
Sources
- Cowper, Colonel L.I., The King's Own: The Story of a Royal Regiment, 3 vols. (Oxford University Press, 1939)
- Spring, Matthew H., With Zeal and With Bayonets Only: The British Army on Campaign in North America, 1775-1783 (University of Oklahoma Press, 2008)
- Fischer, David Hackett, Paul Revere's Ride (Oxford University Press, 1994)
- Philbrick, Nathaniel, Bunker Hill: A City, A Siege, A Revolution (Viking, 2013)
- King's Own Royal Regiment Museum, Lancaster City Museum, collection guides and interpretive materials
Lancashire Infantry Museum
Museums
Historical Significance
The 47th Regiment of Foot, which later became the Loyal Regiment (North Lancashire) and is now commemorated at the Lancashire Infantry Museum, served in North America continuously from 1773 to 1783. The regiment had a long prior connection to the continent, having been stationed in Nova Scotia and Canada from 1750 through the French and Indian War. It returned to Ireland for a decade before redeploying to Boston in 1773, placing it squarely at the centre of events when the Revolution erupted.
The 47th's flanking companies -- the grenadier and light infantry detachments -- were part of the expedition to Lexington and Concord on April 19, 1775, the opening engagement of the war. Two months later, the regiment fought at the Battle of Bunker Hill (June 17, 1775), where British forces stormed the American fortifications on Breed's Hill at horrific cost. The 47th was initially held in reserve but was committed to the assault as the battle intensified, joining the final attack that carried the redoubt. Across the entire British force, casualties exceeded 40 percent of the men engaged.
Following Bunker Hill, the 47th served through the siege of Boston and subsequent campaigns. In 1777, the bulk of the regiment formed part of General John Burgoyne's ill-fated invasion from Canada down the Hudson Valley. The campaign ended in disaster at Saratoga (October 17, 1777), where Burgoyne surrendered his entire force, including much of the 47th. The soldiers were taken prisoner and spent years in captivity. Meanwhile, the companies that had remained in Canada continued to serve in the northern theatre through the remainder of the war, conducting operations along the frontier. The regiment's bifurcated fate -- part captured at Saratoga, part fighting on in Canada -- illustrates both the strategic overreach and the tenacity that characterised the British war effort.
Key Figures
- Lieutenant Colonel Nesbit Balfour -- Commanded the 47th during its early Boston service and at Bunker Hill
- General John Burgoyne -- Commander of the northern invasion force that included the 47th; his surrender at Saratoga was a turning point of the war
- General Thomas Gage -- Commander-in-chief in Boston who deployed the 47th's flanking companies to Lexington and Concord
- Major General William Phillips -- Artillery commander under Burgoyne who directed elements of the force in which the 47th served
What's There Today
The Lancashire Infantry Museum is housed at Fulwood Barracks, an active military installation in the northern suburbs of Preston. The museum covers the history of the Duke of Lancaster's Regiment and its numerous antecedent units, including the 47th Foot (later the Loyal Regiment, North Lancashire), the East Lancashire Regiment, and the South Lancashire Regiment. It claims the largest regimental archive in the north of England. Collections include uniforms, weapons, medals, personal belongings, and documentary records spanning from the 18th century to modern operations. Among the museum's prized exhibits is the Salamanca Eagle, a Napoleonic trophy, though the collections also encompass the regiment's earlier American service.
Because the museum is located within an active barracks, visitors should be aware of specific access requirements. Adult visitors must produce photo identification (such as a UK driving licence or passport). Pre-booking online is recommended. The museum is open Friday to Sunday, 10am to 4pm, with last entry at 3pm. Admission is charged (approximately 6 pounds for adults). Fulwood Barracks is conveniently located near the M6 and M55 motorways, and Preston is well served by rail.
Sources
- Biddulph, Colonel John, The Nineteenth and their Times (John Murray, 1899)
- Spring, Matthew H., With Zeal and With Bayonets Only: The British Army on Campaign in North America, 1775-1783 (University of Oklahoma Press, 2008)
- Ketchum, Richard M., Saratoga: Turning Point of America's Revolutionary War (Henry Holt, 1997)
- Lancashire Infantry Museum, Fulwood Barracks, Preston, collection guides and interpretive materials
- lancashireinfantrymuseum.org.uk
Royal Armouries Museum, Leeds
Museums
Historical Significance
The Royal Armouries Museum in Leeds holds the National Collection of Arms and Armour -- one of the most important collections of its kind in the world, comprising over 75,000 objects spanning centuries of military history. For visitors seeking to understand the material culture of the American Revolution, the collection is essential: it includes the weapons that armed both sides of the conflict, drawn from holdings that originated at the Tower of London, which served as the primary ordnance depot for supplying British forces throughout the war.
The weapon most closely associated with the British soldier during the American Revolution is the Land Pattern musket, universally known as the "Brown Bess." This smoothbore flintlock was the standard arm of the British infantry from the 1720s until the 1830s, and it was the weapon carried by redcoats at Lexington, Bunker Hill, Brandywine, and Yorktown. The Brown Bess was slow to load, limited in accuracy, and frequently unreliable in wet conditions, but its robustness and the effectiveness of its socket bayonet made it the backbone of British infantry tactics -- tactics that emphasised volley fire at close range followed by a bayonet charge. The Royal Armouries collection includes examples of the Brown Bess and its variants, along with the bayonets, officers' swords, pistols, and other weapons of the period.
The Tower of London's role as the nation's armoury gave it a direct connection to the American war. The Board of Ordnance, headquartered at the Tower, was responsible for the procurement, storage, and distribution of all weapons and ammunition supplied to British forces. The logistical challenge of arming an army fighting three thousand miles across the Atlantic was immense: weapons had to be manufactured, proofed, packed, and shipped in quantities sufficient to sustain prolonged operations. The Royal Armouries' holdings from the Board of Ordnance and the later Ministry of Defence Pattern Room collections preserve the physical record of this supply chain, including production models, pattern weapons, and captured arms that illuminate the armament of both British and American forces.
The collection also reflects the broader context of the war as a global conflict. By 1778, Britain was fighting not only the American rebels but also France, Spain, and the Dutch Republic. The weapons in the collection -- French Charleville muskets supplied to the Continental Army, naval weapons, and arms from across Europe -- tell the story of a war sustained by international alliances and global supply networks.
Key Figures
- British infantry of the American Revolution -- the rank-and-file soldiers who carried the Brown Bess musket into every major engagement of the war
- The Board of Ordnance -- the organisation headquartered at the Tower of London responsible for supplying arms and ammunition to British forces in America
- Continental Army soldiers -- whose captured weapons, including French-supplied Charleville muskets, entered British collections during the war
What's There Today
The Royal Armouries Museum is a purpose-built, five-floor museum located at Leeds Dock on the bank of the River Aire. Opened in 1996 at a cost of £42.5 million, it was designed specifically to house and display the national collection in a modern, accessible setting. The museum's galleries are organised thematically -- War, Tournament, Oriental, Self-Defence, and Hunting -- allowing visitors to encounter Revolutionary War-period weapons within broader narratives of military technology and its evolution. The collection includes royal armours of the Tudor and Stuart kings, English Civil War weapons, and an exceptional collection of oriental arms and armour alongside the 18th-century military weapons most relevant to the American Revolution.
The museum offers daily live shows and fight demonstrations that bring historical combat techniques to life, providing context for how the weapons in the collection were actually used. The searchable online collection at collections.royalarmouries.org allows researchers to explore specific holdings before visiting.
Admission to the Royal Armouries Museum is free, as it is a national museum. The museum is open daily from 10:00 to 17:00, closing only on 24-26 December. It is located at Armouries Drive, Leeds LS10 1LT, and is accessible from Leeds railway station. For visitors following the heritage trail, the Royal Armouries provides the most comprehensive opportunity to examine the weapons that defined infantry combat during the American Revolution, from the ubiquitous Brown Bess to the officers' swords and bayonets that shaped the close-quarters fighting of the war.
Sources
- Royal Armouries. Collection records and gallery interpretation. Leeds.
- Royal Armouries. "Age of Revolution." ageofrevolution.org.
- Harding, David, ed. Weapons: An International Encyclopedia from 5000 BC to 2000 AD. New York: St. Martin's Press, 1990.
- Neumann, George C. The History of Weapons of the American Revolution. New York: Harper & Row, 1967.
- Darling, Anthony. Red Coat and Brown Bess. Historical Arms Series No. 12. Ottawa: Museum Restoration Service, 1970.
The Green Howards Museum
Museums
Historical Significance
The 19th Regiment of Foot, later known as the Green Howards, served in the closing stages of the American Revolutionary War during one of the conflict's most brutal campaigns. The regiment arrived in North America in 1781, joining British forces in the southern theatre at a time when the war in the Carolinas had devolved into a grinding contest of attrition between Nathanael Greene's Continental Army and a series of British garrisons and mobile columns. The 19th Foot was thrust immediately into active service.
The regiment fought at the Battle of Quinby Bridge (July 17, 1781) and Shubrick's Plantation, engagements that formed part of the wider British effort to maintain control of the South Carolina lowcountry. At the Battle of Eutaw Springs on September 8, 1781, the 19th Foot was heavily engaged in what proved to be the last major battle in the Carolinas. Grenadier and light infantry companies drawn from the 19th were part of the British force under Lieutenant Colonel Alexander Stewart that initially repelled Greene's attack before the fighting dissolved into confused close-quarters combat around a fortified brick house. The battle was one of the bloodiest of the entire war in proportion to the forces engaged. The 19th suffered severely: out of approximately 18 officers and 420 men committed, the regiment lost 1 officer, 3 sergeants, and 25 rank and file killed, with 9 officers, 9 sergeants, and over 140 other ranks wounded. Though the British held the field, the cost was unsustainable, and the engagement effectively ended major British operations outside Charleston.
The regiment's experience illustrates a pattern common to many British units that arrived late in the war: deployment into a strategic situation that was already deteriorating, heavy casualties in tactically inconclusive engagements, and eventual withdrawal. In 1782, the regiment received a county designation as the 19th (1st Yorkshire North Riding) Regiment of Foot, tying it formally to the region around Richmond where it had long recruited. After the war, the regiment moved on to the West Indies, beginning eight years of Caribbean service.
Key Figures
- Lieutenant Colonel Alexander Stewart — Commanded the British force at Eutaw Springs, including elements of the 19th Foot; a capable officer who managed a tactical hold on the field despite appalling casualties
- Major General Nathanael Greene — Commander of the Continental Army's Southern Department; his strategy of wearing down British forces through repeated engagements shaped the campaign in which the 19th fought
- Colonel The Hon. Charles Grey — Colonel of the 19th Foot during the early part of the American war period, later notorious as "No Flint" Grey for his bayonet attack at Paoli in 1777
- Colonel The Hon. Thomas Howard — The regiment's 18th-century colonel from whom the name "Green Howards" derived, distinguishing the 19th from the 3rd Foot (also called "Howard's") by the colour of its colonel's facings
What's There Today
The Green Howards Museum is housed in the former Holy Trinity Church, which stands in the centre of Richmond's large cobbled market place. The museum covers over 300 years of the regiment's history across three floors, drawing on a collection of more than 35,000 artefacts and 3,000 medals. Displays include uniforms, weapons, personal effects, and campaign records spanning the regiment's service from its formation in 1688 through its amalgamation into the Yorkshire Regiment in 2006. While the museum's collections are strongest on the 19th- and 20th-century campaigns, the 18th-century material provides context for understanding the regiment during the American war period, including the conditions of soldiering in the late Georgian army.
The museum is located at Trinity Church Square in the centre of Richmond, a well-preserved market town on the edge of the Yorkshire Dales. The town itself has deep military connections: Richmond Castle, which dominates the town, has been associated with military use since the medieval period. The museum is open Monday to Saturday, 10am to 4:30pm, and Sunday 10am to 4pm. Admission is charged. Richmond is accessible by road from the A1 and has regular bus connections from Darlington, the nearest railway station.
Sources
- Spring, Matthew H., With Zeal and With Bayonets Only: The British Army on Campaign in North America, 1775-1783 (University of Oklahoma Press, 2008)
- Babits, Lawrence E., and Howard, Joshua B., Long, Obstinate, and Bloody: The Battle of Guilford Courthouse (University of North Carolina Press, 2009)
- Buchanan, John, The Road to Guilford Courthouse: The American Revolution in the Carolinas (Wiley, 1997)
- Green Howards Museum, Richmond, collection guides and interpretive materials
- 19th Regiment of Foot historical records, National Archives (WO 1, WO 12 series)
Walker Art Gallery (Tarleton Portrait)
Museums
Historical Significance
The Walker Art Gallery in Liverpool holds one of the most striking visual records of the American Revolution in any British collection: Sir Joshua Reynolds' 1782 portrait of Colonel Banastre Tarleton. The painting depicts Tarleton in the green uniform of the British Legion, a mixed force of loyalist cavalry and light infantry that he commanded in the southern campaigns of the war. With battle smoke swirling behind him and a captured American flag at his feet, the portrait was an audacious piece of image-making for a young officer who had become both famous and infamous for his conduct in the Carolinas.
Tarleton was born in Liverpool in 1754, the son of John Tarleton, a prosperous merchant deeply involved in the slave trade and Atlantic commerce. Educated at Oxford and the Middle Temple, the younger Tarleton purchased a commission in the army and sailed for America in 1775. He quickly distinguished himself as a bold and aggressive cavalry officer, playing a role in the capture of General Charles Lee in 1776 and rising to command the British Legion by 1778. His raids through South Carolina and Virginia earned him the nickname "Bloody Ban" among the American population, particularly after the controversial engagement at the Waxhaws in May 1780, where his forces killed or wounded a large number of Continental soldiers who were reportedly attempting to surrender.
Despite the controversy, Tarleton returned to England as something of a celebrity. Reynolds, the president of the Royal Academy and the most sought-after portraitist of the age, painted him in a composition that emphasised martial vigour and dashing courage. The portrait was exhibited at the Royal Academy in 1782 and drew considerable public attention. It remains one of Reynolds' most dynamic military portraits and a key document of how the American war was represented in British visual culture.
Tarleton's subsequent career further entwined his story with Liverpool. He served as Member of Parliament for Liverpool from 1790 to 1812, defending the slave trade in Parliament and opposing abolition. His dual legacy as a Revolutionary War commander and a parliamentary champion of the slave trade makes him a figure of considerable historical complexity, and the Reynolds portrait in the Walker Art Gallery serves as a focal point for engaging with both dimensions of his life.
Key Figures
- Colonel Banastre Tarleton (1754-1833) — Liverpool-born cavalry commander of the British Legion in the American South, later MP for Liverpool
- Sir Joshua Reynolds (1723-1792) — president of the Royal Academy and painter of the celebrated 1782 Tarleton portrait
- John Tarleton — Banastre's father, a Liverpool merchant involved in the slave trade and Atlantic commerce
- Lord Cornwallis — British commander in the southern campaign under whom Tarleton served
What's There Today
The Walker Art Gallery, located on William Brown Street in Liverpool's cultural quarter, is one of the finest art museums in England outside London. The Reynolds portrait of Tarleton is displayed in the gallery's collection of eighteenth- and nineteenth-century British art and is one of the institution's most recognised works. The painting's large scale and dramatic composition make it a commanding presence in the gallery. Interpretive materials address both Tarleton's military career and his connections to the slave trade, reflecting the gallery's broader commitment to contextualising its collections within Liverpool's Atlantic history.
Admission to the Walker Art Gallery is free. The gallery is part of National Museums Liverpool and sits alongside the World Museum and the Central Library on William Brown Street, making it easy to incorporate into a wider cultural visit. For those tracing the American Revolution trail through Liverpool, the gallery is a short walk from Liverpool Town Hall and a brief journey from the Albert Dock museums. The Reynolds portrait offers a vivid, personal connection to the war that complements the broader economic and political narratives explored at those other sites.
Sources
- Bass, Robert D. The Green Dragoon: The Lives of Banastre Tarleton and Mary Robinson. New York: Henry Holt, 1957.
- Walker Art Gallery, National Museums Liverpool. Collection records for Joshua Reynolds, Colonel Banastre Tarleton, 1782 (accession no. WAG 2958).
- Mannings, David, and Martin Postle. Sir Joshua Reynolds: A Complete Catalogue of His Paintings. New Haven: Yale University Press, 2000.
- Scotti, Anthony J. Brutal Virtue: The Myth and Reality of Banastre Tarleton. Bowie, MD: Heritage Books, 2002.
York Army Museum
Museums
Historical Significance
The York Army Museum tells the story of Yorkshire's military regiments, including two with significant service in the American Revolutionary War: the 33rd Regiment of Foot and the 15th Regiment of Foot. Between them, these regiments fought in many of the war's most important engagements, and the 33rd in particular was central to the British experience of the conflict from beginning to end.
The 33rd Foot arrived in America in 1776 under the command of its colonel, Charles, Lord Cornwallis, who would become the most prominent British field commander of the war. The regiment fought at Long Island (August 1776), Brandywine (September 1777), Germantown (October 1777), and Monmouth (June 1778). When British strategy shifted southward, the 33rd followed Cornwallis into the Carolinas, fighting at the Siege of Charleston (1780), Camden (August 1780), and the savage engagement at Guilford Courthouse (March 1781), where the regiment was involved in brutal hand-to-hand fighting with Continental regulars. The 33rd was so highly regarded for its discipline and professionalism that it earned the nickname "the Pattern" -- suggesting it was the model to which all British infantry regiments should aspire. Under the capable field leadership of Lieutenant Colonel James Webster, who was mortally wounded at Guilford Courthouse, the regiment performed with distinction throughout the war. The 33rd marched with Cornwallis into Virginia and surrendered with the rest of his army at Yorktown in October 1781.
The 15th Foot also served extensively in the American war. Arriving in North America in 1776, the regiment fought at Long Island, White Plains, and Fort Washington before participating in the 1777 Philadelphia campaign. At the Battle of Brandywine on September 11, 1777, the 15th gained lasting fame when, having exhausted its ball ammunition, the soldiers continued to "snap" their muskets -- firing blank charges of powder to maintain the impression of sustained fire while more ammunition was brought forward. This earned the regiment its enduring nickname, "the Snappers." The 15th also fought at Germantown and White Marsh.
In 1782, the 33rd received its Yorkshire designation as the 33rd (1st Yorkshire West Riding) Regiment of Foot, and the 15th became the 15th (Yorkshire East Riding) Regiment of Foot, formalising their long connections to the county.
Key Figures
- Charles, Lord Cornwallis — Colonel of the 33rd Foot and later commander of British forces in the southern campaign; his surrender at Yorktown effectively ended the war. Cornwallis went on to serve as Governor-General of India and Lord Lieutenant of Ireland
- Lieutenant Colonel James Webster — Field commander of the 33rd in America; mortally wounded leading the regiment at Guilford Courthouse in March 1781; widely regarded as one of the finest regimental officers in the British Army
- Major General William Phillips — Yorkshire-born artillery officer who served in both the Saratoga and Virginia campaigns; died at Petersburg in 1781
- Patrick Ferguson — Tested his breech-loading rifle with companies drawn from Yorkshire regiments including the 15th; killed at the Battle of Kings Mountain (October 1780)
What's There Today
The York Army Museum is located in the Tower Street drill hall, a short walk from Clifford's Tower and the city centre. The museum houses the collections of the Prince of Wales's Own Regiment of Yorkshire and the Royal Dragoon Guards, both descended from regiments with long Yorkshire associations. Displays are arranged thematically across galleries including "Lines of Fire" and "The Yorkshire Soldier," covering over 300 years of military service through uniforms, weapons, medals, personal items, and campaign records. The collections allow visitors to trace the experience of Yorkshire soldiers from the 18th century through modern operations, placing the American war within the broader arc of British military history.
The museum is open Monday to Saturday, 10am to 5pm, with last admission 30 minutes before closing. Admission is charged. York itself offers extensive historical context, with the Castle Museum, the Minster, and the city walls all within walking distance. The museum is accessible from York railway station, approximately 10 minutes on foot.
Sources
- MacNiven, Robbie, The Pattern: The 33rd Regiment in the American Revolution 1770-1783 (Helion, 2023)
- Spring, Matthew H., With Zeal and With Bayonets Only: The British Army on Campaign in North America, 1775-1783 (University of Oklahoma Press, 2008)
- Wickwire, Franklin and Mary, Cornwallis: The American Adventure (Houghton Mifflin, 1970)
- York Army Museum, York, collection guides and interpretive materials
- Chartrand, Rene, British Forces in North America 1793-1815 (Osprey, 1998)
Bersham Ironworks
Military
Historical Significance
Bersham Ironworks near Wrexham in northeast Wales was the site of one of the most important industrial innovations of the eighteenth century, one that had direct consequences for the military conduct of the American War of Independence. In 1774, John Wilkinson -- known as "Iron Mad" Wilkinson for his obsessive devotion to the metal -- patented a revolutionary technique for boring cannon from solid castings at Bersham. This method produced cannon barrels that were far more accurate and reliable than those made by the traditional process of casting around a core, which left imperfections that could cause the gun to explode. Wilkinson's boring machine transformed artillery production and was eagerly adopted by the Board of Ordnance.
During the American War, Bersham produced munitions on a large scale for the British government. The demand for reliable cannon was immense: the war stretched the Royal Navy and Army across the Atlantic, the Caribbean, the Mediterranean, and home waters, and every theatre required artillery. Wilkinson's Bersham works was one of the key suppliers. The same boring technique that made his cannon superior was also applied to the manufacture of cylinders for James Watt's steam engines, linking Bersham to the broader Industrial Revolution that was transforming the Midlands and Wales.
Wilkinson's relationship with the government during the war was not without controversy. He was accused -- though never convicted -- of secretly supplying cannon to France, which was aiding the American cause. The allegation was explosive: if true, Wilkinson was arming Britain's enemy while simultaneously profiting from British military contracts. The Royal Navy, alarmed by the accusation, pushed to revoke his patent in 1779. Wilkinson denied the charges, and the matter was never conclusively resolved, but the episode illustrates the tangled commercial and political loyalties of the industrial Midlands during the Revolution. Bersham Ironworks stands at the intersection of industrial innovation, military supply, and the murky ethics of wartime commerce.
Key Figures
- John "Iron Mad" Wilkinson - Ironmaster who patented the precision cannon-boring technique at Bersham in 1774; major supplier to the British military during the American War; accused of also supplying France.
- James Watt - Scottish engineer whose steam engine cylinders were bored using Wilkinson's technique; the partnership linked Bersham to the wider Industrial Revolution.
- Matthew Boulton - Watt's business partner and Lunar Society member, who worked closely with Wilkinson on steam engine production.
- Charles Middleton (later Lord Barham) - Comptroller of the Navy 1778-1790, who oversaw naval procurement including cannon supply during the American War.
- Lord Sandwich - First Lord of the Admiralty 1771-1782, whose office managed the vast demand for naval ordnance that Bersham helped fulfil.
What's There Today
The Bersham Ironworks site lies just outside Wrexham and is managed as a heritage attraction. The remains of the ironworks include substantial stone ruins of furnace buildings, casting houses, and ancillary structures, set along the River Clywedog in a wooded valley. A heritage centre provides interpretation of the site's history, covering Wilkinson's innovations, the cannon-boring technique, and Bersham's role in supplying the British military. Display panels and reconstructions help visitors understand the industrial processes that took place here.
The site is freely accessible, and the surrounding area offers pleasant walking along the river valley. Bersham is part of a cluster of industrial heritage sites in the Wrexham area, including the nearby Minera Lead Mines and the Pontcysyllte Aqueduct World Heritage Site. For trail visitors, Bersham connects to the broader story of Welsh industry and the American War: the ironworks supplied the cannon, while Parys Mountain on Anglesey and the Swansea copper works supplied the copper sheathing for the ships that carried them. Together, these Welsh sites reveal the industrial backbone of Britain's war effort.
Sources
- W.H. Chaloner, "John Wilkinson, Ironmaster," History Today, Vol. 1, No. 5 (1951)
- Jenny Uglow, The Lunar Men: The Friends Who Made the Future (Faber and Faber, 2002)
- John Harris, The Copper King: A Biography of Thomas Williams of Llanidan (Liverpool University Press, 1964)
- Cadw (Welsh Government Historic Environment Service), "Bersham Ironworks," Scheduled Monument listing
Parys Mountain Copper Mine
Military
Historical Significance
In 1768, a massive deposit of copper ore was discovered on Parys Mountain near Amlwch on the island of Anglesey, and by the mid-1770s the mine had become the largest copper-producing operation in Europe. This geological windfall coincided precisely with the outbreak of the American War of Independence, and Parys Mountain copper became critical to one of the most important naval innovations of the conflict: the emergency programme to sheathe the hulls of Royal Navy warships with copper plating to protect them from the shipworm and marine fouling that degraded wooden hulls in tropical and warm waters.
The decision to copper the entire fleet was made in January 1779 by Sir Charles Middleton, Comptroller of the Navy Board, in response to the desperate strategic situation Britain faced after France and Spain entered the war. British warships operating in the Caribbean and along the American coast were losing speed and seaworthiness to fouled hulls, putting them at a disadvantage against cleaner French and Spanish vessels. Copper sheathing, which had been tested experimentally since the 1760s, was the solution -- but it required enormous quantities of copper plate. Parys Mountain, already producing on an industrial scale, was the principal source. By 1781, eighty-two ships of the line had been coppered, a logistical achievement that restored the fleet's operational effectiveness at a critical point in the war.
The man who dominated the Anglesey copper trade was Thomas Williams, known as "the Copper King." Williams controlled the Parys Mountain operations and built a vertically integrated business encompassing mining, smelting, and copper product manufacture. In 1784, he won the Navy contract to supply copper sheathing, consolidating his dominance. The copper from Parys Mountain had global reach: it has been documented in the bolts of USS Constitution, the American frigate launched in 1797 and built partly with copper sourced through Paul Revere's rolling mill, which acquired Anglesey copper. The mountain thus connects to both sides of the revolutionary conflict.
Key Figures
- Thomas Williams - "The Copper King" who controlled Parys Mountain's output and won the 1784 Navy contract for copper sheathing; one of the most powerful industrialists in Wales.
- Sir Charles Middleton (later Lord Barham) - Comptroller of the Navy Board who made the January 1779 decision to copper the entire fleet, creating massive demand for Parys Mountain copper.
- Nicholas Bayly - Anglesey landowner who held rights to the mountain and profited enormously from the copper discovery.
- Roe and Company - Mining partnership that initially developed the Parys Mountain lode in the 1760s before Williams consolidated control.
- Paul Revere - American patriot and coppersmith whose rolling mill later worked with copper originating from Anglesey, connecting the mine to both sides of the Atlantic.
What's There Today
Parys Mountain is one of the most visually dramatic industrial heritage sites in Britain. The open-cast workings have created a vast, lunar landscape of ochre, red, and purple earth, with exposed rock faces, ruined engine houses, and deep pools of mineral-tinted water. The scale of the eighteenth-century extraction is immediately apparent. The site is freely accessible via walking trails that wind through the workings and along the mountain's ridges, with interpretive panels explaining the mining history and the geological context.
The nearby town of Amlwch grew from a small fishing village to one of the largest settlements in Wales during the copper boom, and its port was built specifically to ship copper ore. The Amlwch Industrial Heritage Trust has developed heritage interpretation in the town, and Amlwch Port retains visible traces of its industrial past. The Copper Kingdom Centre in Amlwch (opening times vary) provides museum exhibits on the copper industry. For trail visitors, Parys Mountain is an essential site: it connects the American War's naval strategy to Welsh industrial history in a landscape of extraordinary power. Combined with Bersham Ironworks and the Swansea copper sites, it reveals the Welsh industrial contribution to Britain's war effort.
Sources
- J.R. Harris, The Copper King: A Biography of Thomas Williams of Llanidan (Liverpool University Press, 1964)
- N.A.M. Rodger, The Command of the Ocean: A Naval History of Britain 1649-1815 (Allen Lane, 2004)
- Roger Knight, "The Introduction of Copper Sheathing into the Royal Navy 1779-1786," The Mariner's Mirror, Vol. 59, No. 3 (1973)
- David Jenkins, "Copper Mining at Parys Mountain," Industrial Archaeology Review, Vol. 17, No. 1 (1994)
Royal Welsh Fusiliers Museum, Caernarfon Castle
Military
Historical Significance
The 23rd Regiment of Foot, the Royal Welsh Fusiliers, was among the most heavily engaged British infantry regiments of the American Revolutionary War. The regiment was already stationed in Boston when tensions erupted into open conflict. Companies of the 23rd marched as part of the column sent to seize colonial arms stores on April 19, 1775, and were involved in the fighting along the road from Concord back to Boston — the opening engagement of the war. Two months later, the regiment fought at the Battle of Bunker Hill on June 17, 1775, suffering severe casualties in the costly British assault on the American redoubt on Breed's Hill.
The 23rd continued to serve in the principal theatre of operations throughout the war. Under Lieutenant Colonel Benjamin Bernard, the regiment was part of General Howe's forces during the Philadelphia campaign of 1777, fighting at the Battle of Brandywine (September 11) and the Battle of Germantown (October 4). The following year, the Royal Welsh Fusiliers were engaged at the Battle of Monmouth (June 28, 1778) in New Jersey, one of the longest single-day battles of the war. The regiment subsequently served in the southern campaigns and was among the British forces besieged at Yorktown in October 1781, where Cornwallis's surrender effectively ended major combat operations in North America.
The regiment's sustained front-line service across the full span of the war — from the first shots at Lexington to the final capitulation at Yorktown — makes the Royal Welsh Fusiliers one of the defining British units of the conflict. The human cost was considerable: the regiment endured repeated battlefield losses and the attrition of disease and harsh campaigning conditions that plagued all armies in the American theatre. The regimental museum at Caernarfon Castle preserves artifacts, documents, and colours from this period, offering a direct material connection to the regiment's American War service.
Key Figures
- Lt. Col. Benjamin Bernard — Commanding officer of the 23rd Regiment of Foot during the early campaigns, including at Lexington and Concord and Bunker Hill
- Major General William Howe — Commander-in-chief of British forces in North America, 1775-1778, under whom the 23rd served during the Philadelphia campaign
- Lt. Col. Nisbet Balfour — Later commanding officer of the regiment during the southern campaigns
- Lord Cornwallis — British general whose surrender at Yorktown in 1781 included the Royal Welsh Fusiliers among the capitulating garrison
What's There Today
The Royal Welsh Fusiliers Museum is housed within the walls of Caernarfon Castle, one of the great medieval fortresses built by Edward I in the late 13th century and now a UNESCO World Heritage Site managed by Cadw, the Welsh Government's historic environment service. The museum occupies several rooms within the castle's towers and tells the story of the regiment from its formation in 1689 to the present day. Displays covering the American Revolutionary War include period weapons, uniforms, regimental colours, and documentary records. The museum provides one of the few opportunities in Britain to encounter the American war from the perspective of the ordinary soldiers and officers who fought it.
Caernarfon Castle is located in the heart of the town of Caernarfon in Gwynedd, northwest Wales. The castle itself is a major visitor attraction, and the regimental museum is included in the castle admission. The museum is maintained by the Royal Welsh Fusiliers Regimental Trust. Visitors should note that the museum's displays span the regiment's entire history, so the American Revolution material forms one section of a broader narrative. Caernarfon is accessible by road via the A487 and by bus services from Bangor, which has a mainline rail station.
Sources
- Mackesy, Piers. The War for America, 1775-1783. Harvard University Press, 1964.
- Cary, A.D.L., and Stouppe McCance. Regimental Records of the Royal Welsh Fusiliers (23rd Foot). 2 vols. Royal United Service Institution, 1921.
- Cadw (Welsh Government historic environment service), Caernarfon Castle site information and listing records.
- Spring, Matthew H. With Zeal and With Bayonets Only: The British Army on Campaign in North America, 1775-1783. University of Oklahoma Press, 2008.
Francis Lewis Birthplace, Llandaff
People
Historical Significance
Francis Lewis was born on 21 March 1713 in Llandaff, then a village outside Cardiff and now a suburb of the Welsh capital. His father, the Reverend Francis Lewis, was rector of Llandaff, and the family lived near the ancient cathedral that had served the parish since the twelfth century. Both parents died when Lewis was young -- he was orphaned by about the age of five -- and he was raised by a maiden aunt in Wales before being sent to Westminster School in London for his education. He also studied in Scotland, where he learned Gaelic.
At twenty-one, Lewis inherited property from his father's estate, converted it to merchandise, and sailed for New York. He prospered as a merchant, trading across the Atlantic. When the revolutionary crisis came, Lewis was already in his sixties -- among the oldest of the signers. He co-founded the New York Sons of Liberty, attended the Stamp Act Congress in 1765, and was elected to the Continental Congress in 1775, where he signed the Declaration of Independence the following year.
The war exacted a devastating personal cost. British troops destroyed Lewis's Long Island estate and captured his wife Elizabeth, holding her in a filthy prison without adequate food, clothing, or bedding. Although she was eventually exchanged through the intervention of George Washington, her health never recovered, and she died in 1779. Lewis himself spent most of his personal fortune purchasing supplies for the Continental Army. The orphan from Llandaff who had crossed the Atlantic with inherited merchandise died in New York on 31 December 1802, having given everything to the cause.
Key Figures
- Francis Lewis (1713-1802) - Declaration signer for New York; born in Llandaff; orphaned young; merchant and patriot
- Rev. Francis Lewis - Father; rector of Llandaff; died when Francis was young
- Amy Pettingal Lewis - Mother; daughter of a Caernarvon clergyman
- Elizabeth Annesley Lewis (d. 1779) - Wife; captured by the British; died from effects of imprisonment
What's There Today
Llandaff Cathedral, dating from the twelfth century with significant later additions and twentieth-century restoration after wartime bomb damage, remains the dominant landmark of the area and the most identifiable site connected to Lewis's birth. His father served as rector here, and the family would have lived in or near the cathedral close. The cathedral is an active Church in Wales place of worship and is open to visitors. No dedicated plaque or memorial to Francis Lewis has been identified at the site. Llandaff is now a prosperous suburb of Cardiff, approximately two miles northwest of the city centre, easily reached by bus or car. Cardiff Castle, the National Museum of Wales, and the Principality Stadium are all nearby.
Sources
- National Park Service, "Signers of the Declaration: Francis Lewis"
- National Constitution Center, "Francis Lewis" biography
- Declaration Signers Digital Institute, "Francis Lewis," dsdi1776.com
- Trinity Church Wall Street, "Francis Lewis: Immigrant, Merchant, Activist"
- Llandaff Cathedral, official website
Cyfarthfa Castle Museum
Commercial
Historical Significance
The town of Merthyr Tydfil in the South Wales valleys became one of Britain's most important centres of iron production in the second half of the 18th century, and the American Revolutionary War played a direct role in accelerating that transformation. In 1765, Anthony Bacon, an English-born merchant and Member of Parliament, secured a lease on mineral rights in the Merthyr area and established ironworks that would grow into one of the largest industrial operations in Wales. Bacon's critical advantage was his ability to win government contracts to supply cannon, shot, and other iron ordnance to the Board of Ordnance — the body responsible for arming Britain's military forces.
When war broke out with the American colonies in 1775, demand for military ordnance surged. Bacon's Cyfarthfa works and the neighbouring Plymouth works expanded production dramatically to fulfil government contracts. The Merthyr valley's combination of iron ore, limestone, coal, and water power made it ideally suited to large-scale iron smelting, and the wartime contracts provided the capital and guaranteed demand that allowed the industry to grow at a pace that would have been impossible under peacetime market conditions alone. By the end of the American war, the Merthyr Tydfil iron district was well established as a national centre of heavy industry.
The legacy of this wartime expansion endured long after the peace. When Anthony Bacon died in 1786, his works passed through various hands before being acquired by Richard Crawshay, whose family built Cyfarthfa Castle in 1825 as a grand residence overlooking the ironworks. The castle, designed in the Gothic Revival style, now serves as a museum and art gallery telling the story of Merthyr Tydfil's industrial heritage. While the American Revolution is not the museum's primary focus, the wartime ordnance contracts that fuelled the town's early industrial growth are an essential part of the narrative. The site connects the American conflict to the broader story of Britain's Industrial Revolution.
Key Figures
- Anthony Bacon — Merchant, ironmaster, and MP who established the Cyfarthfa ironworks in 1765 and won Board of Ordnance contracts to supply cannon and shot during the American war
- The Board of Ordnance — Government body responsible for military supply, which contracted with Bacon and other ironmasters for wartime production
- Richard Crawshay — Ironmaster who took over the Cyfarthfa works after Bacon's death and whose family built Cyfarthfa Castle in 1825
- William Brownrigg — Bacon's early partner in the Merthyr iron ventures
What's There Today
Cyfarthfa Castle Museum and Art Gallery is housed in the castellated mansion built by the Crawshay family in 1825, set in extensive parkland overlooking what was once the site of the Cyfarthfa ironworks. The museum covers the full sweep of Merthyr Tydfil's history, from its origins as a small Welsh parish to its emergence as one of the great iron-producing towns of the Industrial Revolution. Displays include material on the 18th-century ironworks, the Bacon and Crawshay dynasties, and the social history of the ironworking communities. The connection between military ordnance contracts and industrial expansion is explored as part of the broader story.
The castle and park are located on the northern edge of Merthyr Tydfil town centre. Admission to the museum is free. The surrounding Cyfarthfa Park offers walking trails and views of the valley landscape that was reshaped by two centuries of iron production. Merthyr Tydfil is accessible by rail from Cardiff (approximately one hour) and by road via the A470. While little remains of the original 18th-century ironworks, the museum provides essential context for understanding how the demands of a distant war in America helped forge one of the birthplaces of industrial Britain.
Sources
- Evans, Chris. The Labyrinth of Flames: Work and Social Conflict in Early Industrial Merthyr Tydfil. University of Wales Press, 1993.
- Lloyd, John. The Early History of the Old South Wales Ironworks, 1760-1840. Bedford Press, 1906.
- Wilkins, Charles. The History of the Iron, Steel, Tinplate, and Other Trades of Wales. Joseph Williams, 1903.
- Cyfarthfa Castle Museum and Art Gallery, exhibition materials and interpretive displays.
White Rock Copper Works Site
Commercial
Historical Significance
The White Rock Copper Works, established on the banks of the River Tawe in Swansea in 1737, was one of the oldest and most important copper smelting operations in what became the world centre of the copper industry during the eighteenth century. Swansea's lower Tawe valley -- known as "Copperopolis" -- concentrated more copper smelting capacity than anywhere else on earth, and the White Rock works was among the foundational enterprises that created this industrial dominance. During the American War of Independence, the works was active and formed part of the critical supply chain producing copper for the Royal Navy's warship sheathing programme.
Copper smelting concentrated in Swansea rather than at the mine sites because of the economics of fuel. It took far more coal to smelt copper ore than it took ore to produce copper, and Swansea sat on the South Wales coalfield with easy coastal access for importing ore from Cornwall, Anglesey, and overseas. During the American War, the demand for copper plate surged after Sir Charles Middleton's January 1779 decision to sheathe the entire Royal Navy fleet with copper. Ore from Parys Mountain in Anglesey and from Cornish mines was shipped to Swansea's smelters, including White Rock, where it was refined into the copper plate and bolts needed for hull sheathing. This supply chain was essential to restoring the fleet's operational capability in tropical waters.
The wartime industrial expansion is reflected in the physical record at White Rock. Smith's Canal, constructed in 1783, was built to improve the transport of materials to and from the works, reflecting the growth in production capacity driven by wartime and immediate post-war demand. The White Rock works continued to operate for over a century after the American War, and its ruins now form part of the scheduled archaeological remains that document Swansea's extraordinary copper heritage. The site represents the smelting and manufacturing stage of the copper supply chain that began at Parys Mountain and ended on the hulls of warships fighting in American and Caribbean waters.
Key Figures
- Robert Morris - Established the earliest copper smelting operations in the Swansea area in the early eighteenth century; the Morris family were pioneers of "Copperopolis."
- Thomas Williams - "The Copper King" of Parys Mountain who shipped ore to Swansea smelters and dominated the copper trade during and after the American War.
- Sir Charles Middleton (later Lord Barham) - Navy Board Comptroller whose 1779 copper sheathing decision created the demand that drove Swansea's wartime production.
- John Vivian - Copper smelter who later established the Hafod works adjacent to White Rock, expanding Swansea's smelting capacity in the post-war period.
What's There Today
The White Rock Copper Works site is located on the east bank of the River Tawe in the lower Swansea valley, an area that has undergone significant regeneration since the decline of heavy industry. The site is a Scheduled Ancient Monument, and substantial industrial archaeology remains are visible, including ruins of furnace buildings, flue systems, engine houses, and sections of Smith's Canal. The remains are spread across a site that conveys the scale of eighteenth-century copper smelting operations, though interpretation on the ground is limited and the site requires some effort to navigate.
The wider lower Tawe valley is undergoing transformation as part of Swansea's urban regeneration, and there are ongoing efforts to improve heritage interpretation and public access to the copper works sites. The Swansea Museum in the Maritime Quarter holds collections relating to the copper industry, and the National Waterfront Museum (part of Amgueddfa Cymru -- National Museum Wales) covers Welsh industrial history including copper smelting. For trail visitors, White Rock completes the Welsh copper story that begins at Parys Mountain on Anglesey and passes through the cannon foundries at Bersham: ore, smelting, and the finished product that helped keep the Royal Navy at sea during the American War.
Sources
- Ronald Rees, King Copper: South Wales and the Copper Trade 1584-1895 (University of Wales Press, 2000)
- Stephen Hughes, Copperopolis: Landscapes of the Early Industrial Period in Swansea (Royal Commission on the Ancient and Historical Monuments of Wales, 2000)
- N.A.M. Rodger, The Command of the Ocean: A Naval History of Britain 1649-1815 (Allen Lane, 2004)
- Cadw (Welsh Government Historic Environment Service), "White Rock Copper Works," Scheduled Monument listing
Richard Price Birthplace, Llangeinor
Protest & Dissent
Historical Significance
Richard Price, born in 1723 at Tynton Farm in the parish of Llangeinor in Glamorgan, was one of the most influential British defenders of the American cause. A Dissenting minister, moral philosopher, and mathematician, Price became a central figure in the transatlantic debate over colonial rights when he published Observations on the Nature of Civil Liberty, and the Principles of Government, and the Justice and Policy of the War with America in February 1776 — just months before the Declaration of Independence. The pamphlet was a sensation: it sold approximately 60,000 copies in its first year, went through multiple editions, and was widely reprinted in the American colonies. Price argued that the war was unjust, that the colonists had a natural right to self-government, and that Britain's coercive policies threatened liberty at home as well as in America.
The impact of Price's intervention was immediate and substantial. The Continental Congress formally thanked him and extended an invitation of American citizenship. Benjamin Franklin, then serving as American Commissioner in Paris, maintained a warm correspondence with Price, and Thomas Jefferson later sought his views on constitutional design. Price followed his 1776 pamphlet with Additional Observations on the Nature and Value of Civil Liberty (1777), in which he further developed his arguments and advised on the management of public debt — a subject on which his mathematical expertise gave him particular authority. His advice on structuring American government finances was taken seriously by Congressional leaders grappling with the practical challenges of funding the war.
Price's defence of America was rooted in the broader tradition of British Rational Dissent, which held that civil and religious liberty were inseparable and that government derived its legitimacy from the consent of the governed. His work connected the American struggle to domestic British reform movements, influencing radicals and reformers who would carry these arguments forward into the 1780s and 1790s. Price's birthplace at Llangeinor links this global intellectual history to a specific Welsh landscape, reminding visitors that the ideas that shaped the American Revolution had deep roots in British Nonconformist thought.
Key Figures
- Richard Price — Welsh moral philosopher and Dissenting minister whose 1776 pamphlet was one of the most widely read defences of the American cause published in Britain
- Benjamin Franklin — American Commissioner in Paris and longtime correspondent with Price on matters of liberty and governance
- Thomas Jefferson — Sought Price's counsel on constitutional questions; admired his philosophical writings
- Joseph Priestley — Fellow Dissenting intellectual and close friend of Price; shared his sympathies for the American cause
- The Earl of Shelburne — Whig politician and patron of Price who became Prime Minister in 1782 and negotiated the peace with America
What's There Today
The village of Llangeinor lies in the Garw Valley in Bridgend County Borough, in the former county of Glamorgan. Tynton Farm, where Richard Price was born, still stands in the area, though it is a private residence and not open to the public. A memorial plaque in the village commemorates Price's birth and his contributions to philosophy and political thought. The nearby village of Bridgend and the wider Glamorgan area offer additional context for understanding the Dissenting communities from which Price emerged, though there is no dedicated Price museum at Llangeinor itself.
Visitors interested in Price's legacy should note that his connection to Llangeinor is primarily one of birth and early life; he spent most of his career in London, where he ministered to Dissenting congregations at Newington Green and Hackney. Nonetheless, the site is significant as the point of origin for one of the most important intellectual voices in the transatlantic debate over American independence. Llangeinor is accessible by road from Bridgend (approximately four miles) via the A4064. The Garw Valley offers pleasant walking country, and the village retains a quiet, rural character far removed from the metropolitan world in which Price made his name.
Sources
- Thomas, D.O. The Honest Mind: The Thought and Work of Richard Price. Clarendon Press, 1977.
- Laboucheix, Henri. Richard Price as Moral Philosopher and Political Theorist. Oxford: Voltaire Foundation, 1982.
- Price, Richard. Observations on the Nature of Civil Liberty, and the Principles of Government, and the Justice and Policy of the War with America. London, 1776.
- Peach, W. Bernard, and D.O. Thomas, eds. The Correspondence of Richard Price. 3 vols. Duke University Press and University of Wales Press, 1983-1994.
Regimental Museum of the Royal Welsh
Museums
Historical Significance
The 24th Regiment of Foot -- later the South Wales Borderers, now part of the Royal Welsh -- shares in one of the most consequential episodes of the American Revolutionary War: the Saratoga disaster of 1777. Sent to Quebec in June 1776, the 24th joined the British forces assembling in Canada for General John Burgoyne's ambitious campaign to march south through the Hudson Valley, split the rebellious colonies in two, and link up with British forces advancing from New York. It was a plan that demanded speed, logistical precision, and good fortune. Burgoyne's army had none of these in sufficient measure.
During the advance south, the 24th Foot was assigned to critical positions. At the battles around Saratoga in September and October 1777, the regiment served under Brigadier General Simon Fraser on the right wing, alongside light infantry and grenadier companies. Fraser's command was tasked with turning the American left flank by moving through the heavily wooded high ground north and west of Bemis Heights -- difficult terrain that favoured the American defenders and negated much of the British advantage in open-field tactics. At the Second Battle of Saratoga on October 7, Fraser was mortally wounded, and the British right collapsed. Ten days later, on October 17, 1777, Burgoyne surrendered his entire force of approximately 5,700 men, the 24th Foot among them.
The consequences were transformative. The Saratoga surrender demonstrated to France that the American rebellion could succeed militarily, leading directly to the Franco-American alliance of February 1778. The war became a global conflict, with France, Spain, and eventually the Dutch Republic ranged against Britain. For the men of the 24th, Saratoga meant years of captivity: the surrendered troops -- the "Convention Army" -- were marched to internment camps in Massachusetts and later Virginia, where they remained prisoners until the war ended in 1783. The regiment's experience at Saratoga illustrates the devastating human cost of a campaign that altered the course of the war.
Key Figures
- General John Burgoyne -- Commander of the northern army; a talented but overconfident general whose failure at Saratoga became one of Britain's most significant military disasters
- Brigadier General Simon Fraser -- Commanded the right wing, including the 24th Foot, at Saratoga; his death during the second battle was a turning point in the engagement
- Major General Horatio Gates -- American commander at Saratoga, whose defensive strategy and superior numbers trapped Burgoyne's army
- Major General Benedict Arnold -- Although not in formal command at Saratoga, Arnold's aggressive leadership on the battlefield contributed to the British defeat
What's There Today
The Regimental Museum of the Royal Welsh is located in the Barracks at Brecon, a historic military complex on the Watton (B4601), the road leading east from Brecon towards Abergavenny. The museum is the first building within the barracks complex and tells the story of the regiment from its founding in 1689 through to the present day. Collections span more than three centuries and include uniforms, weapons, colours, medals, personal effects, and campaign records. The 24th Foot's 18th-century service -- including the American Revolution and the Saratoga campaign -- is set within a broader narrative that also encompasses the regiment's famous defence of Rorke's Drift during the Anglo-Zulu War of 1879, for which eleven Victoria Crosses were awarded. The museum allows visitors to understand how the regiment's American experience fits within a long tradition of service across the globe.
The museum is situated at The Barracks, Brecon, Powys LD3 7EB, in the Brecon Beacons (Bannau Brycheiniog) National Park. It is open Monday to Friday, 10:00am to 5:00pm (last admission 4:30pm), with Saturday opening from 10:30am to 4:00pm between Easter and September. It is closed on Sundays. Admission is GBP 6.50 for adults, GBP 2.00 for children aged 5 to 16, and free for children under 5. Serving personnel and veterans receive a discounted rate of GBP 4.50 with a Defence Discount card or HM Armed Forces Veteran card. Free parking is available in front of the museum.
Sources
- Ketchum, Richard M., Saratoga: Turning Point of America's Revolutionary War (Henry Holt, 1997)
- Spring, Matthew H., With Zeal and With Bayonets Only: The British Army on Campaign in North America, 1775-1783 (University of Oklahoma Press, 2008)
- National Army Museum, "The South Wales Borderers" (online collection guide)
- Royal Welsh Museum, Brecon, official website and interpretive materials (royalwelshmuseum.wales)
- RevWarTalk, "24th Regiment of Foot (South Wales Borderers)" (online regimental history)
Adam Smith Heritage Centre, Kirkcaldy
Political
Historical Significance
Adam Smith, baptised on 5 June 1723 in Kirkcaldy, Fife, wrote much of his epoch-making An Inquiry into the Nature and Causes of the Wealth of Nations while living in his mother's house in this Fife coastal town between 1767 and 1773. Having resigned his professorship at the University of Glasgow, Smith returned to Kirkcaldy to concentrate on the work that would transform economic thought. The years he spent here, corresponding with David Hume and other Enlightenment figures, were the most productive of his intellectual life.
The Wealth of Nations was published on 9 March 1776, just months before the American Declaration of Independence. Its timing was not coincidental to the imperial crisis. Smith argued explicitly that the colonial system was economically irrational, that the costs of defending and administering the American colonies far exceeded the commercial benefits, and that monopolistic trade restrictions harmed both Britain and the colonists. He proposed either granting the colonies full parliamentary representation or letting them go entirely. These arguments gave intellectual ammunition to those in Parliament, including the Marquess of Rockingham and Edmund Burke, who favoured conciliation or independence.
Smith's influence on the revolutionary generation extended beyond the war itself. His advocacy for free trade, limited government intervention, and the self-regulating market profoundly shaped the economic thinking of Alexander Hamilton, Thomas Jefferson, and James Madison as they built the new American republic. The fact that Smith developed these world-altering ideas in a modest Fife town underscores the outsized role the Scottish Enlightenment played in shaping the Atlantic world of the late eighteenth century.
Key Figures
- Adam Smith (1723-1790) - Moral philosopher and political economist; his Wealth of Nations provided the intellectual framework for critiquing British colonial policy during the American Revolution.
- David Hume (1711-1776) - Scottish philosopher and Smith's closest intellectual companion; corresponded extensively with Smith during the Kirkcaldy writing years and shared his scepticism about the value of empire.
- Charles Townshend (1725-1767) - Chancellor of the Exchequer whose colonial taxation policies provoked American resistance; ironically, Townshend had employed Smith as tutor to his stepson, the Duke of Buccleuch.
- Edmund Burke (1729-1797) - Whig politician who drew on arguments paralleling Smith's in his parliamentary speeches urging conciliation with America.
- Henry Dundas, 1st Viscount Melville (1742-1811) - Scottish political manager who later consulted Smith on colonial and trade policy during the postwar restructuring of the British Empire.
What's There Today
The Adam Smith Heritage Centre is housed in a restored late-sixteenth-century building at 229 High Street, Kirkcaldy. Opened following a major restoration, the centre tells the story of Smith's life and ideas through interactive displays, period furnishings, and audio-visual presentations. It occupies a building that dates to around 1590, offering visitors an authentic sense of the old burgh Smith knew. The centre is managed by a local trust and operates seasonally, so visitors should check opening hours in advance.
Kirkcaldy also offers an Adam Smith Trail, a walking route through the town that passes key sites associated with his life, including the approximate location of his mother's house where he wrote The Wealth of Nations and the site of the burgh school he attended as a boy. A statue of Smith stands on the High Street. The town's location on the Fife coast, with views across the Firth of Forth to Edinburgh, makes it an accessible stop for visitors travelling between Edinburgh and the other Fife sites on the trail.
Sources
- Ian Simpson Ross, The Life of Adam Smith (Oxford University Press, 2010)
- Nicholas Phillipson, Adam Smith: An Enlightened Life (Yale University Press, 2010)
- Adam Smith, An Inquiry into the Nature and Causes of the Wealth of Nations (W. Strahan and T. Cadell, 1776), Book IV, Chapter VII
- Kirkcaldy Civic Society, "Adam Smith Heritage Centre," adamsmithkirkcaldy.co.uk
Panmure House (Adam Smith Residence)
Political
Historical Significance
Panmure House on the Canongate in Edinburgh is the only surviving residence of Adam Smith, who lived here from 1778 until his death on 17 July 1790. Smith moved to Edinburgh upon his appointment as Commissioner of Customs for Scotland, a post he held for the remainder of his life. The position was ironic for the man who had argued most persuasively against trade restrictions, but Smith took his duties seriously and was a diligent administrator of the customs regime he had criticised in theory.
During his twelve years at Panmure House, Smith revised The Wealth of Nations through four further editions, each incorporating refinements that reflected the unfolding consequences of the American war and its aftermath. The conflict had vindicated many of his predictions about the costs of empire, and the postwar reorganisation of British trade policy bore his intellectual imprint. Smith's Edinburgh years also saw the publication of the heavily revised sixth edition of his earlier work, The Theory of Moral Sentiments (1790), which he considered his more important book.
Panmure House became an intellectual salon during Smith's residency. His regular Sunday suppers attracted leading figures of the Scottish Enlightenment and visiting dignitaries, including Benjamin Franklin's associates and American merchants navigating the new transatlantic commercial relationships that followed independence. Smith's home thus served as an informal meeting point where ideas about free trade, taxation, and governance circulated among the very people implementing the postwar economic order on both sides of the Atlantic.
Key Figures
- Adam Smith (1723-1790) - Political economist and moral philosopher; lived at Panmure House from 1778 to 1790, revising his major works and serving as Commissioner of Customs for Scotland.
- David Douglas, Lord Reston (d. 1819) - Smith's nephew and heir; lived with Smith at Panmure House and inherited his papers, most of which Smith ordered destroyed before his death.
- Joseph Black (1728-1799) - Chemist and physician, discoverer of latent heat; one of Smith's closest Edinburgh friends and a regular guest at Panmure House suppers.
- Adam Ferguson (1723-1816) - Moral philosopher and author of An Essay on the History of Civil Society; fellow member of Smith's Edinburgh intellectual circle.
- Henry Dundas, 1st Viscount Melville (1742-1811) - Scotland's most powerful politician; consulted Smith at Panmure House on trade and colonial policy during the postwar period.
What's There Today
Panmure House is located at Little Lochend Close, just off the Canongate section of Edinburgh's Royal Mile. The seventeenth-century townhouse was in a state of serious disrepair for many years before Heriot-Watt University's Edinburgh Business School undertook a major restoration, completed in 2018. The building now serves as a centre for economic debate and hosts the Panmure House Prize and regular public lectures on topics Smith would have recognised: trade, inequality, and the relationship between markets and morality.
The exterior can be viewed from the Canongate at any time, and the building is open for scheduled events and occasional public tours. Visitors should check the Panmure House website for upcoming programmes. The location places it within easy walking distance of the Scottish Parliament, the Palace of Holyroodhouse, and numerous other Royal Mile attractions. Combined with a visit to Adam Smith's birthplace and heritage centre in Kirkcaldy, a short train ride across the Firth of Forth, Panmure House offers a compelling picture of the thinker whose ideas shaped the economic dimensions of the American Revolution.
Sources
- Ian Simpson Ross, The Life of Adam Smith (Oxford University Press, 2010)
- Nicholas Phillipson, Adam Smith: An Enlightened Life (Yale University Press, 2010)
- Edinburgh Business School, Heriot-Watt University, "Panmure House," panmurehouse.org
- Historic Environment Scotland, "Panmure House" listing, portal.historicenvironment.scot
Black Watch Castle & Museum
Military
Historical Significance
The 42nd Regiment of Foot, universally known as the Black Watch, was one of the most distinguished and heavily committed British units of the American Revolutionary War. Originally raised in 1725 as independent Highland companies tasked with policing the Scottish Highlands — the Gaelic name Am Freiceadan Dubh refers to the dark tartan that distinguished them from the government's "Red Soldiers" — the regiment had been formally constituted as a line infantry unit in 1739. By 1776, the Black Watch was a veteran regiment with a formidable reputation, and it was dispatched to North America as part of the British effort to suppress the rebellion.
The regiment's American service was extensive and costly. The Black Watch fought at the Battle of Brooklyn (Long Island) on August 27, 1776, where it played a central role in the British assault on the American positions. It subsequently participated in the capture of Fort Washington in November 1776. In 1777, the regiment was heavily engaged at Brandywine (September 11) and Germantown (October 4), two of the major battles of the Philadelphia campaign. At Monmouth Court House (June 28, 1778), the Black Watch was again in the thick of the fighting during the last major engagement in the northern theatre. Throughout this service, casualties were severe, and the regiment's ranks were repeatedly thinned by combat, disease, and the sheer attrition of campaigning in North America.
The experience of the 42nd in America illustrates several broader themes of the war: the professional quality of British regular infantry, the difficulty of replacing losses so far from home, and the complex motivations of Highland soldiers serving a government that had, within living memory, suppressed their own culture. Many of the regiment's rank and file were Gaelic-speaking Highlanders, recruited from estates across Perthshire and the central Highlands. Their service in America was part of the wider pattern of Highland military mobilisation that profoundly shaped both the British Army and Scottish society in the later 18th century.
Key Figures
- Major John Murray — Commanded elements of the 42nd during the American campaigns; a member of the Atholl Murray family prominent in Perthshire military tradition
- Major the Hon. Charles Stuart — Son of the Earl of Bute; served with the 42nd in America and was noted for his leadership at Brooklyn and Fort Washington
- Lord William Murray — Colonel of the 42nd during portions of the war; the regiment's aristocratic connections reflected the Highland elite's investment in military service
- General Sir William Howe — Commander-in-chief of British forces in North America 1776-1778, under whom the Black Watch fought at Brooklyn, Fort Washington, Brandywine, and Germantown
What's There Today
The Black Watch Castle and Museum is housed in Balhousie Castle, a baronial-style castle on the northern edge of Perth's North Inch parkland. The museum tells the story of the regiment from its origins in the early 18th century to the present day. Collections of particular relevance to the American Revolution include period uniforms, weapons, regimental colours, officers' personal effects, and campaign records from the 1776-1783 period. The displays place the regiment's American service in the broader context of Highland military history, allowing visitors to understand both the tactical realities of the war and the social world from which the soldiers came.
Balhousie Castle is located on Hay Street, a short walk from Perth city centre. The museum is open throughout the year, with free admission. The surrounding North Inch provides a pleasant setting for the visit. Perth itself, as the historic capital of the central Highlands, offers further context for understanding the recruiting grounds of the Black Watch. The regiment drew its soldiers from across Perthshire, and the museum's archive — available to researchers by appointment — holds enlistment records, letters, and orderly books that document the experience of individual soldiers during the American campaigns.
Sources
- Linklater, Eric, and Haldane, Andro, The Black Watch: The History of the Royal Highland Regiment (Barrie & Jenkins, 1977)
- Mackillop, Andrew, 'More Fruitful Than the Soil': Army, Empire and the Scottish Highlands, 1715-1815 (Tuckwell Press, 2000)
- Spring, Matthew H., With Zeal and With Bayonets Only: The British Army on Campaign in North America, 1775-1783 (University of Oklahoma Press, 2008)
- Black Watch Castle and Museum, Perth, collection guides and interpretive materials
- Stewart, David, Sketches of the Character, Manners, and Present State of the Highlanders of Scotland; with Details of the Military Service of the Highland Regiments, 2 vols. (Edinburgh, 1822)
Carron Ironworks Site
Military
Historical Significance
The Carron Company, founded in 1759 on the banks of the River Carron near Falkirk, was one of the largest and most technologically advanced ironworks in 18th-century Europe. At its peak, the works employed over 2,000 people and produced a vast range of iron goods, from domestic stoves to heavy ordnance. Its connection to the American Revolution is twofold: the works supplied conventional cannon, shot, and military stores to the British war effort, and it invented the weapon that bore its name — the carronade — a short-barrelled naval gun that transformed close-range sea combat in the final years of the conflict and for decades afterward.
The carronade was developed around 1778 under the direction of Charles Gascoigne, the works' energetic general manager. Unlike a conventional long gun, the carronade was short, lightweight, and designed to fire a heavy ball at short range. It could be operated by a smaller crew, mounted on a simpler slide carriage, and its devastating close-range firepower made it ideal for the kind of ship-to-ship actions that characterised the naval war. The Royal Navy adopted the carronade rapidly, and by the early 1780s it was in widespread service. Its impact was felt in engagements across the Atlantic and the Caribbean, and it remained a standard naval weapon well into the Napoleonic Wars. The name "carronade" — derived directly from the Carron works — ensured that this Scottish ironworks was permanently associated with the naval warfare of the period.
Carron's significance extended beyond armaments. The works was a showpiece of the Industrial Revolution, and it attracted distinguished visitors. Benjamin Franklin visited Carron in 1759, the year of its founding, during one of his trips to Britain — though he was reportedly refused a detailed tour, possibly over concerns about industrial espionage. James Watt, the engineer who transformed the steam engine, had a long professional relationship with the Carron Company, which produced components for his engines. The ironworks thus sat at the intersection of industrial innovation, military technology, and the wider Atlantic world in which the American Revolution played out.
Key Figures
- Charles Gascoigne — General manager of the Carron Company during the Revolutionary War period; oversaw the development and marketing of the carronade and the expansion of ordnance production
- John Roebuck — Physician, chemist, and industrialist who co-founded the Carron Company in 1759; a pioneer of large-scale iron smelting in Scotland
- Samuel Garbett — Birmingham-based merchant and co-founder of Carron; his commercial networks connected the works to government ordnance contracts
- Benjamin Franklin — American polymath and diplomat who visited the Carron works in 1759, reflecting the international interest in Scottish industrial innovation
- James Watt — Scottish engineer whose steam engine development was connected to the Carron Company through the production of engine components
What's There Today
The Carron Ironworks closed in 1982 after more than two centuries of continuous operation, and most of the original works have been demolished. The site, located along the River Carron between Falkirk and Stenhousemuir, is now partly occupied by modern industrial and commercial development. However, several features survive to mark the historical significance of the place. The Carron Company offices, a handsome 18th-century building, still stand and are a recognisable landmark. A section of the old works boundary wall and the Carron blast furnace clock tower are also extant. The Falkirk area retains a strong industrial heritage identity, and Carron's history is featured in local interpretive resources.
For visitors, the Carron site is best understood in the context of the wider Falkirk area's industrial heritage. The Falkirk Wheel and the Kelpies, major modern attractions, draw visitors to the area, while the Callendar House museum in Falkirk provides historical context on the region's development. The Carron site itself is not a formal visitor attraction, but the surviving buildings can be viewed from public roads. The carronade as an artefact can be seen in collections at the National Museum of Scotland in Edinburgh, the Royal Armouries, and in various naval museums. The Carron Company's records are held in the Falkirk Archives, providing a rich documentary resource for researchers interested in the industrial dimensions of the Revolutionary War.
Sources
- Campbell, R.H., Carron Company (Oliver & Boyd, 1961)
- Watters, Brian, Where Iron Runs Like Water! A New History of Carron Iron Works, 1759-1982 (John Donald, 1998)
- Lavery, Brian, The Arming and Fitting of English Ships of War, 1600-1815 (Conway Maritime Press, 1987)
- Rodger, N.A.M., The Command of the Ocean: A Naval History of Britain, 1649-1815 (Allen Lane, 2004)
- National Records of Scotland, Carron Company Records (reference GD58)
Edinburgh Castle
Military
Historical Significance
Edinburgh Castle served as a major military garrison and recruiting centre during the American Revolutionary War, playing a central role in Scotland's contribution to the British war effort. Scotland provided a disproportionately large share of the soldiers who fought in North America, and Edinburgh Castle was a key mustering point for Highland and Lowland regiments alike. The Castle housed the headquarters of the military command in Scotland and functioned as a depot for arms, ammunition, and supplies destined for regiments serving overseas.
Several regiments raised or recruited in Scotland during the American war assembled at or passed through Edinburgh Castle before deployment. These included newly raised Highland regiments such as the 71st (Fraser's) Highlanders and the 78th (Seaforth) Highlanders, as well as Lowland units. The Highland regiments in particular gained a formidable combat reputation in the American war, fighting at engagements including Brooklyn, Brandywine, and the southern campaigns. Recruiting in Scotland was driven partly by economic hardship in the Highlands following the clearances, and partly by the established tradition of military service in Scottish society.
Edinburgh was also a centre of intellectual debate about the American crisis. The Scottish Enlightenment was at its height, and figures such as Adam Smith, David Hume (who died in 1776), and Adam Ferguson engaged with the political and philosophical questions raised by the Revolution. The city's university, clubs, and taverns were venues for discussion of American rights, imperial governance, and the justice of the war. Scottish opinion was divided, though the predominant sentiment among the educated classes, unlike in England, tended toward support for the government's position. This is a generalisation, however, and Scottish opinion was more nuanced than any simple summary can convey.
Key Figures
- Simon Fraser of Lovat - Raised the 71st Highlanders; fought at Saratoga, where he was killed in action (1777)
- Lord John Murray - Governor of Edinburgh Castle during the early war years
- Adam Smith - Published The Wealth of Nations in 1776 from Edinburgh, with significant analysis of colonial trade and imperial policy
- Henry Dundas - Scottish politician who became influential in managing Scottish military recruitment (his greatest influence came after the war, but his career began during it)
- Flora MacDonald - Jacobite heroine who emigrated to North Carolina; her family's Loyalist service in America connected the Highlands to the American conflict
What's There Today
Edinburgh Castle is one of Scotland's most visited historic attractions, managed by Historic Environment Scotland. The Castle sits atop Castle Rock in the centre of Edinburgh and is accessible from the Royal Mile. Visitors can explore the Great Hall, the Scottish National War Memorial, the Crown Jewels of Scotland (the Honours of Scotland), and the military prison. The Castle also houses the National War Museum of Scotland, which covers Scottish military history including the 18th-century period.
The regimental museums within the Castle, including those of the Royal Scots and the Royal Scots Dragoon Guards, contain material relating to the American Revolutionary War period, though the extent of specific American war displays varies. The Castle's fortifications, including the Half Moon Battery and the Argyle Battery, date from various periods and reflect the site's long military history. Edinburgh Castle is open year-round, with extended hours during the summer. The broader Old Town and New Town of Edinburgh, a UNESCO World Heritage Site, provide an outstanding Georgian urban context for understanding 18th-century Scottish life.
Sources
- Mackillop, Andrew. 'More Fruitful Than the Soil': Army, Empire and the Scottish Highlands, 1715-1815. Tuckwell Press, 2000.
- Brumwell, Stephen. Redcoats: The British Soldier and War in the Americas, 1755-1763. Cambridge University Press, 2002. (Covers the preceding conflict but provides essential context for Highland recruitment patterns.)
- Dziennik, Matthew P. The Fatal Land: War, Empire, and the Highland Soldier in British America. Yale University Press, 2015.
- Historic Environment Scotland guidebook: Edinburgh Castle. Various editions.
- Sher, Richard B. Church and University in the Scottish Enlightenment. Edinburgh University Press, 1985.
Fort George
Military
Historical Significance
Fort George, situated on a promontory jutting into the Moray Firth northeast of Inverness, is one of the most impressive 18th-century military fortifications in Europe. Built between 1748 and 1769 in the aftermath of the Jacobite rising of 1745, it was designed by the military engineer William Skinner as a permanent garrison capable of controlling the Scottish Highlands. By the time of the American Revolution, the fort had assumed a different role: it served as a major mustering and training depot for the Highland regiments that the British Army raised in large numbers to fight in North America.
The connection between Fort George and the American Revolution is direct and substantial. Highland soldiers passed through the fort on their way to the war. The 71st Regiment of Foot (Fraser's Highlanders), raised in 1775 by Simon Fraser of Lovat, recruited heavily across the northern Highlands and mustered at Fort George before being dispatched to America. The 71st fought at Brooklyn, Brier Creek, Savannah, and Cowpens — where much of the regiment was captured. They were among the most heavily engaged British units of the entire war. The 78th Regiment of Foot (Seaforth Highlanders), raised in 1778 by Kenneth Mackenzie, Earl of Seaforth, also drew on the Highland recruiting grounds that Fort George served and saw active service in the closing years of the conflict.
The broader context matters as well. The same Highland society that had been suppressed after Culloden was, within a generation, providing some of the British Empire's most effective soldiers. The American Revolution accelerated this transformation. Highland landowners, eager to demonstrate loyalty and secure government favour, raised entire regiments from their estates. The men who enlisted did so for complex reasons — economic necessity, clan obligation, and the promise of land grants in the colonies among them. Fort George was the physical point at which many of these recruits were transformed from Gaelic-speaking crofters into soldiers of the Crown, before being shipped across the Atlantic to fight against American independence.
Key Figures
- Simon Fraser of Lovat — Raised the 71st (Fraser's) Highlanders in 1775; son of the Jacobite lord executed after Culloden, his regiment's service symbolised the Highland clans' integration into the British military
- Archibald Campbell — Officer in the 71st Highlanders who led the British capture of Savannah in December 1778; later served as Governor of Jamaica
- Kenneth Mackenzie, Earl of Seaforth — Raised the 78th (Seaforth) Highlanders in 1778 for service in the American war
- Lieutenant Colonel Banastre Tarleton — British cavalry commander at Cowpens (1781), where much of the 71st was captured; his defeat marked a turning point in the Southern campaign
- William Skinner — Military engineer who designed Fort George; his fortress provided the infrastructure for Highland military mobilisation a generation later
What's There Today
Fort George remains a working military installation — one of the oldest continuously occupied military sites in Britain — and is managed by Historic Environment Scotland as a visitor attraction. The fortifications are virtually unchanged from the 18th century: the massive ramparts, bastions, ravelin, and ditch survive intact, and the overall design can be appreciated from the rampart walk that circuits the entire site. The fort houses the Highlanders' Museum, which tells the story of the Highland regiments from their 18th-century origins through to the present day. Collections include uniforms, weapons, medals, and documents from the American Revolutionary War period, providing tangible evidence of the Highland soldiers' experience in the conflict.
The fort is located approximately 11 miles northeast of Inverness, off the B9006. The site is open year-round, with extended hours in summer. Beyond the regimental museum, visitors can explore the reconstructed barrack rooms, the magazine, the chapel, and the garrison buildings, all of which convey the scale and purpose of this military installation. The setting on the Moray Firth is dramatic, with views toward the Black Isle and the northern Highlands. Fort George is a key site for understanding the Scottish military contribution to the American Revolution and the broader transformation of Highland society in the 18th century.
Sources
- Mackillop, Andrew, 'More Fruitful Than the Soil': Army, Empire and the Scottish Highlands, 1715-1815 (Tuckwell Press, 2000)
- Historic Environment Scotland, Fort George — official guidebook and interpretive materials
- Brumwell, Stephen, Redcoats: The British Soldier and War in the Americas, 1755-1763 (Cambridge University Press, 2002) — provides context on Highland recruitment practices that continued into the Revolution
- Prebble, John, Mutiny: Highland Regiments in Revolt, 1743-1804 (Secker & Warburg, 1975)
- Spring, Matthew H., With Zeal and With Bayonets Only: The British Army on Campaign in North America, 1775-1783 (University of Oklahoma Press, 2008)
Greenock Harbour
Military
Historical Significance
Greenock, situated on the south bank of the Firth of Clyde, served as the principal embarkation port for Highland regiments dispatched to fight in the American war. Its deep-water harbour and position at the gateway to the Atlantic made it the natural assembly point for troops raised across the Scottish Highlands and Lowlands. Beginning in 1776, thousands of soldiers sailed from Greenock's quays to join the British war effort in North America, making this modest Clyde port one of the most significant military departure points of the entire conflict.
The most notable embarkation was that of Fraser's 71st Regiment of Foot (Fraser's Highlanders), raised in 1775 by Simon Fraser of Lovat from among the clans of the central and western Highlands. In 1776, over 3,000 Highland soldiers, including the two battalions of the 71st, sailed from Greenock to join General Howe's forces in North America. The 71st went on to fight at Brooklyn, Brandywine, Savannah, and Cowpens, suffering heavily throughout the war. Other regiments that passed through Greenock included the 42nd (Black Watch), the 73rd (MacLeod's Highlanders), and various Loyalist units being transported to the American theatre.
Greenock's military role reflected the broader mobilisation of the Scottish Highlands during the American Revolution, a transformation that saw communities still recovering from the aftermath of Culloden and the Highland Clearances providing some of Britain's most effective soldiers for a conflict three thousand miles away. The harbour was also defended during the war: Fort Beauclerc, the gun battery protecting the anchorage, was extended and reinforced in response to the threat posed by American and French privateers operating in British waters, particularly after John Paul Jones's raids along the western Scottish coast in 1778.
Key Figures
- Simon Fraser of Lovat (1726-1782) - Raised Fraser's 71st Highlanders for American service; the regiment embarked from Greenock in 1776 and became one of the most heavily engaged units in the war.
- Banastre Tarleton (1754-1833) - British cavalry commander whose force defeated part of the 71st Highlanders at Cowpens in January 1781; the regiment's journey began at Greenock.
- John Paul Jones (1747-1792) - Continental Navy captain whose raids on the Scottish coast in 1778-1779 prompted the reinforcement of Greenock's Fort Beauclerc.
- Lord Frederick North (1732-1792) - Prime Minister whose government authorised the large-scale recruitment of Highland regiments for American service.
- John Mackenzie, Lord MacLeod (1727-1789) - Raised the 73rd (MacLeod's) Highlanders, another regiment that embarked through Clyde ports for overseas service during the war.
What's There Today
Greenock's harbour and waterfront have been substantially redeveloped since the eighteenth century, but the town retains significant historical architecture. The most prominent landmark on the quay is the neoclassical Custom House, designed by William Burn and completed in 1818, which now houses HM Revenue and Customs and is considered one of the finest custom house buildings in Britain. While postdating the Revolution by four decades, it reflects the ongoing importance of the port in transatlantic trade and customs enforcement.
The site of Fort Beauclerc is in the western part of the town near the Battery Park, which takes its name from the wartime gun emplacement. The McLean Museum and Art Gallery on Kelly Street holds collections relating to Greenock's maritime history, including material on the town's role as a military embarkation point. The Greenock waterfront offers views across the Firth of Clyde to the Argyll hills, the same view seen by thousands of Highland soldiers as they sailed for America. Greenock is easily accessible by train from Glasgow, approximately forty minutes west.
Sources
- Stuart Reid, Highland Clansman 1689-1746 and 18th Century Highlanders (Osprey Publishing, 1997)
- Stephen Brumwell, Redcoats: The British Soldier and War in the Americas, 1755-1763 (Cambridge University Press, 2002)
- Matthew P. Dziennik, The Fatal Land: War, Empire, and the Highland Soldier in British America (Yale University Press, 2015)
- Inverclyde Council and McLean Museum, "Greenock's Maritime Heritage," inverclyde.gov.uk
Leith Fort
Military
Historical Significance
In September 1779, the Franco-American squadron commanded by John Paul Jones sailed into the Firth of Forth and threatened to raid the port of Leith, Edinburgh's harbour and commercial gateway. Jones's cruise was part of the broader Franco-American naval effort that followed France's entry into the war in February 1778; his squadron sailed under American colours but was equipped and partly manned by France, and its operations coincided with the combined Franco-Spanish fleet's incursion into the English Channel that same summer. Commanding the frigate Bonhomme Richard, Jones intended to hold Leith to ransom and destroy its shipping. Only a sudden change of wind forced the squadron to withdraw, but the episode sent shockwaves through Edinburgh and exposed how thinly defended Britain's coastline was.
The near-raid on Leith provoked immediate action. Edinburgh's citizens, led by the city's merchant community, raised funds for a coastal battery to defend the port. The nine-gun fortification was designed by James Craig, the architect best known for his plan of Edinburgh's celebrated New Town. Construction began in 1780, and the resulting Leith Fort represented a direct military response to the American Revolution being fought on British home waters. The battery was part of a broader pattern of coastal defence improvements prompted by John Paul Jones's raids around the British Isles in 1778-1779.
The panic generated by Jones's appearance in the Forth illustrates a dimension of the American Revolution often overlooked: the war's direct impact on British civilian populations. Edinburgh residents could see the enemy squadron from Calton Hill and the coast at Leith. The episode undermined public confidence in the Royal Navy's ability to protect the home islands and added to growing war-weariness that strengthened the hand of opposition politicians calling for peace with America.
Key Figures
- John Paul Jones (1747-1792) - Scottish-born Continental Navy captain whose daring raids around Britain in 1778-1779 terrorised coastal communities; his appearance in the Firth of Forth directly prompted the construction of Leith Fort.
- James Craig (1744-1795) - Edinburgh architect who designed the New Town street plan and the defensive battery at Leith Fort; his involvement underscores the civilian urgency of the response.
- Benjamin Franklin (1706-1790) - American Commissioner in Paris who helped arrange French naval support for Jones's squadron and approved the Firth of Forth expedition.
- John Murray, 4th Duke of Atholl (1755-1830) - Scottish peer who raised alarm about coastal defences in Scotland following Jones's raids.
- Lord Provost David Steuart (d. 1797) - Edinburgh's chief magistrate who coordinated the city's emergency defensive response to Jones's threat.
What's There Today
Leith Fort is located in the Leith district of Edinburgh, north of the city centre near the junction of North Fort Street and Ferry Road. The fort is a Category B-listed structure, and its walls and gatehouse survive, though the site has been substantially developed for residential housing. The remaining military architecture, including the perimeter walls and the arched gateway, can be viewed from the surrounding streets.
The fort is not a museum or managed heritage site, so there is no visitor centre or interpretive displays on site. However, the surrounding Leith area has undergone significant regeneration and offers numerous restaurants, bars, and cultural attractions along the waterfront, including the Royal Yacht Britannia at Ocean Terminal. Visitors interested in the John Paul Jones connection should consider combining this stop with a visit to Jones's birthplace cottage at Arbigland near Kirkbean in Dumfries and Galloway, approximately two hours south by car. The nearby Signal Tower at Leith Docks also provides context for the port's maritime history.
Sources
- Evan Thomas, John Paul Jones: Sailor, Hero, Father of the American Navy (Simon & Schuster, 2003)
- Samuel Eliot Morison, John Paul Jones: A Sailor's Biography (Little, Brown, 1959)
- Historic Environment Scotland, "Leith Fort" Category B listing, portal.historicenvironment.scot
- James S. Marshall, "John Paul Jones and the Firth of Forth Raid," The Mariner's Mirror 62, no. 3 (1976)
- Jonathan R. Dull, The French Navy and American Independence (Princeton University Press, 1975)
St Mary's Isle Kirkcudbright
Military
Historical Significance
On April 23, 1778 — the same day as the Whitehaven raid — Captain John Paul Jones sailed across the Solway Firth to St Mary's Isle, a peninsula near the town of Kirkcudbright in Galloway, Scotland. His plan was to kidnap Dunbar Hamilton Douglas, 4th Earl of Selkirk, and hold him as a hostage to exchange for American sailors held prisoner in Britain. The scheme reflected Jones's frustration at the harsh treatment of captured American seamen, who were often confined in appalling conditions and denied prisoner-of-war status. A high-value hostage, Jones reasoned, could force the British government to negotiate an exchange.
The plan failed because the Earl was not at home. Jones later claimed that he intended to withdraw quietly, but his officers and crew — motivated by the prospect of plunder — insisted on going ashore. A party of armed sailors entered the house and demanded the family silver. Lady Selkirk — Helen Hamilton Douglas, Countess of Selkirk — faced the intruders with remarkable composure. Alone with her children and servants, she assessed the situation quickly, ordered the butler to surrender the plate, and managed the encounter so calmly that accounts from both sides credit her conduct with preventing violence. Her own letter describing the event, preserved in the Selkirk family papers, is a striking document: precise, indignant, and wholly self-possessed. The silver was taken to the Ranger. Jones was embarrassed by the episode and wrote an extraordinary letter of apology to Lady Selkirk, promising to return the silver. He eventually did so in 1784, after the war, purchasing it back from the prize proceedings in France — an act that became a well-known episode in his personal legend.
The St Mary's Isle incident is historically significant both as part of Jones's Irish Sea cruise and for what it reveals about the tensions between Jones's ambitions as a gentleman-officer and the rougher realities of naval warfare and crew expectations. It also illustrates the Revolutionary War's direct impact on civilian life in Britain, which is often overlooked in narratives focused on battles in North America.
Key Figures
- John Paul Jones - Continental Navy captain who planned the kidnapping; he had grown up nearby in Kirkbean, across the Solway
- Dunbar Hamilton Douglas, 4th Earl of Selkirk - Intended kidnapping target, absent during the raid
- Helen Hamilton Douglas, Countess of Selkirk - Handled the confrontation with Jones's crew and later received his letter of apology
- Lieutenant Samuel Wallingford - Led the landing party at St Mary's Isle (some accounts differ on the composition of the shore party)
What's There Today
St Mary's Isle is a residential area on a peninsula jutting into Kirkcudbright Bay. The original Selkirk family house, St Mary's Isle House, was largely demolished in the 20th century, though some associated structures remain. The site is on private land, and there is limited public access to the immediate grounds of the former house. However, the approach and general setting can be appreciated from the town of Kirkcudbright and the surrounding paths.
Kirkcudbright itself is a charming small town with a thriving arts community, sometimes called the "Artists' Town." The Tolbooth Art Centre and Kirkcudbright Galleries provide local history context. Interpretive information about the Jones raid can be found locally, and the event is part of the town's heritage narrative. Kirkcudbright is accessible by road (A711/A755) from Dumfries and Castle Douglas. The wider Galloway coast offers opportunities to trace Jones's early life, including his birthplace at Arbigland near Kirkbean, where a small museum and cottage are open to visitors.
Sources
- Morison, Samuel Eliot, John Paul Jones: A Sailor's Biography (Little, Brown, 1959)
- Thomas, Evan, John Paul Jones: Sailor, Hero, Father of the American Navy (Simon & Schuster, 2003)
- Jones, John Paul, letter to the Countess of Selkirk, May 8, 1778 — reproduced in various editions of Jones's correspondence
- Mackenzie, Alexander Slidell, Life of John Paul Jones (Harper & Brothers, 1846)
- Schaeper, Thomas J., John Paul Jones and the Battle off Flamborough Head (Peter Lang, 1989)
- Kirkcudbright History Society, local history resources
Stirling Castle
Military
Historical Significance
Stirling Castle, commanding the strategically vital crossing of the River Forth in central Scotland, served as a military garrison and mustering point during the American Revolutionary War. Like Edinburgh Castle, Stirling was part of the network of Scottish fortifications that supported recruiting, training, and deployment of troops for service in North America and other theatres of the global conflict. Scottish regiments, both Highland and Lowland, were mustered at Stirling before being dispatched south to embarkation ports.
Scotland's contribution to the British Army during the American war was substantial. The Scottish Highlands in particular became a major recruiting ground, and Stirling's central location between the Highlands and the Lowlands made it a natural assembly point. Regiments raised under letters of service granted to clan chiefs and landed gentry gathered at garrison towns like Stirling before marching to war. The 42nd (Royal Highland) Regiment of Foot (the Black Watch), which had a long association with Stirling, served with distinction in the American war, fighting at Long Island, Brandywine, Germantown, and Monmouth among other engagements.
The use of Highland soldiers in the American war was politically significant. Only three decades earlier, many Highland clans had risen in rebellion against the Hanoverian Crown during the Jacobite rising of 1745. The recruitment of Highlanders into the British Army during the Seven Years' War and the American Revolution represented a remarkable transformation in the relationship between the Highlands and the British state. Stirling Castle, which had itself been besieged during the 1745 rising, was now a staging post for Highland soldiers fighting to preserve the British Empire.
Key Figures
- Lord John Murray - Colonel of the 42nd (Black Watch) Regiment, which was associated with Stirling and served in America
- Sir William Howe - British Commander-in-Chief in America (1775-1778), commanded troops that included Scottish regiments mustered at Stirling and elsewhere
- Simon Fraser of Lovat - Raised the 71st Highlanders, some of whom may have passed through Stirling on their way south
- Recruiting officers of the Stirling garrison - Responsible for local enlistment efforts (individual names are generally not prominent in surviving records)
What's There Today
Stirling Castle is one of Scotland's grandest and most historically important castles, managed by Historic Environment Scotland. The Castle complex includes the magnificent Great Hall (built for James IV), the Renaissance Royal Palace, the Chapel Royal, and extensive fortifications. The Argyll and Sutherland Highlanders Regimental Museum, housed within the Castle, covers the regiment's history and includes material from the 18th century. The museum provides context for understanding the Scottish military tradition that supplied so many soldiers to the American war.
The Castle sits atop a volcanic crag overlooking the city of Stirling and the Forth valley, with views extending to the Highlands. It is open year-round, with full visitor facilities including guided tours, audio guides, and exhibition spaces. The 18th-century outer defences, including ravelins and batteries, date broadly from the period of the American war and reflect the Castle's continued military significance. Stirling is accessible by rail from Edinburgh and Glasgow, and the Castle is a short uphill walk from the city centre. The nearby Old Town retains considerable historic character, and the Church of the Holy Rude and Mar's Wark are also worth visiting.
Sources
- Dziennik, Matthew P. The Fatal Land: War, Empire, and the Highland Soldier in British America. Yale University Press, 2015.
- Mackillop, Andrew. 'More Fruitful Than the Soil': Army, Empire and the Scottish Highlands, 1715-1815. Tuckwell Press, 2000.
- Fawcett, Richard. Stirling Castle. Historic Scotland/Batsford, 1995.
- Historic Environment Scotland guidebook: Stirling Castle. Various editions.
- Stewart, David. Sketches of the Character, Manners, and Present State of the Highlanders of Scotland. 2 vols. Edinburgh, 1822. (Contemporary account of Highland regiments, though written after the fact.)
Dunmore Park (The Dunmore Pineapple)
People
Historical Significance
Dunmore Park, located near the village of Airth in Stirlingshire, was the Scottish estate of John Murray, 4th Earl of Dunmore — a figure whose actions as the last Royal Governor of Virginia placed him at the centre of one of the most consequential and morally complex episodes of the American Revolution. Lord Dunmore governed Virginia from 1771 until he was effectively driven from power in 1775. As the colony moved toward open rebellion, Dunmore issued his famous proclamation on November 7, 1775, from aboard a Royal Navy ship in the Chesapeake. The document declared martial law and offered freedom to enslaved people and indentured servants belonging to rebel owners who were willing and able to bear arms for the Crown.
Lord Dunmore's Proclamation was a calculated military measure designed to destabilise the rebel economy and bolster British manpower, but its implications reached far beyond the battlefield. Approximately 800 to 1,000 enslaved people escaped to British lines in response, forming what became known as "Lord Dunmore's Ethiopian Regiment," wearing uniforms bearing the motto "Liberty to Slaves." The proclamation galvanised opinion on both sides: it outraged Virginia slaveholders and pushed some moderates toward independence, while it offered a desperate hope of freedom to the enslaved. Many who responded died of disease, particularly during a devastating smallpox outbreak at Dunmore's base on Gwynn's Island in 1776. Dunmore's offer was pragmatic, not principled — he himself held enslaved people and did not free them — yet the proclamation exposed the Revolution's central moral contradiction more starkly than any parliamentary speech. It demonstrated that the language of liberty, once loosed, could not easily be confined to those whom the revolutionaries deemed worthy of it. The broader promises of British freedom proved inconsistent throughout the war, but for the enslaved people who risked everything to reach Dunmore's lines, the proclamation represented a concrete, if perilous, path to emancipation.
Dunmore himself returned to Britain after his failed attempt to retain Virginia. His Scottish estate at Dunmore Park is notable for an extraordinary architectural feature: the Dunmore Pineapple, a garden building whose upper storey is sculpted in stone to represent a giant pineapple. The lower hothouse level was built around 1761, while the iconic pineapple dome was added in 1777 — during the very years of the Revolutionary War. Whether Dunmore commissioned the pineapple from America or upon his return to Scotland, it stands as an eccentric monument from the era, linking a Scottish aristocratic estate to the upheavals of the American Revolution and the question of who, exactly, was entitled to the liberty the conflict was fought over.
Key Figures
- John Murray, 4th Earl of Dunmore — Last Royal Governor of Virginia; his November 1775 proclamation offering freedom to enslaved people who joined the British was one of the war's most provocative acts
- Enslaved people who responded to the proclamation — Approximately 800 to 1,000 men, women, and children escaped to British lines; those who bore arms formed "Lord Dunmore's Ethiopian Regiment," though the majority were employed in non-combat roles or perished from disease
- Lady Charlotte Murray, Countess of Dunmore — Dunmore's wife, who remained in Virginia during the early stages of the crisis before departing for Britain; her experience reflected the disruption the war caused to loyalist families
- General George Washington — Commander of the Continental Army, who recognised the proclamation's threat to the rebel cause and urged measures to prevent enslaved people from reaching British lines
What's There Today
The Dunmore Pineapple is one of Scotland's most unusual and photographed historic buildings. The structure consists of a conventional classical garden pavilion at ground level, with the extraordinary 14-metre stone pineapple rising above it. The craftsmanship of the pineapple dome is remarkable: each leaf is individually carved and angled so that rainwater drains away, preventing frost damage. The building was originally part of a walled garden designed to grow exotic fruits, including pineapples, in heated glasshouses — a fashionable pursuit among the 18th-century Scottish aristocracy. The Dunmore Pineapple is now owned by the National Trust for Scotland, and the surrounding grounds are maintained as a garden open to the public. The pavilion itself is available as a holiday rental through the Landmark Trust.
Dunmore Park is located near Airth, approximately 7 miles east of Stirling, accessible by minor roads off the A905. The estate grounds, including the walled garden and the Pineapple, can be visited during daylight hours. The wider Dunmore Park estate is largely in private ownership, and the main house (Dunmore House) is no longer extant. For visitors tracing the Revolutionary War trail, the site pairs naturally with the Carron Ironworks site at nearby Falkirk, creating a cluster of Revolution-connected locations in the Forth valley. Interpretive signage at the Pineapple explains its history, though the full story of Lord Dunmore's role in Virginia and the significance of his proclamation deserves broader telling at the site.
Sources
- Selby, John E., The Revolution in Virginia, 1775-1783, rev. ed. (University of Virginia Press, 2013)
- Holton, Woody, Forced Founders: Indians, Debtors, Slaves, and the Making of the American Revolution in Virginia (University of North Carolina Press, 1999)
- Pybus, Cassandra, Epic Journeys of Freedom: Runaway Slaves of the American Revolution and Their Global Quest for Liberty (Beacon Press, 2006)
- National Trust for Scotland, The Dunmore Pineapple — site guide and interpretive materials
- Gilbert, Alan, Black Patriots and Loyalists: Fighting for Emancipation in the War for Independence (University of Chicago Press, 2012)
Flora MacDonald Grave, Kilmuir Cemetery
People
Historical Significance
Flora MacDonald is one of the most remarkable figures connecting Scottish and American history. Already famous for aiding the escape of Bonnie Prince Charlie after the Battle of Culloden in 1746, she emigrated with her husband Allan MacDonald to North Carolina in 1774, joining a large Highland community in the Cape Fear region. The MacDonalds arrived just as tensions between Patriot and Loyalist factions were reaching a breaking point in the colony.
The Highlanders' loyalty to the Crown in 1776 was rooted in a complex blend of motives. Many, including the MacDonalds, had taken oaths of allegiance to George III upon emigrating, and Highland culture placed profound weight on the honour of a sworn oath. Governor Josiah Martin actively recruited among the clans, and Allan MacDonald raised the Anson County Battalion of Loyalist militia. Flora, already a figure of legendary stature, reportedly rode among the clansmen to encourage recruitment, lending the prestige of her Jacobite fame to the Loyalist cause. On 27 February 1776, the Loyalist force of roughly 1,600 Highlanders marched toward the coast to rendezvous with a British naval expedition, but were intercepted at Moore's Creek Bridge by Patriot militia under Colonels Richard Caswell and Alexander Lillington. The Patriots had partially dismantled the bridge and greased its timbers; the Highlanders' charge across it was cut to pieces in minutes. The defeat shattered Loyalist power in North Carolina and secured the colony for the Patriot cause months before the Declaration of Independence. Allan MacDonald and Flora's son-in-law Alexander MacLeod were among those captured.
Flora's circumstances after Moore's Creek illustrate the particular burdens the Revolution placed on women. With Allan imprisoned, she was left to manage the family's affairs alone amid hostile neighbours. Patriot authorities confiscated the plantation, and she endured what she later described as insults and deprivations. Her experience was shared by thousands of Loyalist women across the colonies who, as historian Mary Beth Norton has documented, were thrust into roles as heads of household, negotiators with occupying forces, and ultimately refugees — yet whose stories were largely omitted from early histories of the war. Flora's fame ensured her ordeal was recorded; most Loyalist women left little trace. She returned to Skye around 1779, her health broken. Allan eventually followed after his release. She spent her final years at Kingsburgh House, dying on 4 March 1790. Her funeral was reportedly one of the largest ever seen on the island. In 1880, a Celtic cross was erected at her grave in Kilmuir Cemetery, replacing an earlier stone chipped away by souvenir hunters.
Key Figures
- Flora MacDonald (1722-1790) - Scottish Jacobite heroine turned Loyalist figurehead in North Carolina; her celebrity status made her a powerful rallying symbol for Crown supporters in the Cape Fear region.
- Allan MacDonald of Kingsburgh (c.1722-1792) - Flora's husband; commanded the Anson County Loyalist Battalion and was captured at Moore's Creek Bridge; later exchanged and returned to Skye.
- Josiah Martin (1737-1786) - Last Royal Governor of North Carolina; organised the Highland Loyalist rising that led to Moore's Creek Bridge.
- Richard Caswell (1729-1789) - Patriot militia colonel who commanded forces at Moore's Creek Bridge; later first Governor of the State of North Carolina.
- Alexander MacLeod of Glendale - Flora's son-in-law; served as a Loyalist officer and was captured at Moore's Creek Bridge alongside Allan MacDonald.
What's There Today
Kilmuir Cemetery occupies a dramatic clifftop position at the northern tip of the Trotternish peninsula on the Isle of Skye, with panoramic views across the Sound of Raasay to the Scottish mainland. Flora MacDonald's grave is marked by the imposing Celtic cross erected in 1880, one of the most-visited monuments in the Highlands. The original gravestone was destroyed by souvenir hunters, and even the 1880 cross has required restoration. An interpretive panel explains Flora's life and her American connections.
Adjacent to the cemetery, the Skye Museum of Island Life preserves a cluster of traditional thatched cottages illustrating Highland life in the era when Flora and thousands like her emigrated to the American colonies. The museum provides valuable context for understanding the economic pressures and clan disruptions that drove Highland emigration. The site is freely accessible year-round, though the museum operates seasonally. Visitors should allow time for the scenic drive along the Trotternish peninsula.
Sources
- Flora Fraser, Flora MacDonald: The Most Loyal Rebel (Knopf, 2023)
- Hugh Douglas, Flora MacDonald: The Most Loyal Rebel (Sutton Publishing, 1993)
- James Banks, David Fanning's Narrative and the Battle of Moore's Creek Bridge (University of North Carolina Press, 1981)
- Historic Environment Scotland, "Kilmuir Cemetery" listing, portal.historicenvironment.scot
- Rankin, Hugh F., "The Moore's Creek Bridge Campaign, 1776," North Carolina Historical Review, Vol. 30, No. 1 (January 1953)
- Norton, Mary Beth, Liberty's Daughters: The Revolutionary Experience of American Women, 1750-1800 (Little, Brown, 1980)
- Skye Museum of Island Life, "Flora MacDonald and Highland Emigration," skyemuseum.co.uk
James Wilson Birthplace, Carskerdo
People
Historical Significance
James Wilson, born on 14 September 1742 at the farm of Carskerdo near the village of Ceres in Fife, became one of the most intellectually formidable of America's Founding Fathers. He studied at the University of St Andrews, then briefly at the University of Glasgow and the University of Edinburgh, before emigrating to Pennsylvania in 1765. In Philadelphia he studied law under John Dickinson and quickly rose to prominence as a legal theorist and advocate for colonial rights.
Wilson holds a distinction shared by only five other men in American history: he signed both the Declaration of Independence in 1776 and the United States Constitution in 1787. At the Constitutional Convention, he was second only to Gouverneur Morris in the number of speeches delivered, and his advocacy for popular sovereignty and proportional representation profoundly shaped the final document. Wilson argued forcefully that the new government derived its authority from the people rather than from the states, a principle that became foundational to American constitutional law.
In 1789, George Washington appointed Wilson as one of the original six justices of the United States Supreme Court. On the bench, his opinion in Chisholm v. Georgia (1793) articulated a sweeping vision of federal judicial authority that, though controversial at the time, anticipated later developments in constitutional interpretation. His later years were marked by financial ruin from land speculation, and he died in disgrace in 1798. Despite this unhappy ending, modern legal scholars have increasingly recognised Wilson as among the most original constitutional thinkers of the founding generation. His Fife birthplace connects one of Scotland's most modest farming communities to the highest levels of American statecraft.
Key Figures
- James Wilson (1742-1798) - Fife-born lawyer, signer of both the Declaration of Independence and the Constitution, and original Supreme Court justice; one of the most influential architects of American constitutional government.
- John Dickinson (1732-1808) - Philadelphia lawyer under whom Wilson studied; author of Letters from a Farmer in Pennsylvania and delegate to the Constitutional Convention.
- George Washington (1732-1799) - Commander-in-Chief and first President; appointed Wilson to the Supreme Court in 1789.
- Benjamin Franklin (1706-1790) - Fellow Pennsylvania delegate who, alongside Wilson, signed both the Declaration and the Constitution.
- Gouverneur Morris (1752-1816) - Constitutional Convention delegate and principal drafter of the Constitution's final text; Wilson's closest collaborator at the Convention.
What's There Today
Carskerdo is a working farm located roughly two miles south of the village of Ceres in the East Neuk of Fife. A commemorative plaque marks Wilson's birthplace, though the original farmhouse has been substantially altered over the centuries. The site is on private agricultural land, so visitors should view the plaque from the road or seek permission from the landowner before approaching.
The nearby village of Ceres is one of the most picturesque in Fife and offers a small folk museum. The University of St Andrews, where Wilson studied, is approximately eight miles to the east and features the preserved medieval college buildings he would have known. St Andrews itself is a rewarding destination, with the university's heritage collections providing context for the Scottish Enlightenment education that shaped Wilson and many other Scots who influenced the American founding. Visitors combining this site with others on the Fife trail should allow a half-day for the area.
Sources
- Charles Page Smith, James Wilson: Founding Father, 1742-1798 (University of North Carolina Press, 1956)
- Mark David Hall, The Political and Legal Philosophy of James Wilson, 1742-1798 (University of Missouri Press, 1997)
- Nicholas Pedersen, "The Lost Founder: James Wilson in American Memory," Yale Journal of Law & the Humanities 22, no. 2 (2010)
- University of St Andrews, "Notable Alumni and Connections," st-andrews.ac.uk
John Paul Jones Birthplace Cottage
People
Historical Significance
John Paul Jones, the Continental Navy's most celebrated captain, was born John Paul on July 6, 1747, in a small cottage on the Arbigland estate near the village of Kirkbean in Kirkcudbrightshire, Scotland. His father, John Paul Sr., was the head gardener on the estate, which belonged to the Craik family. The cottage where Jones was born and spent his early childhood still stands — a modest stone dwelling that speaks to the humble origins of a man who would become one of the most consequential naval officers of the American Revolution.
Young John Paul left Kirkbean at the age of thirteen, apprenticed to a merchant shipowner at Whitehaven across the Solway Firth. He spent the next decade and a half at sea, trading between Britain, the West Indies, and the American colonies. After a series of incidents — including a killing in Tobago in 1773 that remains poorly documented — he added "Jones" to his name and settled in Virginia, where he secured a commission in the fledgling Continental Navy through the patronage of influential figures in the Continental Congress. His transformation from a Scottish gardener's son to an American naval hero is one of the most remarkable personal stories of the Revolution.
Jones's significance to the war was established primarily during his 1778 cruise aboard the sloop Ranger, when he carried the conflict to British home waters. Sailing from Brest, he raided his former port of Whitehaven, attempted to kidnap the Earl of Selkirk at nearby St Mary's Isle, and defeated HMS Drake off Carrickfergus in Ireland. In 1779, commanding the Bonhomme Richard, he engaged HMS Serapis off Flamborough Head in one of the war's most famous naval actions, reportedly declaring "I have not yet begun to fight" when called upon to surrender. These exploits demonstrated that the Continental Navy could threaten Britain's coasts and disrupt its sense of maritime security.
The Kirkbean birthplace is the starting point for understanding Jones's career and the Scottish dimension of the American Revolution. Many Scots served on both sides of the conflict, and the Galloway coast — with Kirkbean, Whitehaven across the water, and St Mary's Isle nearby — is one of the most concentrated landscapes of Revolutionary War memory in Britain.
Key Figures
- John Paul Jones — Born John Paul at Arbigland in 1747; Continental Navy captain whose raids on British waters in 1778-1779 made him America's first naval hero
- John Paul Sr. — Jones's father, head gardener on the Arbigland estate; his modest station shaped his son's drive for recognition and advancement
- William Craik — Laird of Arbigland, employer of John Paul Sr.; his estate is where the cottage stands
- Robert Morris — Philadelphia merchant and member of Congress who was instrumental in supporting Jones's naval commissions
- Benjamin Franklin — American Commissioner in Paris who authorized and supported Jones's cruises in European waters
What's There Today
The John Paul Jones Birthplace Cottage is preserved as a small museum dedicated to the life of the naval captain. The whitewashed stone cottage has been restored to reflect its 18th-century appearance, with period furnishings and interpretive displays covering Jones's early life in Scotland, his seafaring career, and his role in the American Revolution. The museum holds artefacts, documents, and illustrations relating to Jones's major engagements. A garden to the rear of the cottage has been maintained in a manner appropriate to the period.
The cottage is located on the Arbigland estate, which lies on the Solway coast south of Kirkbean, accessible by minor roads off the A710 (the Solway Coast road from Dumfries). The estate's gardens are open to visitors during the summer months. The surrounding coastline offers views across the Solway Firth to Whitehaven — the English port that Jones raided in 1778 and from which he first went to sea as a boy. Kirkbean parish church, where Jones was baptised, is nearby and contains a font donated by the United States Navy in 1945. The broader Galloway coast provides further sites associated with Jones, including St Mary's Isle at Kirkcudbright.
Sources
- Morison, Samuel Eliot, John Paul Jones: A Sailor's Biography (Little, Brown, 1959)
- Thomas, Evan, John Paul Jones: Sailor, Hero, Father of the American Navy (Simon & Schuster, 2003)
- Mackenzie, Alexander Slidell, Life of John Paul Jones (Harper & Brothers, 1846)
- John Paul Jones Birthplace Museum, Arbigland Estate, exhibition materials and visitor information
- Fry, Michael, The Scottish Empire (Tuckwell Press, 2001)
John Witherspoon Birthplace, Gifford
People
Historical Significance
John Witherspoon was born on 5 February 1723 in the manse of the parish church at Gifford, East Lothian, where his father, the Reverend James Alexander Witherspoon, served as minister. The village of Gifford, a planned estate village at the foot of the Lammermuir Hills, provided the setting for Witherspoon's earliest years before he was sent to the grammar school in nearby Haddington and then to the University of Edinburgh, where he enrolled at the age of thirteen and completed both his arts and divinity degrees.
Witherspoon's East Lothian upbringing steeped him in the traditions of Scottish Presbyterianism that would profoundly shape his American career. His father's ministry, the intellectual rigour of his Edinburgh education, and the Scottish kirk's tradition of principled resistance to unjust authority all informed the political theology Witherspoon carried to America. When he emigrated in 1768 to become president of the College of New Jersey (Princeton), he brought with him a distinctly Scottish conviction that moral philosophy, religious faith, and civic duty were inseparable.
At Princeton, Witherspoon became a central figure in the American Revolution. He was the only active clergyman to sign the Declaration of Independence and served continuously in the Continental Congress from 1776 to 1782. His influence as an educator was equally profound: Princeton under his leadership produced an extraordinary number of the new nation's political leaders, including James Madison. The trajectory from the Gifford manse to the Continental Congress illustrates the remarkable pipeline of Scottish intellectual talent that flowed into the American founding. Witherspoon died in 1794 at his farm near Princeton, but his Scottish origins remained central to his identity throughout his life.
Key Figures
- John Witherspoon (1723-1794) - Born in Gifford; became president of Princeton, signer of the Declaration of Independence, and one of the most influential figures in the American founding.
- Rev. James Alexander Witherspoon (d. 1759) - John's father; minister of Gifford's Yester Parish Church, whose example of scholarly ministry shaped his son's career.
- Anne Walker Witherspoon - John's mother; a descendant of John Welsh, the celebrated Scottish Reformed minister, connecting John to a distinguished line of Presbyterian clergy.
- James Madison (1751-1836) - Witherspoon's student at Princeton; the "Father of the Constitution" and fourth President, who credited Witherspoon's teaching with shaping his political thought.
- Richard Stockton (1730-1781) - New Jersey lawyer and Princeton trustee who travelled to Scotland in 1766 to recruit Witherspoon for the college presidency.
What's There Today
Gifford is a picturesque village of whitewashed houses approximately twenty-five miles east of Edinburgh, situated at the northern edge of the Lammermuir Hills. A wall plaque commemorating Witherspoon's birth is located near Yester Parish Church, the successor to the church where his father ministered. The original manse where Witherspoon was born no longer stands, but the church and its surrounding churchyard remain at the heart of the village.
The village itself is charming and compact, centred on a broad main street with a village green. The Goblin Ha' Hotel takes its name from the medieval Goblin Hall beneath nearby Yester Castle, referenced in Sir Walter Scott's Marmion. Gifford makes a pleasant half-day excursion from Edinburgh, and visitors can combine it with a stop in the county town of Haddington, four miles to the north, where Witherspoon attended grammar school. Haddington's St Mary's Church and town trail offer additional historical interest. The village is freely accessible at all times, though the church interior may require advance arrangements to visit.
Sources
- Jeffry H. Morrison, John Witherspoon and the Founding of the American Republic (University of Notre Dame Press, 2005)
- Varnum Lansing Collins, President Witherspoon: A Biography (Princeton University Press, 1925)
- East Lothian Council, "Gifford Village Trail," eastlothian.gov.uk
- Martha Lou Lemmon Stohlman, John Witherspoon: Parson, Politician, Patriot (Westminster Press, 1976)
John Witherspoon Statue, Paisley
People
Historical Significance
John Witherspoon was the only active clergyman to sign the Declaration of Independence, and his influence on the American founding extended far beyond that single act. Before emigrating to America in 1768, Witherspoon served for a decade as minister of the Laigh Kirk in Paisley, from 1758 to 1768. During his Paisley years, he established himself as one of the Church of Scotland's leading evangelical voices, publishing theological works that brought him international attention and ultimately attracted the invitation from the College of New Jersey (now Princeton University) that changed the course of his life.
At Princeton, Witherspoon transformed the college into a training ground for American leaders. His students included a future president (James Madison), a vice president (Aaron Burr), twelve members of the Continental Congress, five delegates to the Constitutional Convention, and forty-nine members of the early U.S. Congress. His lectures on moral philosophy, rooted in Scottish Common Sense Realism, shaped the intellectual framework through which an entire generation of American leaders understood rights, governance, and liberty.
When the Revolution came, Witherspoon threw himself into the cause with extraordinary energy. He served in the Continental Congress from 1776 to 1782, sitting on over one hundred committees, including the crucial Board of War and the Committee on Foreign Affairs. His speech urging his fellow delegates to vote for independence on 2 July 1776, declaring that the country was "not only ripe for the measure, but in danger of rotting for the want of it," became one of the most quoted remarks of the founding era. His Paisley roots and Scottish ecclesiastical training made him a unique bridge between Old World religious traditions and New World revolutionary politics.
Key Figures
- John Witherspoon (1723-1794) - Minister of Paisley's Laigh Kirk, president of the College of New Jersey, signer of the Declaration of Independence, and member of over 100 Congressional committees.
- James Madison (1751-1836) - Witherspoon's most famous student at Princeton; later principal architect of the Constitution and fourth President of the United States.
- Benjamin Rush (1746-1813) - Philadelphia physician and fellow Signer who encouraged Witherspoon's emigration to America and became a lifelong friend.
- Richard Stockton (1730-1781) - New Jersey delegate who travelled to Paisley to persuade Witherspoon to accept the Princeton presidency; himself a Signer of the Declaration.
- Alexander Stoddart (b. 1959) - Scottish sculptor who created the Witherspoon statues for both Paisley and Princeton University, unveiled in 2001.
What's There Today
The bronze statue of John Witherspoon by Alexander Stoddart stands on County Square in central Paisley, erected in 2001. It is a twin of the statue placed at Princeton University the same year, depicting Witherspoon in his clerical robes holding a copy of the Declaration of Independence. The Paisley statue faces the approximate location of the Laigh Kirk where he ministered for a decade. The Laigh Kirk building itself survives and now operates as Paisley Arts Centre, hosting performances and exhibitions in a space that retains its ecclesiastical architecture.
Paisley town centre is easily accessible from Glasgow, approximately seven miles to the east. Visitors can walk between the Witherspoon statue and the former Laigh Kirk in minutes. The Paisley Museum, which reopened in 2024 following a major renovation, provides broader context on the town's industrial and cultural history. The Witherspoon statue is freely accessible at all times. For visitors tracing the Witherspoon story, a companion visit to his birthplace village of Gifford in East Lothian, roughly ninety minutes east by car, completes the picture of his Scottish origins.
Sources
- Jeffry H. Morrison, John Witherspoon and the Founding of the American Republic (University of Notre Dame Press, 2005)
- Varnum Lansing Collins, President Witherspoon: A Biography (Princeton University Press, 1925)
- L. Gordon Tait, The Piety of John Witherspoon: Pew, Pulpit, and Public Forum (Westminster John Knox Press, 2001)
- Renfrewshire Council, "John Witherspoon Statue and Paisley's American Connections," renfrewshire.gov.uk
Kerelaw Castle (Alexander Hamilton's Father)
People
Historical Significance
Kerelaw Castle in Stevenston, Ayrshire, was the seat of the Hamilton family from which Alexander Hamilton -- the first Secretary of the Treasury and architect of American financial independence -- descended. Alexander Hamilton, the laird of Grange, purchased Kerelaw Castle in 1655. His grandson, also Alexander Hamilton, fathered James Hamilton (born c.1718 at the Grange or Kerelaw estate). James, the fourth son with little prospect of inheritance, left Scotland for the Caribbean, where his relationship with Rachel Faucette produced Alexander Hamilton the Founding Father, born in 1757 on Nevis.
The younger Hamilton's Scottish roots shaped his trajectory in ways both direct and indirect. His father James's genteel origins -- and his inability to maintain the status his birth implied -- haunted both father and son. Alexander Hamilton arrived in New York in 1773 as a teenage immigrant from the West Indies, carrying his father's Scottish name and little else. He rose to become George Washington's chief of staff during the Revolution, the principal author of the Federalist Papers, and the first Secretary of the Treasury, where he established the national bank, the mint, and the financial infrastructure of the new republic. When Washington offered the Treasury position to Robert Morris (born in Liverpool and also on this trail), Morris declined and recommended Hamilton -- connecting two British-born strands of the founding story.
The Hamilton family's Ayrshire roots also connect to another trail site. Hercules Mulligan, Washington's spy in New York, was born in Coleraine, Northern Ireland, and it was through Mulligan that Hamilton first entered New York society. The web of British and Irish connections surrounding Hamilton illustrates how deeply the founding generation's roots ran into the soil of the British Isles.
Key Figures
- James Hamilton (c.1718-1799) - Alexander Hamilton's father; born at Kerelaw/Grange estate; emigrated to the Caribbean
- Alexander Hamilton (1757-1804) - First Secretary of the Treasury; killed in a duel with Aaron Burr
- Alexander Hamilton, Laird of Grange (d. c.1680) - Purchased Kerelaw Castle 1655; James Hamilton's great-grandfather
- George Washington - Hamilton's commander and patron; offered Treasury to Morris, who recommended Hamilton
What's There Today
Kerelaw Castle survives as a ruin with three walls in various states of decay on a hilltop in Stevenston, North Ayrshire. The site is owned by North Ayrshire Council and is accessible from Campbell Avenue or Cambuskeith Road. The castle itself is fenced for safety, but the grounds are open. Crucially, the site already has heritage infrastructure: an interpretation board and QR code plaque form the first stop on the Stevenston Heritage Trail, which connects several Hamilton family locations in the town with blue plaques and information panels. Conservation work was carried out in 2014 to clear vegetation and stabilise the structure. The North Ayrshire Heritage Centre actively promotes the Hamilton connection. Stevenston is approximately forty minutes by train from Glasgow.
Sources
- Chernow, Ron, Alexander Hamilton (Penguin Press, 2004)
- North Ayrshire Heritage Centre, "Alexander Hamilton," naheritage.co.uk
- Library of Congress, Alexander Hamilton Papers, Kerelaw House description
- Ramsing, H.U., "Alexander Hamilton og hans moderne slaegt" (1939)
- Stevenston Heritage Trail route guide, naheritagetrails.co.uk
King's College, Aberdeen (Patrick Henry's Father)
People
Historical Significance
King's College, Aberdeen, is where Patrick Henry's father received his education. John Henry (c.1704-1773) attended King's College on scholarship from 1720 to 1724, studying in the shadow of the magnificent Crown Tower and worshipping in the chapel with its medieval woodwork -- the finest in Scotland. Though he did not complete a degree, his years at Aberdeen shaped the intellectual formation he would pass to his son. John Henry was the second son of Patrick Alexander Henry and Jean Robertson of Aberdeenshire. He emigrated to Virginia in February 1727, settling in Hanover County, where Patrick Henry was born in 1736.
Patrick Henry became the voice of the Revolution. His "Give me liberty, or give me death" speech in March 1775 crystallised the choice facing the colonies and helped push Virginia toward independence. He served as the first and sixth governor of Virginia and was instrumental in demanding the Bill of Rights be added to the Constitution. The Scottish education his father brought from Aberdeen -- steeped in the Scottish Enlightenment's emphasis on rhetoric, moral philosophy, and natural rights -- shaped the household in which one of America's greatest orators was raised. John Henry personally taught his son and instilled in him the classical learning and debating tradition that would make Patrick Henry's courtroom and legislative speeches legendary.
Aberdeen's connection to the Revolution extends beyond the Henry family. The Scottish Enlightenment, centred on universities like Aberdeen, Edinburgh, and Glasgow, produced the philosophical frameworks that American colonists used to justify independence. The trail already includes Edinburgh University, where Benjamin Rush and Arthur Lee studied; King's College adds another strand to the story of how Scottish intellectual life shaped the American founding.
Key Figures
- John Henry (c.1704-1773) - Patrick Henry's father; attended King's College Aberdeen 1720-1724; emigrated to Virginia 1727
- Patrick Henry (1736-1799) - "Give me liberty, or give me death"; first governor of Virginia; shaped by his father's Scottish education
- Patrick Alexander Henry - John Henry's father; Aberdeenshire landowner
- Jean Robertson - John Henry's mother
What's There Today
King's College Chapel, built between 1498 and 1509, is the centrepiece of the Old Aberdeen campus of the University of Aberdeen. Its distinctive Crown Tower -- one of only two surviving medieval crown steeples in Scotland -- is visible across the city. Inside, the chapel contains the finest medieval woodwork in Scotland, including a carved oak rood screen, choir stalls, and pulpit dating from the early sixteenth century. The chapel is open to visitors Monday to Friday, generally 9:00 AM to 5:00 PM, and is free to enter. The broader Old Aberdeen campus, with its cobbled streets and historic buildings, is a rewarding area to explore. The university's matriculation records from this period survive and document the students who passed through these halls.
Sources
- Encyclopedia Virginia, "Patrick Henry (1736-1799)"
- Kukla, Jon, Patrick Henry: Champion of Liberty (Simon & Schuster, 2017)
- Patrick Henry's Red Hill, "Patrick Henry's Family," redhill.org
- University of Aberdeen, "King's College Chapel," abdn.ac.uk
- Anderson, P.J., Roll of Alumni in Arts of the University and King's College of Aberdeen, 1596-1860 (1900)
Marischal College (Hugh Mercer Plaque)
People
Historical Significance
Hugh Mercer was born around 1726 near Pitsligo in Aberdeenshire and studied medicine at Marischal College, Aberdeen, from 1740 to 1744. Shortly after completing his studies, he joined the Jacobite rising of 1745 and served as an assistant surgeon at the Battle of Culloden in April 1746. With the Jacobite cause crushed, Mercer fled Scotland and emigrated to Pennsylvania around 1747, eventually settling in Fredericksburg, Virginia, where he established a successful medical practice and formed a close friendship with his neighbour George Washington.
When the American Revolution began, Mercer's military experience and his relationship with Washington made him a natural choice for command. Congress appointed him brigadier general in the Continental Army in June 1776. He served with distinction during Washington's daring crossing of the Delaware and the subsequent victory at the Battle of Trenton on 26 December 1776. Days later, at the Battle of Princeton on 3 January 1777, Mercer led an advance guard that collided with British reinforcements. Unhorsed and surrounded, he refused demands to surrender and was bayoneted repeatedly. He died of his wounds on 12 January 1777 at the age of fifty.
Mercer's death made him one of the first martyred heroes of the Revolution. His sacrifice was widely commemorated in the new nation: Mercer County in New Jersey, Kentucky, and several other states bears his name, as does Fort Mercer. The connection between his Aberdeen education, his Jacobite past, and his American patriotism illustrates the broader Scottish contribution to the Revolution. A commemorative plaque on the west wall of Marischal College marks his association with the institution.
Key Figures
- Hugh Mercer (c.1726-1777) - Aberdeen-educated physician turned Continental Army brigadier general; mortally wounded leading troops at the Battle of Princeton.
- George Washington (1732-1799) - Commander-in-Chief of the Continental Army and Mercer's close friend and neighbour in Fredericksburg; Mercer served as one of his most trusted subordinates.
- Charles Mawhood (1729-1780) - British colonel commanding the 17th Regiment of Foot at Princeton; his troops bayoneted Mercer after he refused to surrender.
- Charles Cornwallis, 1st Marquess Cornwallis (1738-1805) - British general whose pursuit of Washington from Trenton led to the engagement at Princeton.
- Benjamin Rush (1746-1813) - Philadelphia physician and fellow Signer of the Declaration who attended Mercer in his final days.
What's There Today
Marischal College stands on Broad Street in central Aberdeen and is one of the most striking granite buildings in Scotland. The current facade, a dramatic perpendicular Gothic design by Alexander Marshall Mackenzie, was completed in 1906, though the institution traces its origins to 1593. Since 2011, the building has served as the headquarters of Aberdeen City Council. The Hugh Mercer plaque is located on the west wall and can be viewed from the street. Visitors should also note the Mitchell Hall interior, which is occasionally open for events and exhibitions.
The building is not a museum and public access to the interior is limited, but the exterior and forecourt are freely accessible. The nearby King's College campus of the University of Aberdeen, which merged with Marischal College in 1860, offers additional historic architecture. Aberdeen's Maritime Museum and Tolbooth Museum are within walking distance for visitors seeking further historical context on the city's transatlantic connections.
Sources
- Joseph M. Waterman, With Sword and Lancet: The Life of General Hugh Mercer (Kingsport Press, 1941)
- David Hackett Fischer, Washington's Crossing (Oxford University Press, 2004)
- Marischal College and University of Aberdeen, "Notable Alumni," abdn.ac.uk
- American Battlefield Trust, "Hugh Mercer," battlefields.org
University of Edinburgh Old College
People
Historical Significance
The University of Edinburgh was one of the most important intellectual institutions in the Atlantic world during the 18th century, and its influence on the leaders of the American Revolution was profound and direct. At the heart of this connection was the university's medical school, which by the 1760s was the finest in the English-speaking world. Colonial Americans who sought advanced education — particularly in medicine — frequently travelled to Edinburgh, and several of them returned home to play leading roles in the independence movement.
The most notable of these students was Benjamin Rush, who arrived in Edinburgh in 1766 and earned his Doctor of Medicine degree in 1768. Rush studied under William Cullen, the leading medical theorist of the age, and absorbed the intellectual culture of the Scottish Enlightenment during his time in the city. He returned to Philadelphia to become the colonies' most prominent physician and, in 1776, a signer of the Declaration of Independence. He later served as Surgeon General of the Continental Army's Middle Department. Rush was not alone: Arthur Lee of Virginia, who would serve as an American diplomat in Europe during the war, studied medicine and later law at Edinburgh. John Morgan, founder of America's first medical school at the College of Philadelphia (later the University of Pennsylvania), was also an Edinburgh graduate. These men carried Scottish medical training and Enlightenment ideas back across the Atlantic, where both shaped the new republic.
The university's influence extended well beyond its medical graduates. The Scottish Enlightenment, centred in Edinburgh, produced ideas that permeated American revolutionary thought. Adam Smith's economic reasoning, David Hume's philosophical scepticism, Francis Hutcheson's moral philosophy, and the broader Scottish tradition of Common Sense philosophy all found receptive audiences among the educated colonial elite. Thomas Jefferson, while not an Edinburgh student, drew extensively on Scottish Enlightenment thinkers in framing the intellectual foundations of American independence. The University of Edinburgh was the institutional core of this intellectual movement, and its Old College — the physical centre of the university — was where much of this teaching and scholarship took place.
Key Figures
- Benjamin Rush — Philadelphia physician, Declaration of Independence signer, and Continental Army surgeon who earned his MD at Edinburgh in 1768; later known as the "Father of American Medicine"
- William Cullen — Professor of Medicine at Edinburgh, one of the foremost medical teachers of the 18th century, and Rush's principal instructor
- Adam Smith — Though based primarily at Glasgow, Smith was deeply connected to the Edinburgh intellectual world; his Wealth of Nations (1776) influenced American economic thinking
- David Hume — Edinburgh philosopher and historian whose writings on government, liberty, and human nature were widely read by the American founders
- Arthur Lee — Virginia-born physician and diplomat who studied at Edinburgh before serving as American Commissioner to France and Spain during the Revolution
- John Morgan — Edinburgh-trained physician who founded America's first medical school and served as Director General of Continental Army hospitals
What's There Today
The Old College building that visitors see today is not the one that Rush and his contemporaries knew. The present structure was designed by Robert Adam, Scotland's most celebrated architect, and begun in 1789 — the year the French Revolution broke out and just six years after the Treaty of Paris ended the American war. Adam's neoclassical design was completed, after long delays and modifications by William Henry Playfair, in the 1820s and 1830s. The grand entrance from South Bridge leads into a magnificent courtyard, and the Playfair Library Hall within the complex is one of the finest 19th-century interiors in Scotland. While the fabric is later, the institution is the same one where Rush studied, and the site has been the university's home since 1583.
Old College is located on South Bridge in central Edinburgh, easily accessible on foot from the Royal Mile and the Old Town. The building houses the university's law school and the Talbot Rice Gallery, which hosts exhibitions and is open to the public. Visitors can enter the courtyard and access the gallery freely. The broader Edinburgh landscape offers rich context: the Scottish National Portrait Gallery on Queen Street holds portraits of Hume, Smith, and other Enlightenment figures, while the university's Main Library (on George Square) holds archival material relating to its 18th-century students, including colonial Americans. The city itself — its New Town planned during the very decades of the Revolution — is a monument to the confidence and ambition of Enlightenment Edinburgh.
Sources
- Goodman, Nathan G., Benjamin Rush: Physician and Citizen, 1746-1813 (University of Pennsylvania Press, 1934)
- Sher, Richard B., The Enlightenment and the Book: Scottish Authors and Their Publishers in Eighteenth-Century Britain, Ireland, and America (University of Chicago Press, 2006)
- Broadie, Alexander, ed., The Cambridge Companion to the Scottish Enlightenment (Cambridge University Press, 2003)
- Herman, Arthur, The Scottish Enlightenment: The Scots' Invention of the Modern World (Fourth Estate, 2001)
- University of Edinburgh, Centre for Research Collections — archival records of 18th-century matriculations and medical degrees
Merchant City Glasgow
Commercial
Historical Significance
Glasgow's Merchant City stands as a monument to the vast wealth generated by the colonial tobacco trade in the 18th century. By the 1770s, Glasgow had surpassed London and Bristol to become the leading tobacco port in Britain, importing more than half of all tobacco entering the country from the American colonies, particularly Virginia and Maryland. The men who controlled this trade — known as the "Tobacco Lords" — amassed enormous fortunes and reshaped Glasgow's built environment, commissioning grand townhouses, churches, and public buildings that still define the city's character.
The Tobacco Lords operated through a system of factors and stores in the Chesapeake colonies, extending credit to planters and purchasing tobacco for resale across Europe. Firms like those of John Glassford, Alexander Speirs, and William Cunninghame dominated the trade. Glassford was reputed to be the wealthiest merchant in Britain, with interests spanning multiple colonies. The American Revolution devastated this trade almost overnight. When war broke out, debts owed by colonial planters to Glasgow merchants were estimated at over £1.3 million — a staggering sum that was never fully recovered. The Treaty of Paris (1783) included provisions for the recovery of pre-war debts, but enforcement proved difficult, and the issue poisoned Anglo-American relations for years.
The impact of the Revolution on Glasgow was profound. Some firms went bankrupt; others diversified into cotton, sugar, and manufacturing, pushing Glasgow toward industrialisation and its eventual identity as the "Second City of the Empire." The wealth the Tobacco Lords accumulated was inseparable from enslaved labour. The Chesapeake tobacco they traded was cultivated, harvested, and cured by enslaved Africans and their descendants; Glasgow's grand civic buildings were funded, directly and indirectly, by this system. When American patriots invoked liberty, they did so from plantations that owed their productivity to bondage -- a contradiction that Glasgow's merchant elite, dependent on the same labour system for their profits, had little incentive to examine.
Key Figures
- John Glassford of Dougalston - Glasgow's wealthiest tobacco merchant, with trading operations across Virginia and Maryland
- Alexander Speirs of Elderslie - Major tobacco merchant whose firm was one of the largest in the Chesapeake trade
- William Cunninghame of Lainshaw - Tobacco lord whose mansion on Queen Street (now the Gallery of Modern Art) symbolizes the trade's wealth
- Andrew Cochrane - Provost of Glasgow and merchant, corresponded with Adam Smith on trade matters
- Adam Smith - Professor at the University of Glasgow whose Wealth of Nations (1776) drew partly on his observation of Glasgow's mercantile economy
What's There Today
Glasgow's Merchant City is a vibrant quarter of the city centre, roughly bounded by George Square, the High Street, the Trongate, and Queen Street. Many of the Tobacco Lords' buildings survive, repurposed for modern use. The most prominent is the Cunninghame Mansion on Royal Exchange Square, now the Gallery of Modern Art (GoMA). The Tobacco Merchant's House on Miller Street (built c. 1775) is believed to be the oldest surviving house in this part of the city. Virginia Street, named for the colony that generated so much of the city's wealth, runs through the district. The Trades Hall on Glassford Street (itself named for John Glassford) is another notable surviving 18th-century building.
Walking tours of the Merchant City are available and typically include interpretation of the tobacco trade and its connections to colonial America and the slave economy that underpinned tobacco production. The Mitchell Library and Glasgow City Archives hold extensive records of the tobacco firms. Glasgow is well served by rail and air, and the Merchant City is a short walk from Glasgow Queen Street and Glasgow Central stations.
Sources
- Devine, T.M., The Tobacco Lords: A Study of the Tobacco Merchants of Glasgow and Their Trading Activities, c. 1740-90 (Edinburgh University Press, 1975)
- Devine, T.M., Scotland's Empire 1600-1815 (Penguin, 2004)
- Price, Jacob M., France and the Chesapeake (University of Michigan Press, 1973)
- Glasgow City Heritage Trust, "Merchant City Heritage Trail"
- Morgan, Philip D., Slave Counterpoint: Black Culture in the Eighteenth-Century Chesapeake and Lowcountry (University of North Carolina Press, 1998)
- National Records of Scotland, tobacco trade records
Tontine Building, Glasgow
Commercial
Historical Significance
The Tontine Building, constructed in 1781 on the Trongate at Glasgow Cross, was built as the city's first commercial exchange at the very moment when the American Revolution was destroying the economic foundations upon which Glasgow's eighteenth-century prosperity had been built. By 1775, Glasgow had become the dominant tobacco port in the British Empire, importing more Virginia and Maryland tobacco than all English ports combined. The so-called Tobacco Lords, Glasgow's merchant elite, had grown fabulously wealthy through the colonial trade, and their profits had transformed the city's architecture, institutions, and social life.
The outbreak of the American Revolution in 1775 shattered this tobacco economy almost overnight. American ports were closed to British trade, debts owed by colonial planters became uncollectable, and the entire commercial system that had enriched Glasgow for half a century collapsed. Many Tobacco Lords faced financial ruin. The construction of the Tontine Building in 1781, funded through a tontine investment scheme, represented both the twilight of the old tobacco wealth and the beginning of Glasgow's pivot toward new industries, particularly cotton manufacturing, sugar refining, and engineering, that would power the city's nineteenth-century industrial revolution.
The irony of the Tontine Building is that it was built with the profits of a colonial system that was being destroyed by the war raging as its walls went up. The building served as Glasgow's commercial hub for decades, housing the exchange, a coffee room where merchants gathered for news and deal-making, and one of the city's most important hotels. It stands as a physical monument to the transformative impact the American Revolution had on British economic life, far from any battlefield but no less consequential.
Key Figures
- John Glassford of Dougalston (1715-1783) - Glasgow's wealthiest Tobacco Lord, who at his peak owned over twenty-five ships and controlled a vast transatlantic trading network; the Revolution devastated his business empire.
- Alexander Speirs of Elderslie (1714-1782) - Another leading Tobacco Lord whose firm was the largest tobacco importer in Glasgow; struggled to recover American debts after the war began.
- Andrew Buchanan of Drumpellier (d. 1759) - Earlier Tobacco Lord whose wealth helped establish the merchant culture the Tontine Building embodied; Buchanan Street bears his name.
- Lord North (1732-1792) - Prime Minister whose continuation of the war prolonged the economic devastation of Glasgow's American trade.
- Henry Dundas, 1st Viscount Melville (1742-1811) - Scottish political leader who helped redirect Glasgow's commercial energies toward new imperial markets after the American war.
What's There Today
The Tontine Building stands at 1-29 Trongate, at the historic Glasgow Cross in the heart of the Merchant City district. The building has been substantially altered since the eighteenth century, but key features survive, including the distinctive carved stone heads of Tobacco Lords set into the facade, a tangible reminder of the merchant elite who built their fortunes on the American colonial trade. The Trongate arcade at street level now houses shops and businesses.
Glasgow's Merchant City, the neighbourhood surrounding the Tontine Building, is itself a monument to the tobacco wealth that the American Revolution ended. Walking the grid of streets, many bearing the names of Tobacco Lord families, including Buchanan, Ingram, Glassford, and Virginia Streets, visitors can trace the physical footprint of Glasgow's American connections. The nearby Gallery of Modern Art on Royal Exchange Square occupies the former mansion of another Tobacco Lord, William Cunninghame. Glasgow City Council offers a Merchant City heritage trail. The area is in the city centre, easily reached on foot from Glasgow Central or Queen Street stations.
Sources
- T.M. Devine, The Tobacco Lords: A Study of the Tobacco Merchants of Glasgow and their Trading Activities, c.1740-90 (Edinburgh University Press, 1975)
- T.M. Devine, Scotland's Empire and the Shaping of the Americas, 1600-1815 (Smithsonian Books, 2003)
- John R. Hume and Michael S. Moss, Clyde Shipbuilding from Old Photographs (B.T. Batsford, 1975)
- Glasgow City Heritage Trust, "Merchant City Heritage Trail," glasgowheritage.org.uk
Charlemont House (Hugh Lane Gallery)
Political
Historical Significance
Charlemont House on Pall Mall (now Rutland Square North) in Dublin was the townhouse of James Caulfeild, 1st Earl of Charlemont, one of the most consequential figures in Ireland during the American Revolutionary era. When the American war drained British troops from Ireland after 1775, and France's entry into the conflict in 1778 raised the spectre of invasion, Irish Protestants formed Volunteer companies to defend their country. Charlemont, a cultivated aristocrat and patron of the arts, accepted the position of commander-in-chief of the Irish Volunteers, earning himself the title "the Volunteer Earl." From this house, he directed a movement that would reshape Irish politics.
The Volunteers, originally formed for defence, rapidly became a vehicle for political reform. Inspired by the American colonists' arguments about representation and self-governance, the Volunteers demanded free trade for Ireland and an end to the restrictive legislation that subordinated the Irish Parliament to Westminster. In November 1779, Volunteer companies paraded on College Green, and the British government was forced to concede free trade for Ireland. In 1782, following the Dungannon Convention, the Volunteers pressed successfully for the repeal of the Declaratory Act and Poynings' Law, winning legislative independence for the Irish Parliament in what became known as "Grattan's Parliament." Charlemont, operating from his Dublin residence, was the movement's figurehead throughout this transformative period.
The house itself reflects Charlemont's refined taste and his connections to the wider world of Enlightenment culture. Designed by the architect Sir William Chambers and completed in 1763, it was conceived as a showcase for Charlemont's art collection and library, assembled during a grand tour of Europe. The building's neoclassical elegance made it a fitting headquarters for a man who combined aristocratic cultivation with political radicalism inspired, in part, by events unfolding across the Atlantic.
Key Figures
- James Caulfeild, 1st Earl of Charlemont - Commander-in-chief of the Irish Volunteers and political leader who used the crisis of the American war to win legislative independence for Ireland.
- Henry Grattan - Orator and parliamentarian who championed Irish legislative independence in the Irish House of Commons, closely allied with Charlemont.
- Sir William Chambers - Architect who designed Charlemont House in 1763, one of Dublin's finest neoclassical buildings.
- Henry Flood - Politician and rival of Grattan who also played a prominent role in the Volunteer movement and the campaign for parliamentary reform.
- Lord North - British Prime Minister whose government was forced to concede Irish free trade and legislative independence under Volunteer pressure.
What's There Today
Charlemont House is now the Hugh Lane Gallery (Dublin City Gallery The Hugh Lane), one of Ireland's most important public art collections. The gallery was established in 1908 and houses works by Impressionist masters, Irish artists, and international contemporary figures. The building's eighteenth-century interiors have been sensitively adapted for gallery use, and visitors can appreciate the elegant proportions and detailing of Chambers's original design.
While the gallery's primary focus is art rather than history, the building itself is the principal historical attraction. The entrance hall and staircase convey the grandeur of an eighteenth-century aristocratic townhouse, and the gallery occasionally mounts exhibitions touching on Dublin's Georgian heritage. Visitors interested in the Volunteer story can combine a visit with nearby sites on Pall Mall and a short walk to the former Irish Parliament on College Green. Admission to the Hugh Lane Gallery is free.
Sources
- Padraig O Snodaigh, The Irish Volunteers, 1715-1793 (Lilliput Press, 1995)
- R. B. McDowell, Ireland in the Age of Imperialism and Revolution, 1760-1801 (Clarendon Press, 1979)
- Maurice Craig, Dublin 1660-1860 (Allen Figgis, 1969)
- Hugh Lane Gallery, "History of the Building" (hughlane.ie)
Dungannon Convention Site (Presbyterian Church)
Political
Historical Significance
On 15 February 1782, delegates representing more than 140 Irish Volunteer companies gathered in the Presbyterian church at Dungannon, County Tyrone, for a convention that would alter the constitutional relationship between Ireland and Britain. The Dungannon Convention was the climactic moment of a political movement born directly from the American Revolutionary War. When British troops were withdrawn from Ireland to fight in America, and France's alliance with the colonies raised fears of invasion, Irish Protestants had formed Volunteer companies for self-defence. By 1782, this armed citizen militia numbered tens of thousands, and its members were determined to use their leverage to win political reform.
The convention's resolutions, passed unanimously, declared that only the King and the Irish Parliament had the right to make laws for Ireland, directly challenging Westminster's claim to legislate for the country under the Declaratory Act of 1720. The delegates also affirmed the right of Ireland's judges to independence from British interference and called for the relaxation of the Penal Laws against Catholics. The language and logic of these resolutions drew explicitly on the principles that had animated the American Revolution: that government derived its legitimacy from the consent of the governed, and that distant legislatures had no right to impose laws on communities they did not represent.
The impact of the Dungannon resolutions was immediate and decisive. Within months, the British government repealed the Declaratory Act and amended Poynings' Law, granting the Irish Parliament legislative independence. The resulting era of self-governance, known as "Grattan's Parliament," lasted until the Act of Union in 1800. The Dungannon Convention thus stands as one of the most direct examples of American revolutionary ideas producing concrete political change in the British Isles, and the church where it took place remains a powerful symbol of that connection.
Key Figures
- James Caulfeild, 1st Earl of Charlemont - Commander-in-chief of the Irish Volunteers and presiding figure of the convention, who guided the movement toward legislative independence.
- Henry Grattan - Leading parliamentarian who translated the Volunteers' demands into legislation, securing the repeal of the Declaratory Act in the Irish House of Commons.
- Henry Flood - Politician and Volunteer activist who helped draft the Dungannon resolutions and pressed for further parliamentary reform.
- Francis Dobbs - Volunteer officer and pamphleteer who was instrumental in organising the Dungannon Convention and articulating its constitutional arguments.
- Joseph Pollock - Belfast lawyer and Volunteer ideologist whose writings connected American revolutionary principles to the Irish reform movement.
What's There Today
The First Presbyterian Church in Dungannon, where the convention took place, remains an active place of worship. The present building, a handsome stone structure, retains the character of an eighteenth-century Ulster meeting house, though it has been modified over the centuries. A plaque on the exterior commemorates the 1782 convention, and the church's congregation maintains an awareness of the building's historical significance.
Dungannon itself is a market town in the heart of County Tyrone, easily accessible from Belfast and Dublin. The town has other historical connections, including the O'Neill heritage and the Flight of the Earls, but the 1782 convention is its most significant link to the age of Atlantic revolution. Visitors should note that as an active church, access to the interior may be limited outside of service times. The surrounding area offers opportunities to explore the Ulster countryside and other sites associated with the Volunteer movement and the dissenting tradition that nurtured pro-American sympathy in eighteenth-century Ireland.
Sources
- Padraig O Snodaigh, The Irish Volunteers, 1715-1793 (Lilliput Press, 1995)
- R. B. McDowell, Ireland in the Age of Imperialism and Revolution, 1760-1801 (Clarendon Press, 1979)
- A. T. Q. Stewart, A Deeper Silence: The Hidden Origins of the United Irishmen (Faber and Faber, 1993)
- Ian McBride, Scripture Politics: Ulster Presbyterians and Irish Radicalism in the Late Eighteenth Century (Clarendon Press, 1998)
Irish Houses of Parliament (Bank of Ireland)
Political
Historical Significance
The Irish Houses of Parliament on College Green in Dublin were the setting for some of the most consequential political debates provoked by the American Revolutionary War outside of Westminster itself. Ireland in the 1770s was governed by its own Parliament, but that body's legislative authority was severely constrained by Poynings' Law (1494) and the Declaratory Act of 1720, which asserted the British Parliament's right to legislate for Ireland. The American colonists' arguments against taxation without representation and parliamentary overreach resonated powerfully with Irish politicians who saw direct parallels between their own subordinate status and the grievances of the colonies.
The American war created both a political opening and an economic crisis in Ireland. British trade restrictions that limited Irish exports — particularly the prohibition on direct trade with the colonies — became a point of intense agitation as the war disrupted commerce and inflated prices. When regular army troops were withdrawn from Ireland for service in America, Irish Volunteers began forming in 1778, ostensibly to defend the island against a threatened French invasion. The Volunteer movement rapidly grew into a formidable political force, with some 40,000 armed men organized along military lines, and its leaders used this leverage to demand economic and constitutional concessions from the British government.
The result was a transformation of the Irish constitutional settlement. Henry Grattan and the patriot opposition in the Irish Parliament, emboldened by the American example and backed by the implied threat of the Volunteers, pressed for free trade and legislative independence. In 1779, the British government conceded free trade for Ireland. In 1782, following Cornwallis's surrender at Yorktown and the fall of Lord North's ministry, the new Whig administration under Rockingham agreed to repeal the Declaratory Act and amend Poynings' Law, granting the Irish Parliament what became known as "Grattan's Parliament" — a period of legislative independence that lasted until the Act of Union in 1800. The American Revolution thus directly catalysed Ireland's most significant constitutional change of the 18th century.
Key Figures
- Henry Grattan — Leader of the patriot opposition in the Irish Parliament; his oratory drove the campaign for legislative independence achieved in 1782
- Henry Flood — Prominent Irish parliamentarian and rival of Grattan who also championed constitutional reform
- Lord North — British Prime Minister (1770-1782) whose government imposed the trade restrictions that fuelled Irish discontent
- The Earl of Charlemont — Commander-in-chief of the Irish Volunteers, the citizen militia whose formation was prompted by the withdrawal of troops to America
- Lord Rockingham — British Prime Minister in 1782 whose government conceded Irish legislative independence
What's There Today
The former Irish Houses of Parliament on College Green is today the College Green branch of the Bank of Ireland, which purchased the building after the Act of Union dissolved the Irish Parliament in 1800. The building, designed by Edward Lovett Pearce and completed in 1733, was the world's first purpose-built bicameral parliament house and remains an architectural landmark of Georgian Dublin. The original House of Lords chamber survives intact and is open to visitors, retaining its 18th-century tapestries, the Speaker's mace, and a magnificent Dublin crystal chandelier. The House of Commons chamber was deliberately altered after the sale to prevent its use as a political assembly space.
The Bank of Ireland welcomes visitors to the House of Lords chamber during banking hours at no charge. Guided tours are available and cover the building's architectural and political history, including the period of Grattan's Parliament. College Green is in the heart of Dublin, directly opposite Trinity College, and is easily reached on foot or by public transport. For visitors tracing the American Revolution's impact on Ireland, the building is the essential starting point — the place where the American precedent was most explicitly invoked to reshape the political order of another part of the British Atlantic world.
Sources
- McDowell, R.B. Ireland in the Age of Imperialism and Revolution, 1760-1801. Clarendon Press, 1979.
- Kelly, James. Prelude to Union: Anglo-Irish Politics in the 1780s. Cork University Press, 1993.
- Smyth, Jim. The Men of No Property: Irish Radicals and Popular Politics in the Late Eighteenth Century. Macmillan, 1992.
- Casey, Christine. The Buildings of Ireland: Dublin. Yale University Press, 2005.
Wolfe Tone Memorial, St Stephen's Green
Political
Historical Significance
Theobald Wolfe Tone (1763-1798) was the most important figure connecting the American Revolution to Irish republicanism. Directly and explicitly inspired by the American example, Tone co-founded the Society of United Irishmen in 1791 with the aim of uniting "Protestant, Catholic, and Dissenter" in common citizenship -- echoing the American ideal that political rights should not depend on religious affiliation. The 1798 Irish Rebellion he helped organise was the most significant armed uprising inspired by the American Revolution anywhere in the British Isles.
Tone absorbed the influence of Thomas Paine and the American Congress, citing both in his 1791 pamphlet An Argument on Behalf of the Catholics of Ireland. He argued that the American Congress and French National Assembly had proved that Catholic populations could participate in democratic self-governance -- a direct challenge to the Penal Laws that excluded Irish Catholics from political life. The United Irishmen's constitution was modelled on American revolutionary principles: popular sovereignty, representative government, and the separation of church and state.
The 1798 Rebellion, though it failed militarily, demonstrated that the American Revolution's ideas had taken root in Irish soil. The trail already includes sites showing how the Revolution galvanised the Irish Volunteer movement and inspired demands for parliamentary independence in the 1780s. Wolfe Tone represents the next step: the point where inspiration became insurrection. The Museum of the American Revolution in Philadelphia maintains a dedicated exhibit on Tone and the United Irishmen, recognising the direct connection.
Key Figures
- Theobald Wolfe Tone (1763-1798) - Founder of the United Irishmen; inspired by the American Revolution; died in prison after the 1798 Rebellion
- Thomas Russell (1767-1803) - Co-founder of the United Irishmen; executed for his role in the 1803 rebellion
- Thomas Paine - His Rights of Man (1791) was a foundational text for the United Irishmen
- Lord Edward Fitzgerald (1763-1798) - United Irishmen leader; died of wounds after arrest
What's There Today
The Wolfe Tone Memorial stands at the northeast corner of St Stephen's Green, near the Merrion Row entrance. The freestanding bronze statue, three metres high, was created by sculptor Edward Delaney and unveiled by President de Valera in 1967. It stands on a platform of eight roughly hewn granite slabs with a curved backdrop of granite monoliths -- a distinctive design known locally as "Tone Henge." The memorial is freely accessible in the public park at all times. St Stephen's Green is one of Dublin's most popular visitor destinations. Tone's birthplace at 44 Wolfe Tone Street (formerly Stafford Street) bears a deteriorating shield plaque erected by the 1798 Centenary Committee, approximately one kilometre north. The memorial is within walking distance of Dublin City Hall and the Irish Parliament, both already on the trail.
Sources
- Museum of the American Revolution, "United Irishmen: Theobald Wolfe Tone," amrevmuseum.org
- Elliott, Marianne, Wolfe Tone: Prophet of Irish Independence (Yale University Press, 1989)
- Age of Revolution, "Theobald Wolfe Tone," ageofrevolution.org
- National Army Museum, "Irish Rebellion of 1798"
- Buildings of Ireland, "Wolfe Tone Memorial, St Stephen's Green"
Carrickfergus Castle
Military
Historical Significance
On April 24, 1778, the day after his raids on Whitehaven and St Mary's Isle, Captain John Paul Jones in the Continental Navy sloop Ranger engaged HMS Drake in Belfast Lough off the coast of Carrickfergus, County Antrim. The battle was one of the few ship-to-ship engagements of the American Revolution fought in British home waters and resulted in a clear American victory. The Drake, a 20-gun sloop commanded by Captain George Burdon, sailed out from Carrickfergus to intercept the Ranger after Jones had been spotted reconnoitring the harbour the previous day.
The engagement lasted approximately one hour and five minutes. Jones manoeuvred the Ranger to rake the Drake's stern, and sustained gunfire dismasted the British vessel and killed her captain and first lieutenant. The Drake struck her colours and was taken as a prize. Jones sailed with his prize to Brest, France, arriving on May 8, 1778 — a triumphant entry that cemented his reputation in Europe and provided a major morale boost to the American cause. The captured Drake was the first British warship taken by a Continental Navy vessel in European waters.
Carrickfergus Castle, a Norman fortress dominating the harbour, witnessed the engagement from shore. Local tradition holds that townspeople watched the battle from the castle walls and surrounding heights. The engagement had been preceded by an earlier, abortive approach on April 21, when Jones entered Belfast Lough intending to cut out the Drake at anchor but was carried past by the current and had to withdraw. The successful action on the 24th climaxed Jones's Irish Sea cruise, one of the most remarkable offensive operations of the Continental Navy.
Key Figures
- John Paul Jones - Captain of the Ranger, commanding the Continental Navy's first major warship victory in European waters
- Captain George Burdon - Commander of HMS Drake, killed during the engagement
- Lieutenant Dobbs - First lieutenant of HMS Drake, also killed in the battle
- Thomas Simpson - First lieutenant of the Ranger, whose relationship with Jones was strained by disputes over credit for the victory
- Benjamin Franklin - American Commissioner in Paris who had dispatched Jones on his cruise
What's There Today
Carrickfergus Castle is one of the best-preserved Norman castles in Ireland, managed by the Department for Communities (Northern Ireland). The castle dates from 1177 and overlooks the harbour where HMS Drake was anchored before the engagement. Visitors can tour the castle's interior, which includes exhibits on its long military history, and look out over the lough where the battle took place. The castle is open year-round and charges an admission fee.
The town of Carrickfergus, approximately 11 miles northeast of Belfast, has a pleasant waterfront and a heritage trail. An information panel near the harbour recounts the Jones and Drake engagement. The castle and surrounding area can be reached by rail (Carrickfergus station on the Belfast–Larne line) or by road from Belfast. For visitors tracing Jones's 1778 cruise, Carrickfergus pairs naturally with Whitehaven (across the Irish Sea) and St Mary's Isle in Galloway.
Sources
- Morison, Samuel Eliot, John Paul Jones: A Sailor's Biography (Little, Brown, 1959)
- Thomas, Evan, John Paul Jones: Sailor, Hero, Father of the American Navy (Simon & Schuster, 2003)
- Crawford, Michael J., ed., Naval Documents of the American Revolution (Naval History and Heritage Command, ongoing)
- Department for Communities, Northern Ireland, "Carrickfergus Castle," visitor information
- Syrett, David, The Royal Navy in European Waters During the American Revolutionary War (University of South Carolina Press, 1998)
Charlemont Fort
Military
Historical Significance
Charlemont Fort, situated on the River Blackwater in County Armagh, was the ancestral seat of the Caulfeild family and the place from which the Earls of Charlemont derived their title. The fort had been a military installation since the Elizabethan period, originally built in 1602 by Lord Mountjoy during the Nine Years' War and subsequently granted to Sir Toby Caulfeild, the founder of the family's Irish fortune. Throughout the seventeenth and eighteenth centuries, the fort served as a garrison post and a symbol of Protestant military authority in the Ulster borderlands. It was garrisoned continuously through the eighteenth century, including during the crisis years of the American Revolutionary War.
The fort's most significant connection to the American Revolution lies in the Caulfeild family and, above all, in James Caulfeild, 1st Earl of Charlemont. When the American war drained British regular troops from Ireland after 1775, and France's entry into the conflict in 1778 created a genuine invasion threat, Charlemont accepted the position of commander-in-chief of the Irish Volunteers. The Volunteers were a militia of armed Protestant citizens who filled the military vacuum left by the regulars' departure. From his base of power in Armagh and Dublin, Charlemont led a movement that drew direct inspiration from the American colonies' struggle for self-governance. Under his command, the Volunteers won free trade for Ireland in 1779 and legislative independence in 1782.
Charlemont Fort thus represents the intersection of the Caulfeild family's long military heritage in Ireland with the political upheaval of the American revolutionary era. The earl's willingness to lead an armed citizens' movement against the policies of the British government he nominally served made him one of the most important political figures of his age, and his family seat at Charlemont was the foundation of his authority and influence in Ulster.
Key Figures
- James Caulfeild, 1st Earl of Charlemont - Commander-in-chief of the Irish Volunteers, known as "the Volunteer Earl," who used the crisis of the American war to win Irish legislative independence.
- Sir Toby Caulfeild, 1st Baron Charlemont - Founder of the Caulfeild dynasty in Ireland, who was granted Charlemont Fort in the early seventeenth century.
- Henry Grattan - Parliamentarian and ally of Charlemont who led the campaign for Irish legislative independence in the House of Commons.
- Francis Hardy - Charlemont's first biographer, whose Memoirs of the Political and Private Life of James Caulfield, Earl of Charlemont (1810) remains a key primary source.
What's There Today
Charlemont Fort today is largely ruinous. The site suffered extensive damage when it was burned in 1920 during the Irish War of Independence, and only the gatehouse and fragments of the surrounding walls survive. The gatehouse, a stone structure dating from the seventeenth century with later modifications, is the most substantial remaining feature and gives a sense of the fort's former scale and military character. The site is on the banks of the River Blackwater, near the village of Charlemont in County Armagh.
The ruins are accessible but unmanaged, and visitors should be prepared for an informal heritage experience. There are no on-site exhibitions or visitor facilities, but the surviving gatehouse and the scenic river setting reward a visit. The nearby village of Moy, established by the Caulfeild family as a planned estate village, retains its eighteenth-century character and provides context for understanding the family's influence in the region. For those tracing the Volunteer story across Ireland, Charlemont Fort is a meaningful stop that connects the political movement to its roots in Ulster's landed society.
Sources
- Padraig O Snodaigh, The Irish Volunteers, 1715-1793 (Lilliput Press, 1995)
- Francis Hardy, Memoirs of the Political and Private Life of James Caulfield, Earl of Charlemont (T. Cadell and W. Davies, 1810)
- R. B. McDowell, Ireland in the Age of Imperialism and Revolution, 1760-1801 (Clarendon Press, 1979)
- Northern Ireland Environment Agency, Historic Monuments record for Charlemont Fort
Cork Harbour
Military
Historical Significance
Cork Harbour was the single most important provisioning port for the British army in North America during the American Revolutionary War. Ireland's long-established provisions trade — centred on salted beef, salted pork, butter, and other preserved foodstuffs — made Cork the natural hub for supplying military forces operating thousands of miles from home. The Cork provisions merchants had decades of experience packing and shipping preserved meats to Atlantic and Caribbean destinations, and when war came in 1775, the British Army's commissariat turned to Cork as its principal source of the vast quantities of food needed to sustain armies in the field across the ocean.
The scale of the Cork provisions operation during the American war was enormous. Hundreds of thousands of barrels of salted beef and pork were inspected, packed, and shipped from Cork's quays over the course of the conflict. Troop transports and supply convoys assembled in the harbour's deep, sheltered waters before making the Atlantic crossing. Cork's geographic position on Ireland's southern coast made it a natural gathering point for ships heading west, and the harbour — one of the largest natural harbours in the world — could accommodate the fleets of merchantmen and warships required for major expeditionary operations. Reinforcement convoys bound for New York, Charleston, and the Caribbean routinely staged through Cork.
The dependence on Cork also revealed the fragility of Britain's logistical chain. Delays in assembling supplies, shortages of shipping, and the ever-present threat of spoilage during long Atlantic voyages were persistent problems that undermined military operations in America. The quality of Cork provisions was a recurring source of complaint from army officers, and the commissariat's reliance on a single distant port created vulnerabilities that French and American privateers could exploit. Nonetheless, without Cork's provisions trade, Britain's ability to sustain military operations in North America would have been gravely compromised. The harbour's role in the war effort illustrates how the American Revolution was, at its core, a logistical contest fought across an ocean.
Key Figures
- British Army commissariat officers — Responsible for contracting, inspecting, and shipping provisions from Cork to the armies in America
- Cork provisions merchants — The commercial firms that supplied salted beef, pork, and butter under government contract; they profited from wartime demand but also bore the risks of supply chain disruption
- Treasury Secretary John Robinson — Coordinated much of the financial and logistical machinery of supply from the Treasury in London
- Sir Guy Carleton — Among the commanders in North America who depended on Cork supply convoys to sustain their forces
What's There Today
Cork Harbour remains one of Europe's great natural harbours and a working commercial port. The town of Cobh (formerly Queenstown), situated on Great Island within the harbour, is the most visitor-oriented area and is best known for its later associations with transatlantic emigration and the Titanic. The Cobh Heritage Centre, housed in the restored Victorian railway station, focuses primarily on the emigration story, and dedicated interpretation of the harbour's 18th-century provisioning role is limited. However, the quays and waterfront of Cork city itself, where much of the provisions trade was centred, retain elements of their Georgian mercantile character, and the English Market — a covered food market dating from 1788 — continues a centuries-old tradition of food trading in the city.
Visitors seeking to understand Cork's role in the American war should explore both Cork city centre and Cobh. The harbour can be viewed from various points around its shoreline, and boat tours offer perspectives on the scale of the waterway that once accommodated assembling convoys. Cork city is served by Kent Station (Irish Rail) with connections to Dublin and other Irish cities, and Cobh is accessible by a short rail journey from Cork. The physical infrastructure of the 18th-century provisions trade has largely been absorbed into the modern city, but the harbour itself — vast, sheltered, and strategically positioned — is the unchanged constant that explains why this place was so critical to Britain's American war effort.
Sources
- Cullen, L.M. An Economic History of Ireland Since 1660. Batsford, 1972.
- Bowler, R. Arthur. Logistics and the Failure of the British Army in America, 1775-1783. Princeton University Press, 1975.
- Truxes, Thomas M. Irish-American Trade, 1660-1783. Cambridge University Press, 1988.
- Dickson, David. Old World Colony: Cork and South Munster, 1630-1830. Cork University Press, 2005.
Spike Island, Cork Harbour
Military
Historical Significance
Cork Harbour was Britain's most important provisioning and assembly point for military operations during the American Revolutionary War. The harbour's deep, sheltered waters and its proximity to Cork's vast provisions trade made it the natural staging ground for fleets bound for North America. At the height of the conflict, more than 400 vessels assembled in Cork Harbour, carrying troops, supplies, and the salted provisions that sustained British forces across the Atlantic. Contemporary officials described Cork as the "ultimate base of the army in America," and the annual Cork Fleet sailing for the colonies was the logistical lifeline of the British war effort.
Spike Island, a 104-acre island commanding the entrance to Cork's inner harbour, became a critical component of this infrastructure. In 1779, after France entered the war as an American ally, the threat of enemy naval attack on Cork Harbour became acute. British military engineers moved to fortify the island, constructing batteries and defensive works to protect the anchorage and the enormous quantity of shipping gathered there. Colonel Charles Vallancey, a military engineer and antiquarian serving in Ireland, oversaw the harbour's defensive arrangements during this period. His work ensured that one of Britain's most strategically vital harbours remained secure throughout the war.
The fortification of Spike Island during the American War marked the beginning of the island's long military history. The defences established in 1779 were expanded significantly during the Napoleonic Wars and throughout the nineteenth century, eventually becoming Fort Mitchel, a substantial star-shaped fortress. The island's strategic importance, first recognised during the struggle for America, would endure for nearly two centuries of British and later Irish military use.
Key Figures
- Colonel Charles Vallancey - Military engineer who directed the fortification of Cork Harbour from 1779. Also a noted antiquarian and scholar of Irish history, he combined military expertise with deep intellectual curiosity.
- Lord George Germain - Secretary of State for the Colonies who coordinated the logistical effort to supply British forces in America, relying heavily on Cork as the primary staging point.
- Sir Henry Clinton - Commander-in-chief of British forces in North America from 1778, whose armies depended on the provisions and reinforcements dispatched from Cork Harbour.
- John Jervis (later Earl of St Vincent) - Naval officer who commanded convoy escorts from Cork during the war, protecting the vital supply lines to America.
What's There Today
Spike Island is now one of Ireland's premier heritage attractions, accessible by ferry from the town of Cobh (formerly Queenstown) on the harbour's northern shore. The crossing takes approximately fifteen minutes and offers panoramic views of the harbour that once sheltered hundreds of warships and transports. Fort Mitchel, the nineteenth-century expansion of the original American War-era fortifications, dominates the island and houses exhibitions on the island's layered military history, from the 1779 batteries through its use as a prison and military base in the nineteenth and twentieth centuries.
Visitors can explore the fort's bastions, magazines, and tunnels on guided tours, and interpretation panels throughout the island explain its strategic significance. The views from the ramparts across Cork Harbour provide a vivid sense of why this anchorage was so vital to British operations during the American Revolution. The island was named Europe's Leading Tourist Attraction in 2017 by the World Travel Awards.
Sources
- Thomas M. Truxes, Irish-American Trade, 1660-1783 (Cambridge University Press, 1988)
- R. B. McDowell, Ireland in the Age of Imperialism and Revolution, 1760-1801 (Clarendon Press, 1979)
- David Syrett, Shipping and the American War, 1775-83 (Athlone Press, 1970)
- Spike Island Heritage Site, "History of Spike Island" (spikeislandcork.ie)
Charles Thomson Birthplace, Maghera
People
Historical Significance
Charles Thomson was born on 29 November 1729 in the townland of Gorteade, near Maghera, County Londonderry, to John Thomson, an Ulster-Scots Presbyterian linen bleacher. When his wife died in 1739, John Thomson gathered his sons and sailed for America. He died during the voyage. The boys arrived penniless at New Castle, Delaware, and were separated among strangers. Young Charles was taken in by a blacksmith, but his intelligence attracted attention, and he was eventually educated at Francis Alison's academy in New London, Pennsylvania.
By 1774, Thomson had risen to become Secretary of the Continental Congress -- a position he held for the entire fifteen-year existence of that body, from 1774 to 1789. No other official served the revolutionary government so continuously. It was Thomson who engrossed the Declaration of Independence for the formal signing on 2 August 1776 -- his handwriting produced the document the delegates actually signed. His was one of the first two signatures on the initial printed broadside, alongside John Hancock's. Thomson also co-designed the Great Seal of the United States and chose its three Latin mottos: "E pluribus unum," "Annuit coeptis," and "Novus ordo seclorum." The orphan from Gorteade thus left his mark on the most recognisable symbols of American nationhood.
Thomson's connection to the Revolution began not in Philadelphia's political circles but in the Delaware Valley's dispossessed immigrant communities. Adopted by the Lenape people, who named him "the man who tells the truth," he brought an outsider's perspective to colonial politics. His Ulster Presbyterian background -- shaped by the experience of being a religious minority under the Penal Laws -- made him a natural ally of the cause of liberty.
Key Figures
- Charles Thomson (1729-1824) - Secretary of the Continental Congress; engrossed the Declaration of Independence; co-designer of the Great Seal of the United States
- John Thomson (d. 1739) - Charles's father; linen bleacher from Gorteade who died during the emigration voyage
- John Hancock - President of Congress; his and Thomson's were the first two signatures on the Declaration broadside
What's There Today
The townland of Gorteade is rural farmland near Upperlands, approximately four kilometres southwest of Maghera. No dedicated birthplace marker or plaque has been confirmed at the specific site, though the Maghera Heritage Centre in the town maintains exhibits and materials on Thomson's life. In February 2026, the Seamus Heaney HomePlace in nearby Bellaghy hosted a major lecture -- "Charles Thomson: Irish Emigrant, American Founder" -- with a screening of the documentary "The Man Who Told The Truth" and a display of Public Record Office of Northern Ireland artefacts. Northern Ireland has been granted "special status" by the America250 Commission, with a funded USA-NI250 programme managed by the Ulster-Scots Agency that includes Thomson among its featured figures. Maghera is accessible by car on the A29, and the surrounding area includes the Seamus Heaney HomePlace (8 km) and the Ulster American Folk Park in Omagh (60 km).
Sources
- Maghera Heritage Centre, "The Life of Charles Thomson," maghera-heritage.org.uk
- University of Pennsylvania Archives, "Charles Thomson" biography
- Schlenther, Boyd S., Charles Thomson: A Patriot's Pursuit (University of Delaware Press, 1990)
- Presbyterian Historical Society of Ireland, records of Maghera parish
- Seamus Heaney HomePlace, "Charles Thomson: Irish Emigrant, American Founder" lecture (February 2026)
Gray's Printing Press, Strabane (John Dunlap)
People
Historical Significance
Gray's Printing Press in Strabane, County Tyrone, is where John Dunlap learned the trade that changed history. On the night of 4 July 1776, the Continental Congress commissioned Dunlap to print the first broadsides of the Declaration of Independence. Approximately two hundred copies -- the "Dunlap Broadsides" -- were printed and dispatched to all thirteen colonial assemblies. Only twenty-six are known to survive, each worth millions of dollars. The physical document that announced American independence to the world was produced by a man trained in this small Irish town.
Dunlap was born in Strabane in 1747 (some sources say 1746) and served his apprenticeship at Gray's before emigrating to Philadelphia at the age of ten, where he joined his uncle's printing business. He went on to found the Pennsylvania Packet, the first successful daily newspaper in America, and served as a mounted trooper in the Continental Army during the war. Separately, James Wilson -- grandfather of President Woodrow Wilson -- also trained at Gray's before emigrating, making this modest premises the training ground for two men whose work shaped American history.
Key Figures
- John Dunlap (1747-1812) - Printer of the first broadsides of the Declaration of Independence; apprenticed at Gray's; emigrated to Philadelphia
- James Wilson - Grandfather of President Woodrow Wilson; also trained at Gray's
What's There Today
Gray's Printing Press is a National Trust property at 49 Main Street, Strabane. It operates as a working museum of printing history, with a collection of nineteenth-century hand-printing machines, wood and metal type, and an audio-visual display on "The Power of Print." When open, admission is by guided tour only, led by local volunteers who demonstrate the printing process. The museum is currently temporarily closed -- contact the National Trust (028 8674 8210) for the reopening timeline. Separately, a plaque on Meeting House Street marks Dunlap's actual birthplace: "John Dunlap, Printer of the American Declaration of Independence, 1746-1812, was born here." Additional plaques appear on the Old Water Wall Memorial at The Bowling Green. Strabane is approximately twenty-five miles south of Derry and pairs naturally with the Charles Thomson birthplace at Maghera on a Northern Ireland heritage circuit.
Sources
- National Trust, "Gray's Printing Press" and "History of Gray's Printing Press and John Dunlap"
- Harvard Declaration Resources Project, "December Highlight: Dunlap"
- Culture Northern Ireland, "The American Declaration Was First Printed by a Man from Strabane"
- National Trust Northern Ireland, visitor information
Hercules Mulligan Birthplace, Coleraine
People
Historical Significance
Hercules Mulligan, born in Coleraine, County Londonderry, in 1740, became one of the most effective and daring spies of the American Revolution. His family emigrated to New York when he was a child, and Mulligan grew up to become a prosperous tailor on Queen Street (now Pearl Street) in lower Manhattan. His trade placed him at the centre of New York's social and commercial life, and when the revolutionary crisis came, Mulligan threw himself into the patriot cause. He was a founding member of the New York Sons of Liberty and played a role in the early resistance to British authority in the city.
When the British occupied New York in September 1776, Mulligan remained behind as a spy for General George Washington's intelligence network. His position was ideal: as a fashionable tailor, he counted British officers among his clients, and their casual conversations during fittings provided a stream of valuable military intelligence. Mulligan passed information about troop movements, supply plans, and intended operations to the Continental Army through a network of couriers. His intelligence is credited with saving Washington's life on at least two occasions, once by warning of a plot to ambush the general and once by reporting a plan to intercept him during travel. Mulligan's courage was extraordinary; discovery would have meant execution.
Mulligan also served as a mentor and protector of the young Alexander Hamilton, who lodged with the Mulligan family when he first arrived in New York from the Caribbean in 1773. Mulligan introduced Hamilton to the patriot cause and the intellectual circles that would shape his career. After the war, Washington publicly acknowledged Mulligan's service by making the tailor's shop one of his first stops upon entering New York in November 1783, a gesture that silenced those who had suspected Mulligan of loyalism during the occupation. Mulligan's Irish origins in Coleraine connect one of the Revolution's most colourful figures to the Ulster emigrant tradition that shaped early American history.
Key Figures
- Hercules Mulligan - Coleraine-born tailor, founding Son of Liberty, and spy for George Washington whose intelligence saved the general's life at least twice during the British occupation of New York.
- George Washington - Commander-in-chief of the Continental Army, who relied on Mulligan's intelligence and publicly honoured him after the war.
- Alexander Hamilton - Future Founding Father and first Secretary of the Treasury, who boarded with the Mulligan family upon his arrival in New York and was mentored by Hercules Mulligan.
- Cato - Mulligan's enslaved servant who acted as his courier, carrying intelligence from occupied New York to American agents at great personal risk.
- Hugh Mulligan - Hercules's brother and a successful merchant who also supported the patriot cause and facilitated intelligence operations.
What's There Today
Coleraine is a market town on the River Bann in County Londonderry, Northern Ireland. While no specific building has been definitively identified as Mulligan's birthplace, the town has begun to recognise its connection to this remarkable figure. Memorial plans are underway in anticipation of the 250th anniversary of the American Revolution, and there is growing local interest in commemorating Mulligan's story as part of the broader narrative of Ulster's links to the founding of the United States.
Visitors to Coleraine will find an attractive riverside town with a long history. The town centre retains elements of its eighteenth-century layout, and the surrounding area is rich in heritage sites associated with the Ulster-Scots and the emigrant tradition. The nearby Causeway Coast and the Giant's Causeway World Heritage Site make Coleraine an accessible stop on a wider tour of Northern Ireland. As commemoration plans develop for the 250th anniversary, Coleraine's connection to Hercules Mulligan is likely to become an increasingly prominent part of the town's identity and visitor offer.
Sources
- Michael C. Harris, Brandywine: A Military History of the Battle that Lost Philadelphia but Saved America (Savas Beatie, 2014)
- Alexander Rose, Washington's Spies: The Story of America's First Spy Ring (Bantam Books, 2006)
- Ron Chernow, Alexander Hamilton (Penguin Press, 2004)
- John A. Nagy, Invisible Ink: Spycraft of the American Revolution (Westholme Publishing, 2010)
John Barry Monument, Wexford
People
Historical Significance
John Barry was born on 25 March 1745 at Ballysampson, in the townland of Tacumshane, County Wexford, to a Catholic small-farming family. After the family was evicted by their landlord, they moved to Rosslare, where Barry's uncle was a fisherman. At the age of fifteen, Barry left Ireland for Philadelphia as a cabin boy. Within six years he was a ship captain, and by the outbreak of the Revolution he was one of the most experienced mariners in the American colonies.
George Washington personally commissioned Barry to command the Continental Navy brig Lexington. In April 1776, Barry captured the British tender Edward -- the first American naval victory of the war. He went on to fight in numerous engagements at sea, and when the Delaware was frozen, he led his sailors ashore to fight as infantry at Trenton and Princeton. His wartime record included capturing or destroying more enemy vessels than any other Continental Navy officer. After the war, when Congress created the United States Navy in 1794, President Washington gave Barry the first commission -- effectively making him the first flag officer of the new service. For this, he is known as the "Father of the American Navy," a title he shares in popular memory with John Paul Jones, whose raids on Whitehaven and Carrickfergus are already part of this trail.
Barry's Irish Catholic origins are significant. Unlike many of the Protestant Ulster-Scots founders in this trail, Barry came from the dispossessed Catholic community of southeast Ireland. His rise from evicted tenant's son to commodore of a new nation's navy is one of the Revolution's most dramatic social ascents -- and a reminder that the American cause drew from every corner of British and Irish society.
Key Figures
- Commodore John Barry (1745-1803) - "Father of the American Navy"; first flag officer of the United States Navy; born at Ballysampson, Tacumshane
- George Washington - Commissioned Barry to command the Lexington and later gave him the first US Navy commission
- John Paul Jones - Fellow naval hero of the Revolution, whose British Isles raids are already in the trail
What's There Today
The principal memorial is the bronze statue of Commodore Barry at Crescent Quay in Wexford Town, overlooking the harbour. The statue was a gift from the United States, delivered by the destroyer USS John R. Pierce and unveiled in 1956. Each year, the Irish Naval Service and the Minister for Defence hold the "Barry Day" parade and wreath-laying ceremony at the statue -- a formal commemoration that has continued for decades. The statue stands in the centre of Wexford's waterfront, adjacent to the tourist office and easily accessible on foot.
Barry's birthplace at Ballysampson, approximately twenty minutes' drive southeast of Wexford Town, is rural farmland with no surviving structures or visitor infrastructure. The original thatched cottage is long gone. However, the nearby Tacumshane Windmill (an intact seventeenth-century windmill) and Our Lady's Island (a medieval pilgrimage site) give visitors reason to explore the area. Wexford itself is a lively town with good tourist amenities and transport connections.
Sources
- Coast Monkey, "Remembering Wexford's John Barry -- Father of the American Navy"
- Ancient Order of Hibernians, "Commodore John Barry: The Irish Father of the American Navy" (March 2026)
- Clark, William Bell, Gallant John Barry (Macmillan, 1938)
- Government of Ireland, Department of Defence, "Annual John Barry Commemoration, Crescent Quay, Wexford"
- Buildings of Ireland, National Inventory of Architectural Heritage, "Commodore John Barry Monument"
Cork Butter Exchange (Butter Museum)
Commercial
Historical Significance
During the American Revolutionary War, the city of Cork served as the logistical backbone of Britain's military effort in North America. Cork's provisions trade, centred on salted beef, pork, and butter, fed the Royal Navy and the British Army across the Atlantic. The city's merchants had perfected the art of curing and preserving meat and dairy on an industrial scale, and when war broke out in 1775, Cork became indispensable. Contemporary observers described the city as the "ultimate base of the army in America," and the enormous annual Cork Fleet, laden with barrels of salt provisions, was the lifeline connecting Britain's fighting forces to their food supply.
The Cork Butter Exchange, established in 1769 by the Committee of Merchants, was the regulatory heart of this trade. The Exchange standardised the quality, weight, and grading of butter for export, ensuring that Cork's products maintained their reputation in markets across the Atlantic world. During the American War, the Exchange oversaw a dramatic expansion of output as demand surged. Cork's butter, beef, and pork provisioned not only the forces in North America but also garrisons in the Caribbean and convoys throughout the Atlantic. The city's coopers, packers, slaughtermen, and dairymen worked at a pace dictated by the rhythms of war.
The scale of Cork's contribution to the British war effort is difficult to overstate. Hundreds of transport vessels loaded provisions at the city's quays each year, and the fortunes of entire campaigns could hinge on whether the Cork Fleet sailed on time and arrived intact. Delays caused by weather, French privateers, or administrative confusion had direct consequences on the battlefields of America. Cork's provisions trade thus connected the commercial life of an Irish city directly to the outcome of the revolution that created the United States.
Key Figures
- John Anderson - Prominent Cork provisions merchant who supplied large quantities of salted beef and pork to the British forces during the war.
- Lord George Germain - Secretary of State for the Colonies who coordinated the provisioning system, with Cork as its centrepiece.
- Sir John Irwin - Commander-in-chief of British forces in Ireland, responsible for managing military logistics through Cork.
- Treasury Commissioners - The British Treasury contracted directly with Cork merchants for provisions, making the city a hub of wartime government spending.
What's There Today
The Cork Butter Museum occupies the historic Butter Exchange building on John Redmond Street in the Shandon quarter of Cork city. The handsome limestone building, with its distinctive arched entrance, is a tangible link to the trade that made Cork one of the most important commercial cities in the eighteenth-century Atlantic world. The museum tells the story of Ireland's butter trade from its medieval origins through to the twentieth century, with exhibits on the grading system, cooperage, and export networks that made Cork butter a global commodity.
Visitors can see original firkins (butter casks), weighing scales, and brand stamps used by the Exchange, alongside displays explaining the role of provisions in Atlantic trade and warfare. The surrounding Shandon neighbourhood retains much of its eighteenth-century character, and the nearby Church of St Anne with its famous bells offers panoramic views of the city. The museum provides an accessible and engaging introduction to an aspect of the American Revolution rarely explored: the industrial-scale food production that sustained armies and navies thousands of miles from home.
Sources
- Thomas M. Truxes, Irish-American Trade, 1660-1783 (Cambridge University Press, 1988)
- David Dickson, Old World Colony: Cork and South Munster, 1630-1830 (Cork University Press, 2005)
- David Syrett, Shipping and the American War, 1775-83 (Athlone Press, 1970)
- Cork Butter Museum, "Our History" (corkbutter.museum)
Protest & Dissent
3 sites
Clifton House, Belfast
Protest & Dissent
Historical Significance
Belfast in the 1770s and 1780s was a centre of pro-American sympathy and radical political activity, rooted in the town's predominantly Presbyterian character and its strong commercial ties to the Atlantic world. The Presbyterian community in Ulster had a long tradition of dissent from the established Anglican order, and many Belfast Presbyterians saw a direct parallel between the American colonists' resistance to British overreach and their own experience of civil and religious disabilities under the Penal Laws. News from America was followed closely in the town, and the Declaration of Independence was reprinted and celebrated in Belfast with an enthusiasm unusual for any city within the British Isles.
The outbreak of war with America and the subsequent entry of France into the conflict in 1778 prompted the formation of the Irish Volunteers, a citizen militia raised to defend Ireland while regular troops were deployed to the American theatre. Belfast was at the forefront of this movement. The Belfast Volunteer Company, established in 1778, became one of the most prominent and politically active Volunteer units in Ireland. Far from confining themselves to military drill, the Belfast Volunteers became a vehicle for demanding political and economic reform, echoing the American arguments about representation, free trade, and the rights of citizens. The movement contributed to the campaign that secured Irish legislative independence in 1782.
Clifton House, completed in 1774 as the Belfast Charitable Society's poorhouse and almshouse, is one of the few surviving buildings from this era of Belfast's history. The Belfast Charitable Society, founded in 1752, was itself a product of the town's Presbyterian civic culture, and its members included figures active in the Volunteer movement and sympathetic to the American cause. The building thus stands as a tangible connection to the Belfast community that engaged most directly with the political ideas unleashed by the American Revolution — ideas that would continue to reverberate through Irish radical politics in the decades that followed.
Key Figures
- Belfast Volunteer Company leaders — Officers and members of one of the most politically active Irish Volunteer units, formed in 1778 in response to the withdrawal of regular troops to America
- Dr. William Drennan — Belfast-born physician and poet, later a founder of the Society of United Irishmen, whose political radicalism was shaped by the American revolutionary example
- Rev. William Steel Dickson — Presbyterian minister and Volunteer who openly supported the American cause and later became involved in the 1798 rebellion
- Francis Joy — Founder of the Belfast News-Letter, which provided extensive coverage of the American war; the Joy family were prominent in Belfast's civic life
- Henry Joy McCracken — Belfast Presbyterian radical of the next generation, whose political formation owed much to the pro-American sympathies of the Volunteer era
What's There Today
Clifton House stands on North Queen Street in Belfast's Cathedral Quarter and is the oldest surviving building in continuous use in the city. The Georgian building, with its distinctive octagonal tower, was designed by the architect Robert Joy (a member of the Joy family prominent in Belfast's civic and commercial life) and completed in 1774 — the very eve of the American Revolution. The Belfast Charitable Society continues to operate from the building, making it one of the longest-running charitable institutions in Ireland. The interior retains original 18th-century features, and the Society maintains an archive relating to its history and the history of Belfast.
Guided tours of Clifton House are available and cover the building's architectural history, the work of the Charitable Society, and the broader story of 18th-century Belfast, including the Volunteer era and the radical political currents that connected the town to the American and later the French Revolution. The building is a short walk from Belfast city centre and is accessible by public transport. For visitors tracing the American Revolution's impact on Ireland, Clifton House complements the story told at the Irish Houses of Parliament in Dublin by offering the perspective of a provincial town where support for the American cause was rooted not in parliamentary manoeuvre but in the convictions of a Presbyterian commercial community with its own history of dissent.
Sources
- Stewart, A.T.Q. A Deeper Silence: The Hidden Roots of the United Irish Movement. Faber and Faber, 1993.
- McBride, Ian. Scripture Politics: Ulster Presbyterians and Irish Radicalism in the Late Eighteenth Century. Clarendon Press, 1998.
- Agnew, Jean. Belfast Merchant Families in the Seventeenth Century. Four Courts Press, 1996.
- Belfast Charitable Society, Clifton House archive and exhibition materials.
- Smyth, Jim. The Men of No Property: Irish Radicals and Popular Politics in the Late Eighteenth Century. Macmillan, 1992.
Dublin City Hall (Former Royal Exchange)
Protest & Dissent
Historical Significance
On 4 November 1779, the anniversary of King William III's birthday, approximately 1,000 armed Irish Volunteers paraded on College Green in the heart of Dublin. The demonstration was a calculated act of political theatre: the Volunteers positioned a cannon bearing placards reading "Free Trade or Else!" and "A Short Money Bill!" directly opposite the Irish Parliament. The message was unmistakable. Ireland's trade was strangled by British restrictions that barred Irish exports from competing in colonial and foreign markets, and the Volunteers, armed and organised, were demanding change. The American war had created both the crisis and the opportunity: with British troops committed to fighting in America, the Volunteers were the only armed force in Ireland, and they knew it.
The demonstration succeeded. The British government, already reeling from military setbacks in America and unable to risk open confrontation in Ireland, capitulated. Within weeks, Westminster lifted the most damaging trade restrictions, granting Ireland access to colonial markets and permitting the export of wool and glass. The victory on College Green was a watershed moment in Irish political history, demonstrating that American revolutionary methods, including armed citizens demanding their rights, could produce results within the British constitutional system. The events of November 1779 set the stage for the Dungannon Convention and the winning of legislative independence in 1782.
The building overlooking these dramatic events was the Royal Exchange, designed by Thomas Cooley and completed in 1779 after a decade of construction. Its imposing Corinthian portico and domed rotunda made it one of Dublin's architectural masterpieces. Built as a centre of commerce for Dublin's merchant community, the Royal Exchange was an apt backdrop for a protest about trade and economic freedom. The building's completion in the same year as the Volunteer demonstration gives it a dual significance: it is both an architectural landmark and a witness to one of the most consequential political events of the revolutionary era.
Key Figures
- James Napper Tandy - Dublin radical and Volunteer organiser who helped coordinate the College Green demonstration and later became a prominent figure in Irish republicanism.
- James Caulfeild, 1st Earl of Charlemont - Commander-in-chief of the Irish Volunteers, whose authority lent the movement respectability even as it employed confrontational tactics.
- Henry Grattan - Parliamentarian who channelled Volunteer pressure into legislative action, winning free trade and later legislative independence for Ireland.
- Lord North - British Prime Minister whose government was forced to concede Irish free trade under the pressure of the Volunteer demonstration and the wider crisis of the American war.
- Thomas Cooley - Architect who designed the Royal Exchange (1769-1779), providing Dublin with one of its finest neoclassical public buildings.
What's There Today
The former Royal Exchange has served as Dublin City Hall since 1852 and is one of the finest public buildings in Ireland. The building's centrepiece is the magnificent domed rotunda, ringed by Corinthian columns and decorated with frescoes depicting scenes from Dublin's history. The rotunda floor features a mosaic of the Dublin city arms, and statues of notable figures, including Daniel O'Connell, line the walls.
Dublin City Hall hosts "The Story of the Capital," a multimedia exhibition in the vaults beneath the rotunda that traces Dublin's history from its origins to the present day, including the events of the revolutionary era. The exhibition includes original documents, artefacts, and audiovisual displays. The building stands on Cork Hill at the western end of Dame Street, a short walk from Trinity College and the site of the former Irish Parliament on College Green. Admission to the exhibition is modest, and the rotunda itself can be visited free of charge. It is among the most accessible and rewarding Georgian buildings in Dublin.
Sources
- Padraig O Snodaigh, The Irish Volunteers, 1715-1793 (Lilliput Press, 1995)
- R. B. McDowell, Ireland in the Age of Imperialism and Revolution, 1760-1801 (Clarendon Press, 1979)
- Christine Casey, Dublin: The City Within the Grand and Royal Canals and the Circular Road (Yale University Press, 2005)
- Dublin City Council, "City Hall: The Story of the Capital" (dublincity.ie)
Rosemary Street First Presbyterian Church
Protest & Dissent
Historical Significance
Rosemary Street First Presbyterian Church, Belfast's oldest surviving church, was the intellectual and spiritual centre of a community deeply sympathetic to the American revolutionary cause. Belfast's Presbyterian dissenters, excluded from full political participation by the Test Act and shaped by a tradition of independent thought rooted in Scottish Enlightenment theology, identified powerfully with the American colonists' arguments about liberty, representation, and the rights of the governed. The pulpit of Rosemary Street and the homes of its congregation were places where news from America was discussed, debated, and celebrated.
When the American war drained British troops from Ireland and France's entry into the conflict in 1778 raised fears of invasion, Belfast was among the first towns to form Volunteer companies. The Belfast First Volunteer Company, established in March 1778 and commanded by the merchant Waddell Cunningham, drew heavily from the Rosemary Street congregation and the wider dissenting community. These Volunteers were not merely a defence force; they were a political movement, and their demands for free trade and legislative independence echoed the principles for which the American colonies were fighting. Belfast's Volunteers were among the most radical in Ireland, pushing for Catholic emancipation and parliamentary reform alongside the broader Volunteer programme.
The present church building, completed in 1783 as the war drew to its close, embodies the confidence and aspirations of this community. Its design, attributed to Roger Mulholland, features a remarkable elliptical plan that is unique among Irish churches of the period. The Georgian interior, with its curved galleries and elegant plasterwork, reflects the refined taste and relative prosperity of Belfast's mercantile Presbyterian community. The building is a physical expression of the same Enlightenment values that connected Belfast's dissenters to the revolutionary movement in America.
Key Figures
- Waddell Cunningham - Belfast merchant and commander of the Belfast First Volunteer Company, formed in March 1778. A prominent figure in the town's commercial and political life.
- William Steel Dickson - Presbyterian minister and radical who preached in support of American independence and later became involved in the United Irishmen movement.
- William Drennan - Belfast-born physician and poet, son of a Rosemary Street minister, who coined the phrase "Emerald Isle" and was a founding member of the Society of United Irishmen.
- Dr. James Crombie - Minister of Rosemary Street (First Belfast) whose sermons reflected the congregation's sympathy with Enlightenment political philosophy.
- Henry Joy McCracken - Member of a prominent Belfast Presbyterian family and later a leader of the 1798 Rebellion, whose political formation owed much to the radical dissenting tradition.
What's There Today
Rosemary Street First Presbyterian Church remains an active place of worship in the heart of Belfast city centre. The building is notable for its rare Georgian interior, which has survived remarkably intact. The elliptical plan, curved galleries, and original plasterwork create an interior of unusual beauty and architectural interest. The church is widely regarded as one of the finest Georgian ecclesiastical interiors in Ireland.
The church is open for Sunday services and occasionally for heritage events and tours. Visitors should check ahead for access outside of service times, as the building is not always open to the public. A short walk from Belfast City Hall and the Cathedral Quarter, Rosemary Street is easily incorporated into a tour of Belfast's historic core. The surrounding area retains fragments of the eighteenth-century street plan, and several other sites in Belfast, including Clifton House and the entries (narrow lanes) off High Street, offer further connections to the city's revolutionary-era history.
Sources
- Ian McBride, Scripture Politics: Ulster Presbyterians and Irish Radicalism in the Late Eighteenth Century (Clarendon Press, 1998)
- A. T. Q. Stewart, A Deeper Silence: The Hidden Origins of the United Irishmen (Faber and Faber, 1993)
- Padraig O Snodaigh, The Irish Volunteers, 1715-1793 (Lilliput Press, 1995)
- Raymond Gillespie and Rowan S. Greenwood, eds., The Parish of Rosemary Street, Belfast: Two Centuries of Church Life (Ulster Historical Foundation, 2005)
Castle Cornet, Guernsey
Military
Historical Significance
Castle Cornet, commanding the entrance to St Peter Port harbour, was the military headquarters from which Guernsey's wartime operations were directed during the American Revolution. The Channel Islands' most significant contribution to the war was privateering -- the state-sanctioned seizure of enemy shipping -- and Guernsey's privateers were devastatingly effective. During the Anglo-French War (1778-1783), Guernsey and Alderney privateers captured 221 prizes worth approximately £981,300 -- the equivalent of roughly £100 million today. Island businessmen, including senior officials of the States of Guernsey, assembled privateer fleets as soon as war was declared, operating under Letters of Marque from the King. The French called the Channel Islands a "nest of pirates."
The threat of French invasion, dramatically confirmed by the Battle of Jersey in January 1781, prompted significant defensive expansion. Fifteen loophole towers were built around Guernsey's coast in 1778-1779, with additional batteries covering potential landing sites. The island militia of approximately three thousand men provided both infantry and coastal artillery units, supplemented by rotating British infantry battalions. Castle Cornet, which had served as the governor's residence and military stronghold for centuries, oversaw this defensive network.
The castle also holds an unexpected Anglo-American heritage object: the Guernsey Falcon, an artillery piece cast in 1550 that was given to Plymouth, Massachusetts, in 1921 to mark the tercentenary of the Pilgrims' voyage. It was returned to Guernsey in 1985 and is now displayed on a replica carriage -- a physical symbol of the long connection between the Channel Islands and America.
Key Figures
- Guernsey privateers - Island businessmen who captured 221 enemy prizes during the war
- The Governor of Guernsey - Commanded the island's military forces from Castle Cornet
- Baron de Rullecourt (1744-1781) - His invasion of Jersey in 1781 prompted Guernsey to strengthen its defences
What's There Today
Castle Cornet is a former tidal island, now connected to St Peter Port harbour by a breakwater built in 1859. The castle is open seasonally from late March through autumn, with daily public tours at 10:30 AM and a noon-day gun fired during the season. Admission is approximately £10.50 for adults. The castle houses five museums: the Story of Castle Cornet (in the mid-eighteenth-century Lower Barracks), the Royal Guernsey Militia Museum (with late eighteenth-century uniforms, weapons, and documents from the war period), a Maritime Museum, a 201 Squadron RAF Museum, and a Royal Guernsey Light Infantry Museum. Four historic period gardens include an eighteenth-century Governor's Garden based on a 1735 plan. Living history performances take place during summer months. The castle provides panoramic views across St Peter Port and the neighbouring islands.
Sources
- Guernsey Museums, "Castle Cornet" and "History of the Castle," museums.gov.gg
- Guernsey Museums, "Royal Guernsey Militia Regimental Museum"
- Wikipedia, "Fortifications of Guernsey" and "Castle Cornet"
- Wikipedia, "History of Guernsey"
- Jamieson, A.G., A People of the Sea: The Maritime History of the Channel Islands (Methuen, 1986)
Elizabeth Castle, Jersey
Military
Historical Significance
Elizabeth Castle was the stronghold that saved Jersey during the Battle of Jersey on 6 January 1781. When the Baron de Rullecourt sent the signed capitulation document demanding the garrison surrender, Captain Mulcaster refused and opened fire, killing several advancing French soldiers and forcing a retreat. Had the castle fallen, the French would have controlled the harbour and the island's principal defensive position. Mulcaster's defiance gave Major Peirson time to organise the counterattack that defeated the invasion.
The castle had been Jersey's main fortification since the sixteenth century, when advances in artillery made the older Mont Orgueil Castle on the east coast obsolete. Named after Elizabeth I, it was built on a tidal island in St Aubin's Bay and served as the island's military nerve centre throughout the wars of the eighteenth century. After the 1781 battle exposed St Helier's vulnerability to surprise attack, the States of Jersey authorised construction of Fort Regent on the hill above the town -- a direct consequence of the battle. Elizabeth Castle continued as a military garrison until 1923.
Key Figures
- Captain Mulcaster - Castle commander who refused to surrender; his defiance was pivotal to the British victory
- Major Francis Peirson (1757-1781) - Led the counterattack from outside the castle; killed in action
- Baron de Rullecourt (1744-1781) - French commander; sent the capitulation demand that Mulcaster rejected
What's There Today
Elizabeth Castle is a Jersey Heritage property on a tidal island in St Aubin's Bay. At low tide visitors walk the causeway from West Park; at high tide a pirate-themed amphibious Castle Ferry operates throughout the day. The castle is open seasonally from mid-March to early November. Every Sunday through the season, historical interpreters recreate the 1781 garrison with musket and cannon firing demonstrations. The Castle Gunner tells the story of the Battle of Jersey, and visitors may be "drafted" into the Midday Parade. The renovated Officers' Quarters show period military life, and the Hospital Block exhibition tells the story of the Jersey Militia. The castle also houses a Regimental Museum of the Royal Jersey Militia, a cannon and fortifications museum, and the sixth-century Hermitage of St Helier. Admission is charged and included in the Jersey Heritage Pass.
Sources
- Jersey Heritage, "Elizabeth Castle," jerseyheritage.org
- Jersey Heritage, "The History and Future of an Island's Fortress"
- Jersey Heritage, "Castles of Jersey"
- Visit Jersey, "Elizabeth Castle," jersey.com
- Syvret, Marguerite and Stevens, Joan, Balleine's History of Jersey (Phillimore, 1998)
Fort Regent, St Helier, Jersey
Military
Historical Significance
Fort Regent is a direct consequence of the Battle of Jersey. After the French invasion of 6 January 1781 exposed how vulnerable St Helier was to surprise attack -- the French marched four kilometres from the coast to the centre of town undetected -- the States of Jersey authorised construction of a major fortification on the hill overlooking the town. Work began in 1806 and the fort was completed in 1814, designed to ensure that no future invader could take St Helier without first subduing the commanding heights above it.
The fort thus represents the lasting military impact of the only Revolutionary War ground combat on British soil. While the immediate battle was won by Major Peirson's counterattack, the long-term response was this substantial defensive work that transformed St Helier's skyline. The fort served as a military installation until the 1920s, when it was decommissioned and eventually converted into a leisure and conference centre.
Key Figures
- Major Francis Peirson (1757-1781) - His death in the Battle of Jersey prompted the defensive reassessment that led to Fort Regent's construction
- Baron de Rullecourt (1744-1781) - French commander whose invasion exposed St Helier's vulnerability
What's There Today
Fort Regent sits prominently on the hill above St Helier, visible from across the town and harbour. The fort's impressive Napoleonic-era walls and ramparts survive, though the interior was converted into a leisure centre in the 1970s. The Signal Station on the ramparts offers panoramic views across St Helier, Elizabeth Castle, and the bay. The fort is accessible on foot from the town centre via a steep path or by the Fort Regent shuttle. Visitors interested in the Battle of Jersey connection should combine this with the Royal Square, Jersey Museum, and Elizabeth Castle -- all within walking distance below.
Sources
- Jerripedia, "Fort Regent," theislandwiki.org
- Jersey Heritage, "Castles of Jersey"
- Syvret, Marguerite and Stevens, Joan, Balleine's History of Jersey (Phillimore, 1998)
La Rocque, Grouville (French Landing Site)
Military
Historical Significance
La Rocque on Jersey's southeast coast is where approximately eight hundred French soldiers under the Baron de Rullecourt landed on the night of 5-6 January 1781, beginning the Battle of Jersey -- the only Revolutionary War ground combat on British soil. The invasion, funded by Louis XVI, was part of France's alliance with the United States; Jersey-based British privateers had been disrupting French and American shipping, and eliminating this "nest of pirates" was the objective.
The French chose La Rocque because it was one of the few strategic locations on the east coast lacking a defensive tower -- a gap that was immediately rectified after the battle with the construction of Platte Rocque Tower in 1782. The landing was originally planned for two thousand soldiers in four divisions, but a storm scattered the fleet and only the first division of eight hundred reached shore. The guards at the landing point had abandoned their post to celebrate "Old Christmas Night" (6 January), allowing the French to march four kilometres to St Helier undetected.
Key Figures
- Baron de Rullecourt (1744-1781) - French commander; landed at La Rocque; mortally wounded in St Helier; died 7 January
- Grenadiers of the 83rd Regiment - British soldiers killed fighting the French rearguard at La Rocque; memorialised in Grouville Parish Church
What's There Today
La Rocque is a publicly accessible coastal area with a harbour, slipway, public facilities, and beach access. Platte Rocque Tower, a Martello-style tower built in 1782 in direct response to the 1781 invasion, stands at the closest point to where the French landed. Grouville Parish Church, a short distance inland, contains a granite memorial slab in the churchyard "to the memory of these brave men" -- the grenadiers of the 83rd Regiment killed fighting the French at La Rocque. The church has a distinctive white spire and hosts part of the annual Battle of Jersey commemorative walk each January, when islanders retrace the route of the Jersey Militia from various parishes to Royal Square in St Helier.
Sources
- Jersey Heritage, "The Battle of Jersey," jerseyheritage.org
- Jerripedia, "A History of La Rocque," theislandwiki.org
- Imperial War Museums, "Grenadiers 1781 Memorial," iwm.org.uk
- Wikipedia, "Battle of Jersey"
Royal Square, St Helier (Battle of Jersey)
Military
Historical Significance
Royal Square in St Helier was the epicentre of the Battle of Jersey on 6 January 1781 -- the only actual Revolutionary War ground combat on British soil. On that morning, approximately 800 French troops under the Baron de Rullecourt landed on Jersey's southeast coast and marched undetected to St Helier, surprising the Lieutenant Governor Moses Corbet in bed. De Rullecourt bluffed Corbet into signing a capitulation by claiming thousands more French troops had already overwhelmed the island.
The deception failed when Captain Mulcaster at Elizabeth Castle refused to surrender and opened fire. Twenty-four-year-old Major Francis Peirson, the senior regular officer on the island (all more senior commanders were on leave in England), assembled a counterattack force of regular troops and Jersey Militia -- roughly two thousand men. They advanced on the Royal Square, where the French had taken defensive positions around the gilded statue of George II. In the fighting, Peirson was killed by a musket ball to the chest. Despite his death, his troops overwhelmed the French within fifteen minutes. De Rullecourt was mortally wounded and died the following day. Approximately five hundred French soldiers were taken prisoner.
The battle inspired one of the most famous paintings of the Revolutionary War era: John Singleton Copley's The Death of Major Peirson, 6 January 1781, completed in 1783 and now hanging at Tate Britain, already on this trail. The painting's dramatic depiction of Peirson's death made him a national hero and the battle a defining moment in Jersey's identity.
Key Figures
- Major Francis Peirson (1757-1781) - Led the British counterattack; killed in action aged 24; immortalised by Copley's painting
- Baron de Rullecourt (1744-1781) - French commander; mortally wounded during the battle; died 7 January
- Major Moses Corbet - Lieutenant Governor; tricked into signing capitulation
- Captain Mulcaster - Commander of Elizabeth Castle; refused to surrender; his defiance saved the island
- John Singleton Copley - Boston-born artist who painted The Death of Major Peirson (Tate Britain)
What's There Today
Royal Square is an open public space in the heart of St Helier, freely accessible at all times. The gilded lead statue of George II, erected in 1751 by sculptor John Cheere, still stands in the square. During a 1997 restoration, musket ball marks were discovered beneath layers of paint and filler -- physical evidence of the 1781 battle. The Peirson pub occupies a corner of the square, and memorial tablets to Major Peirson are in the nearby St Helier Parish Church (Town Church) on Church Street. Each January, islanders walk from a different parish to the Royal Square for the Battle of Jersey commemoration, featuring the Jersey Scout Band, 1781 Jersey Militia re-enactors, and a re-enactment of Copley's painting. The square is surrounded by the Royal Court House, which houses both the Royal Court and the States Chamber.
Sources
- Parish of St Helier, "Battle of Jersey Commemorations," sthelier.je
- Jerripedia, "Royal Square" and "Statue of George II," theislandwiki.org
- Imperial War Museums, "Major Francis Peirson Memorial," iwm.org.uk
- Jersey Evening Post, "Walk to remember key event in Jersey history" (2024, 2026)
- Copley, John Singleton, The Death of Major Peirson, 6 January 1781 (1783), Tate Britain
Jersey Museum, St Helier
Museums
Historical Significance
Jersey Museum holds the physical and artistic evidence of the Battle of Jersey -- the only Revolutionary War ground combat on British soil. Its permanent "Being Jersey" exhibition devotes a section to the battle, exploring how the 1781 invasion shaped the island's identity and its relationship with the British Crown. The museum also holds two significant paintings of the battle that complement the famous Copley painting at Tate Britain.
The first is an oil on canvas by Edward Francis Burney (1781), a contemporaneous artistic response painted in the same year as the battle. The second, discovered during conservation work, is a late eighteenth-century version by P. Wright (dated 1796) that was found hidden beneath later overpainting. This Wright version was the reference painting commissioned to enable James Heath to produce the widely circulated engraving of Copley's masterpiece. Together with the Copley original at Tate Britain, these works form a trio that shows how the battle was visualised, reproduced, and disseminated in British art.
The battle appeared frequently in Jersey's visual culture for centuries, featuring on Jersey banknotes (the one-pound and later ten-pound notes) and in annual commemorative events. The museum's collection provides the material context for understanding both the military event and its long cultural afterlife.
Key Figures
- John Singleton Copley (1738-1815) - Boston-born artist; painted the famous Death of Major Peirson (Tate Britain)
- Edward Francis Burney (1760-1848) - Painted a contemporaneous version of the battle scene (Jersey Museum)
- P. Wright - Painted the reference copy used for Heath's engraving (discovered during conservation)
- James Heath (1757-1834) - Engraver who produced the widely circulated print of Copley's painting
What's There Today
Jersey Museum, Art Gallery and Victorian House is located at The Weighbridge, 5 Caledonia Place, St Helier. It is open year-round, Monday to Saturday 9:00/10:00 AM to 4:00/5:00 PM and Sunday 10:00 AM to 4:00 PM, with free admission. The "Being Jersey" permanent exhibition on the first floor uses animation, video, and commissioned art to tell the island's story, including the Battle of Jersey. The museum also houses a Victorian House (the gas-lit home of Dr Charles Ginestet), a Link Gallery for temporary exhibitions, a Story of Jersey film, and the Jersey Island Geopark Visitor Centre. The museum is a short walk from both Royal Square and the Liberation bus station.
Sources
- Jersey Heritage, "Jersey Museum, Art Gallery & Victorian House," jerseyheritage.org
- Art UK, "Battle of Jersey, the Death of Major Peirson" (Burney painting)
- Jerripedia, "The Copley painting of the Battle of Jersey," theislandwiki.org
- Art UK, Jersey Museum and Art Gallery venue page
- Wikipedia, "The Death of Major Peirson, 6 January 1781"